Prepare yourself for a culinary journey to Spain, where we’ll explore the delightful world of Homemade Spanish Flan. This iconic dessert, a testament to Spanish culinary prowess, boasts a rich history interwoven with the country’s cultural fabric. While its exact origins are debated, many believe its roots lie in ancient Roman times, evolving through centuries of culinary innovation to reach its present-day perfection. Some trace its lineage back to the Roman dessert custard, suggesting a long and fascinating evolution across different cultures and culinary traditions. The Moors’ influence on Iberian cuisine during their rule is undeniable, and their contribution to the development of rich, creamy desserts likely played a part in the flan’s journey.
Spanish Flan, unlike its French counterpart crème caramel, distinguishes itself through subtle yet crucial differences in texture and flavor. The Spanish version typically features a firmer, richer custard, often enhanced with the warming notes of cinnamon or lemon zest. This variation highlights a key aspect of Spanish cuisine: its reliance on simple, high-quality ingredients to achieve complex and satisfying flavors. The caramelized sugar topping, a hallmark of flan, adds a delightful contrast in texture and sweetness, making it a beloved dessert across generations. Interestingly, approximately 85% of Spanish households include flan as part of their regular dessert rotation, highlighting its widespread popularity.
Beyond its deliciousness, flan holds significant cultural importance in Spain. It’s a staple at family gatherings, celebrations, and religious festivals. It’s frequently served during special occasions like Christmas, Easter, and birthdays, symbolizing togetherness and shared joy. The smooth, creamy texture mirrors the warmth and harmony often associated with family traditions. Furthermore, regional variations exist, with subtle changes in ingredients and preparation methods reflecting the diverse culinary landscape of Spain. This widespread presence and adaptability contribute to its enduring allure and lasting legacy within Spanish culture.
The simple elegance of Homemade Spanish Flan belies its depth and historical significance. More than just a dessert, it represents a culinary heritage passed down through generations, a delicious testament to Spain’s rich culinary history and the enduring power of simple pleasures. Its consistent popularity, both within Spain and globally, underscores its universal appeal and timeless charm. Preparing this flan at home allows you to connect with this tradition, experiencing the satisfaction of creating a dessert with such a profound cultural impact.
Ingredients and Measurements for Homemade Spanish Flan
Creating a truly authentic Spanish flan requires precise measurements and high-quality ingredients. The richness and smoothness of the final product depend heavily on the accuracy of your measurements and the freshness of your components. Don’t be tempted to substitute ingredients, as this can significantly alter the texture and flavor profile.
For the Custard Base, you will need:
- 1 (14 ounce) can of sweetened condensed milk: Use a reputable brand for consistent sweetness and creaminess. Ensure the can is not dented or damaged before opening.
- 1 (12 ounce) can of evaporated milk: This adds richness and helps achieve the perfect velvety texture. Make sure the can is well-shaken before use to ensure even distribution of the cream.
- 4 large eggs: Use large eggs, not extra-large or jumbo, to maintain the correct ratio of yolks to liquid. Room temperature eggs will emulsify better with the other ingredients, resulting in a smoother custard.
- 1 teaspoon pure vanilla extract: A high-quality vanilla extract is crucial for enhancing the overall flavor. Avoid using imitation vanilla, as it can impart an artificial taste.
- 1/2 cup granulated sugar: Use granulated white sugar for the best results. Brown sugar will alter the delicate flavor of the flan.
For the Caramel Sauce, you will need:
- 1 cup granulated sugar: Use the same granulated white sugar as for the custard. The type of sugar significantly impacts the color and texture of the caramel.
- 1/4 cup water: Use only cold water. This helps prevent the sugar from crystallizing and burning during the caramel-making process. Adding hot water will result in an uneven caramel.
Important Considerations:
Measuring Accuracy: Use a kitchen scale for the most accurate measurements, especially for the condensed and evaporated milk. If using measuring cups, ensure they are level and properly calibrated. Inaccurate measuring can lead to a flan that is too runny or too firm.
Egg Temperature: Room temperature eggs are essential for proper emulsification. Cold eggs can cause the custard to curdle. Allow your eggs to sit at room temperature for at least 30 minutes before incorporating them into the custard mixture.
Fresh Ingredients: Use the freshest ingredients possible for optimal flavor and texture. Stale evaporated milk or old eggs can negatively affect the final product.
Careful Mixing: Gently whisk the custard ingredients together to avoid incorporating excessive air. Excessive air can lead to a less smooth and potentially airy flan.
By following these instructions and paying close attention to detail, you’ll be well on your way to crafting a delicious and authentic Spanish flan. Enjoy!
Equipment List
Making a perfect homemade Spanish flan requires the right tools. While some items might seem interchangeable, using the correct equipment ensures even cooking, prevents sticking, and ultimately contributes to a smoother, more elegant final product. This list details the essential equipment, along with recommendations for optimal results.
1. Saucepan (2-quart capacity): A medium-sized saucepan with a heavy bottom is crucial for making the caramel and heating the custard mixture. A heavy bottom prevents scorching and ensures even heat distribution, vital for a smooth, lump-free caramel and custard. Avoid using non-stick pans for caramel making, as the caramel can react with the coating. A stainless steel or heavy-bottomed enamel saucepan is ideal. 2-quart capacity is sufficient for a typical flan recipe. Larger saucepans are acceptable, but smaller ones will be too cramped.
2. Whisk (balloon whisk preferred): A balloon whisk is highly recommended for incorporating the eggs and sugar smoothly, resulting in a light and airy custard. The large surface area of a balloon whisk efficiently incorporates air, preventing lumps and promoting a silky texture. While a regular whisk can work, a balloon whisk significantly enhances the process. Ensure your whisk is clean and dry to prevent unwanted water from entering the custard mixture.
3. Measuring Cups and Spoons: Accurate measuring is paramount in baking. Use standard measuring cups and spoons to ensure the correct proportions of ingredients. Inconsistencies in measurements can affect the final texture and consistency of the flan. Invest in a good quality set for reliable results. Measuring cups should be clearly marked for both liquid and dry ingredients.
4. Rubber Spatula or Silicone Scraper: A rubber spatula or silicone scraper is essential for scraping down the sides of the bowl while whisking the custard. This ensures that all the ingredients are thoroughly combined, preventing any lumps or unmixed pockets of eggs and sugar. A flexible spatula allows you to reach all corners of the bowl effectively.
5. 9-inch or 10-inch Flan Ring or Baking Dish: The flan ring (a removable ring mold) is ideal for achieving a neat, professional-looking flan. However, a 9-inch or 10-inch round baking dish (preferably oven-safe) can also be used. If using a baking dish without a removable base, carefully invert the flan onto a serving plate. Ensure the baking dish is oven-safe and can withstand high temperatures.
6. Large Bowl (at least 4-quart): You’ll need a large bowl for whisking the custard mixture. A stainless steel or glass bowl is preferred for its durability and non-reactivity. Choose a bowl that is large enough to accommodate the ingredients and whisk comfortably without spilling.
7. Fine-Mesh Sieve: Optional, but highly recommended. Passing the custard mixture through a fine-mesh sieve removes any lumps or undissolved sugar, resulting in an exceptionally smooth and creamy flan. This step significantly improves the final texture.
8. Oven: A conventional oven is necessary for baking the flan. Ensure it’s clean and functioning correctly. Accurate oven temperature control is essential for even cooking and preventing over-baking.
9. Baking Sheet or Roasting Pan: A baking sheet or roasting pan is needed for the water bath (bain-marie) method of baking the flan. This provides a stable, even heat for the flan and prevents cracking.
10. Cooling Rack: After baking, allow the flan to cool completely on a wire cooling rack to prevent sticking and ensure even cooling. This prevents condensation from accumulating on the bottom of the flan.
Instructions (Preparation)
Making a flawless Spanish flan requires meticulous preparation. Begin by gathering all your ingredients and ensuring they’re at room temperature, especially the eggs. Cold eggs can lead to a curdled texture. This recipe yields approximately 6-8 servings, depending on the size of your ramekins.
Prepare the Caramel: In a medium saucepan over medium heat, combine 1 cup (200g) granulated sugar and ¼ cup (60ml) water. Do not stir the mixture. Swirl the pan occasionally to distribute the sugar evenly. The sugar will begin to melt and caramelize, progressing from a clear liquid to a rich amber color. This process takes patience; avoid rushing it as burning the sugar will impart a bitter taste to your flan.
Once the caramel reaches a deep amber hue, immediately pour it into your ramekins, tilting them to evenly coat the bottom and sides. Work quickly, as the caramel will harden rapidly. If any caramel remains in the saucepan, carefully pour it into a heatproof container for later use. Be cautious handling hot caramel; it can cause severe burns.
Prepare the Custard Mixture: In a large bowl, whisk together 1 (14 ounce) can sweetened condensed milk, 1 (12 ounce) can evaporated milk, and 6 large eggs. Ensure the eggs are room temperature for a smoother, more consistent texture. Whisk vigorously until the mixture is completely smooth and homogenous. Any lumps will result in a lumpy flan. A hand mixer or electric whisk can be used for this step to save time and effort.
Optional Flavor Enhancements: For an extra touch of flavor, consider adding 1 teaspoon of vanilla extract or a teaspoon of lemon zest to the custard mixture. These additions complement the richness of the flan beautifully. Be mindful not to overpower the delicate flavor profile of the flan.
Assemble and Bake: Carefully pour the custard mixture evenly over the caramel in each ramekin. Fill them about ¾ full to allow for expansion during baking. Place the ramekins in a larger baking dish. Pour enough hot water into the baking dish to come halfway up the sides of the ramekins. This creates a water bath, which helps prevent the flan from cracking and ensures even cooking. The water bath is crucial for a smooth, creamy flan.
Baking Process: Bake in a preheated oven at 350°F (175°C) for approximately 50-60 minutes, or until the flan is set. The center should still jiggle slightly when gently shaken. Overbaking will result in a dry, rubbery flan. Once cooked, carefully remove the ramekins from the water bath and let them cool completely at room temperature before refrigerating for at least 4 hours, or preferably overnight, to allow the flan to fully set and the flavors to meld.
Important Note: Baking times may vary depending on your oven and the size of your ramekins. It’s always best to check for doneness a few minutes before the minimum baking time is reached. A toothpick inserted into the center should come out clean or with just a few moist crumbs attached.
Instructions
This recipe yields approximately 6-8 servings of luscious Spanish Flan. Please ensure all ingredients are at room temperature for optimal results.
Step 1: Caramelizing the Sugar. In a medium-sized saucepan over medium heat, combine 1 cup of granulated sugar and ¼ cup of water. Do not stir. Allow the sugar to melt slowly, swirling the pan occasionally to distribute the heat evenly. Once the sugar has completely dissolved and turned into a rich amber caramel, immediately remove the pan from the heat. Caution: Caramel is extremely hot. Handle with care.
Step 2: Preparing the Caramel Mold. Carefully pour the hot caramel into a 9-inch round baking dish or individual ramekins. Tilt the dish to coat the bottom and sides evenly. Let the caramel cool and set completely. This is crucial for a beautiful presentation and prevents the caramel from dissolving into the flan.
Step 3: Making the Custard. In a large bowl, whisk together 1 (14 ounce) can of sweetened condensed milk, 1 (12 ounce) can of evaporated milk, 6 large eggs, and 1 teaspoon of vanilla extract. Whisk vigorously until the mixture is smooth and well combined. Ensure there are no lumps; this is key for a creamy texture. If you prefer a less sweet flan, you can reduce the amount of condensed milk slightly.
Step 4: Baking the Flan. Carefully pour the custard mixture over the set caramel in the prepared baking dish. Place the baking dish in a larger roasting pan. Pour enough hot water into the roasting pan to come halfway up the sides of the baking dish. This creates a water bath, preventing the flan from cracking and ensuring even cooking. The water bath is essential for a smooth, silky flan.
Step 5: Baking and Cooling. Bake in a preheated oven at 350°F (175°C) for 50-60 minutes, or until the flan is set around the edges and the center is just slightly jiggly. Do not overbake; overbaking can result in a rubbery texture. The center should still have a slight wobble when gently shaken. Remove the flan from the oven and carefully remove it from the water bath. Let it cool completely at room temperature.
Step 6: Chilling and Serving. Once cooled, cover the flan and refrigerate for at least 4 hours, or preferably overnight, to allow the flavors to meld and the flan to fully set. To serve, run a thin knife or offset spatula around the edges of the flan to loosen it from the mold. Invert the flan onto a serving plate. The caramel will beautifully cascade down the sides. Serve chilled and enjoy!
Professional Tip: For a richer flavor, you can add a pinch of salt to the custard mixture. This will enhance the sweetness of the flan. You can also experiment with different extracts like rum or orange extract for a unique twist.
Storage: Store leftover flan in the refrigerator for up to 3 days. It’s best enjoyed chilled.
Cooling and Setting
The cooling and setting process is crucial for achieving a perfectly smooth and jiggly Spanish flan. Rushing this stage can result in a cracked or uneven flan, undermining all your hard work. Patience is key!
Once you’ve removed your flan from the bain-marie (water bath), let it cool completely at room temperature. This gradual cooling prevents thermal shock, which is a leading cause of cracking. Resist the urge to immediately refrigerate it. Allow it to sit undisturbed for at least 1-2 hours, or until it’s reached room temperature. You’ll notice the custard will start to set during this time.
After the initial room temperature cooling, carefully transfer the flan to the refrigerator. This is where the magic of setting truly happens. Gently run a thin, flexible knife or offset spatula around the edges of the flan to loosen it from the ramekin. This prevents sticking and makes unmolding easier later. Ensure the ramekin is completely sealed with plastic wrap to prevent the flan from absorbing any refrigerator odors. Refrigerate for at least 4-6 hours, preferably overnight. The longer it chills, the firmer and more stable your flan will become.
Proper refrigeration is paramount. A consistently cold temperature ensures even setting. Avoid placing the flan near the door of the refrigerator, as temperature fluctuations there can affect the setting process and potentially lead to uneven consistency. The center of your refrigerator is usually the most consistently cold spot.
Checking for doneness is simple. After the minimum refrigeration time, gently jiggle the ramekin. A properly set flan will have a slight wobble, but it won’t be liquidy in the center. If it still feels too soft, return it to the refrigerator for another hour or two. Over-refrigeration is less problematic than under-refrigeration; a slightly firmer flan is always preferable to a wobbly one.
Unmolding your flan requires a delicate touch. To unmold, run a thin knife or offset spatula around the edges one more time. Place a serving plate upside down on top of the ramekin and quickly and carefully invert the two. Support the ramekin and plate with your hands to ensure a secure and controlled inversion. Give it a gentle tap if needed to help the flan release. If it doesn’t release easily, run the knife around the edges again, ensuring you’re getting under the flan’s edges.
If your flan cracks during unmolding, don’t panic! It’s usually a result of temperature shock or improper cooling. While not ideal aesthetically, it won’t affect the taste. A beautifully presented flan is a bonus, but a delicious flan is the ultimate goal.
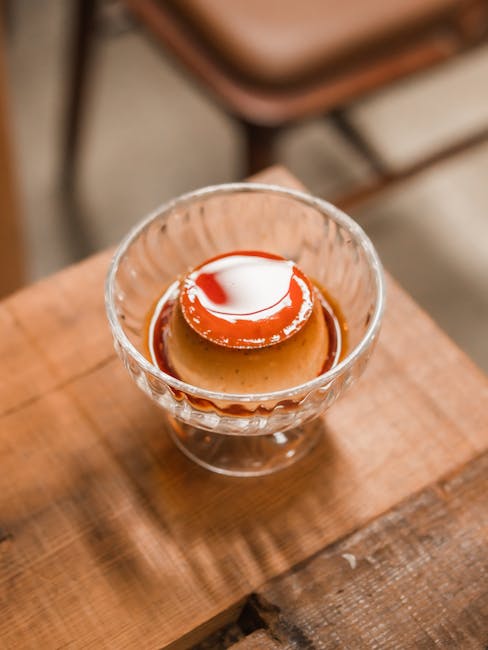
Once unmolded, your perfectly set Spanish flan is ready to be admired and enjoyed! Garnish with caramel sauce and a sprinkle of cinnamon for an extra touch of elegance.
Unmolding the Flan: A Step-by-Step Guide
Unmolding your perfectly baked Spanish flan can be a delicate process, but with the right technique, it’s surprisingly straightforward. A flawlessly unmolded flan is a testament to your baking prowess, showcasing its smooth, creamy texture and rich caramel coating. Here’s how to achieve that perfect release:
Preparation is Key: Before you even think about attempting to unmold, ensure your flan has completely cooled. This is crucial to prevent cracking or breakage. Ideally, let it cool completely at room temperature for at least 2-3 hours, then refrigerate for at least 4 hours, or preferably overnight. This allows the flan to set firmly and prevents it from slipping or breaking during the unmolding process.
Running a Knife: Once the flan is thoroughly chilled, run a thin, sharp knife around the edge of the flan, gently separating it from the sides of the ramekin or baking dish. This creates a small gap, preventing the flan from sticking. A thin offset spatula or a butter knife works best for this. Avoid using a dull knife, as it may scrape or damage the flan.
The Water Bath Technique (Recommended): For added security, especially with stubborn flans, use the water bath method. Place your ramekin in a larger bowl or sink. Carefully pour warm (not hot!) water into the bowl, ensuring the water level reaches about halfway up the sides of the ramekin. Let it sit for about 1-2 minutes. The warm water will gently loosen the flan from the sides of the dish, making unmolding significantly easier. Avoid using hot water, as this could crack the ramekin or the flan itself.
The Inversion: Place a serving plate or platter upside down on top of the ramekin. Firmly hold the plate and the ramekin together. Quickly and confidently, invert the ramekin and plate, holding them securely. Let the flan sit for a few seconds to ensure it releases completely. If it doesn’t immediately release, gently jiggle the ramekin. If necessary, use a thin spatula to help loosen any remaining edges.
Troubleshooting: If your flan sticks, don’t panic! Try running the knife around the edges again and repeating the warm water bath technique. If it’s still stuck, you might have used a ramekin that wasn’t properly greased. Next time, ensure your ramekin is thoroughly greased with butter or cooking spray before pouring in the flan mixture.
The Final Touch: Once your flan is beautifully unmolded, admire your handiwork! The caramel sauce should be perfectly coating the bottom and sides. If you wish, you can garnish your flan with fresh berries, whipped cream, or a sprinkle of cinnamon. Serve immediately and enjoy this delectable Spanish dessert.
Remember: Practice makes perfect! Don’t be discouraged if your first attempt isn’t flawless. With a little patience and the right technique, you’ll soon be mastering the art of unmolding a perfect Spanish flan every time.
Homemade Spanish Flan: Recommendations
Your homemade Spanish flan is a delightful dessert, rich and creamy with a perfectly caramelized top. To ensure you enjoy it to the fullest, follow these recommendations for serving, storage, and pairing.
Serving Suggestions: For the ultimate indulgence, serve your flan chilled. Allow it to rest in the refrigerator for at least 4 hours, or preferably overnight, to allow the custard to fully set and the flavors to meld. Individual ramekins are ideal, creating a beautiful presentation for a special occasion. Garnish each serving with a sprinkle of finely grated cinnamon, a dusting of cocoa powder, or a few fresh berries for a pop of color and contrasting flavor. A drizzle of caramel sauce, made from the leftover caramel in the pan, adds extra sweetness and richness.
Storage: Proper storage is crucial to maintaining the quality and texture of your flan. Once completely cooled, cover the ramekins or the larger baking dish with plastic wrap, pressing it directly onto the surface to prevent a skin from forming. Store in the refrigerator for up to 3 days. After 3 days, the texture may begin to change slightly, although the flan will still be safe to consume.
Complementary Dishes: This decadent dessert pairs beautifully with a variety of other dishes. Consider serving it after a light meal, such as grilled fish with lemon and herbs, or a simple salad with vinaigrette. For a more substantial pairing, it complements the richness of a slow-cooked stew or roasted chicken perfectly. The contrasting textures and flavors create a balanced and satisfying dining experience. A strong coffee or a sweet dessert wine, such as Pedro Ximénez sherry, would also make an excellent accompaniment.
Nutritional Information (Approximate per serving, depending on recipe variations): The exact nutritional information varies greatly based on the specific recipe used (particularly the amount of sugar and cream). However, a typical serving of Spanish flan (approximately 150g) will contain approximately 250-350 calories. This includes a significant amount of fat from the eggs and cream, as well as sugar from the caramel and the custard itself. The nutritional breakdown will also include some protein from the eggs and a small amount of calcium. For a more precise nutritional analysis, use a nutrition calculator with your specific recipe ingredients and serving size.
Important Note: Always ensure your eggs are cooked thoroughly before consuming. While the flan’s custard texture is relatively soft, the baking process ensures the eggs are safely cooked. If you have any concerns regarding food safety or allergies, consult a healthcare professional or nutritionist.