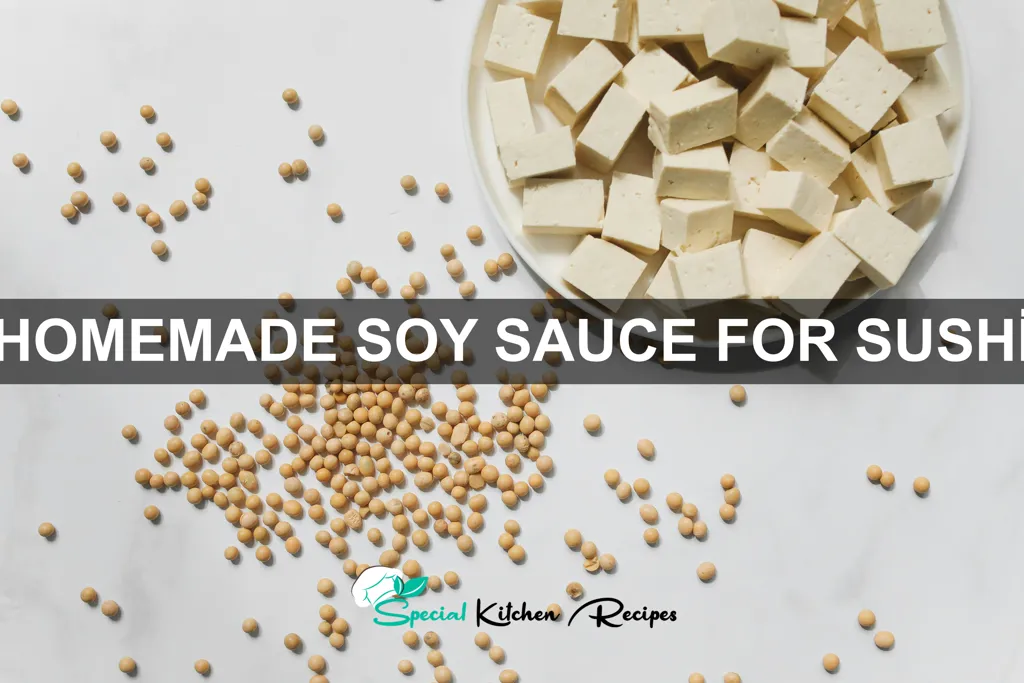
Soy sauce, a cornerstone of East Asian cuisine, boasts a history as rich and complex as its umami-laden flavor. Its origins can be traced back over two thousand years to China, where a fermented soybean paste known as jiàngyóu laid the foundation for what we know today. The process, initially a simple preservation technique, evolved over centuries, spreading its influence across East Asia and eventually becoming a global culinary staple. Japan, in particular, embraced soy sauce, refining its production and integrating it deeply into its culinary traditions. Today, approximately 80% of global soy sauce production originates in China, followed by Indonesia and Japan. This high production volume underscores its ubiquitous nature, highlighting its significance in countless dishes worldwide.
The journey of soy sauce from ancient fermented paste to the refined condiment used in sushi is a testament to human ingenuity and cultural exchange. Traditional methods, often passed down through generations, emphasize natural fermentation processes, using koji (a type of mold), yeast, and salt to break down soybeans and wheat. This lengthy fermentation, sometimes lasting for months or even years, yields a complex flavor profile that is impossible to replicate through quicker, industrial methods. This prolonged process also contributes to the rich nutritional profile of homemade soy sauce, offering a greater concentration of beneficial enzymes and probiotics compared to mass-produced varieties. The subtle nuances of flavor, particularly in homemade soy sauce, vary widely depending on the ingredients, fermentation techniques, and the climate.
In the context of sushi, homemade soy sauce takes on a particularly significant role. Sushi, a culinary art form originating in Japan, relies heavily on the balance of flavors and textures. A high-quality, homemade soy sauce can elevate the sushi experience, complementing the delicate flavors of the fish and rice without overpowering them. The depth of its umami, the subtle sweetness or saltiness depending on the recipe, and even the aromatic notes contribute to the overall harmony of the dish. Furthermore, using homemade soy sauce allows for greater control over the sodium content, a crucial factor in maintaining a balanced flavor profile and catering to individual preferences. The use of homemade soy sauce in sushi is not merely a culinary choice; it’s a statement of appreciation for the tradition, craftsmanship, and the deep cultural significance embedded within this humble condiment.
Ingredients and Measurements
Creating authentic soy sauce for sushi requires careful attention to ingredient quality and precise measurements. Using inferior ingredients will significantly impact the final flavor profile, so sourcing high-quality components is paramount.
For this recipe, we’ll be making approximately 500ml of soy sauce. Adjust quantities proportionally if you need a larger or smaller batch. Accurate weighing is crucial for consistent results, especially when dealing with fermented products. A kitchen scale is highly recommended.
Ingredients:
- Soybeans (whole, organic): 200g. Choose organic soybeans for the best flavor and to avoid potential pesticide residues. Rinse the soybeans thoroughly before use.
- Roasted Wheat Berries: 100g. Lightly toasted wheat berries add a desirable complexity and sweetness to the soy sauce. Toast them in a dry pan over medium heat until fragrant, being careful not to burn them.
- Koji Starter (Aspergillus oryzae): 10g. This is a crucial ingredient; ensure you obtain a high-quality, food-grade koji starter from a reputable supplier. Do not substitute with other types of mold.
- Sea Salt (non-iodized): 75g. Non-iodized sea salt is essential as iodine can interfere with the fermentation process and affect the final taste.
- Filtered Water: 500ml. Use filtered or spring water to avoid chlorine or other impurities that could negatively impact the fermentation.
- (Optional) Mirin (sweet rice wine): 25ml. A small amount of mirin can add depth and a subtle sweetness, enhancing the overall flavor profile. Use only high-quality mirin.
Important Note: The koji starter is a live culture and requires careful handling. Ensure your equipment is thoroughly sterilized before use to prevent contamination. Maintaining a sterile environment throughout the fermentation process is vital for successful results and food safety.
Measurement Precision: While some recipes might allow for approximate measurements, achieving a consistently delicious soy sauce requires precise weighing of ingredients. Use a kitchen scale to accurately measure the soybeans, wheat berries, salt, and koji starter. Measure liquids using a graduated measuring cylinder or cup for accuracy.
Equipment List
Making homemade soy sauce, especially for the delicate flavors of sushi, requires careful attention to sanitation and precise measurements. The equipment you use will directly impact the final product’s quality and safety. Therefore, selecting the right tools is crucial.
Food-grade containers are paramount. You’ll need several containers of varying sizes, all made from materials suitable for food storage and fermentation. Avoid using anything that might leach chemicals into your brew. I recommend at least a 1-gallon (3.8-liter) glass jar for the primary fermentation, a smaller glass jar (approximately 1-quart/0.95-liter) for secondary fermentation (if desired) and several smaller, sterile glass containers for storing the finished soy sauce. Ensure all containers are thoroughly cleaned and sanitized before use. A solution of hot water and a food-safe sanitizer, such as a bleach solution (diluted according to manufacturer’s instructions), is ideal. Rinse well with clean water afterwards.
Precise measurement is key. A kitchen scale capable of measuring in grams is essential for accurate ingredient ratios. Soy sauce fermentation is a delicate balance, and even slight variations can affect the final taste and consistency. A set of measuring cups and spoons can be used as supplementary tools, but for precise measurements, especially of salt, a gram scale is non-negotiable. Invest in a reliable, accurate scale.
Other essential tools include: a large wooden spoon or spatula for stirring (avoid metal utensils as they can react with the soy sauce), a cheesecloth or fine-mesh strainer for filtering the fermented mixture, a funnel to aid in transferring the liquid to storage containers, and a pH meter (optional but highly recommended). Using a pH meter will allow you to monitor the fermentation process and ensure the optimal pH level for safe and flavorful soy sauce. A pH meter provides greater control and reduces the risk of spoilage.
Optional but helpful equipment: airtight seals for your fermentation jars (to prevent unwanted microorganisms from entering), a fermentation weight (to keep the soybeans submerged during fermentation), and clean, sterilized bottles for bottling your finished soy sauce. While not strictly necessary, these items can enhance the process and improve the quality of your final product. Prioritize cleanliness throughout the entire process; it is the most important factor in producing safe and delicious homemade soy sauce.
Preparation of Soybeans (Soaking & Cleaning)
Making high-quality soy sauce at home begins with properly preparing the soybeans. This crucial first step significantly impacts the final flavor and texture of your homemade sauce. We’ll be using 1 kilogram (approximately 2.2 pounds) of soybeans for this recipe. Choose high-quality soybeans specifically designated for soy sauce production if possible; these will generally have a higher protein content resulting in a richer sauce.
First, thoroughly inspect the soybeans for any debris, damaged beans, or foreign objects. Remove any undesirable items. Discard any beans that are discolored, shriveled, or show signs of insect damage. A small amount of careful sorting will improve the overall quality of your final product.
Next, rinse the soybeans under cold running water for at least 2-3 minutes. This initial rinsing helps remove any loose dust or dirt clinging to the bean’s surface. Avoid using hot water at this stage, as it can damage the beans.
Now, it’s time for soaking. Place the cleaned soybeans in a large, clean container. Add approximately 3 liters (approximately 6.3 pints) of cool, filtered water. The water should completely submerge the soybeans. Ensure the container is large enough to allow the soybeans to expand significantly during soaking. A glass or food-grade plastic container is recommended.
Allow the soybeans to soak for at least 12 hours, or preferably 24 hours, at room temperature. Soaking for a longer period helps soften the beans, making them easier to process later and contributing to a smoother soy sauce. During this time, the beans will absorb a significant amount of water and expand considerably.
After soaking, drain the water and rinse the soybeans again under cold running water. You should notice a significant increase in the size of the soybeans. Gently rub the soybeans between your hands to remove any remaining skins or debris. This step isn’t crucial but helps yield a clearer soy sauce.
Finally, your soybeans are ready for the next stage of soy sauce production. Properly soaked and cleaned soybeans are fundamental for achieving a superior quality homemade soy sauce. Remember to always maintain cleanliness throughout the entire process to prevent unwanted bacterial growth.
Cooking the Soybeans (Boiling & Steaming)
Preparing soybeans correctly is crucial for achieving a rich and flavorful homemade soy sauce. This section details two methods: boiling and steaming. While both achieve the desired result, steaming offers a slightly gentler approach, potentially preserving more nutrients. Choose the method that best suits your equipment and preferences.
Method 1: Boiling
For this method, you’ll need approximately 1 pound (450g) of dried soybeans. Begin by rinsing the soybeans thoroughly under cold running water to remove any debris or dust. This step is essential for a cleaner final product. Place the rinsed soybeans in a large pot and cover them with ample water – about 3-4 inches above the beans. Bring the water to a rolling boil over high heat. Once boiling, reduce the heat to a gentle simmer, partially cover the pot, and cook for approximately 60-90 minutes, or until the soybeans are tender and easily mashed between your fingers. The cooking time may vary slightly depending on the age and type of soybeans used. Regularly check the water level and add more boiling water as needed to prevent the beans from burning or sticking to the bottom of the pot.
Method 2: Steaming
Steaming offers a more delicate approach. Again, start with 1 pound (450g) of rinsed soybeans. Place the soybeans in a steamer basket set over a pot of boiling water. Ensure the water level in the pot is sufficient to prevent it from boiling dry during the steaming process. Cover the steamer and steam for approximately 90-120 minutes, or until the soybeans are tender and easily mashed. Steaming may take slightly longer than boiling, but it results in a less mushy texture. Monitor the water level in the pot and add more boiling water as needed to maintain a steady steam.
Important Considerations for Both Methods:
Regardless of the method you choose, it is crucial to cook the soybeans until they are completely tender. Undercooked soybeans will significantly impact the final flavor and texture of your soy sauce. Once cooked, drain the soybeans thoroughly. You can use a colander or fine-mesh sieve to ensure all excess water is removed. Properly cooked and drained soybeans are ready for the next stage of soy sauce production – koji inoculation.
Professional Recommendation: For optimal flavor and texture, consider using a pressure cooker. Pressure cooking significantly reduces the cooking time while ensuring the soybeans reach the desired tenderness.
Koji Inoculation and Fermentation
Koji inoculation is a crucial step in soy sauce production, determining the quality and flavor of your final product. For a 1-gallon batch of soy sauce, you’ll need approximately 1 cup of high-quality Aspergillus oryzae koji starter. Ensure your koji starter is pure and potent; contamination will ruin your batch. Purchase from a reputable supplier specializing in food-grade koji.
Before beginning, sterilize all your equipment. This includes your fermentation vessel (a food-grade plastic bucket or a glass container works well), stirring utensils, and any measuring tools. Thorough sterilization is paramount to prevent unwanted bacterial or fungal growth. You can achieve this by washing everything thoroughly with hot, soapy water, followed by a rinse with a solution of 1 part bleach to 10 parts water, and then a final rinse with sterile water.
Prepare your cooked soybeans (approximately 4 pounds) by cooling them to around 100-110°F (38-43°C). This temperature is ideal for the koji spores to germinate. Spread the soybeans in a thin, even layer on a clean, sterilized surface. Avoid clumping, as this will hinder even inoculation.
Gently sprinkle the 1 cup of koji starter evenly over the soybeans, ensuring complete coverage. Use your clean, sterilized hands or a sanitized spatula to gently mix the koji into the soybeans, making sure every soybean is coated. Avoid excessive force, as this can damage the spores.
Transfer the inoculated soybeans to your sterilized fermentation vessel. Maintain a temperature between 86-95°F (30-35°C) throughout the fermentation process. This can be achieved using a temperature-controlled incubator or by placing the vessel in a warm, consistent environment. Monitor the temperature regularly.
The fermentation process will take approximately 3-5 days. During this time, the koji will grow and transform the soybeans. You’ll notice a significant increase in volume and a change in color and aroma. Regularly check for any signs of mold other than the desired white/yellow koji growth. Discard the batch if contamination is observed.
Once the fermentation is complete (the soybeans should be fully covered in a fluffy, white koji), you are ready to proceed to the next step of the soy sauce making process – the moromi fermentation. Proper koji inoculation and fermentation are the foundation for a delicious and safe homemade soy sauce. Pay close attention to detail, and your efforts will be rewarded with a unique and flavorful product.
Salt Brine Preparation and Mixing
Creating the perfect salt brine is crucial for successful homemade soy sauce fermentation. The salt concentration directly impacts the microbial activity and the final flavor profile of your soy sauce. Accuracy is paramount in this step.
For a typical batch of homemade soy sauce, using approximately 1 kilogram of soybeans and 1 kilogram of wheat, you’ll need a significant amount of salt brine. We recommend using non-iodized sea salt, as iodized salt can interfere with the fermentation process. Avoid using table salt with additives.
To prepare the brine, start by calculating the desired salinity. A salinity of around 20% is generally recommended for effective fermentation and preservation. This means 200 grams of salt for every 1000 grams (1 liter) of water. For a larger batch, proportionally increase the salt and water quantities. For example, for 2 liters of water, you would use 400 grams of salt.
Precise measurement is essential. Use a kitchen scale to weigh your salt accurately. Adding too much salt can inhibit fermentation, while too little can lead to spoilage. Once you’ve weighed your salt, slowly add it to your water, stirring continuously until it’s completely dissolved. This may take some time and effort, especially with larger quantities.
The water you use should be clean and preferably filtered or spring water. Avoid using chlorinated tap water as the chlorine can negatively affect the beneficial bacteria involved in the fermentation process. Let the brine cool to room temperature before proceeding to the next step (mixing with soybeans and wheat).
Once the salt is completely dissolved and the brine is at room temperature, you can begin the koji mixing step. Ensure the brine is fully homogenous to guarantee even salt distribution throughout the mixture. Any undissolved salt crystals can create localized high-salt areas that compromise the fermentation.
After mixing the brine with your cooked soybeans and wheat koji, ensure that the mixture is completely submerged in the brine. This prevents unwanted mold growth and ensures even fermentation. Proper submersion is critical for a successful and safe fermentation.
Remember to always maintain proper hygiene throughout the process. Clean and sanitize all your equipment before use to prevent contamination. Following these steps carefully will help ensure that your homemade soy sauce develops a rich, flavorful, and safe product.
Recommendations for Homemade Soy Sauce for Sushi
This homemade soy sauce is perfect for elevating your sushi experience. Its rich, savory flavor profile complements the delicate taste of sushi rice and various seafood and vegetables. For optimal flavor, we recommend using it immediately after preparation. However, if storing, ensure you follow the instructions below.
Serving Suggestions: Use this homemade soy sauce as a dipping sauce for nigiri, sashimi, and maki rolls. A small amount goes a long way, allowing the natural flavors of the sushi to shine through. You can also drizzle it lightly over your finished sushi plate for an extra touch of umami. Consider offering a small bowl alongside wasabi and pickled ginger for a classic sushi presentation.
Storage Conditions: Store your homemade soy sauce in an airtight container in the refrigerator. This will help maintain its freshness and prevent spoilage. While it should last for several weeks, we recommend using it within 2 weeks for the best quality and flavor. Avoid storing it in direct sunlight or at high temperatures.
Complementary Dishes: This soy sauce is incredibly versatile and isn’t limited to sushi. It pairs beautifully with other Japanese dishes like edamame, miso soup, and tempura. It can also be used as a marinade for grilled meats or fish, adding a unique depth of flavor. Experiment with its use in stir-fries or noodle dishes for a delicious Asian-inspired twist.
Nutritional Information (per tablespoon, approximate): The exact nutritional content varies depending on ingredients used. However, a general estimate is approximately 10-15 calories, with minimal fat and carbohydrates. It’s a good source of sodium, so keep that in mind if you are on a low-sodium diet. This homemade soy sauce is naturally gluten-free if you use gluten-free tamari or a similar alternative in place of regular soy sauce during preparation.
Important Note: The taste of homemade soy sauce can vary based on the ingredients and fermentation time. Adjust the ingredients to your preference for a personalized flavor profile.