Salsa, a vibrant and essential component of countless cuisines, boasts a rich history far exceeding its current status as a ubiquitous condiment. While the exact origins are debated, its roots lie firmly within the culinary traditions of Mexico. Long before the arrival of Europeans, indigenous cultures in Mexico utilized a variety of ingredients – tomatoes, chiles, onions, and herbs – to create savory sauces and preparations. These early forms, though not precisely salsa as we know it, laid the foundation for the diverse array of salsas enjoyed globally today. The word salsa itself comes from the Spanish word for sauce, highlighting its evolution within the context of Spanish colonization and the subsequent blending of indigenous and European culinary practices.
The precise timeline of salsa’s development is difficult to pinpoint, but its popularity exploded in the United States during the late 20th century. The rise of Tex-Mex cuisine, a fusion of Mexican and Texan flavors, played a significant role in its mainstream acceptance. The simple yet endlessly adaptable nature of salsa made it a perfect accompaniment to a wide range of dishes, from tacos and nachos to eggs and chips. Today, salsa is a multi-billion dollar industry in the U.S. alone, with annual sales reaching staggering figures. This reflects not only its deliciousness but also its versatility and cultural significance.
Beyond its economic impact, salsa holds deep cultural meaning. It’s more than just a condiment; it’s a reflection of family traditions, regional variations, and personal preferences. Each family often has its own secret recipe, passed down through generations, incorporating unique ingredients and levels of spice. This culinary heritage is deeply intertwined with cultural identity, with the specific types of chiles used often reflecting regional origins and traditions. The preparation of salsa itself can be a communal activity, bringing families and friends together in a shared culinary experience. More than just a taste, it’s a taste of home, a taste of history, and a taste of community.
The beauty of homemade salsa lies in its adaptability. While there are countless variations, the fundamental principles remain consistent: fresh ingredients, a balance of flavors, and a touch of personal creativity. This recipe aims to provide a foundation for your own salsa journey, encouraging you to experiment with different chiles, herbs, and levels of spice to create a salsa that truly reflects your unique palate. Whether you prefer a fiery, habanero-infused salsa or a milder, tomatillo-based version, the process of creating your own salsa is a rewarding experience that connects you to a rich culinary history and allows you to express your creativity in the kitchen. Get ready to embark on a flavorful adventure!
Ingredients and Measurements
Creating the perfect homemade salsa hinges on using fresh, high-quality ingredients and precise measurements. The following recipe yields approximately 2 cups of salsa, perfect for a small gathering or as a side for a couple of meals. Feel free to double or triple the recipe depending on your needs.
Tomatoes: The foundation of any good salsa is the tomato. We recommend using approximately 2 pounds of ripe Roma tomatoes. Roma tomatoes, also known as plum tomatoes, possess a firmer flesh and lower water content than other varieties, resulting in a less watery and more flavorful salsa. Avoid using tomatoes that are overly soft or bruised, as this can affect the overall texture and taste. If you prefer a smoother salsa, you can briefly blanch the tomatoes before chopping to remove the skins. This is entirely optional, but many find it enhances the overall consistency.
Onion: A medium-sized white onion (approximately ½ cup chopped) provides a sharp, crisp counterpoint to the sweetness of the tomatoes. Yellow or red onion can be substituted, but white onion offers a slightly milder flavor that won’t overpower the other ingredients. Ensure you finely chop the onion to distribute the flavor evenly throughout the salsa. Avoid over-chopping, as this can release excess moisture and make the salsa watery.
Jalapeño Peppers: For the perfect kick, use 1-2 jalapeño peppers, depending on your spice preference. Remember to wear gloves when handling jalapeños to avoid irritating your skin. Remove the seeds and membranes for a milder salsa, or leave them in for a fiery experience. Finely mince the jalapeños for even heat distribution. If you’re sensitive to spice, start with one jalapeño and add more to taste later.
Cilantro: Fresh cilantro adds a vibrant, herbaceous note. Use approximately ½ cup of packed, fresh cilantro leaves, finely chopped. Don’t over-chop the cilantro, as this can release some of its essential oils and make it taste bitter. If you dislike cilantro, parsley can be used as a substitute, but the flavor profile will change noticeably.
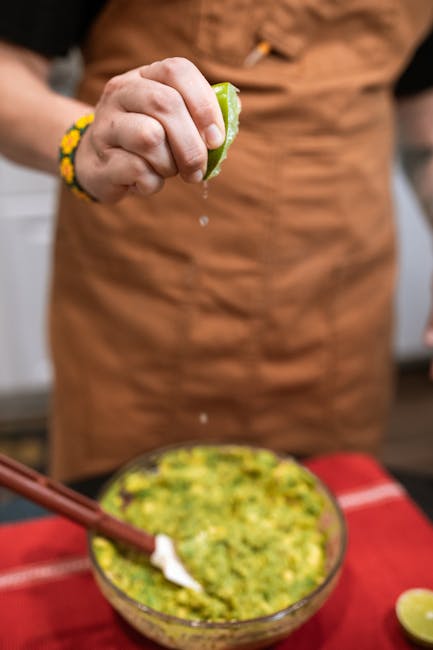
Lime Juice: The acidity of lime juice is crucial for balancing the sweetness of the tomatoes and enhancing the overall flavor of the salsa. Use the juice of 2 limes, approximately 2 tablespoons. Freshly squeezed lime juice is always best, but bottled lime juice can be used in a pinch.
Garlic: A few cloves of garlic add a pungent aroma and depth of flavor. Use 2-3 cloves of garlic, minced. Don’t overdo it; too much garlic can overpower the other ingredients.
Salt and Pepper: Seasoning is key. Start with 1 teaspoon of salt and ½ teaspoon of freshly ground black pepper. Taste and adjust seasoning according to your preference. Salt enhances the flavors of the other ingredients, so don’t be shy.
Optional Additions: Feel free to experiment with other ingredients to customize your salsa. Consider adding diced bell peppers, corn, cumin, or oregano for additional flavor complexity.
Preparation of Ingredients (Chopping, Seeding, etc.)
The success of your homemade salsa hinges significantly on the preparation of your ingredients. Proper chopping and seeding techniques not only affect the texture and appearance of your salsa but also its overall flavor profile. We’ll walk you through the process step-by-step, ensuring a consistently delicious result.
Tomatoes: We’ll be using 4 large ripe Roma tomatoes for this recipe. Roma tomatoes are ideal due to their meaty texture and lower water content, resulting in a less watery salsa. Begin by washing the tomatoes thoroughly under cold running water. Then, using a sharp knife, carefully cut each tomato in half lengthwise. Using a small spoon, gently scoop out the seeds and pulp from the inside of each tomato half. Discarding the seeds helps to prevent your salsa from becoming overly watery and provides a more concentrated tomato flavor. Next, dice the tomato halves into approximately 1/2-inch pieces. Consistency is key here; aim for uniformity in size for even cooking and a pleasant mouthfeel.
Onion: We’ll use 1 medium-sized white onion, known for its crispness and mild flavor. Again, start by washing the onion. Then, cut the onion in half lengthwise. Peel off the outer layer. Now, slice the onion in half again, creating quarters. To minimize tear-inducing fumes, place the onion in the fridge for 30 minutes before chopping. This helps to reduce the release of volatile compounds. Once chilled, finely dice the onion, aiming for similarly sized pieces as the tomatoes (approximately 1/2-inch). Avoid making them too small, as this can lead to a mushy texture.
Jalapeno Peppers: For a medium level of heat, we’ll incorporate 2 medium jalapeno peppers. Handle jalapenos with care, avoiding touching your eyes or face. Wash the peppers thoroughly. Slice them in half lengthwise and remove the seeds and membranes. The membranes contain the majority of the capsaicin, which produces the heat. Removing them will reduce the spiciness, making the salsa suitable for a wider range of palates. Finely dice the jalapenos to a similar size as the tomatoes and onions.
Cilantro: Fresh cilantro adds a vibrant, herbaceous note to the salsa. Use 1/2 cup of packed fresh cilantro leaves. Wash the cilantro thoroughly under cold water, shaking off excess water. Roughly chop the cilantro leaves. Avoid over-chopping the cilantro, as this can bruise the leaves and diminish their fresh flavor. A slightly coarser chop will retain more of the cilantro’s vibrant color and aroma.
Other Ingredients: Remember to prepare any other ingredients according to the recipe instructions. This might include finely mincing garlic cloves or chopping other vegetables like bell peppers or red onions if your recipe calls for them. Always maintain a consistent size for all your chopped ingredients for optimal texture and presentation.
Important Note: Sharp knives are essential for efficient and safe preparation. Use a cutting board that provides a stable surface for chopping. Always wash your hands thoroughly before and after handling ingredients, particularly jalapenos.
Combining Ingredients
This section details the crucial step of combining your meticulously prepared ingredients to create a vibrant and flavorful salsa. The order in which you combine ingredients can affect the final texture and taste, so follow these steps carefully for optimal results.
Begin by placing your finely chopped tomatoes (approximately 3 cups) into a large mixing bowl. Using a large bowl is essential to allow for easy mixing and prevent spilling. A stainless steel bowl is recommended as it won’t react with the acidity of the tomatoes.
Next, add the finely diced red onion (½ cup). Avoid over-dicing the onion; aim for pieces that are roughly the same size as your tomatoes. This ensures even distribution of flavor and texture throughout the salsa. Too large, and you’ll get overpowering onion bites; too small, and the onion flavor will be lost.
Now, incorporate the chopped cilantro (½ cup). Fresh cilantro is crucial for the best flavor. If using dried cilantro, use a significantly smaller amount (about 1 tablespoon) as it’s much more concentrated. Add the cilantro gently, avoiding excessive crushing, which can release bitter compounds.
Gently fold in the jalapeños (2-3, depending on desired heat level), finely minced. Remember to wear gloves when handling jalapeños to avoid skin irritation. If you prefer a milder salsa, remove the seeds and membranes before mincing. For a spicier salsa, leave the seeds and membranes in.
Add the lime juice (juice of 2 limes). Freshly squeezed lime juice is always best, offering a brighter, more vibrant flavor than bottled juice. The acidity of the lime juice will help to balance the sweetness of the tomatoes and enhance the overall flavor profile of the salsa.
Now, it’s time for the seasoning. Add the salt (1 teaspoon) and cumin (½ teaspoon). Start with the suggested amounts and taste before adding more. Salt enhances the flavors of all the ingredients, while cumin provides a warm, earthy note. Adjust these seasonings to your personal preference. You can also experiment with other spices such as chili powder or smoked paprika for added complexity.
Finally, gently but thoroughly combine all the ingredients using a large spoon or spatula. Avoid overmixing, which can cause the tomatoes to break down and release too much juice, resulting in a watery salsa. A gentle folding motion is best to ensure even distribution of all ingredients while maintaining a desirable texture.
Once combined, taste the salsa and adjust the seasoning as needed. You might want to add more salt, lime juice, or jalapeño depending on your preference. Taste testing is crucial for achieving the perfect balance of flavors.
After tasting and adjusting, allow the salsa to sit for at least 15-30 minutes before serving. This allows the flavors to meld and deepen, creating a more complex and delicious salsa. Enjoy your homemade salsa!
Adjusting Seasoning and Taste
Achieving the perfect salsa balance is a journey, not a destination! Even with a precise recipe, individual preferences and the varying ripeness of ingredients can significantly impact the final taste. This section guides you through adjusting your homemade salsa to achieve your ideal flavor profile.
Salt: Salt is crucial for bringing out the flavors of your salsa. Start with the amount specified in the recipe, but don’t be afraid to adjust. Taste your salsa after the initial mixing. If it seems bland, add ¼ teaspoon of salt at a time, mixing thoroughly and tasting again after each addition. Over-salting is easier to fix than under-salting. If you do over-salt, you can try adding a bit more salsa (if you have extra prepared), a splash of lime juice, or a diced tomato to dilute the saltiness.
Acidity: Lime juice provides the essential acidity that balances the sweetness and heat of the salsa. If your salsa lacks brightness or seems too flat, add more lime juice, one tablespoon at a time. Start with small increments to avoid making it too tart. Taste after each addition. Remember that the acidity will mellow slightly over time, so you might need a bit more lime juice if you are making salsa ahead of time.
Heat: The level of heat in your salsa depends entirely on your preference and the type of chili peppers used. If you find your salsa too mild, add a finely minced jalapeño or serrano pepper, starting with a small amount (about ½ a pepper) and increasing gradually until you reach your desired heat level. Remember that the heat increases over time, so taste your salsa after letting it sit for at least 15 minutes to allow the flavors to meld.
Sweetness: If your salsa seems too tart or spicy, a touch of sweetness can help balance it. A teaspoon or two of sugar or agave nectar can work wonders. Alternatively, you could add a finely diced sweet onion or a small amount of finely chopped mango or pineapple for a more complex sweetness. Add sweeteners sparingly, as too much can overpower the other flavors.
Other flavor enhancers: Don’t be afraid to experiment! A dash of your favorite hot sauce can add a unique kick. A pinch of cumin or coriander can add depth and earthiness. Cilantro, while a common addition, is a divisive herb; some people love it, others don’t. Add it to your liking, or omit it entirely. Consider your overall flavor profile before adding any additional ingredients. A well-balanced salsa should have a harmonious blend of sweet, sour, salty, and spicy elements.
Tasting and adjusting is key. Taste your salsa frequently throughout the process. It’s better to make small adjustments and taste as you go than to end up with a batch that’s significantly off-balance. Don’t be afraid to experiment and find the perfect salsa recipe that suits your palate. Enjoy the process and the delicious results!
Serving Suggestions
Your freshly made salsa is incredibly versatile and can elevate a wide range of dishes. Beyond the classic tortilla chip accompaniment, there are countless ways to enjoy this vibrant condiment. To best appreciate the fresh flavors, we recommend serving your salsa at room temperature or slightly chilled, never heated. Heating the salsa will diminish the bright, fresh flavors and textures.
Classic Pairing: Tortilla Chips. This is a timeless combination. Serve approximately 1-1.5 cups of salsa per 4-6 people alongside a generous bowl (or several smaller bowls) of your favorite tortilla chips. For a truly authentic experience, opt for homemade or high-quality, lightly salted tortilla chips. Avoid overly thick or heavily seasoned chips, which can overpower the delicate flavors of your homemade salsa.
Elevated Appetizer: Shrimp Ceviche with Salsa. For a sophisticated appetizer, combine 1 cup of your salsa with 1 pound of cooked and diced shrimp (about 1/2 inch pieces). Marinate the shrimp in the salsa for at least 30 minutes in the refrigerator to allow the flavors to meld. Serve chilled with lime wedges and avocado slices. The acidity of the lime and creaminess of the avocado complements the salsa beautifully. This dish serves 4-6 people.
Taco Tuesday Upgrade: Tacos and Burritos. Spoon 1/4 to 1/2 cup of salsa per taco or burrito, depending on your preference for heat. The salsa adds a burst of freshness and flavor to the classic fillings. Remember to adjust the amount based on the spiciness of your salsa; a milder salsa can be used more generously.
Beyond Tacos: Eggs and Breakfast Burritos. Add a spoonful of your salsa to scrambled eggs, omelets, or breakfast burritos for a spicy kick. The fresh flavors of the salsa pair surprisingly well with eggs, adding a vibrant contrast to the richness of the eggs. About 2 tablespoons per serving is a good starting point, but adjust to your liking.
Creative Uses: Grilled Chicken or Fish. Brush your grilled chicken or fish with a thin layer of your salsa during the last few minutes of grilling for a flavorful glaze. The salsa will caramelize slightly, adding a delightful sweetness to the savory protein. Use approximately 1/4 cup of salsa per pound of chicken or fish.
Unexpected Delight: Quesadillas. Spread a layer of your salsa inside a quesadilla before adding the cheese. The salsa adds a flavorful layer and prevents the cheese from becoming dry. Use about 2-3 tablespoons per quesadilla, depending on its size.
Storage Tip: To maintain the freshness of your homemade salsa, store it in an airtight container in the refrigerator. It will typically keep for 3-5 days. Avoid storing the salsa in metal containers, as this can affect the flavor. Glass or plastic containers are recommended.
Customization: Don’t hesitate to experiment! Add a dollop of sour cream or Greek yogurt to your salsa for a creamier texture. A sprinkle of fresh cilantro or a squeeze of lime juice can also enhance the flavors. Feel free to adjust the ingredients in the recipe to create your perfect salsa.
Storage Instructions
Proper storage is crucial for maintaining the vibrant flavor and optimal safety of your homemade salsa. How long your salsa lasts depends heavily on the ingredients used and the storage method employed. Fresh salsa, brimming with delicate ingredients like tomatoes and cilantro, will naturally have a shorter shelf life than a salsa incorporating robust components like roasted peppers and onions.
Refrigeration is essential for all homemade salsas. Never leave your salsa at room temperature for more than two hours, especially in warmer climates. This significantly reduces the risk of bacterial growth, ensuring your salsa remains safe and delicious.
For optimal freshness and flavor, store your salsa in an airtight container. Glass containers are ideal, as they prevent flavor transfer and are easily cleaned. Ensure the container is completely sealed to prevent air exposure, which can lead to oxidation and browning of the ingredients. Avoid using metallic containers, as they can interact with the acidity of the salsa, potentially affecting its taste and causing discoloration.
Portioning your salsa into smaller containers is highly recommended, especially if you’re making a large batch. This allows you to easily access smaller quantities without compromising the remaining salsa. Having multiple smaller containers also facilitates quick and efficient refrigeration, ensuring that the entire batch cools down evenly and quickly. Use containers of approximately 1-2 cups in size for convenient serving and optimal storage.
The shelf life of refrigerated homemade salsa typically ranges from 3 to 5 days. However, this can vary based on several factors. Salsas with a higher water content tend to spoil faster, while those with a lower water content and more robust ingredients (like roasted peppers) may last slightly longer. Always check for any signs of spoilage before consuming, such as an off-putting odor, mold growth, or significant changes in texture or color.
Inspect your salsa daily. Look closely for any signs of mold, which may appear as fuzzy patches or discoloration. Even a small amount of mold indicates that the entire batch should be discarded. If you notice any unusual smell or a significant change in the salsa’s consistency, it’s best to err on the side of caution and throw it away. Food safety should always be your priority.
Freezing salsa is possible, but it can alter its texture. The water content in the salsa will expand upon freezing, potentially resulting in a slightly less desirable consistency upon thawing. If you choose to freeze your salsa, use freezer-safe containers and leave some headspace at the top to accommodate expansion. Frozen salsa is best used within 2-3 months for optimal quality. Remember to thaw it completely in the refrigerator before serving.
By following these storage instructions carefully, you can enjoy your delicious homemade salsa for several days, savoring its fresh and vibrant flavors without compromising food safety.
Recommendations for Your Homemade Salsa
This homemade salsa recipe is incredibly versatile and can be enjoyed in a multitude of ways. To maximize its flavor and freshness, consider these recommendations.
Serving Suggestions: The possibilities are endless! This salsa is fantastic as a dip with tortilla chips, of course. But don’t stop there! Try it as a topping for grilled chicken, fish, or tofu. Spoon it over baked potatoes or scrambled eggs for a zesty kick. It’s also delicious as a condiment for tacos, burritos, and quesadillas. Get creative and experiment! A dollop on top of your favorite soup or chili adds a vibrant burst of flavor. Consider using it as a marinade for meats before grilling for an extra layer of complexity.
Storage and Shelf Life: For optimal flavor and texture, consume your salsa within 3-5 days of preparation. Store it in an airtight container in the refrigerator. While it may still be safe to eat after 5 days, the flavor and texture will begin to degrade. To help preserve its freshness, avoid using a metal spoon as this can react with the ingredients. Opt for a plastic or wooden spoon instead. If you notice any signs of spoilage, such as mold or an off-putting odor, discard the salsa immediately.
Complementary Dishes: This salsa pairs beautifully with a wide range of dishes. It’s a natural complement to Mexican-inspired cuisine, such as tacos, fajitas, and enchiladas. However, its bright and zesty flavor profile also works well with other types of food. Consider serving it alongside grilled meats, especially fish or chicken. It also adds a wonderful contrast to richer dishes like creamy soups or stews. For a complete meal, try it with some simple grilled vegetables, such as corn on the cob or bell peppers, for a well-rounded and flavourful experience.
Nutritional Information (per 1/2 cup serving, approximate values will vary based on ingredients): The nutritional content of your salsa will depend on the specific ingredients you use. However, a typical serving of homemade salsa is relatively low in calories and fat, and a good source of vitamins and antioxidants. Expect approximately: Calories: 50-70, Fat: 1-2g, Protein: 1-2g, Carbohydrates: 10-15g, Fiber: 2-4g. This is an estimate and may vary significantly depending on the types and amounts of vegetables used. For a more precise nutritional analysis, use a nutrition calculator and input your specific ingredients and quantities.
Important Note: This nutritional information is an estimate and may vary depending on the specific ingredients used and their quantities. For accurate nutritional information tailored to your recipe, we recommend using online nutrition calculators.