Prepare to embark on a culinary journey with our Homemade Roasted Red Pepper Hummus, a vibrant and flavorful twist on a classic Middle Eastern dip. Hummus itself boasts a rich history, its origins tracing back to the ancient Near East, possibly as far back as the 13th century. While the exact birthplace remains debated, its earliest documented mention appears in Egyptian writings, highlighting its presence in the region’s culinary landscape for centuries. Ancient recipes often focused on simple ingredients like chickpeas, tahini, and lemon juice, a testament to the dish’s enduring appeal. The word hummus itself derives from the Arabic word ḥummuṣ, meaning chickpea, underscoring the legume’s central role in this beloved dish.
Over the years, hummus has transcended its geographical roots, becoming a global phenomenon. Today, it’s enjoyed in countless variations, with regional preferences influencing the addition of spices, herbs, and other ingredients. The global hummus market is a testament to its popularity; estimates suggest it’s a multi-billion dollar industry, with consumption steadily increasing worldwide. This widespread adoption speaks volumes about its versatility and adaptability, appealing to diverse palates and culinary traditions. Our roasted red pepper hummus builds upon this legacy, offering a modern interpretation that retains the core essence of the original while introducing a delightful smoky sweetness.
The cultural significance of hummus is undeniable. It’s more than just a dip; it’s a staple in many Middle Eastern and Mediterranean cuisines, frequently served as part of mezze platters, alongside pita bread, falafel, and other delicacies. It’s a symbol of communal gatherings and shared meals, embodying the spirit of hospitality and conviviality. In some cultures, hummus is even considered a symbol of good luck or prosperity, further illustrating its deep-seated importance within various communities. Our recipe aims to honor this rich heritage, providing a homemade version that allows you to savor the authentic flavors and appreciate the cultural context of this extraordinary dish. The addition of roasted red peppers adds a bright, sweet counterpoint to the earthy chickpeas, creating a complex and satisfying flavor profile that’s perfect for sharing.
Beyond its cultural significance and widespread popularity, hummus also offers notable health benefits. Chickpeas are an excellent source of plant-based protein and fiber, contributing to satiety and digestive health. Tahini, a sesame seed paste, provides healthy fats and minerals. The combination of these ingredients creates a nutritious and flavorful snack or meal component. Our recipe emphasizes fresh, high-quality ingredients, ensuring a wholesome and delicious experience that appeals to both the palate and the health-conscious consumer. Enjoy!
Ingredients and Measurements
Creating the perfect homemade Roasted Red Pepper Hummus hinges on using high-quality ingredients and precise measurements. The following list details each component, offering practical tips and professional recommendations to ensure your hummus is creamy, flavorful, and utterly delicious.
Roasted Red Peppers (12 ounces): This is the star of the show! We recommend using approximately 12 ounces of roasted red peppers, either from a jar (look for high-quality brands with minimal added ingredients) or roasted from fresh. If roasting your own, choose firm, vibrant red bell peppers. Roasting brings out their natural sweetness and intensifies their flavor profile. For optimal flavour, char the peppers well over an open flame or under a broiler until the skin is blackened and blistered. This step is crucial for achieving that signature smoky taste.
Canned Chickpeas (15 ounces): A 15-ounce can of chickpeas (also known as garbanzo beans) provides the creamy base of our hummus. Ensure you drain and rinse the chickpeas thoroughly before using them. This removes excess starch and prevents a gritty texture. If you prefer a smoother hummus, you can also peel the chickpeas, although this is a more time-consuming step. Consider using organic chickpeas for a richer, more flavorful result.
Tahini (1/2 cup): Tahini, a sesame seed paste, is essential for both the flavor and texture of hummus. Choose a high-quality tahini with a smooth, creamy consistency. Avoid tahini that has separated significantly, as this can affect the final texture of your hummus. If your tahini is stiff, you may need to warm it gently in a double boiler before adding it to the food processor.
Lemon Juice (2 tablespoons): Freshly squeezed lemon juice adds brightness and acidity, balancing the richness of the tahini and chickpeas. Using fresh lemon juice is highly recommended over bottled juice, as the flavor is significantly more vibrant. Adjust the amount to your preference – some prefer a more tart hummus, while others prefer a milder flavor.
Garlic (2 cloves): Fresh garlic adds a pungent and savory note. Use 2 cloves of garlic for a noticeable but not overpowering garlic flavor. More or less can be adjusted to your personal preference. If you prefer a milder garlic flavor, you can roast the garlic cloves alongside the peppers for a sweeter and less pungent taste.
Olive Oil (1/4 cup + extra for drizzling): High-quality extra virgin olive oil is vital for both flavor and texture. A good quality olive oil will significantly impact the overall taste of your hummus. 1/4 cup is incorporated into the hummus for creaminess, while extra is reserved for drizzling on top for added richness and visual appeal.
Salt (1 teaspoon + to taste): Sea salt or kosher salt is preferred for its cleaner flavor. Start with 1 teaspoon, but taste and adjust the salt level to your liking as needed. Remember that the saltiness can be affected by the saltiness of the canned chickpeas.
Water (2-4 tablespoons): Water is added to achieve the desired consistency. Start with 2 tablespoons and add more as needed until you reach your preferred creamy texture. Don’t add too much water at once; it’s easier to add more than to take it away.
Optional additions: Consider adding a pinch of cumin, paprika, or a drizzle of chili oil for extra flavor complexity. A sprinkle of chopped fresh parsley or cilantro adds a vibrant garnish.
Equipment List
Making homemade roasted red pepper hummus requires a relatively straightforward set of equipment, but the right tools will make the process significantly easier and yield a smoother, more delicious final product. Let’s break down the essential tools and offer some helpful tips for each.
1. Baking Sheet (12×17 inch or similar): You’ll need a large baking sheet to comfortably roast the red peppers. A larger sheet is preferable to prevent overcrowding, which can lead to uneven roasting and steaming instead of proper charring. Avoid using non-stick baking sheets, as the high heat can damage the coating. A standard aluminum baking sheet is ideal.
2. Food Processor (at least 7-cup capacity): This is the workhorse of the recipe. A powerful food processor with a wide feed tube will make quick work of blending the roasted peppers, chickpeas, and other ingredients into a smooth and creamy hummus. A smaller food processor might struggle with the volume of ingredients, resulting in an uneven texture. Investing in a high-quality food processor is highly recommended for optimal results. Look for one with a strong motor and multiple speed settings.
3. Sharp Knife & Cutting Board: You’ll need a sharp knife for accurately trimming the tops and stems from the red peppers. A dull knife can make this task difficult and potentially dangerous. Use a sturdy, non-porous cutting board to prevent cross-contamination and ensure easy cleaning. A good quality chef’s knife (8-10 inches) is perfect for this task.
4. Measuring Cups & Spoons: Accurate measurements are crucial for achieving the desired consistency and flavor in your hummus. Ensure you have a set of both dry and liquid measuring cups and spoons. Using standardized measuring tools is critical for consistent results between batches.
5. Small Bowl(s): You’ll need at least one small bowl for holding the tahini while you prepare the other ingredients. Additional small bowls can be useful for measuring out spices and other additions. Glass or stainless steel bowls are recommended for their durability and ease of cleaning.
6. Rubber Spatula or Scraper: A rubber spatula or scraper is essential for scraping down the sides of the food processor bowl to ensure all ingredients are thoroughly blended. This is particularly important when making hummus to achieve a smooth, consistent texture. A flexible spatula is best to reach all the corners of the bowl.
7. Serving Bowl: Finally, you’ll need a nice bowl to serve your delicious homemade roasted red pepper hummus. Choose a bowl that complements your presentation style. Consider the size of your serving and select a bowl accordingly.
Optional Equipment: While not strictly necessary, a grill pan can be used for roasting the peppers for a smokier flavor. Similarly, a hand-held immersion blender can help with achieving a super-smooth consistency if your food processor doesn’t quite get to the desired texture. A kitchen scale can also improve accuracy in measuring ingredients.
Preparation of Red Peppers (Roasting and Peeling)
Roasting red peppers brings out their sweetness and intensifies their flavor, creating a depth that’s essential for a truly delicious homemade hummus. This process also makes peeling them incredibly easy. For this recipe, we’ll be using about 1 pound (450g) of red bell peppers. You can adjust this amount based on your desired hummus yield.
Choosing your peppers: Select firm, vibrant red bell peppers with smooth skin and no bruises. Avoid peppers that are soft or have blemishes, as these may indicate spoilage. Larger peppers are often more economical, but smaller ones can be just as flavorful.
Method 1: Roasting in the Oven This is the most common and arguably easiest method for roasting peppers. Preheat your oven to 400°F (200°C). Wash the peppers thoroughly and remove the stems, leaving the peppers whole. Place the peppers directly on the oven rack, or on a baking sheet lined with parchment paper (this will make cleanup easier). Roast for 30-40 minutes, turning them halfway through, until the skins are completely blackened and blistered. You’ll notice the peppers collapsing slightly as they soften.
Method 2: Roasting on the Stovetop (Gas Stove Only): This method is faster but requires careful attention. Place the whole peppers directly over a gas flame, turning frequently with tongs. Roast for 15-20 minutes, or until the skins are completely blackened and blistered. This method works best with smaller peppers. Caution: This method can be messy, so be prepared for some splattering.
Method 3: Broiling (Faster but requires close attention): Preheat your broiler. Place the peppers directly on the oven rack, ensuring they are not near other items. Broil for 10-15 minutes, turning frequently with tongs. Watch carefully to prevent burning. This method is quick but demands close supervision to prevent burning.
Peeling the Peppers: Once the peppers are roasted, immediately transfer them to a heatproof bowl and cover tightly with plastic wrap for 10-15 minutes. This steaming process will loosen the skins significantly, making peeling much easier. After steaming, carefully peel off the blackened skin. You can use your fingers, but kitchen tongs or a small, sharp paring knife can be helpful for stubborn bits. Remove the seeds and membranes, as they can add a slightly bitter taste. Rinse the peeled peppers under cool water to remove any remaining charred bits.
Important Note: Wear oven mitts when handling hot peppers. The skins will be extremely hot after roasting, so be careful to avoid burns. The peppers will be soft after roasting and peeling, making them easy to handle and process for your hummus.
Once peeled and cleaned, your roasted red peppers are ready to be incorporated into your delicious homemade roasted red pepper hummus recipe!
Making the Hummus (Blending and Mixing)
Once your roasted red peppers have cooled and been peeled and deseeded, it’s time to create the creamy heart of your hummus. This section details the blending and mixing process, crucial for achieving that perfect texture and flavor.
Begin by adding the following ingredients to your food processor: 1 (15-ounce) can of chickpeas, drained and rinsed. Thoroughly rinsing the chickpeas is vital; it removes excess starch which can lead to a grainy texture in the final hummus. Make sure to remove any stray skins as well, as these can create an unpleasant, slightly bitter taste.
Next, add 1 cup of your roasted red peppers. If you have particularly large peppers, you might want to roughly chop them before adding them to the food processor to ensure even blending. Smaller pieces will blend more smoothly and prevent large chunks from remaining.
Now, incorporate the liquids: 1/4 cup tahini (ensure it’s well-stirred before measuring), 1/4 cup fresh lemon juice (about one large lemon), and 2 cloves garlic, minced. The garlic adds a pungent flavor that complements the sweetness of the roasted peppers. If you prefer a milder garlic flavor, start with one clove and add more to taste later.
Finally, add 1/2 teaspoon ground cumin, 1/4 teaspoon smoked paprika, and salt and freshly ground black pepper to taste. Start with 1/2 teaspoon of salt, but remember you can always add more later. The smoked paprika adds a smoky depth that beautifully complements the roasted peppers and cumin. Don’t be afraid to experiment with the spices to find your perfect balance.
Begin processing on low speed. This is extremely important to prevent splattering and ensure that all the ingredients are incorporated gradually. Scrape down the sides of the bowl with a spatula a few times during the process to ensure everything is blended evenly. Slowly increase the speed to medium-high and blend until completely smooth and creamy, about 2-3 minutes. If your food processor is struggling, you might need to stop and scrape down the sides a few more times.
Check the consistency. If it’s too thick, add 1-2 tablespoons of ice water or more lemon juice, one tablespoon at a time, until you reach your desired consistency. If you prefer a thicker hummus, simply reduce the amount of liquid you add.
Taste and adjust seasoning as needed. You may want to add more lemon juice for acidity, salt for saltiness, or more spices for depth of flavor. This step is crucial to perfecting your hummus to your personal preferences.
Once you’ve achieved your desired consistency and flavor, transfer the hummus to a bowl, cover it, and refrigerate for at least 30 minutes to allow the flavors to meld. This chilling period helps the hummus to thicken and develop a more intense flavor profile. Enjoy!
Seasoning and Taste Adjustment
Seasoning your homemade roasted red pepper hummus is crucial for achieving the perfect balance of flavors. While the roasted peppers themselves contribute a sweetness and depth, additional seasonings elevate the hummus to a truly exceptional level. Remember that taste is subjective, so feel free to adjust the quantities to your preference. Start with smaller amounts and gradually add more until you reach your desired flavor profile.
Salt is the foundation of any good hummus. Begin by adding 1 teaspoon of kosher salt to your blended hummus. Kosher salt is preferred because its larger crystals dissolve more evenly, preventing overly salty pockets. Taste and adjust accordingly; you might need slightly more or less depending on the saltiness of your roasted peppers and tahini.
Lemon juice provides acidity, which cuts through the richness of the tahini and enhances the sweetness of the peppers. Start with 2 tablespoons of freshly squeezed lemon juice. Freshly squeezed is always best as bottled juice can be more acidic and unpredictable. Taste and add more lemon juice, 1/2 tablespoon at a time, until the desired tanginess is achieved. Don’t be afraid to add more! The right amount of lemon juice is key to achieving a bright, vibrant flavor.
Garlic is another essential component of many hummus recipes. While some recipes call for raw garlic, roasted garlic offers a smoother, sweeter flavor that complements the roasted peppers beautifully. Start with 1-2 cloves of roasted garlic, pureed or finely minced. If using raw garlic, begin with just one clove and add more cautiously as raw garlic’s pungency is much more intense. Taste and adjust according to your preference.
Cumin adds a warm, earthy note that beautifully complements the sweetness of the roasted peppers and the richness of the tahini. Start with 1/2 teaspoon of ground cumin. Be careful not to overdo it, as cumin can easily overpower the other flavors. Add more in small increments, tasting after each addition, until you achieve the desired level of warmth.
Paprika, especially smoked paprika, adds a lovely smoky depth and vibrant color to the hummus. Start with 1/4 teaspoon of smoked paprika. Sweet paprika can also be used, but smoked paprika provides a more complex flavor profile. Again, add gradually and taste frequently.
Black pepper adds a touch of spice and helps to balance the other flavors. Start with a few grinds of freshly ground black pepper. Adjust to your taste preference.
Optional additions: Consider adding a pinch of cayenne pepper for a subtle kick, or a drizzle of high-quality olive oil for richness and extra flavor. A sprinkle of za’atar adds a unique Middle Eastern flair. These additions should be added sparingly, tasting after each addition, to maintain the balance of flavors.
Important Note: Always taste your hummus throughout the seasoning process. The flavors will meld and develop over time, so allow the hummus to rest for at least 30 minutes in the refrigerator before making final adjustments. This allows the flavors to fully integrate and develop.
Storage Instructions
Proper storage of your homemade Roasted Red Pepper Hummus is crucial to maintaining its vibrant flavor, creamy texture, and overall quality. Following these guidelines will ensure you enjoy your delicious hummus for days to come.
Refrigeration is key: Once your hummus has completely cooled, transfer it to an airtight container. A glass container is ideal, as it prevents any potential plastic interaction with the hummus. Ensure the container is completely sealed to prevent air exposure. Air exposure leads to oxidation, which can cause the hummus to brown and its flavor to deteriorate.
Recommended container size: For optimal freshness, consider portioning your hummus into smaller containers if you don’t plan on consuming the entire batch within a few days. A good rule of thumb is to use containers holding no more than 2 cups of hummus each. This minimizes the surface area exposed to air, further slowing down oxidation.
Storage duration: Properly stored in the refrigerator at a temperature between 35°F and 40°F (1.7°C and 4.4°C), your homemade Roasted Red Pepper Hummus should maintain its peak quality for approximately 5-7 days. After this time, while it may still be safe to consume, the flavor and texture might begin to degrade. You might notice a slight change in color or a less creamy consistency.
Freezing for longer storage: If you wish to enjoy your hummus for a longer period, freezing is a viable option. For freezing, use freezer-safe containers, leaving about an inch of headspace at the top to allow for expansion during freezing. Label the container with the date of freezing to track its age. Frozen hummus can last for up to 2-3 months. When thawing, transfer the hummus to the refrigerator overnight to allow for gentle and even thawing. Avoid thawing at room temperature, as this can promote bacterial growth.
Important note on reheating: While you can certainly enjoy your hummus cold straight from the refrigerator, if you prefer it at a slightly warmer temperature, gently warm it in a microwave-safe bowl in short bursts, stirring frequently to prevent uneven heating. Never overheat the hummus, as this can drastically affect its texture and flavor.
Signs of spoilage: Before consuming your hummus, always inspect it for any signs of spoilage. These could include an off-putting odor, mold growth (visible as fuzzy spots), or a significant change in color or texture, such as becoming significantly watery or extremely thick and dry. If you notice any of these signs, discard the hummus immediately.
By adhering to these guidelines, you can maximize the shelf life and enjoyment of your homemade Roasted Red Pepper Hummus, ensuring each serving is as delicious as the first.
Recommendations for Homemade Roasted Red Pepper Hummus
This homemade roasted red pepper hummus is a vibrant and flavorful dip, perfect for a variety of occasions. Its creamy texture and sweet-smoky flavor profile make it a crowd-pleaser, whether served as an appetizer or incorporated into a larger meal. For optimal flavor, we recommend roasting your own red peppers; the charring adds a depth of flavor that canned peppers simply can’t match. However, if time is short, high-quality jarred roasted red peppers can be substituted.
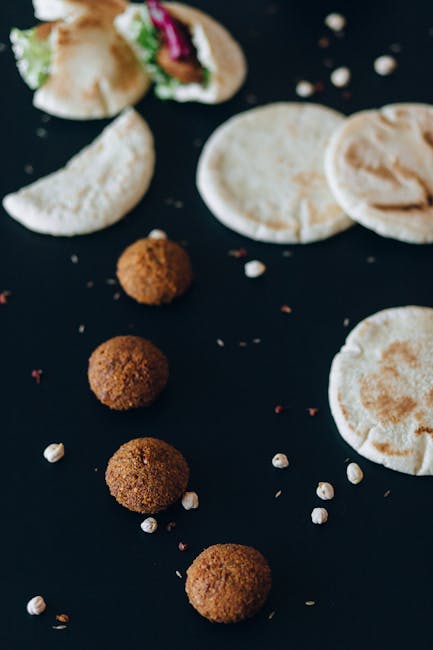
Serving Suggestions: The possibilities are endless! This hummus is delicious served with an array of dippers, including pita bread (both triangles and whole rounds), crudités (carrots, celery, cucumber, bell peppers), toasted baguette slices, and even tortilla chips. For a more elegant presentation, consider serving it in small bowls garnished with a drizzle of olive oil, a sprinkle of paprika, or a few chopped fresh herbs like parsley or cilantro. You can also use it as a spread for sandwiches, wraps, or even as a base for a flavorful pizza topping.
Complementary Dishes: This hummus pairs beautifully with Mediterranean-inspired dishes. Consider serving it alongside grilled halloumi cheese, falafel, baba ghanoush, or a vibrant Greek salad. It also complements grilled meats and fish, adding a creamy, flavorful counterpoint to richer proteins. For a lighter meal, try it with a selection of crudités and some crusty bread, creating a healthy and satisfying platter.
Storage Conditions: Store leftover hummus in an airtight container in the refrigerator. It will keep well for 3-5 days. For longer storage, you can freeze the hummus in an airtight container or freezer bag. Allow the hummus to thaw completely in the refrigerator before serving, as it may become grainy if thawed at room temperature. Remember to stir well after thawing to restore its creamy consistency.
Nutritional Information (per serving, approximate): The exact nutritional content will vary depending on the specific ingredients used and serving size. However, a typical serving (approximately 2 tablespoons) will contain roughly: Calories: 100-150; Fat: 8-12g; Protein: 3-5g; Carbohydrates: 10-15g; Fiber: 2-4g. This information is an estimate and may vary based on the ingredients and portion size. For a more precise nutritional analysis, use a nutrition calculator with your specific recipe details.
Important Note: While this recipe is generally healthy, adjust the amount of tahini and olive oil to control the fat content according to your dietary needs. If you are following a low-sodium diet, be mindful of the salt content and adjust accordingly. Always check ingredient labels for allergens and adjust ingredients to suit your dietary requirements.