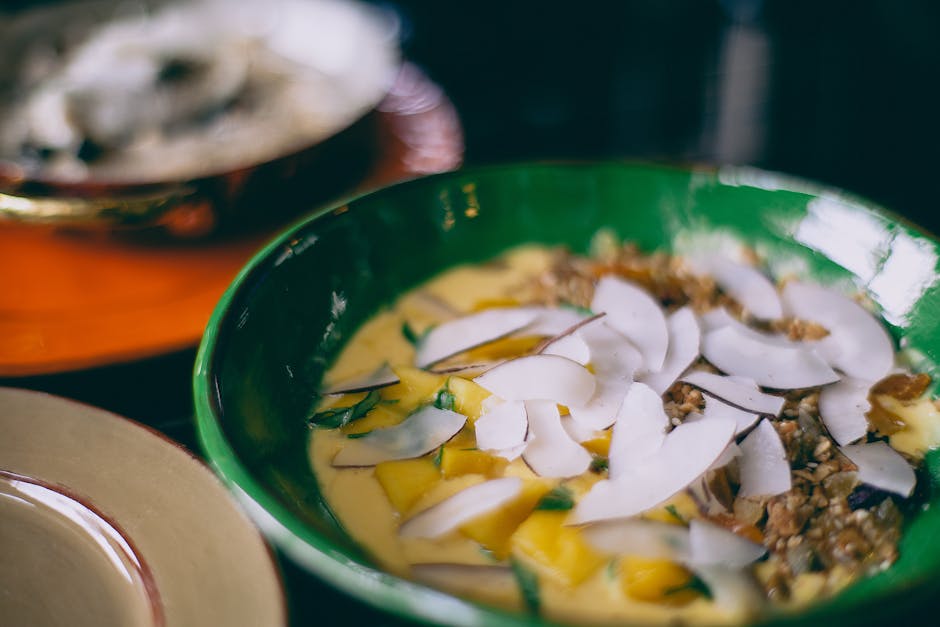
Prepare your taste buds for a culinary journey to Indonesia with a dish that’s as vibrant and diverse as the archipelago itself: Homemade Indonesian Nasi Goreng. More than just a simple fried rice, Nasi Goreng holds a significant place in Indonesian culture, representing a delightful blend of influences and a testament to the nation’s rich history. Its origins are shrouded in some mystery, but most agree that it emerged sometime during the 20th century, likely born from the resourceful use of leftover rice – a common practice across many Asian cuisines. The exact birthplace remains debated, but its popularity quickly spread across the Indonesian islands, evolving into countless regional variations.
The cultural significance of Nasi Goreng is undeniable. It’s a staple food found throughout the country, transcending regional and socioeconomic boundaries. From street vendors’ humble carts to upscale restaurants, Nasi Goreng is a ubiquitous presence, enjoyed for breakfast, lunch, or dinner. Its adaptability is key to its enduring appeal; regional variations showcase the diverse culinary landscape of Indonesia, with ingredients varying from sweet soy sauce and shrimp paste in the west to fiery chilies and kecap manis (sweet soy sauce) in the east. This adaptability also extends to personal preferences; each cook adds their unique touch, making every plate a slightly different experience.
The dish’s popularity extends far beyond Indonesia. Nasi Goreng’s global recognition is a testament to its deliciousness and versatility. It’s become a popular choice in Indonesian restaurants worldwide, and its presence on international menus speaks volumes about its appeal to diverse palates. While precise statistics on global consumption are difficult to obtain, it’s safe to say that millions of portions are consumed daily across the globe. It’s frequently ranked among the world’s most beloved dishes, regularly featuring on best of lists and inspiring countless variations and adaptations. Its simple yet satisfying nature, combined with its adaptable recipe, has made it a global phenomenon.
Beyond its widespread popularity, Nasi Goreng embodies the spirit of Indonesian resourcefulness and culinary creativity. The dish’s origins in utilizing leftover rice underscore the importance of minimizing food waste, a value deeply ingrained in Indonesian culture. Moreover, the countless regional variations, each reflecting local ingredients and tastes, highlight the country’s rich diversity and its ability to transform humble ingredients into extraordinary meals. This homemade version aims to capture the authenticity and soul of this iconic dish, offering a taste of Indonesia’s vibrant culinary heritage.
Ingredients and Measurements
Creating authentic Indonesian Nasi Goreng hinges on the quality and precise measurement of your ingredients. Don’t be afraid to experiment with spices to find your perfect blend, but starting with these quantities will guarantee a delicious result. We’ll be making enough for approximately 4 servings.
Rice: 2 cups of cooked long-grain rice. Crucial Note: The rice is best used leftover, day-old rice is ideal. This allows the grains to firm up, preventing them from becoming mushy during cooking. If using freshly cooked rice, spread it thinly on a baking sheet to cool and dry out before using. This step is essential for achieving the perfect texture.
Protein: 1 cup of cooked protein. You have many choices here, showcasing the versatility of Nasi Goreng. Popular options include: 1 cup shredded chicken breast (about 150g), 1 cup cooked shrimp (peeled and deveined, about 150g), or 1 cup crumbled firm tofu (about 150g). Recommendation: Pre-cook your protein separately and allow it to cool before adding it to the Nasi Goreng. This helps prevent overcooking.
Vegetables: The vegetable component is key to both flavor and visual appeal. Here’s a suggested combination: 1 medium onion, finely chopped (approximately 1/2 cup); 1 red bell pepper, thinly sliced (about 1 cup); 2 cloves garlic, minced; 1-2 green chilies, finely chopped (adjust to your spice preference); 1/2 cup of sliced shallots (optional, but adds a lovely sweetness). Tip: Using a mandoline slicer ensures consistent vegetable sizes, leading to even cooking.
Sauce: The sauce is what truly brings the Nasi Goreng to life. You’ll need: 2 tablespoons of sweet soy sauce (kecap manis); 1 tablespoon of light soy sauce (kecap asin); 1 tablespoon of fish sauce (kecap ikan – optional, but adds umami depth); 1 teaspoon of shrimp paste (belacan – optional, adds a pungent flavor, use sparingly); 1 teaspoon of ground turmeric; 1/2 teaspoon ground coriander; 1/4 teaspoon ground cumin; 1/4 teaspoon ground white pepper; 1 tablespoon of vegetable oil or cooking oil of your choice. Important: Adjust the amount of soy sauce and fish sauce according to your taste preferences. Start with the suggested amounts and add more gradually until you achieve your desired level of saltiness and umami.
Garnish: Fresh ingredients elevate the presentation and flavor. Consider: 1/4 cup of chopped fresh cilantro or coriander; 1 lime, cut into wedges; a fried egg (optional, but a classic addition). Professional Tip: Garnish generously. The vibrant colors of the fresh herbs and the yolk of the fried egg make the dish visually appealing.
Optional Additions: Feel free to personalize your Nasi Goreng! Consider adding other vegetables like bean sprouts, snow peas, or carrots. You can also incorporate other proteins like beef, lamb, or even prawns. Some people like to add a splash of tomato ketchup or a squeeze of sambal oelek for extra heat.
Equipment List
Creating delicious homemade Indonesian Nasi Goreng requires the right tools to ensure efficient and successful cooking. This equipment list details everything you’ll need, from essential cookware to helpful gadgets that will elevate your culinary experience.
WoK or Large Frying Pan: A wok is traditionally used for Nasi Goreng, its curved sides allowing for efficient tossing and even cooking of the ingredients. However, a large, heavy-bottomed frying pan (12-14 inches in diameter) will work just as well. A heavy bottom is crucial for even heat distribution, preventing burning and ensuring perfectly cooked rice.
Spatula or Rice Paddle: You’ll need a sturdy spatula or, ideally, a rice paddle, to effectively stir-fry the Nasi Goreng. A wide, flat spatula provides excellent surface area for maneuvering the ingredients, while a rice paddle’s design is specifically suited for handling and tossing rice without breaking it up excessively. Choose a heat-resistant spatula made from wood, silicone, or metal. Avoid plastic spatulas, as they can melt at high temperatures.
Measuring Cups and Spoons: Accurate measurements are key to achieving the perfect balance of flavors. Having a set of measuring cups (1 cup, ½ cup, ¼ cup, and 1 tablespoon) and measuring spoons (1 teaspoon, ½ teaspoon, ¼ teaspoon) readily available will ensure consistent results. Invest in a quality set for precise measurements.
Cutting Board and Sharp Knife: Preparing the vegetables and proteins requires a sturdy cutting board and a sharp knife. A large cutting board (at least 12×15 inches) provides ample space for chopping. A sharp knife ensures clean cuts and prevents bruising of ingredients, which can affect texture and flavor. Remember to wash and sanitize your cutting board thoroughly after use.
Mixing Bowls: You’ll need at least two mixing bowls – one for preparing the sauce ingredients and another for combining the cooked rice and other components. Medium-sized bowls (approximately 8-10 inches in diameter) are ideal for this purpose. Using separate bowls helps maintain cleanliness and prevents cross-contamination of flavors.
Colander or Sieve: If you’re using freshly cooked rice, a colander or sieve will be necessary to drain any excess water before incorporating it into the Nasi Goreng. This helps prevent the rice from becoming mushy. Ensure your colander is sturdy enough to hold a substantial amount of rice.
Serving Dishes: Finally, you’ll need serving dishes to present your delicious Nasi Goreng. A large platter or individual bowls are both excellent options, depending on your preference and the number of servings. Choose visually appealing serving dishes to enhance the overall dining experience.
Optional but Recommended: A mortar and pestle for grinding spices (for a more authentic flavor profile), a small bowl for holding your kecap manis (sweet soy sauce) for easy access during cooking, and tongs for tossing are all helpful additions to your Nasi Goreng arsenal.
Preparation of Ingredients
Before you begin cooking your Nasi Goreng, meticulous preparation of ingredients is key to achieving the perfect flavour and texture. This section details the steps for preparing the vegetables and meats, ensuring a smooth and efficient cooking process.
Chicken Preparation (serves 4): We’ll start with 200g of boneless, skinless chicken thighs. Choose chicken thighs for their juiciness and flavour, as they hold up better during cooking than breast meat. Cut the chicken thighs into small, roughly 1cm cubes. This ensures even cooking and easy integration into the rice. Avoid overly large pieces, as they may not cook through completely. Once cubed, set the chicken aside in a bowl.
Vegetable Preparation: The vibrant colours and flavours of Nasi Goreng rely heavily on the vegetables. We’ll need the following: 1 medium-sized onion (finely chopped), 2 cloves garlic (minced), 1 red chili (finely chopped – adjust to your spice preference), 1 green chili (finely chopped – for added freshness), 100g of shredded carrots (about ½ cup), and 100g of sliced green beans (about 1 cup). Consistent chopping is crucial for even cooking. For the onion, aim for small, uniform pieces to avoid large chunks in your final dish. The garlic and chilies should be finely minced to release their flavour fully. Prepare the vegetables ahead of time and store them separately to prevent discoloration.
Shrimp Preparation (Optional): If adding shrimp, use around 150g of peeled and deveined shrimp. Ensure the shrimp are thoroughly thawed if frozen. Pat them dry with paper towels to remove excess moisture, which helps them brown better during cooking. If using large shrimp, cut them in half or into smaller pieces for quicker cooking. Smaller shrimp can be added directly to the wok.
Other Important Considerations:
- Sharp Knives are Essential: Invest in a good quality chef’s knife and paring knife for efficient and safe preparation. Dull knives are more dangerous and make chopping more difficult.
- Mise en Place: The French term mise en place translates to everything in its place. This means prepping all your ingredients before you begin cooking. This minimizes stress and ensures a smoother cooking process. Having everything measured and ready to go prevents delays and interruptions.
- Proper Storage: After preparing your ingredients, store them properly to maintain freshness. Keep chopped vegetables in airtight containers in the refrigerator to prevent drying or discoloration. Chicken and shrimp should be refrigerated separately and cooked on the same day.
Following these steps will ensure that your Nasi Goreng ingredients are perfectly prepared for a flavourful and enjoyable meal. Remember, consistency in chopping and careful preparation will significantly impact the quality of your final dish.
Cooking the Rice (if starting with uncooked rice)
Before embarking on the flavorful journey of making Nasi Goreng, you must first prepare the perfect bed of rice. The quality of your rice significantly impacts the final dish, so choosing the right type and cooking it correctly is crucial. For authentic Nasi Goreng, we recommend using medium-grain white rice, as it offers the ideal texture – slightly sticky but not overly so – that holds the other ingredients beautifully.
Choosing your rice: While other rice varieties can be used, medium-grain white rice is the traditional and preferred choice for Nasi Goreng. Avoid long-grain rice, as it will be too dry and fluffy for this dish. Look for high-quality rice for the best results.
Rinsing the rice: Before cooking, rinse the rice thoroughly under cold running water. This removes excess starch and prevents the rice from becoming overly sticky and clumpy. Gently swirl the rice in the water and drain. Repeat this process 2-3 times, until the water runs clear.
The cooking method: We will use the absorption method, a simple and reliable way to cook perfect rice. For approximately 4 cups of cooked rice (enough for 4-6 servings of Nasi Goreng), you will need 2 cups of uncooked medium-grain white rice and 2 ½ cups of water. Adjust these measurements proportionally if you need more or less rice.
Cooking instructions: Combine the rinsed rice and water in a medium-sized saucepan with a tight-fitting lid. Bring the mixture to a rolling boil over high heat. Once boiling, immediately reduce the heat to the lowest setting, cover the saucepan tightly, and simmer for 15-18 minutes. Do not lift the lid during this time, as this will release steam and result in unevenly cooked rice.
Resting the rice: After 15-18 minutes, turn off the heat and let the rice rest, still covered, for another 10 minutes. This allows the steam to finish cooking the rice evenly and creates a fluffy texture. Resist the urge to open the lid prematurely. This crucial step is often overlooked, but it’s essential for perfectly cooked rice.
Fluffing the rice: Once the resting period is complete, carefully fluff the rice with a fork to separate the grains. You can now let the rice cool completely before using it in your Nasi Goreng. Ideally, the rice should be completely cool before being used, as this helps prevent the Nasi Goreng from becoming mushy.
Troubleshooting: If your rice is too sticky, you may have used too much water or not rinsed it sufficiently. If it’s too dry, you may have used too little water or cooked it for too short a time. Practice makes perfect, so don’t be discouraged if your first attempt isn’t flawless. With a little experience, you’ll master the art of cooking perfect rice for your Nasi Goreng.
Stir-frying the Aromatics and Spices
This crucial step lays the foundation for the incredible aroma and flavor of your Nasi Goreng. Properly stir-frying the aromatics and spices ensures that their complex flavors are fully released, creating a rich and savory base for the rest of the dish. We’ll be using a generous amount of aromatics to build a deep, nuanced flavor profile.
Begin by preparing your ingredients. You will need: 2 large shallots, thinly sliced; 4 cloves garlic, finely minced; 2-3 red chilies, finely chopped (adjust to your spice preference); 2cm piece of ginger, finely minced; 2 stalks lemongrass, finely chopped (white part only); 2-3 kaffir lime leaves, roughly chopped; 2 tablespoons of vegetable oil (or your preferred high-heat oil); 1 tablespoon of shrimp paste (belacan, optional, but highly recommended); 1 teaspoon ground turmeric; 1 teaspoon ground coriander; ½ teaspoon ground cumin; ½ teaspoon ground white pepper.
Heat the vegetable oil in a large wok or frying pan over medium-high heat. It’s crucial to have the wok hot before adding the aromatics; this prevents them from stewing instead of stir-frying. Once the oil shimmers, add the shrimp paste (if using). Stir-fry for about 30 seconds, until fragrant and slightly browned. Be mindful of the shrimp paste as it can burn easily.
Next, add the shallots and stir-fry for approximately 2 minutes, until softened and slightly translucent. Then, add the garlic, ginger, and chilies. Continue stir-frying for another minute, until fragrant. The aromatics should be constantly moving to prevent burning. Use a spatula or wok hei to ensure even cooking and prevent sticking.
Now, introduce the lemongrass and kaffir lime leaves. Stir-fry for another minute, allowing their distinctive citrusy notes to infuse the oil. The lemongrass will add a subtle grassy flavor while the kaffir lime leaves impart a bright, almost floral aroma. Don’t overcook these; you want to retain their freshness and vibrant flavors.
Finally, add the ground spices – turmeric, coriander, cumin, and white pepper. Stir-fry for about 30 seconds, constantly stirring, until fragrant. The spices should be toasted slightly to enhance their flavors. Avoid burning them by keeping the heat at a medium-high level and stirring continuously. The mixture should now be aromatic and intensely flavorful, ready to form the base of your Nasi Goreng. Taste the mixture at this stage and adjust the seasoning according to your preference. You may need to add more chilies for extra heat or salt for extra depth.
Once the spices are fragrant, your aromatic base is ready. Proceed to the next step, adding your cooked rice and other ingredients to create your delicious Nasi Goreng.
Adding the Vegetables and Proteins
This section details the crucial step of incorporating your chosen vegetables and proteins into your Nasi Goreng. The order and timing are key to achieving perfectly cooked ingredients with vibrant colors and optimal texture. We’ll be using a base of 2 cups of cooked rice for this recipe.
Protein Selection and Preparation: Begin by selecting your preferred protein. Popular choices include chicken, beef, shrimp, or even tofu. For this recipe, let’s assume we’re using 150g of boneless, skinless chicken breast, cut into bite-sized pieces. Ensure your protein is pre-cooked. This could be achieved by grilling, pan-frying, or boiling it beforehand. Adding raw protein to the wok will significantly extend cooking time and potentially lead to unevenly cooked Nasi Goreng. If using shrimp, ensure they are peeled and deveined. Tofu should be pressed to remove excess water and then lightly pan-fried or baked until slightly firm.
Vegetable Selection and Preparation: The beauty of Nasi Goreng lies in its versatility. Feel free to experiment with your favorite vegetables! A classic combination includes 1 medium onion (finely chopped), 1 red bell pepper (thinly sliced), 1 cup of bean sprouts, and 2 cloves of garlic (minced). Proper preparation is vital. Finely chopping the onions and garlic ensures even cooking and prevents large chunks from dominating the dish. Thinly slicing the bell pepper allows for quicker cooking and a pleasant bite. Washing and draining the bean sprouts thoroughly is essential.
Adding to the Wok: Heat a tablespoon of cooking oil (vegetable or peanut oil works well) in a large wok or frying pan over medium-high heat. High heat is essential for a good stir-fry. Add the onions and garlic and stir-fry for about 1 minute until fragrant. Then, add the red bell pepper and continue to stir-fry for another 2 minutes until slightly softened but still crisp. Don’t overcrowd the wok; if necessary, work in batches to avoid steaming the vegetables.
Incorporating the Protein: Next, add your pre-cooked chicken (or chosen protein) to the wok. Stir-fry for 2-3 minutes, allowing the chicken to heat through and absorb the flavors of the aromatics. Avoid overcooking the protein as this can make it dry and tough.
Finishing Touches: Finally, add the bean sprouts. Stir-fry for just 1 minute until they are slightly wilted but still retain a pleasant crunch. Overcooking bean sprouts will make them mushy. At this point, you can also add any other vegetables you’ve chosen, adjusting cooking times as needed based on their texture. For example, harder vegetables like carrots should be added earlier in the process.
Important Note: Taste your vegetables and adjust seasonings as needed. You may wish to add a pinch of salt and pepper at this stage, or even a dash of soy sauce to enhance the savory notes. Remember, this is your Nasi Goreng – feel free to personalize it to your taste!
Recommendations for Homemade Indonesian Nasi Goreng
To elevate your Homemade Indonesian Nasi Goreng experience, consider these recommendations. Proper preparation and serving are key to unlocking the full flavor profile of this beloved dish.
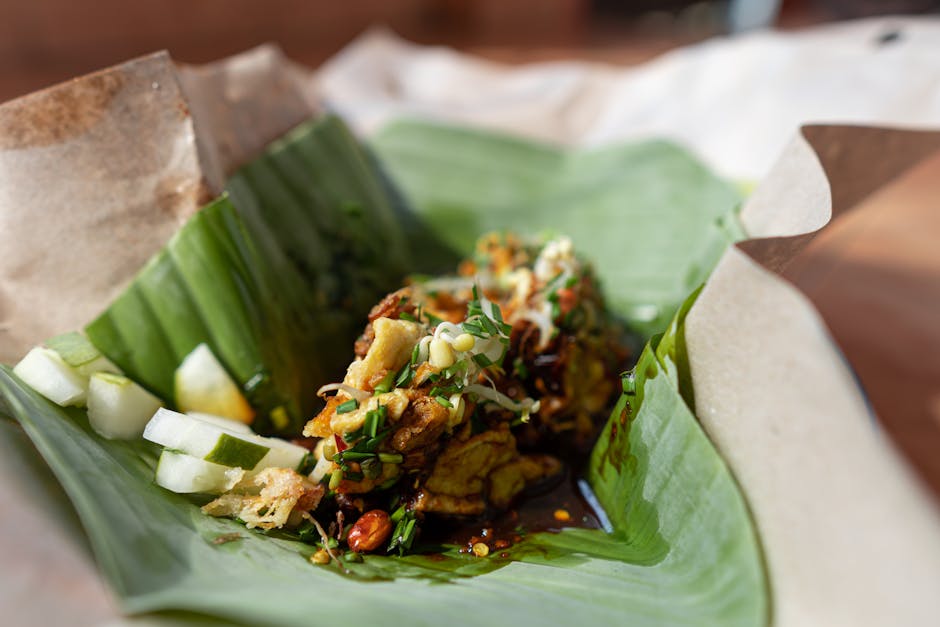
Serving Suggestions: Nasi Goreng is incredibly versatile and can be enjoyed for breakfast, lunch, or dinner. For a truly authentic experience, serve it hot, straight from the wok or pan. Garnish generously with freshly chopped spring onions, fried shallots (bawang goreng), and a wedge of lime. A sprinkle of chopped fresh coriander or cilantro adds a vibrant, herbaceous note. Consider serving it with a fried egg on top, sunny-side up or over-easy, for extra richness and protein. A side of sambal (Indonesian chili sauce) is a must for those who enjoy spice; adjust the amount to your preference. For a complete meal, offer a side of acar (Indonesian pickled vegetables) to cut through the richness of the rice and provide a refreshing contrast in texture and flavor.
Storage Conditions: Leftover Nasi Goreng can be stored in an airtight container in the refrigerator for up to 3 days. To prevent the rice from drying out, ensure the container is properly sealed. Reheat gently in a pan over medium heat, adding a splash of water or soy sauce if needed to restore moisture. Avoid reheating in the microwave, as this can lead to a less appealing texture. Nasi Goreng does not freeze well, as the rice tends to become mushy upon thawing.
Complementary Dishes: Nasi Goreng pairs beautifully with a variety of Indonesian side dishes. Consider serving it with:
- Satay: Grilled marinated chicken or beef skewers offer a delicious protein complement.
- Gado-Gado: This vibrant salad of vegetables in a peanut sauce provides a refreshing contrast to the savory rice.
- Tempeh or Tofu: These vegetarian proteins add substance and texture to the meal.
- Perkedel Kentang (Potato Fritters): These crispy fritters offer a satisfying textural contrast.
Nutritional Information (Approximate per serving, depending on ingredients): This is an estimate and will vary based on the specific ingredients used and portion size. The calorie count can range from 300-500 calories per serving. A typical serving provides a moderate amount of carbohydrates from the rice, protein from the meat or vegetables, and some fat from the oil used in cooking. The nutritional content will be significantly affected by the inclusion of meat, eggs and the type of oil used. It’s a good source of iron if you use meat, and offers various vitamins and minerals depending on the vegetables included. For a healthier version, use brown rice, lean protein, and plenty of vegetables. Reduce the amount of oil used during cooking.
Important Note: This nutritional information is an approximation and should not be considered a precise dietary analysis. For accurate nutritional information, use a nutrition calculator and input the exact ingredients and quantities used in your recipe.