Ginger ale, a seemingly simple beverage, boasts a surprisingly rich and complex history, far exceeding its modern image as a readily available, mass-produced soft drink. Its origins can be traced back centuries, with evidence suggesting ginger’s use as a medicinal and flavoring agent in various cultures dating as far back as ancient China and India. While the exact date of ginger ale’s inception as a carbonated beverage remains elusive, its popularity exploded in the 19th century with the rise of carbonation technology. Early versions often featured homemade recipes passed down through families, emphasizing the potent healing properties of ginger alongside the delightful fizz.
The Victorian era saw ginger ale’s transformation from a home remedy to a fashionable drink. Its perceived health benefits, attributed to ginger’s anti-inflammatory and digestive properties, fueled its widespread adoption. Many believed it could aid digestion, alleviate nausea, and even combat colds and flu. This belief system played a crucial role in its commercial success, with various manufacturers vying for market share. Interestingly, the early versions often lacked the sweetness associated with modern ginger ales; they were typically more tart and spicy, reflecting the medicinal focus.
Ginger ale’s cultural significance extends beyond its historical medicinal uses. It found its place in various social contexts, becoming a staple at social gatherings and a refreshing option in a time before widespread refrigeration. In the United States, ginger ale experienced a surge in popularity during the Prohibition era, often disguised as a mixer for alcoholic beverages or enjoyed on its own as a non-alcoholic alternative. Today, while mass-produced versions dominate the market, the homemade approach continues to appeal to those seeking a more natural, flavorful, and customizable beverage. Global ginger production currently exceeds 2.5 million tons annually, highlighting the enduring popularity of this versatile root and its resulting beverages.
This recipe aims to recapture the essence of those early homemade versions, allowing you to experience the unique, vibrant flavors of a ginger ale crafted from scratch. You’ll discover the satisfying process of transforming simple ingredients into a refreshing and flavorful drink, free from artificial sweeteners and preservatives. Beyond the taste, making your own ginger ale provides a connection to the historical and cultural significance of this timeless beverage, allowing you to appreciate the journey from ancient remedies to a modern classic.
Ingredients and Measurements
Crafting the perfect homemade ginger ale hinges on using high-quality ingredients and precise measurements. The following list details everything you’ll need, along with specific quantities for a batch yielding approximately 1 liter (approximately 4 cups) of bubbly ginger goodness. Feel free to adjust the recipe proportionally for larger or smaller batches, but remember that consistency is key to achieving optimal flavor.
Ginger: The star of the show! You’ll need approximately 100 grams (about 3.5 ounces) of fresh ginger root. This translates to roughly 1-1.5 cups of peeled and thinly sliced ginger. Choosing the right ginger is crucial. Look for firm, plump roots with smooth skin and a vibrant aroma. Avoid ginger that feels soft, shriveled, or has dark spots, as this indicates poor quality and may result in a less flavorful beverage. Organic ginger is preferable if possible, minimizing exposure to pesticides.
Water: We’ll be using 1 liter (about 4 cups) of filtered or spring water. Avoid using tap water, as the chlorine and minerals present can interfere with the subtle flavors of the ginger and potentially affect the fermentation process if you’re making a naturally carbonated version. The purity of your water will significantly impact the final taste of your ginger ale.
Sugar: 100 grams (about ¾ cup) of granulated white sugar or raw cane sugar will provide the necessary sweetness and fuel for fermentation if you’re opting for a naturally carbonated drink. You can adjust the sugar quantity to your preference, but bear in mind that too much sugar can overpower the ginger flavor, while too little might result in a less satisfyingly sweet drink. Honey or maple syrup can be substituted, but may alter the final flavor profile.
Lemon Juice: The addition of 2 tablespoons of freshly squeezed lemon juice adds a bright, zesty note that balances the ginger’s spiciness and enhances the overall flavor complexity. Freshly squeezed is best, as bottled lemon juice often contains preservatives which can impact the taste. If you don’t have fresh lemons, you can use a high-quality bottled lemon juice, but be aware of the potential flavor differences.
Yeast (Optional, for naturally carbonated ginger ale): If you’re aiming for naturally carbonated ginger ale, you’ll need a small amount of yeast. A standard baking yeast packet (about 2.25 teaspoons) will suffice, although specific yeast strains designed for brewing may yield better results. Ensure your yeast is active and follow the instructions carefully for optimal fermentation. If you’re not aiming for carbonation, you can skip this ingredient and carbonate the drink later using a soda maker or by adding carbonated water.
Optional additions: To further personalize your ginger ale, consider adding other flavorings such as a few sprigs of fresh mint, a cinnamon stick, or a few slices of lime. Experiment with different flavor combinations to find your perfect recipe! Remember to adjust the quantities of these additions carefully, as too much can overpower the ginger flavor.
Equipment List
Making homemade ginger ale requires surprisingly little specialized equipment, but the right tools will significantly improve your results and the overall experience. This list details the necessary equipment, along with recommendations and alternatives where applicable.
1. Large Glass Jar (1-gallon or larger): This is your primary fermentation vessel. A glass jar is preferred over plastic because it’s less likely to leach chemicals into your ginger ale during fermentation. Avoid using jars with metal lids as these can react with the ginger and potentially affect the flavor. Look for a wide-mouth jar for easy access during cleaning and adding ingredients. A 1-gallon jar is ideal for a standard batch, allowing room for the fermentation process. If you’re making a smaller batch, a half-gallon jar will suffice.
2. Airlock: An airlock is crucial for allowing carbon dioxide to escape during fermentation while preventing oxygen from entering. Oxygen can lead to unwanted bacteria growth and spoil your ginger ale. There are various types of airlocks available, but a simple, reliable design is best. Ensure a tight seal between the airlock and the jar lid to maintain a proper anaerobic environment. If an airlock isn’t available, a loosely-fitting lid can be used but it’s much less effective and the risk of contamination is significantly higher.
3. Measuring Cups and Spoons: Accurate measurements are vital for a well-balanced ginger ale. Use standard measuring cups and spoons to measure your ginger, sugar, and water precisely. Invest in accurate measuring tools, as inconsistencies in measurements can significantly impact the final product’s flavor and carbonation.
4. Large Pot (at least 4 quarts): You’ll need a large pot to heat the water for making the ginger syrup. A stainless steel pot is ideal, as it’s durable and easy to clean. Ensure the pot is large enough to comfortably hold the water and ginger without boiling over.
5. Fine-Mesh Sieve or Cheesecloth: After brewing the ginger syrup, you’ll need to strain out the ginger solids. A fine-mesh sieve will effectively separate the solids from the liquid. Cheesecloth offers a finer filtration, resulting in a clearer ginger ale, but it requires a bit more effort. Multiple layers of cheesecloth can be used for an even finer filtration.
6. Bottles (12-16 oz): Once fermentation is complete, you’ll need bottles to store your ginger ale. Glass bottles are preferred, and you’ll need enough to hold your finished batch. Ensure the bottles are clean and sanitized before bottling to prevent unwanted bacteria growth and spoilage. Swing-top bottles are ideal, as they create an airtight seal. Avoid using plastic bottles, especially those designed for single-use; they are not suitable for carbonated beverages.
7. Bottle Brush: Thoroughly cleaning your bottles is essential for maintaining hygiene and preventing contamination. A bottle brush with a long handle will allow you to reach the bottom of the bottles effectively. Cleaning the bottles thoroughly, especially before sanitizing, will ensure a better result.
8. Sanitizing Solution (optional but recommended): Sanitizing your equipment before use is crucial to prevent unwanted bacteria and yeast from spoiling your ginger ale. A solution of Star San or a similar no-rinse sanitizer is recommended. Follow the manufacturer’s instructions carefully for the correct dilution and application.
9. Grater or Food Processor: You will need a grater to create the ginger puree or a food processor to help in the ginger preparation. A fine grater works best for maximizing the ginger flavor and ensuring smooth texture. If using a food processor, pulse the ginger to create a coarse paste, not a fine puree.
Preparation of Ginger Syrup
The ginger syrup is the heart of your homemade ginger ale, providing the essential ginger flavor and sweetness. Making a quality syrup requires careful attention to detail, ensuring a balanced flavor profile that’s neither too spicy nor too sweet. This recipe yields approximately 1 ½ cups of syrup, enough for several batches of ginger ale.
Ingredients:
- 1 cup water
- 1 cup granulated sugar
- 1 cup peeled and thinly sliced fresh ginger (about 4-6 ounces)
Instructions:
Begin by thoroughly washing and peeling your fresh ginger. Using a vegetable peeler works best. Then, thinly slice the ginger. The thinner the slices, the more potent the ginger flavor will be in your syrup. Aim for slices that are about ⅛ inch thick. If you prefer a less intense ginger flavor, you can use slightly thicker slices.
In a medium-sized saucepan, combine the water and sugar. Place the saucepan over medium heat and stir constantly until the sugar dissolves completely. Do not let the sugar caramelize; it will impart a burnt taste to your syrup. Once the sugar is dissolved, bring the mixture to a gentle simmer.
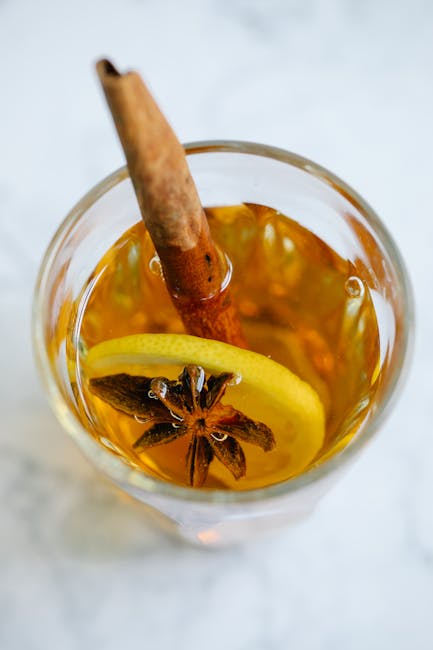
Add the thinly sliced ginger to the simmering sugar syrup. Reduce the heat to low, cover the saucepan, and let it simmer gently for 20-30 minutes. The longer you simmer, the stronger the ginger flavor will become. Check the syrup periodically and stir gently to prevent sticking. You’ll notice the syrup gradually taking on a beautiful amber hue.
After simmering, remove the saucepan from the heat and let the syrup cool completely. Allowing the syrup to cool undisturbed is crucial for extracting the maximum flavor from the ginger. Once it’s cooled, strain the syrup through a fine-mesh sieve or cheesecloth lined strainer, pressing gently on the solids to extract as much liquid as possible. Discard the used ginger.
Important Considerations:
- Ginger Quality: Use fresh, high-quality ginger for the best flavor. Older ginger may be less flavorful and potent.
- Sugar Type: Granulated sugar is recommended for this recipe, but you can experiment with other sugars like coconut sugar or brown sugar for a different flavor profile. Note that this might affect the final sweetness and color of your syrup.
- Storage: Once cooled and strained, store your ginger syrup in an airtight container in the refrigerator. It should keep for up to 2 weeks. For longer storage, consider freezing it in ice cube trays for individual use.
Your ginger syrup is now ready to be used in your homemade ginger ale recipe. Enjoy!
Making the Ginger Ale
Now that you’ve prepared your ginger bug, it’s time to make the ginger ale! This process is surprisingly straightforward, but requires attention to detail for the best results. We’ll be creating a naturally carbonated beverage, so patience and a clean workspace are key.
Begin by sterilizing your equipment. This is crucial to prevent unwanted bacteria or mold from spoiling your brew. Wash all your bottles, jars, and utensils thoroughly with hot, soapy water. Then, rinse everything with boiling water or a solution of one part bleach to ten parts water (followed by a thorough rinse with clean water). Allow everything to air dry completely before proceeding.
Prepare the ginger syrup: In a medium saucepan, combine 1 cup of granulated sugar and 1 cup of water. Heat over medium heat, stirring constantly, until the sugar is completely dissolved. Add 1 cup of finely grated fresh ginger (about 4-6 medium-sized ginger roots, peeled). Reduce the heat to low and simmer for 15 minutes, stirring occasionally. This allows the ginger flavor to fully infuse into the syrup. Don’t boil vigorously, as this can make the ginger taste bitter.
Strain the ginger syrup: Once simmered, remove the saucepan from the heat and let the syrup cool slightly. Strain the syrup through a fine-mesh sieve or cheesecloth to remove the ginger solids. You should have approximately 1 ½ cups of fragrant ginger syrup. Discard the ginger solids or save them for another culinary use.
Combine the syrup and ginger bug: In a large glass jar or bottle, combine the strained ginger syrup with 1 cup of your active ginger bug. Stir gently to combine. Ensure your ginger bug is active and bubbly; a sluggish bug will result in a weaker carbonation. If your bug is not sufficiently active, consider starting a new one.
Bottle and carbonate: Carefully pour the ginger ale mixture into your sterilized bottles, leaving about an inch of headspace at the top. Tightly seal the bottles. Avoid overfilling, as the carbonation process will create pressure. Place the bottles in a cool, dark place for 2-7 days, depending on your desired level of carbonation. Check the bottles daily for pressure build-up. You should notice a slight bulge in the bottles as they carbonate.
Refrigerate and enjoy: Once the desired level of carbonation is achieved (you’ll hear a hiss when you open the bottle), refrigerate the bottles to slow down the carbonation process. Allow the ginger ale to chill for at least a few hours before serving. Be careful when opening the bottles, as they may be under pressure. Open them slowly over a sink or bowl to release the pressure gradually.
Important Note: The level of carbonation will vary depending on the activity of your ginger bug and the temperature of fermentation. Experiment to find the perfect balance for your taste. If the bottles become excessively hard, open them carefully and release some pressure before refrigerating. Enjoy your homemade ginger ale!
Bottling and Carbonation (if carbonated)
This section details the bottling and carbonation process for your homemade ginger ale. Whether you choose to create a still or carbonated beverage depends on your preference. For a still ginger ale, simply skip the carbonation steps and bottle as described below.
For a carbonated ginger ale, you’ll need to bottle your ginger ale using a method that allows for the build-up of carbon dioxide pressure. Do not use regular glass bottles or plastic soda bottles. These are not designed to withstand the pressure that will build up during carbonation and could explode, resulting in a messy and potentially dangerous situation. Instead, use appropriately sized and strong glass bottles designed for homebrewing, such as Grolsch swing-top bottles or similar, or strong plastic bottles specifically designed for carbonation.
Sanitation is crucial. Before you begin bottling, thoroughly sanitize all your equipment, including bottles, caps, and any bottling apparatus you’re using. A solution of hot water and a sanitizer like Star San or a similar brewing sanitizer is ideal. Rinse thoroughly with sterile water after sanitizing.
Once your ginger ale has cooled completely to room temperature (ideally around 70°F or 21°C), you’re ready to bottle. Carefully funnel your ginger ale into your sanitized bottles, leaving approximately 1 inch of headspace at the top. This headspace allows for carbonation and pressure build-up. Overfilling the bottles is dangerous.
For carbonation, you have a few options. The simplest is using priming sugar. This involves adding a small amount of sugar to each bottle to feed the yeast and create carbon dioxide. A common priming sugar calculation is 3/4 teaspoon of granulated white sugar per 12-ounce bottle. Accurately measure the sugar; too much will result in excessively carbonated and potentially explosive bottles, while too little will result in flat ginger ale.
Dissolve the priming sugar in a small amount of the ginger ale before adding it to each bottle. This ensures the sugar is evenly distributed and prevents it from settling at the bottom. Carefully cap the bottles, ensuring a tight seal.
After bottling, store the bottles at room temperature (around 70°F or 21°C) for 2-3 days for carbonation. You’ll notice the bottles becoming slightly firmer as the carbonation progresses. Do not shake or disturb the bottles during this process. After 2-3 days, you can transfer the bottles to a cooler temperature (around 40°F or 4°C) to slow down further carbonation.
Once the carbonation is to your liking, you can refrigerate the bottles for optimal enjoyment. Always handle the bottles carefully, as the pressure inside can still be significant. If you notice any bulging or significant pressure build-up, carefully release the pressure by slightly loosening the cap––do this slowly and carefully in a well-ventilated area, away from your face and eyes.
For still ginger ale, simply skip the priming sugar step and bottle the cooled ginger ale as described above, leaving the appropriate headspace. Store in the refrigerator for optimal freshness.
Remember, safety is paramount. Always use appropriate bottling equipment, sanitize thoroughly, and handle carbonated bottles with care. Enjoy your homemade ginger ale!
Chilling and Serving Your Homemade Ginger Ale
After the fermentation process is complete, the most crucial step before enjoying your homemade ginger ale is proper chilling and serving. This ensures the best possible flavor profile and a refreshing experience. Improper chilling can lead to a cloudy or less flavorful drink, so follow these steps carefully.
First, you’ll need to remove your ginger ale from the fermentation vessel. Use a sanitized siphon or bottling bucket to transfer the liquid, leaving behind the sediment at the bottom. This sediment, composed primarily of ginger particles and yeast, can affect the clarity and taste of your finished product. Avoid disturbing the sediment as much as possible during this transfer.
Once transferred, you have a few options for bottling. If you’re using swing-top bottles, carefully fill them, leaving about an inch of headspace at the top. This allows for expansion during carbonation. Overfilling can lead to bottle breakage. If you’re using regular bottles with screw-on caps, leave a similar headspace and ensure the caps are tightly secured. For best results, use bottles specifically designed for carbonated beverages.
Next comes the chilling process. The ideal temperature for serving ginger ale is between 35°F and 40°F (2°C and 4°C). This temperature enhances the ginger’s spiciness and creates a crisp, refreshing sensation. You can achieve this by placing your bottled ginger ale in the refrigerator for at least 4 hours, or preferably overnight. Avoid rapid chilling methods like freezing, as this can damage the flavor and potentially cause the bottles to crack.
After chilling, it’s time to serve! Carefully remove the bottles from the refrigerator to avoid any sudden temperature changes that could cause condensation and potential breakage. Gently open the bottles, as the carbonation may create pressure. Always point the bottle away from your face and others when opening to avoid any accidental spills or splashes.
Serve your homemade ginger ale in chilled glasses. Consider using elegant highball glasses or simple tumblers. Garnish with a thin slice of fresh ginger or a few mint leaves for an extra touch of sophistication. You can also add a few ice cubes, but be mindful that this will slightly dilute the flavor.
Remember, your homemade ginger ale will continue to carbonate slightly even after chilling. So, if you notice a little extra fizz after a few days, that’s perfectly normal. Proper storage in a cool, dark place will help maintain the quality and freshness of your ginger ale for up to two weeks. Beyond that, the flavor may start to diminish.
Experiment with different serving styles. Try adding a splash of lime juice for a zesty twist, or combine it with other flavors such as berries or citrus fruits for unique variations. Enjoy your refreshing homemade ginger ale!
Recommendations for Your Homemade Ginger Ale
Your homemade ginger ale is best enjoyed chilled, allowing the vibrant ginger flavor to fully express itself. Serve it over ice in tall glasses, garnished with a thin slice of fresh ginger, a lime wedge, or a sprig of mint for an extra touch of sophistication. The subtle spiciness of the ginger pairs beautifully with the citrusy brightness of lime, creating a refreshing and balanced beverage.
For a more decadent treat, consider adding a splash of your favorite dark rum or vodka to create a sophisticated ginger-based cocktail. Experiment with different citrus fruits beyond lime, such as lemon or orange, to discover your preferred flavor profile. A few muddled berries, like raspberries or blackberries, can also add a delightful fruity complexity to your ginger ale.
Storage is crucial to maintaining the freshness and quality of your homemade ginger ale. Store it in airtight glass bottles or containers in the refrigerator. Properly stored, it should last for approximately 5-7 days. However, you may notice some slight changes in carbonation over time, so it’s best to consume it within the first few days for optimal fizz. Avoid storing it in plastic containers, as this can affect the taste and potentially leach chemicals into your drink.
The versatility of homemade ginger ale extends far beyond simply enjoying it as a beverage. It makes a fantastic mixer for cocktails, adding a spicy kick to classic recipes or creating entirely new concoctions. Its bright, zesty flavor also complements various culinary applications, from marinades for grilled meats to a unique ingredient in salad dressings.
Complementary dishes that pair exceptionally well with homemade ginger ale include spicy Asian-inspired cuisine, such as Thai curries or Vietnamese pho. The ginger’s warmth cuts through the richness of the dishes, creating a refreshing contrast. It also complements lighter fare, such as salads with citrus dressings or grilled seafood. The slight sweetness of the ginger ale also balances the savory notes of dishes like tacos or grilled chicken.
Nutritional Information (per 8-ounce serving, approximate values will vary based on recipe): This will depend heavily on the amount of sugar used in your recipe. A typical recipe with a moderate amount of sugar might contain approximately 100-150 calories, with negligible amounts of fat and protein. The primary nutritional content comes from the carbohydrates derived from the sugar and ginger. It’s important to note that this is an estimate, and the exact values will depend on the specific ingredients and quantities used in your recipe.
Important Note: Always ensure the ginger is properly cleaned and peeled before use to remove any potential contaminants. If using a carbonation system, follow the manufacturer’s instructions carefully to ensure safe and effective carbonation.