Prepare yourself for a culinary journey into the heart of the Mediterranean with our Homemade Garlic Hummus! This creamy, dreamy dip isn’t just a delicious snack; it’s a testament to centuries of culinary tradition and cultural exchange. Hummus, whose name derives from the Arabic word ḥummuṣ, meaning chickpea, boasts a history as rich and flavorful as the dish itself. While its precise origins are debated, evidence suggests its roots lie in the ancient Near East, possibly dating back to the early Egyptians or even earlier. Ancient texts and archaeological findings hint at the early consumption of chickpeas and similar preparations, though the exact recipe for hummus as we know it today likely evolved over time.
The widespread popularity of hummus, however, is a relatively recent phenomenon. While enjoyed for centuries in the Levant and throughout the Middle East, its global surge in popularity began in the latter half of the 20th century. The rise of hummus is closely linked to the increasing popularity of Mediterranean cuisine worldwide, fueled by its health benefits and delicious taste. Today, hummus is a staple in countless households and restaurants across the globe, representing a significant portion of the chickpea market. In fact, the global hummus market is estimated to be worth billions of dollars annually, showcasing its massive appeal and commercial success.
Beyond its economic impact, hummus holds significant cultural importance. It’s far more than just a dip; it’s a cornerstone of countless meals and celebrations across various cultures. In many Middle Eastern and Mediterranean countries, hummus is an integral part of daily life, served as a breakfast spread, a lunch accompaniment, or a flavorful addition to dinner. It’s a symbol of community and shared meals, often featured at family gatherings, festivals, and social events. The variations in recipes—from the smooth and creamy to the chunky and intensely garlicky—reflect the diverse culinary traditions and regional preferences across the region. Our homemade version incorporates extra garlic for a bold, flavorful experience, celebrating the versatility and adaptability of this classic dish.
Interestingly, the exact amount of garlic used in hummus is often a matter of personal preference and regional variation. Some prefer a subtle hint of garlic, while others, like ourselves, embrace the pungent power of this aromatic bulb. This recipe aims to satisfy those who relish a strong garlic flavor, creating a truly unforgettable hummus experience. Get ready to embark on a culinary adventure, savoring the rich history and cultural significance embedded within each creamy spoonful of our Homemade Garlic Hummus!
Ingredients and Measurements
Creating the perfect homemade garlic hummus hinges on the precise measurement and quality of your ingredients. Don’t be tempted to substitute or guess – accurate measurements will ensure a smooth, creamy, and flavorful final product. We’ll break down each ingredient, offering tips for selection and alternatives where appropriate.
1. Canned Chickpeas (Garbanzo Beans): You’ll need one (15-ounce) can of chickpeas, rinsed and drained exceptionally well. This is crucial! Excess liquid will thin your hummus, resulting in a less desirable texture. Thoroughly rinse the chickpeas under cold running water for at least a minute, then drain them completely. You can even go a step further and pat them dry with a clean kitchen towel for best results. Using dried chickpeas is an option, but it requires a significant pre-soaking and cooking time.
2. Tahini: Use 1/4 cup of high-quality tahini. Tahini is sesame seed paste, and its quality drastically affects the hummus’s flavor and texture. Look for tahini that is smooth and creamy, with a rich, nutty aroma. Some tahini can be quite thick, so you may need to stir it vigorously before measuring to ensure even distribution. If your tahini is particularly thick, you may need to add a teaspoon or two of water to make it easier to incorporate into the hummus.
3. Lemon Juice: The acidity of fresh lemon juice is key. Use the juice of one medium-sized lemon (approximately 2-3 tablespoons). Avoid using bottled lemon juice, as it often lacks the vibrant, fresh flavor. If lemons are unavailable, you can substitute lime juice, but be aware that it will impart a slightly different flavor profile.
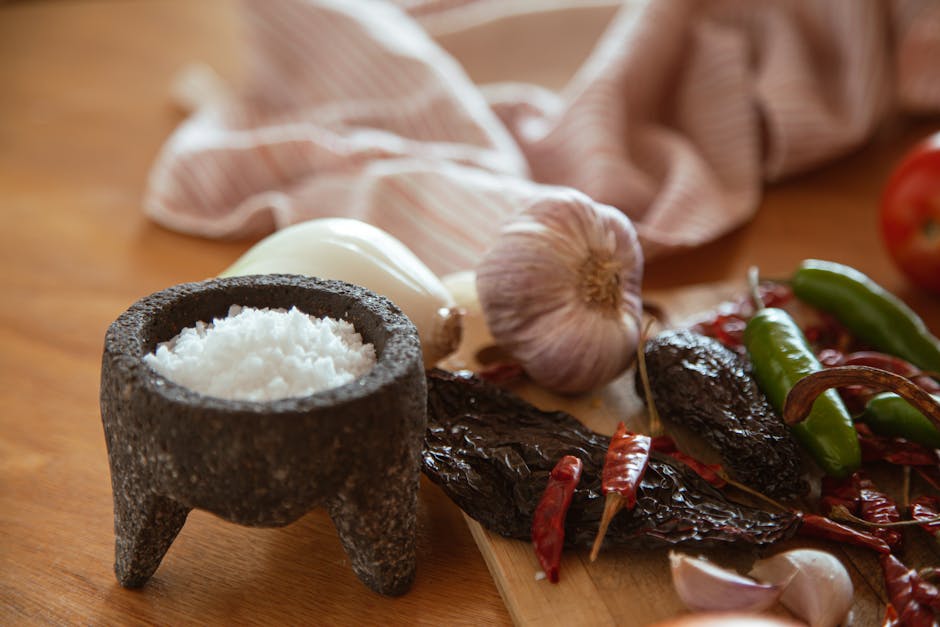
4. Garlic: Garlic is a star ingredient in hummus! Use 2-4 large cloves of garlic, depending on your preference for garlic intensity. More garlic means a stronger, more pungent flavor. For a milder hummus, start with 2 cloves and add more to taste. Remember to mince the garlic finely for even distribution throughout the hummus. Using a garlic press is recommended for a super smooth paste.
5. Olive Oil: Use 1/4 cup of extra virgin olive oil. The quality of your olive oil will significantly impact the overall flavor of the hummus. Opt for a good quality extra virgin olive oil with a fruity and slightly peppery taste. Adding the olive oil gradually helps control the consistency of your hummus. You can start with less and add more until you reach your desired creaminess.
6. Water: Start with 2-4 tablespoons of ice water. Ice water helps keep the hummus cool and prevents it from becoming too warm during blending, which can affect the texture and flavor. Add the water gradually, starting with a smaller amount and adding more as needed to achieve your desired consistency. The amount of water needed may vary depending on the type of chickpeas and tahini used.
7. Salt: Use 1/2 teaspoon of kosher salt, or to taste. Kosher salt is a coarser salt that tends to be less salty by weight compared to table salt. If using table salt, start with 1/4 teaspoon and adjust to your liking. Remember to taste and adjust the seasoning as you go. You can always add more salt, but it’s difficult to remove it once it’s added.
8. Optional Spices: For added depth of flavor, consider adding a pinch of cumin (1/4 teaspoon) or paprika (1/8 teaspoon). These spices complement the other ingredients beautifully and add a warm, earthy note.
Equipment List
Making homemade garlic hummus requires a relatively straightforward collection of equipment, but the quality of your tools can significantly impact the final texture and ease of preparation. Choosing the right equipment will ensure a smooth, creamy hummus every time. This list details the essential tools, along with recommendations for optimal results.
Food Processor: This is the most crucial piece of equipment. A powerful food processor with a large capacity (at least 10-cup) is highly recommended. Smaller processors may struggle to handle the volume of ingredients, resulting in an unevenly processed mixture. Look for a food processor with a strong motor and a variety of blades, including a standard blade for chopping and a blade designed for pureeing or grinding. A model with a pulse function is invaluable for controlling the texture and preventing over-processing.
Measuring Cups and Spoons: Accurate measurements are key to achieving the desired consistency and flavour in your hummus. Invest in a set of reliable measuring cups and spoons for both dry and liquid ingredients. Using a kitchen scale is even more precise, especially for measuring the chickpeas. This will ensure consistency across batches.
Mixing Bowls: You’ll need at least two mixing bowls. One large bowl (approximately 5-quart capacity) is ideal for preparing the tahini paste and combining the ingredients before adding them to the food processor. A smaller bowl can be used for measuring out ingredients or holding the prepared garlic mixture.
Rubber Spatula or Scraper: A rubber spatula or scraper is essential for scraping down the sides of the food processor bowl during processing. This ensures that all ingredients are thoroughly blended and prevents uneven texture. Choose a flexible spatula that can reach into the corners of the bowl effectively.
Small Knife and Cutting Board: A small, sharp knife is needed for peeling and mincing the garlic cloves. A clean cutting board provides a safe and hygienic surface for this task. It’s recommended to use a ceramic or plastic cutting board for mincing garlic, as wooden boards can retain garlic odors.
Citrus Juicer (Optional): While not strictly necessary, a citrus juicer can make adding lemon juice more efficient and prevent seeds from ending up in your hummus. A manual juicer is perfectly adequate; however, an electric juicer will further streamline the process.
Airtight Container: Once your hummus is made, storing it properly is crucial to maintain freshness and prevent oxidation. An airtight container, preferably made of glass or BPA-free plastic, is ideal for storing your hummus in the refrigerator. Ensure the container is properly sealed to prevent air exposure.
Optional Equipment: While not essential, a fine-mesh sieve can be used to remove the skins from the chickpeas for an extra-smooth hummus. A immersion blender can be used as an alternative to a food processor, although it might require more effort for larger batches.
Cleaning Recommendation: Immediately after use, wash all equipment thoroughly with warm, soapy water. For stubborn garlic residue, soak the equipment in warm, soapy water for a few minutes before scrubbing.
Preparation of Ingredients
Making exceptional hummus starts with properly preparing your ingredients. This seemingly simple step significantly impacts the final texture and flavor of your hummus. We’ll focus on the key components: chickpeas and tahini.
Soaking the Chickpeas: While you can use canned chickpeas, soaking dried chickpeas overnight dramatically improves the hummus’s creaminess and reduces cooking time. For this recipe, we’ll use 1 cup of dried chickpeas. Begin by rinsing the chickpeas thoroughly under cold running water in a fine-mesh sieve. This removes any debris or small stones. Then, transfer the rinsed chickpeas to a large bowl and cover them with at least three times their volume of cold water. Ideally, use filtered water for the best results. Soak the chickpeas in the refrigerator for at least 8 hours, or preferably overnight (12-16 hours). This extended soaking period allows the chickpeas to fully hydrate, resulting in a smoother, more tender texture in the final product.
Cooking the Chickpeas: After soaking, drain the chickpeas and rinse them again. Place the chickpeas in a large pot and cover them with fresh cold water, about 4-5 cups. Bring the water to a boil over high heat, then reduce the heat to low, cover the pot, and simmer for at least 60-90 minutes, or until the chickpeas are very tender and easily mashed. Check the chickpeas for doneness by pressing one between your fingers; they should be soft and easily squashable. If they’re not tender enough, continue simmering for another 15-20 minutes. Once cooked, drain the chickpeas and set them aside to cool slightly.
Preparing the Tahini: The quality of your tahini directly impacts the flavor and texture of your hummus. Choose a high-quality tahini made from hulled sesame seeds for the best results. Many tahini jars will have a layer of oil separated at the top. Before using, stir the tahini vigorously to create a smooth, homogenous paste, ensuring that the oil is fully incorporated. This prevents the hummus from becoming grainy or oily. For this recipe, you will need approximately 1/2 cup of tahini. If your tahini is particularly thick, you can add a tablespoon or two of water to help it blend more easily.
Other Ingredients: While not requiring specific preparation, remember to have all other ingredients ready and measured before you start blending. This will ensure a smooth and efficient hummus-making process. This generally includes lemon juice (about 1/4 cup), garlic (2-4 cloves, depending on your preference, minced or finely pressed), and salt (to taste). Consider using fresh garlic for the most intense flavor. Having chilled water on hand is also recommended; you may need to add a tablespoon or two to adjust the consistency of your hummus.
Important Note: The soaking and cooking times for chickpeas can vary depending on their age and type. Always check for doneness to avoid overcooking or undercooking.
Blending Instructions
Creating a perfectly smooth and creamy homemade garlic hummus requires a careful blending process. Follow these instructions closely for optimal results.
Begin by preparing your ingredients. Ensure all ingredients are at room temperature. Cold ingredients, especially the chickpeas, can result in a grainy texture. Allowing them to sit at room temperature for at least 30 minutes before blending will significantly improve the final consistency. This also helps the chickpeas release their natural oils, contributing to a richer, creamier hummus.
Add the chickpeas to your food processor. For a batch yielding approximately 2 cups of hummus, start with 1 ½ cups (approximately 200g) of cooked chickpeas, drained and rinsed thoroughly. Remove any skins from the chickpeas for a smoother final product. This is a slightly tedious but worthwhile step. You can easily remove the skins by gently rolling each chickpea between your fingers – the skins will slip off quite readily.
Incorporate the tahini. Add ¼ cup (60ml) of tahini to the food processor. Tahini is the cornerstone of hummus, providing its characteristic richness and nutty flavor. Ensure the tahini is well incorporated before proceeding to the next step. This prevents clumping and ensures an even distribution of flavor throughout the hummus.
Add the garlic. Incorporate 2-4 cloves of garlic, depending on your preference for garlic intensity. More garlic will result in a stronger flavor. Use a garlic press for finely minced garlic to avoid any lingering chunks in the final product. Alternatively, finely chop the garlic, but be mindful of potential larger pieces remaining.
Introduce the lemon juice. Add the juice of 1 large lemon (approximately 2 tablespoons or 30ml). Lemon juice is essential for balancing the richness of the tahini and providing a bright, acidic counterpoint to the garlic. Adjust the amount of lemon juice according to your taste. Some prefer a more tart hummus, while others prefer a milder flavor.
Blend until smooth. Start by pulsing the food processor for short bursts, scraping down the sides as needed, to prevent the ingredients from sticking to the bottom. Gradually increase the blending time until a completely smooth and creamy consistency is achieved. This may take anywhere from 2 to 5 minutes depending on your food processor’s power. Be patient; this is crucial for achieving the desired texture.
Season and adjust. Once the hummus is smooth, add ½ teaspoon of salt and ¼ teaspoon of ground cumin. Taste and adjust seasonings as needed. You might want to add a pinch more salt, cumin, or even a dash of paprika or cayenne pepper for a touch of heat. Taste testing is an important step in achieving your perfect hummus.
Add water for desired consistency. If the hummus is too thick, add ice-cold water, one tablespoon at a time, until you reach your preferred consistency. Start with small amounts of water to avoid making the hummus too thin. The cold water will help maintain a cool temperature during blending.
Serve and enjoy! Your homemade garlic hummus is now ready to be served. Garnish with a drizzle of olive oil, a sprinkle of paprika, and a few whole chickpeas for added visual appeal and texture.
Seasoning and Taste Adjustment
Seasoning your homemade garlic hummus is crucial for achieving the perfect balance of flavors. This step allows you to personalize your hummus to your preferences and compensate for variations in the ingredients’ saltiness and acidity.
Begin by adding 1 teaspoon of salt. This is a starting point; you might need more or less depending on the saltiness of your tahini and the desired intensity. Taste the hummus carefully after adding the salt. Taste testing is paramount throughout this process. Don’t be afraid to adjust the seasoning gradually.
Next, incorporate 1/2 teaspoon of ground cumin. Cumin adds a warm, earthy note that complements the garlic and lemon beautifully. Again, taste the hummus. If you prefer a more pronounced cumin flavor, add another 1/4 teaspoon, but remember that less is often more. Over-seasoning can easily ruin the delicate balance of flavors.
Now, let’s focus on the lemon juice. Start by adding 2 tablespoons of fresh lemon juice. Freshly squeezed lemon juice is highly recommended; bottled juice often lacks the vibrancy and acidity needed to brighten the hummus. The lemon juice cuts through the richness of the tahini and adds a delightful tang. Taste the hummus and add more lemon juice, 1/2 tablespoon at a time, until you achieve the desired level of acidity. Be mindful not to add too much lemon juice, as it can overpower the other flavors.
Garlic is a key ingredient in hummus, but its intensity can vary depending on the type of garlic used and its freshness. If you find your hummus lacks a sufficient garlic punch, you can add more minced garlic, starting with 1 small clove at a time. However, it’s crucial to incorporate it gradually and taste frequently, as too much garlic can be overpowering.
For a smoother, creamier texture and a slightly richer flavor, consider adding 1-2 tablespoons of ice-cold water. This will help to emulsify the ingredients and create a more homogenous consistency. Add the water slowly, blending until you reach your desired texture. Avoid adding too much water at once, as this can dilute the flavor and make the hummus too thin.
Finally, a pinch of paprika (about 1/8 teaspoon) can add a beautiful color and a subtle smoky flavor. This is entirely optional, but it can enhance the visual appeal and the taste profile of your hummus. Similarly, a very small pinch of cayenne pepper (less than 1/8 teaspoon) can add a touch of heat for those who enjoy a spicy kick.
Remember, the key to successful seasoning is gradual addition and frequent tasting. Adjusting the seasonings slowly allows you to fine-tune the flavors to your exact preferences. Don’t be afraid to experiment and find your perfect balance.
Once you’re satisfied with the seasoning, give your hummus one final taste and make any necessary adjustments. Enjoy your delicious homemade garlic hummus!
Storage Instructions
Proper storage is crucial for maintaining the freshness, flavor, and safety of your homemade garlic hummus. Following these instructions will help ensure you enjoy your delicious hummus for as long as possible.
For optimal freshness, consume your hummus within 3-5 days of preparation. While proper storage can extend its shelf life, the flavor and texture will gradually degrade over time. The vibrant green color from fresh herbs and the creamy texture will be best appreciated within this timeframe.
Refrigeration is essential. Never leave your homemade hummus at room temperature for extended periods, especially for more than two hours. This is crucial to prevent the growth of harmful bacteria. Once prepared, immediately transfer your hummus to an airtight container. A glass container is ideal as it’s non-reactive and prevents flavor absorption or leaching.
Airtight containers are key. Exposure to air will cause the hummus to oxidize, leading to browning and a less appealing texture. Make sure the lid seals completely to minimize air contact. Consider using a container with a tight-fitting lid or even a vacuum sealing system for the longest possible shelf life. If using a standard container, press down firmly on the hummus surface to eliminate any air pockets before sealing.
Portioning for convenience and freshness. If you anticipate not consuming the entire batch within 3-5 days, consider portioning your hummus into smaller, individual containers. This allows you to easily access a single serving without compromising the remaining hummus. Each portion should be approximately 1-1.5 cups, depending on your serving size preferences. Label each container with the date of preparation to help track its freshness.
Freezing your hummus is possible, but with caveats. While freezing hummus is an option for extending its shelf life beyond 5 days, be aware that the texture may change slightly upon thawing. It might become slightly grainier or less creamy. To freeze, portion your hummus into freezer-safe containers, leaving about half an inch of headspace to allow for expansion. Properly frozen hummus can last for up to 2-3 months. Thaw in the refrigerator overnight for best results. Avoid refreezing thawed hummus.
Signs of spoilage to watch out for. Before consuming your hummus, always inspect it for signs of spoilage. These include: a significant change in color (becoming significantly darker or discolored), an off-putting odor, a slimy or unusual texture, or the presence of mold. If you notice any of these signs, discard the hummus immediately. Food safety should always be the top priority.
By following these simple storage instructions, you can maximize the enjoyment of your homemade garlic hummus and savor its deliciousness for days to come. Remember, freshness is key, so consume within the recommended timeframe for the best taste and texture.
Recommendations for Homemade Garlic Hummus
This homemade garlic hummus recipe is incredibly versatile and delicious! To maximize its flavor and enjoyment, consider the following recommendations:
Serving Suggestions: The classic way to enjoy hummus is with pita bread or crudités like carrot sticks, cucumber slices, and bell pepper strips. However, don’t limit yourself! Try scooping it with toasted baguette slices, using it as a dip for falafel, or spreading it on sandwiches and wraps. It also makes a fantastic topping for grilled chicken or fish, adding a creamy, garlicky punch to your meal. Consider adding a drizzle of high-quality olive oil and a sprinkle of paprika or za’atar for extra visual appeal and flavor complexity. For a truly decadent experience, serve it alongside warm, crusty bread and a selection of olives.
Storage Conditions: For optimal freshness and flavor, store your homemade garlic hummus in an airtight container in the refrigerator. It will keep for 3-5 days. To prevent the hummus from drying out, ensure the surface is covered with a thin layer of olive oil before sealing the container. Avoid storing it for extended periods, as the flavor and texture may degrade.
Complementary Dishes: The strong garlic flavor in this hummus pairs beautifully with a variety of dishes. It’s a natural complement to Mediterranean cuisine, working wonderfully with grilled lamb, falafel, shawarma, and various salads. Consider serving it alongside dishes with bright, acidic elements like lemon-herb roasted vegetables or a vibrant Greek salad to balance the richness of the hummus. The creamy texture also contrasts beautifully with crispy textures, making it a perfect accompaniment to roasted vegetables or fried halloumi cheese. For a more substantial meal, serve it as a dip with a platter of mezze, including olives, feta cheese, and marinated vegetables.
Nutritional Information (per serving, approximate values will vary based on specific ingredients): This is an estimate and the nutritional content will vary depending on the specific ingredients used and serving size. Always consult a nutrition calculator for precise values using your exact recipe ingredients.
Approximate Calorie Count: 150-200 calories per 1/2 cup serving.
Approximate Macronutrient Breakdown: The macronutrient breakdown will vary slightly depending on the ingredients used but will generally include significant amounts of healthy fats from tahini and olive oil, moderate amounts of protein from chickpeas, and carbohydrates from chickpeas and other added ingredients.
Important Note: This nutritional information is an estimate and may not be entirely accurate. The actual values can vary depending on the brands and quantities of ingredients used. For the most accurate nutritional information, use a nutrition calculator with your specific recipe details.
Enjoy! This homemade garlic hummus is a delicious and healthy addition to any meal. Experiment with different serving suggestions and complementary dishes to find your favorite combinations.