The simple pleasure of warm, crusty bread, generously slathered with garlic butter and melted cheese, transcends cultural boundaries. While pinpointing the exact origin of garlic bread with cheese is difficult, its roots are deeply intertwined with the history of bread itself, dating back thousands of years. Ancient civilizations utilized various forms of leavened and unleavened bread, often incorporating flavorful herbs and oils. The combination of garlic and bread, however, likely emerged in the Mediterranean region, where garlic was, and remains, a staple ingredient. Early forms probably involved simply rubbing raw garlic cloves onto toasted bread, a practice that continues to this day in some parts of Italy.
The evolution of garlic bread into the cheesy delight we know and love today is a more recent phenomenon. The widespread availability of readily accessible cheese, particularly after the industrial revolution, allowed for its incorporation into countless recipes. The precise moment cheese joined the garlic-bread union is unclear, but its rise in popularity coincides with the burgeoning popularity of Italian-American cuisine in the mid-20th century. Pizzerias and Italian restaurants in the United States helped to popularize this comforting side dish, transforming it from a simple peasant food to a beloved culinary staple. Its adaptability – from simple baguette slices to elaborate artisan loaves – further cemented its place in various cuisines.
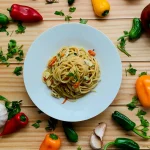
Today, garlic bread with cheese is a global phenomenon. While exact consumption statistics are hard to come by, its ubiquity in restaurants and homes worldwide speaks volumes. It’s a menu mainstay in countless eateries, featuring on everything from casual pizza joints to fine-dining establishments. Its versatility is a key factor in its widespread appeal; it can be a simple appetizer, a satisfying side to pasta dishes, or even a component of larger meals like lasagna. Moreover, its customizable nature allows for endless variations – different types of bread, cheeses, herbs, and spices can be incorporated to personalize the taste experience. From the classic combination of Parmesan and mozzarella to more adventurous pairings with goat cheese and herbs, the possibilities are truly limitless.
Beyond its culinary significance, garlic bread with cheese holds a certain cultural weight. It’s often associated with comforting home-cooked meals, casual gatherings, and shared experiences. Its simple preparation allows for family bonding in the kitchen, creating cherished memories around the table. Furthermore, it frequently features prominently in popular culture, appearing in films, television shows, and even video games, further solidifying its status as a beloved food. In essence, this seemingly simple dish embodies a rich history, a global appeal, and a potent cultural resonance that continues to grow.
Ingredients and Measurements
Creating the perfect homemade garlic bread with cheese requires careful attention to ingredient quality and precise measurements. The success of this recipe hinges on balancing the flavors and textures, so let’s delve into the specifics.
Bread: We’ll start with the foundation – the bread itself. I recommend using a loaf of a crusty Italian or French bread, approximately 1 pound (450g). Avoid using overly soft bread as it won’t hold up well to the garlic butter and may become soggy. A loaf with a slightly firm crumb will provide the best texture and prevent the garlic bread from falling apart. The day-old bread is even better; it will absorb the garlic butter better and be less likely to become soggy. If using fresh bread, consider lightly toasting it before adding the garlic butter.
Garlic Butter: This is the heart of the flavor profile. We’ll need 1/2 cup (1 stick) of unsalted butter, softened to room temperature. Using unsalted butter allows for better control over the saltiness of the final product. If using salted butter, reduce or omit the added salt in the recipe. Next, we need 6-8 cloves of garlic, minced finely. Don’t be shy with the garlic! The more garlic, the more flavor. However, if you’re sensitive to garlic, start with 6 cloves and add more to your preference. A garlic press can help achieve a consistent and smooth mince. Finally, for the garlic butter, we’ll add 1/4 teaspoon of freshly ground black pepper and 1/2 teaspoon of salt (or to taste). The freshly ground pepper enhances the flavor profile significantly compared to pre-ground pepper.
Cheese: The cheese selection is a matter of personal preference, but some excellent choices include Parmesan, mozzarella, provolone, or a blend. We’ll need approximately 1 cup (100-120g) of grated cheese. Use freshly grated cheese whenever possible; pre-shredded cheese often contains cellulose which can affect the melting and texture. If using a harder cheese like Parmesan, grate it finely for even distribution. Softer cheeses like mozzarella will melt more readily.
Optional additions: To elevate your garlic bread, consider adding some fresh herbs. 1 tablespoon of chopped fresh parsley or oregano would complement the garlic and cheese beautifully. A sprinkle of red pepper flakes can add a touch of heat for those who enjoy a spicy kick. Remember to adjust the quantities according to your taste preferences.
Measurements are crucial for consistency. Using a kitchen scale for weighing ingredients, especially the bread and cheese, will ensure the best results. Accurate measurements will guarantee the perfect balance of flavors and prevent the garlic bread from being too dry or overly saturated with butter.
Proper preparation of ingredients is key. Softening the butter to room temperature will ensure it blends smoothly with the garlic and other ingredients. Finely mincing the garlic will prevent large chunks from disrupting the overall texture and flavor distribution. And finally, using freshly grated cheese will provide the best melt and overall taste.
Equipment List
Making delicious homemade garlic bread with cheese requires the right tools to ensure a smooth and efficient process. While some items might seem optional, using the correct equipment significantly impacts the final product’s texture and taste. Below is a detailed list of the equipment needed, categorized for clarity.
Baking Equipment: This section focuses on the tools specifically used for baking the garlic bread. You’ll need a baking sheet (at least 12×17 inches), preferably non-stick, to prevent sticking and ensure even baking. A smaller sheet might work, but you’ll likely need to bake in batches. Parchment paper is highly recommended – it prevents sticking and makes cleanup a breeze. Use a sheet large enough to completely cover your baking sheet. Consider using two baking sheets if you’re making a large batch to avoid overcrowding and uneven cooking.
Knife and Cutting Board: A sharp chef’s knife (8-10 inches) is essential for cleanly slicing the bread loaf. A serrated knife can also work well, especially for crusty bread, but a sharp chef’s knife provides more control. Use a sturdy cutting board, preferably made of wood or plastic, to protect your countertop and provide a stable surface for cutting. A smaller paring knife can be useful for more precise work, such as trimming the ends of the bread or removing any imperfections.
Mixing and Spreading Utensils: For mixing the garlic butter, you’ll need a medium-sized bowl. A small whisk or a fork will suffice for combining the softened butter, garlic, herbs, and cheese. A rubber spatula or silicone spatula is handy for scraping down the sides of the bowl and ensuring all ingredients are incorporated. For spreading the garlic butter evenly onto the bread, a pastry brush provides excellent control and minimizes the risk of tearing the bread. Alternatively, you can use the back of a spoon, but a pastry brush offers a more even and elegant application.
Measuring Utensils: Accurate measurements are vital for achieving the desired flavor balance. You will need a set of measuring spoons (1 teaspoon, 1/2 teaspoon, 1/4 teaspoon) and measuring cups (1 cup, 1/2 cup, 1/4 cup) to accurately measure the butter, garlic powder, herbs, and cheese. A kitchen scale is optional but highly recommended for precise measurements, especially if you’re working with a specific recipe that demands accuracy.
Optional Equipment: While not strictly necessary, a garlic press can make mincing fresh garlic much easier and more efficient. If using fresh herbs, kitchen shears can be useful for finely chopping them. A microwave-safe bowl can help quickly soften the butter if it’s too firm. Finally, oven mitts or gloves are crucial for safely handling hot baking sheets and removing the finished garlic bread from the oven.
Cleaning Supplies: Remember to have readily available cleaning supplies such as paper towels, dish soap, and sponges or dishcloths for easy and efficient cleanup after you’ve finished making your delicious garlic bread.
Preparation of Garlic Butter
Creating the perfect garlic butter is crucial for achieving truly delicious homemade garlic bread. This section details the process, ensuring you produce a flavorful and spreadable butter that will elevate your bread to the next level. We’ll be making approximately ½ cup of garlic butter, enough for a standard loaf of bread.
Ingredients:
- ½ cup (1 stick) unsalted butter, softened to room temperature. Using unsalted butter allows you to control the saltiness of the final product.
- 4-6 cloves garlic, minced. Start with 4 cloves and add more to taste, depending on your preference for garlic intensity. Using a garlic press or finely mincing the garlic ensures even distribution and prevents chunky bits in the butter.
- 1 teaspoon dried parsley. Fresh parsley can be substituted, using approximately 2 tablespoons finely chopped.
- ½ teaspoon dried oregano. Optional, but adds a lovely depth of flavor.
- ¼ teaspoon salt. Adjust to taste, considering the salt content of your cheese.
- ⅛ teaspoon black pepper. Freshly ground black pepper is recommended for the best flavor.
Instructions:
Begin by ensuring your butter is softened but not melted. Room temperature butter is ideal for easy mixing and a smooth, creamy consistency. If your butter is too firm, you can microwave it in short bursts (5-10 seconds at a time), stirring in between, until it reaches the desired consistency. Avoid over-softening, as this can lead to a greasy garlic butter.
In a medium-sized bowl, combine the softened butter, minced garlic, parsley, oregano (if using), salt, and pepper. Use a spatula or fork to thoroughly mix all the ingredients until they are evenly distributed throughout the butter. Work gently to avoid over-mixing, which can incorporate too much air and result in a less smooth texture.
Once the ingredients are well combined, taste the garlic butter and adjust the seasoning as needed. You might want to add more garlic, salt, pepper, or herbs to suit your palate. Remember that the flavors will mellow slightly as the garlic butter sits.
For an even smoother garlic butter, you can transfer the mixture to a food processor and pulse a few times. This will create a very fine and creamy texture, ideal for spreading. However, be careful not to over-process, as this can make the butter too oily.
Once you’re satisfied with the flavor and texture, you can transfer the garlic butter to a small, airtight container and refrigerate it until ready to use. Refrigerating the garlic butter allows the flavors to meld and enhances the overall taste. It can be stored in the refrigerator for up to a week.
Professional Tip: For a truly exceptional garlic butter, consider adding a pinch of red pepper flakes for a subtle kick of heat. You can also experiment with other herbs and spices to create your unique signature garlic butter.
Bread Preparation
The foundation of delicious garlic bread lies in selecting and preparing the right bread. While you can use almost any loaf, a crusty Italian or French bread works best due to its sturdy texture which holds up well to the garlic butter and cheese. A softer bread might become soggy. For this recipe, we recommend a baguette, approximately 12-14 inches long, weighing around 1 pound.
Begin by preheating your oven to 375°F (190°C). This ensures the garlic bread is perfectly baked and the cheese is melted and bubbly. Preheating the oven is crucial for achieving optimal results. While the oven heats, let’s prepare the bread.
Carefully examine your baguette. If there are any particularly hard or burnt areas, gently trim them away with a serrated knife. A serrated knife is ideal for cutting bread cleanly without crushing it. Using a sharp knife is essential for a clean cut; a dull knife will cause the bread to crumble.
Once you’ve trimmed the bread (if necessary), slice the baguette lengthwise. The thickness of your slices will determine the final texture of your garlic bread. For a more substantial garlic bread, aim for slices about ½ inch thick. For a lighter, crispier version, slice thinner, around ¼ inch thick. Consistency in slice thickness is key for even cooking. Try to maintain a uniform thickness throughout the entire length of the baguette.
After slicing, gently separate the two halves of the baguette. Be careful not to tear the bread. If you find the slices are sticking together, you can gently use a butter knife to loosen them further. Avoid excessive force to prevent tearing.
Now, we need to consider the interior of the bread. If you prefer a crispier garlic bread, you can lightly toast the cut surfaces of the bread before adding the garlic butter. You can do this by briefly broiling the cut sides of the bread for 1-2 minutes, keeping a close eye to prevent burning. Alternatively, you can skip this step, and the bread will still be delicious.
Finally, before applying the garlic butter mixture (instructions for which will follow in the next section), it’s a good idea to lightly brush the cut sides of the bread with olive oil. This will help prevent the bread from drying out during baking and will add a subtle layer of flavor. Using olive oil adds moisture and enhances the overall flavour profile. A light brushing is sufficient; you don’t want the bread to be soaking wet.
Assembly
With your garlic butter prepared and your bread slices ready, the assembly of your homemade garlic bread with cheese is a straightforward yet crucial step in achieving that perfect, flavorful result. Careful attention to detail here will make all the difference.
Begin by preheating your oven to 375°F (190°C). This ensures the bread toasts evenly and the cheese melts beautifully. While the oven is heating, lay out your prepared bread slices on a baking sheet. Avoid overcrowding the baking sheet; this prevents even cooking and can lead to soggy bread. Ideally, leave about half an inch of space between each slice.
Now, comes the generous application of garlic butter. Using a butter knife or a pastry brush, spread a generous layer of the garlic butter mixture evenly onto one side of each bread slice. Don’t be shy! The more garlic butter, the more flavor. Ensure you reach the edges for optimal flavor penetration.
For a truly decadent garlic bread, consider using two different types of cheese for a layered flavor profile. A classic choice would be a combination of mozzarella and Parmesan. Start by sprinkling approximately 1/4 cup of grated mozzarella cheese onto the buttered side of each bread slice. Mozzarella’s meltability creates a beautifully gooey texture. Follow this with a generous sprinkling of grated Parmesan cheese (about 1 tablespoon per slice). Parmesan adds a sharp, salty counterpoint to the richness of the mozzarella and garlic butter.
Alternatively, if you prefer a simpler approach, you can opt for just one type of cheese. A good all-around choice would be provolone, which melts well and has a slightly nutty flavor that complements garlic beautifully. Use approximately 1/3 cup of grated provolone for the entire batch, distributing it evenly across your bread slices. Experiment with different cheeses to find your personal preference. Some excellent choices include cheddar, Gruyere, or even a blend of your favorites.
Once the cheese is evenly distributed, you can choose to add extra toppings. Consider finely chopped fresh parsley or chives for a touch of freshness and vibrant green color. A few thin slices of tomato can add a burst of acidity and juicy texture. However, remember that adding too many wet ingredients can lead to soggy bread, so add sparingly.
Finally, place the prepared bread slices, cheese-side up, onto the preheated baking sheet. Bake for 8-10 minutes, or until the bread is golden brown and the cheese is melted and bubbly. Keep a close eye on it to prevent burning. Once cooked, remove from the oven and let it cool slightly before serving. Your aromatic and delicious homemade garlic bread with cheese is now ready to be enjoyed!
Baking Instructions
Preheat your oven to 375°F (190°C). This temperature ensures even baking and a perfectly golden-brown crust without burning the cheese. Ensure your oven rack is positioned in the center for consistent heat distribution.
Lightly grease a baking sheet with butter or non-stick cooking spray. This prevents sticking and makes cleanup a breeze. Alternatively, you can line the baking sheet with parchment paper for even easier cleanup. Avoid overcrowding the baking sheet; leave some space between each slice of garlic bread for optimal browning.
Arrange the prepared garlic bread slices in a single layer on the prepared baking sheet. Make sure they aren’t overlapping, as this can lead to uneven cooking and soggy bread. Spacing them evenly will ensure each slice receives the same amount of heat and cooks to perfection.
For optimal cheese melting and browning, bake for 10-12 minutes. Keep a close eye on your garlic bread during the last few minutes of baking. Ovens vary in temperature, so start checking for doneness around the 10-minute mark. The cheese should be melted, bubbly, and lightly browned, and the bread should be golden brown and crispy.
To achieve a deeper golden brown and extra crispy texture, you can broil the garlic bread for the final minute or two. Broiling should be done carefully and with close supervision to prevent burning. Keep a close eye on it, as broiling can quickly brown the cheese and bread. If using a broiler, place the baking sheet on the upper rack and watch it constantly.
Once the garlic bread is golden brown and the cheese is perfectly melted and bubbly, remove it from the oven. Allow it to cool slightly before serving. This allows the cheese to set slightly, making it easier to handle and preventing burns. Serving immediately after baking is tempting, but a few minutes of cooling ensures a less messy and more enjoyable experience.
If you prefer a crispier garlic bread, you can increase the baking time by a minute or two. However, be mindful of burning. For a softer garlic bread, reduce the baking time slightly. Adjustments depend on your oven, the thickness of your bread slices, and your preference for texture.
Once cooled slightly, serve your homemade garlic bread with cheese immediately. Enjoy the warm, cheesy, and garlicky goodness! Consider serving it alongside your favorite soups, salads, or main courses for a delicious and satisfying meal.
Optional: For extra flavour, you can sprinkle some dried herbs like oregano or parsley over the cheese before baking. A drizzle of olive oil before baking can also add richness and enhance the flavour of the garlic.
Recommendations for Homemade Garlic Bread with Cheese
This homemade garlic bread with cheese is best enjoyed fresh from the oven, while the cheese is melted and bubbly, and the garlic is fragrant. For optimal flavor, consume it within 1-2 hours of baking. However, leftovers can still be delicious if stored and reheated properly.
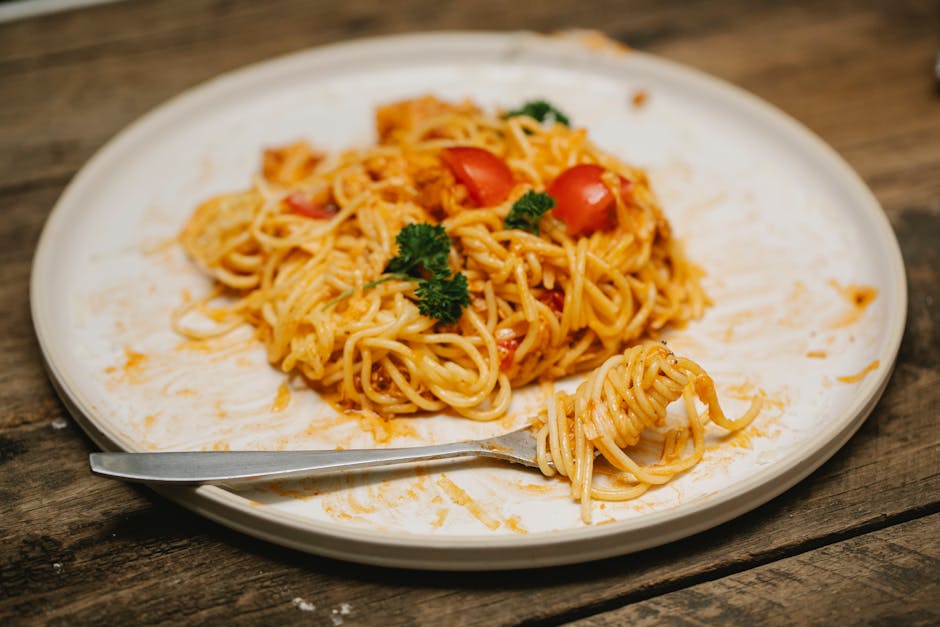
Serving Suggestions: This incredibly versatile side dish pairs beautifully with a wide range of meals. It’s a perfect complement to hearty soups like minestrone or creamy tomato soup, adding a satisfying textural contrast. It also makes a wonderful addition to pasta dishes, especially those with rich tomato-based sauces or creamy Alfredo. Consider serving it alongside grilled meats like chicken or steak, or even alongside vegetarian options such as roasted vegetables or lentil stew. For a truly indulgent experience, serve it alongside a fresh salad to balance the richness of the garlic bread. You can even use it as a base for bruschetta, adding various toppings for a unique appetizer.
Storage: Leftover garlic bread should be stored properly to maintain its quality. Allow it to cool completely before wrapping it tightly in aluminum foil or placing it in an airtight container. Store it in the refrigerator for up to 3 days. To reheat, you can either wrap it in foil and bake it in a preheated oven at 350°F (175°C) for about 5-7 minutes, or you can microwave it in short bursts until heated through. Be mindful that reheating in the microwave might make the bread slightly soggy, so the oven method is generally preferred.
Complementary Dishes: The robust flavor of garlic bread with cheese makes it a fantastic pairing for dishes that need a flavorful counterpoint. Consider serving it alongside lighter dishes to balance the richness, such as a fresh green salad with a light vinaigrette, or a simple side of steamed green beans. For a more substantial meal, pair it with hearty stews, pasta dishes with meat ragu, or even a simple bowl of chili. The possibilities are truly endless!
Nutritional Information (per serving, approximate): The nutritional content will vary depending on the specific ingredients and portion size. However, a typical serving of homemade garlic bread with cheese (approximately 50g) might contain approximately 200-250 calories. This includes carbohydrates from the bread, fats from the cheese and butter, and a small amount of protein. The exact breakdown of macronutrients will depend on the types of cheese and bread used. This garlic bread is a source of carbohydrates for energy and some calcium and fat from the cheese. Please note that this is an estimate, and it’s best to calculate the precise nutritional information using a nutrition calculator based on your specific recipe and ingredients.
Important Note: While delicious, garlic bread is relatively high in calories and fat. Enjoy it in moderation as part of a balanced diet.