Chili, a hearty and flavorful stew, boasts a rich and complex history, its origins shrouded in the mists of time. While pinpointing the exact birthplace is difficult, most culinary historians agree that chili’s roots lie in the southwestern United States and northern Mexico. Early versions, far removed from the canned concoctions available today, were likely created by indigenous peoples centuries ago, utilizing readily available ingredients like beans, peppers, and squash. These early chilis were slow-cooked, often over open fires, allowing the flavors to meld and deepen. The exact recipes were passed down through generations, varying slightly from tribe to tribe and family to family, creating a wide spectrum of regional variations.
As the American Southwest became more involved in trade and cultural exchange, chili’s profile grew. The arrival of European spices and ingredients influenced the evolving chili recipes, introducing new flavor profiles and textures. However, the core concept remained constant: a robust stew combining beans, chili peppers, and various meats. The development of cattle ranching in the region further impacted chili’s evolution, with beef becoming a prominent ingredient. This led to the popularization of the Texas-style chili, known for its robust beef base and often omitting beans entirely, a point of contention among ardent chili aficionados to this day.
The 20th century saw chili’s transformation into a national phenomenon in the United States. Canned chili became ubiquitous, making it a convenient and affordable meal for millions. This mass production, however, often sacrificed the depth of flavor and complexity found in traditional, homemade versions. Today, the chili landscape is incredibly diverse, with regional variations ranging from the aforementioned Texas-style to vegetarian and vegan options. According to the National Restaurant Association, chili remains one of the top ten most popular menu items in American restaurants, underscoring its enduring appeal. Interestingly, the annual International Chili Society’s World Chili Championship continues to draw thousands of competitors and spectators, showcasing the ongoing passion and creativity surrounding this beloved dish.
This recipe offers a healthier twist on the classic chili, incorporating lean ground turkey instead of beef to reduce saturated fat. Turkey, a leaner protein source, provides essential nutrients while significantly lowering the overall calorie and fat content compared to traditional beef chili. This adaptation allows you to enjoy the rich flavors and satisfying texture of chili while maintaining a focus on healthy eating. By using a variety of colorful vegetables and beans, we further enhance the nutritional profile, creating a delicious and nutritious meal that is both satisfying and good for you. Enjoy this modern take on a culinary classic!
Ingredients and Measurements
This recipe yields approximately 8 servings of hearty and healthy turkey chili. Accurate measurements are crucial for achieving the desired flavor and consistency. We recommend using a kitchen scale for the most precise results, especially when measuring spices. However, if you don’t have a scale, use accurate measuring cups and spoons, ensuring they’re level and packed correctly for ingredients like flour and spices.
Turkey: 1.5 lbs ground turkey (93% lean or higher). Using lean ground turkey significantly reduces the fat content, making this chili a healthier option. Avoid using extra-lean turkey as it can be dry. 93% lean provides a good balance of flavor and leanness. If you prefer a richer flavor, you can use a blend of ground turkey and a small amount of ground beef (about 4 ounces).
Onions & Peppers: 1 large yellow onion, finely chopped (approximately 1 ½ cups chopped) and 1 large green bell pepper, finely chopped (approximately 1 cup chopped). Finely chopping the vegetables ensures even cooking and better distribution of flavor throughout the chili. Consider using a food processor for efficient chopping, especially if you’re making a larger batch.
Beans: 1 (15-ounce) can kidney beans, rinsed and drained; 1 (15-ounce) can pinto beans, rinsed and drained; ½ cup of canned black beans, rinsed and drained. Rinsing the beans removes excess sodium and starch, improving the overall texture and taste of the chili. Feel free to experiment with other beans such as chickpeas or great northern beans, but keep in mind that different beans have different cooking times, so adjust accordingly.
Tomatoes: 1 (28-ounce) can crushed tomatoes; 1 (15-ounce) can diced tomatoes, undrained. Using a combination of crushed and diced tomatoes provides a nice texture and depth of flavor. Avoid using stewed tomatoes as they often contain added sugar.
Spices and Aromatics: 2 tablespoons chili powder; 1 tablespoon cumin; 1 teaspoon smoked paprika; ½ teaspoon oregano; ½ teaspoon garlic powder; ¼ teaspoon cayenne pepper (optional, for added heat); 1 teaspoon salt; ½ teaspoon black pepper. Adjust the spice levels to your preference. Start with the suggested amounts and add more chili powder or cayenne pepper if you like it spicier. Freshly ground spices will always provide a more vibrant and intense flavor.
Liquids: 2 cups low-sodium chicken broth or vegetable broth. Using low-sodium broth allows you to control the salt content of the chili. You can also substitute water, but the broth adds more depth of flavor. For a richer chili, consider using a combination of broth and a little bit of red wine.
Optional additions: 1 tablespoon olive oil (for sautéing); ½ cup corn (frozen or canned); chopped cilantro for garnish (optional). Adding a small amount of olive oil helps to sauté the onions and peppers properly before adding the turkey. Fresh cilantro adds a bright, fresh element to the finished dish.
Important Note: Always check the labels of your canned goods for sodium content and adjust the amount of salt accordingly. Fresh ingredients will always provide the best flavor, so if possible use fresh onions, peppers and herbs.
Equipment List
Preparing a delicious and healthy turkey chili requires the right tools. This equipment list outlines everything you’ll need, from the largest stockpot to the smallest measuring spoon. Having everything ready beforehand will streamline your cooking process and ensure a smoother, more enjoyable experience.
Large Stockpot (6-8 quart): A spacious stockpot is crucial for this recipe. The larger capacity allows for even cooking of the chili and prevents overcrowding, which can lead to unevenly cooked ingredients and a less flavorful result. A 6-8 quart pot is ideal for this recipe, comfortably accommodating the turkey, vegetables, and liquids. Avoid using a pot that’s too small, as this will hinder proper simmering and increase the risk of boiling over.
Cutting Board (Large): A large cutting board provides ample space for prepping your vegetables. Choose a sturdy, non-porous material like plastic or wood (properly sanitized). A large surface area minimizes the need for constant repositioning of ingredients, speeding up the preparation process. Consider having two cutting boards: one for raw meat and one for vegetables to maintain optimal food safety.
Chef’s Knife (8-inch): A sharp chef’s knife is essential for efficient and safe chopping of vegetables and dicing the turkey. A dull knife is more dangerous and leads to uneven cutting. Invest in a high-quality chef’s knife and keep it sharp for optimal performance. Regular sharpening will improve your cutting technique and reduce the risk of injury.
Measuring Cups and Spoons: Accurate measurements are key to achieving the desired flavor and consistency in your chili. Use a set of dry and liquid measuring cups (1 cup, ½ cup, ⅓ cup, ¼ cup) and a set of measuring spoons (1 tablespoon, 1 teaspoon, ½ teaspoon, ¼ teaspoon). Ensure your measuring cups and spoons are clean and dry before using them to ensure accurate measurements.
Wooden Spoon or Spatula: A sturdy wooden spoon or spatula is perfect for stirring the chili while it simmers. Avoid using metal utensils, as they can scratch the surface of your pot. A wooden spoon is also less likely to transfer heat to your hand. Choose a spoon or spatula with a comfortable grip for long periods of stirring.
Colander: A colander is essential for draining canned beans and rinsing other ingredients. Choose a colander that’s large enough to hold the volume of beans you’re using. Avoid overcrowding the colander as this may prevent proper draining.
Ladle: A ladle is useful for serving the chili. A ladle with a comfortable handle and a generous bowl will make serving easier and more efficient. Consider using a heat-resistant ladle if you plan to serve directly from the pot.
Can Opener: A can opener is necessary for opening the canned beans and diced tomatoes. A high-quality can opener will make this task quick and easy. Always clean the can opener thoroughly after use.
Serving Bowls: Finally, you’ll need bowls to serve your delicious chili. Choose bowls that are appropriately sized for the portion sizes you’ll be serving.
Preparation Phase: (Includes prepping vegetables, browning meat)
The success of any chili, especially a healthy one, lies in meticulous preparation. This phase focuses on properly prepping the vegetables and browning the turkey, setting the stage for a flavourful and nutritious final product. We’ll be using 1.5 lbs of ground turkey for this recipe, alongside a vibrant array of vegetables.
Vegetable Preparation: Begin by gathering your vegetables: 1 large onion (about 1 cup chopped), 2 cloves garlic (minced), 1 green bell pepper (1 cup chopped), 1 red bell pepper (1 cup chopped), and 1 (15-ounce) can of diced tomatoes, undrained. Proper chopping techniques are crucial. Dice the onions and bell peppers into roughly ½-inch pieces for even cooking. Mincing the garlic ensures its flavor permeates the chili without leaving large, noticeable pieces. If using fresh tomatoes instead of canned, dice them similarly to the bell peppers. Ensure all vegetables are thoroughly washed before chopping to remove any dirt or pesticides.
Browning the Turkey: This step is key to developing deep, rich flavor. Heat a large, heavy-bottomed pot or Dutch oven over medium-high heat. Add 1 tablespoon of olive oil. Once the oil shimmers, add the 1.5 lbs of ground turkey. Avoid overcrowding the pot; if necessary, brown the turkey in batches to ensure proper browning and prevent steaming. Using a wooden spoon or spatula, break the turkey into small crumbles as it cooks. Brown the turkey thoroughly, ensuring it’s no longer pink. This usually takes about 8-10 minutes, depending on the heat and the size of your crumbles. Once browned, remove the turkey from the pot and set it aside. Don’t discard the rendered fat; it adds flavor to the chili.
Sautéing Aromatics: With the turkey removed, reduce the heat to medium. Add the chopped onion to the pot and sauté for about 5-7 minutes, until softened and translucent. Then, add the minced garlic and sauté for another minute, until fragrant. Be careful not to burn the garlic, as this can impart a bitter taste. Adding the garlic towards the end of the onion’s cooking time helps to preserve its delicate flavour.
Adding the Bell Peppers: Now, add the chopped bell peppers (both green and red) to the pot. Sauté for another 5-7 minutes, until slightly softened but still retaining some texture. Don’t overcook the peppers; you want them to contribute a vibrant crunch to the chili. The combination of onions, garlic, and peppers forms the aromatic base of your chili, building a complex flavour profile.
Preparing for the Next Stage: At this point, you have successfully browned the turkey and sautéed your vegetables. The next phase will involve combining all the ingredients and simmering the chili to perfection. Remember to clean your work surface and utensils as you proceed to maintain a clean and efficient cooking process. The aroma from your meticulously prepared ingredients should already be indicating a delicious chili to come!
Cooking Techniques: (Includes Simmering Time, Liquid Management)
This section details the crucial cooking techniques for achieving the perfect healthy turkey chili. Proper simmering time and liquid management are key to developing deep flavors and a satisfyingly thick consistency.
Simmering: The magic of chili lies in its long, slow simmer. We’ll be simmering our turkey chili for at least 1.5 – 2 hours, allowing the flavors to meld and the turkey to become incredibly tender. This low and slow cooking method also helps to break down the connective tissues in the turkey, resulting in a richer, more flavorful chili. Don’t be tempted to rush this process; patience is rewarded with a superior chili.
Initial Browning: Before you begin simmering, ensure you properly brown the turkey. This step is crucial for developing complex flavors and adding depth to your chili. Heat 2 tablespoons of olive oil in a large, heavy-bottomed pot or Dutch oven over medium-high heat. Add 1.5 lbs of ground turkey and cook, breaking it up with a spoon, until browned. This usually takes about 8-10 minutes. Avoid overcrowding the pot; work in batches if necessary to ensure proper browning. Overcrowding will steam the turkey instead of browning it, resulting in a less flavorful chili.
Liquid Management: The amount of liquid you use will affect the final consistency of your chili. Our recipe calls for 28 ounces (3.5 cups) of low-sodium chicken broth, but you may need to adjust this slightly depending on your preference and the absorbency of your beans. Start with the specified amount and add more as needed, a half-cup at a time, if the chili becomes too thick during the simmering process. Avoid adding too much liquid at once, as this can dilute the flavors.
Simmering Process: Once you’ve added all the ingredients (turkey, broth, beans, vegetables, and spices), bring the chili to a gentle simmer over medium-low heat. Reduce the heat to the lowest setting possible, ensuring a slow, steady simmer, not a boil. A gentle simmer is characterized by tiny bubbles rising to the surface. If the chili is boiling vigorously, reduce the heat immediately. Vigorous boiling will make the chili watery and may cause the beans to break down excessively.
Monitoring and Adjusting: Throughout the simmering process, monitor the chili’s consistency. If it becomes too thick, add more broth, a half-cup at a time. If it’s too thin, continue simmering uncovered for a longer period to allow some of the liquid to evaporate. Taste the chili periodically and adjust seasoning as needed. Remember that flavors will deepen as the chili simmers, so don’t be afraid to add a little extra spice or salt towards the end.
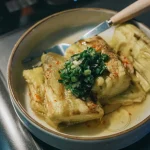
Finishing Touches: After 1.5-2 hours of simmering, your chili should be thick, flavorful, and the turkey perfectly tender. Taste and adjust seasoning one last time. Before serving, consider adding a dollop of plain Greek yogurt or a squeeze of lime juice for extra freshness and acidity. Enjoy your delicious and healthy turkey chili!
Serving Suggestions
This hearty and healthy turkey chili is incredibly versatile and lends itself to a wide array of serving styles, catering to different tastes and dietary needs. To maximize its flavor and appeal, consider these serving suggestions:
Classic Chili Bowl: The simplest and most satisfying way to enjoy this chili is in a classic bowl. Serve 1 ½ to 2 cups of chili per person in a deep bowl. For a heartier meal, consider adding 1/4 cup of cooked quinoa or brown rice per serving for added fiber and texture. This will help stretch the chili and provide a more complete protein source.
Chili Bar Extravaganza: Elevate your chili experience by creating a chili bar! Offer a variety of toppings to allow guests to customize their bowls. Suggest options like: shredded cheddar cheese (1-2 ounces per serving), crumbled cotija cheese (1 tablespoon per serving), finely chopped red onion (1/4 cup per serving), diced avocado (1/4 avocado per serving), a dollop of sour cream or Greek yogurt (2 tablespoons per serving), chopped cilantro (1 tablespoon per serving), and a squeeze of lime juice (1/2 lime per serving). Remember to clearly label all toppings to cater to dietary restrictions and preferences.
Chili-Topped Baked Potatoes: For a comforting and rustic twist, serve the chili atop baked potatoes. Bake large russet potatoes until tender (approximately 1 hour at 400°F/200°C). Top each potato with 1 ½ cups of chili, a sprinkle of shredded cheese, and a dollop of sour cream or Greek yogurt for a truly satisfying meal. This option is ideal for a colder evening.
Chili-Stuffed Sweet Potatoes: A healthier and equally delicious alternative to baked potatoes is to use sweet potatoes. Bake medium-sized sweet potatoes until tender, then cut them in half lengthwise. Scoop out a small amount of the flesh to create a well for the chili. Fill each sweet potato with approximately 1 cup of chili and top with your preferred chili bar toppings. The sweetness of the sweet potato complements the savory chili beautifully.
Chili Cheese Fries: For a fun and slightly indulgent option, serve the chili over a bed of crispy baked sweet potato fries or regular fries. Top with shredded cheese and your favorite chili bar toppings. Use approximately 1 cup of chili per serving and 1/2 cup of fries. This option is best suited for a casual gathering or a fun family meal.
Chili Dog Topping: Add a unique twist to your hot dogs by using this chili as a topping. Top your favorite hot dogs with 1/2 cup of chili and add your desired toppings like mustard, relish, or onions. This is a great option for a quick and easy meal.
Leftovers? This chili tastes even better the next day! Store leftovers in an airtight container in the refrigerator for up to 4 days. Reheat gently on the stovetop or in the microwave. You can also freeze this chili for up to 3 months. Allow the chili to cool completely before freezing to prevent ice crystal formation.
No matter how you choose to serve it, this healthy turkey chili is sure to be a crowd-pleaser. Experiment with different toppings and serving styles to find your favorite combination!
Tips and Tricks for Flavor Enhancement
This section delves into techniques to elevate the flavor profile of your healthy turkey chili, transforming it from a simple meal into a culinary masterpiece. We’ll explore ways to enhance both the savory and spicy elements, ensuring a truly satisfying and memorable dish.
Toasting Spices: Before adding your chili powder, cumin, and other spices to the pot, consider toasting them in a dry skillet over medium heat for 1-2 minutes. This process releases their aromatic oils, significantly deepening their flavor. Use about 1 tablespoon of chili powder, ½ teaspoon of cumin, and ¼ teaspoon of smoked paprika for a well-balanced spice profile. Don’t burn them! Keep a close eye and remove from heat as soon as they become fragrant.
Building Layers of Flavor with Aromatics: Start by sweating your aromatics – finely chopped onions (1 medium, about 1 cup), 2 cloves of minced garlic, and 1-2 finely diced jalapeños (remove seeds for less heat). Sauté these in a tablespoon of olive oil over medium heat until softened, about 5-7 minutes. This slow cooking process allows the flavors to meld and create a delicious base for your chili. Don’t rush this step! The longer you cook the aromatics, the richer your chili will be.
The Power of Liquid: The liquid you choose drastically impacts the flavor. While chicken broth is a classic choice, consider using a combination of broth and diced tomatoes (1 (28 ounce) can, undrained) for added acidity and sweetness. For a deeper, richer flavor, try using homemade chicken broth or even a flavorful vegetable broth. Experiment with different broths to discover your preferred taste.
Adding Depth with Umami: Umami, that savory fifth taste, adds incredible depth to chili. A tablespoon of tomato paste, sautéed with the aromatics, contributes significantly to this. Alternatively, a teaspoon of soy sauce or a splash of Worcestershire sauce can also boost the umami profile. Use these ingredients sparingly, as too much can overpower the other flavors.
Balancing Sweet and Spicy: A touch of sweetness can beautifully complement the chili’s spiciness. A tablespoon of brown sugar or a teaspoon of molasses adds a subtle sweetness that balances the heat. Adjust the amount based on your preference and the spiciness of your chili powder. Start with a small amount and taste as you go.
Garnish for Extra Zing: Don’t underestimate the power of a good garnish! Fresh cilantro, a dollop of Greek yogurt or sour cream (for a less healthy, but delicious option), shredded cheese (cheddar or Monterey Jack work well), and a squeeze of lime juice all add a final layer of flavor and visual appeal. Experiment with different garnishes to find your favorites.
Slow Cooking for Maximum Flavor Development: Allowing your chili to simmer slowly for at least 1-2 hours, or even longer, allows the flavors to meld and deepen. The longer it simmers, the more intense and complex the taste will become. Patience is key when it comes to making delicious chili.
By incorporating these tips and tricks, you can transform your healthy turkey chili into a truly exceptional dish that will impress your family and friends. Remember, cooking is a journey of experimentation and discovery; feel free to adjust the ingredients and techniques to suit your own taste preferences.
Recommendations for Healthy Turkey Chili
This Healthy Turkey Chili recipe is designed to be a delicious and nutritious meal. To maximize its benefits and enjoyment, consider the following recommendations:
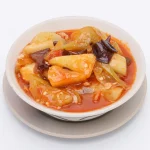
Serving Suggestions: This chili is incredibly versatile. Serve it hot, straight from the pot, as a hearty main course. For a more substantial meal, consider topping it with your favorite additions. Shredded cheddar cheese, a dollop of Greek yogurt or sour cream (for added creaminess, but be mindful of added fat), chopped cilantro, and a squeeze of lime juice all complement the chili’s flavors beautifully. For a spicier kick, add a few slices of jalapeño pepper. You can also serve it with a side of crusty bread for dipping, or alongside cornbread for a classic Southwestern touch. Consider serving it in a bread bowl for a fun and visually appealing presentation.
Storage and Reheating: Leftover chili is even better the next day! Allow the chili to cool completely before storing it in an airtight container in the refrigerator. It will keep for up to 4 days. To reheat, gently warm it on the stovetop or in the microwave, stirring occasionally to prevent scorching. Avoid repeatedly freezing and thawing the chili, as this can affect its texture and flavor. For longer storage, freeze the chili in individual portions for easy reheating. It will keep frozen for up to 3 months.
Complementary Dishes: The robust flavors of this turkey chili pair well with a variety of sides. A simple green salad with a light vinaigrette provides a refreshing contrast to the chili’s warmth. A side of roasted vegetables, such as sweet potatoes or butternut squash, adds sweetness and nutritional value. For a more substantial side, consider serving it with quinoa or brown rice for added fiber and protein. A simple avocado salad adds healthy fats and a creamy texture.
Nutritional Information (per serving, approximate values will vary based on specific ingredients and portion size): Calories: Approximately 300-350; Protein: 25-30g; Fat: 10-15g; Carbohydrates: 25-30g; Fiber: 8-10g. Note: These values are estimates and may vary depending on the specific ingredients used and the portion size. For precise nutritional information, use a nutrition calculator with the exact ingredients and quantities used in your recipe.
Important Note: This recipe is designed to be healthy, but the nutritional content can be adjusted based on your dietary needs and preferences. For example, you can reduce the amount of oil used for cooking to lower the fat content. You can also adjust the spice level to your liking. Always consult with a healthcare professional or registered dietitian if you have specific dietary concerns or restrictions.