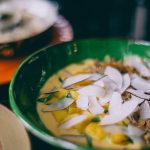
Sweet potato pancakes, a delightful and nutritious breakfast or brunch option, boast a history as rich and varied as the vibrant orange hue of their star ingredient. While pinning down a precise origin is difficult, the dish’s foundations lie in the long and storied cultivation of the sweet potato itself. Sweet potatoes, originating in Central and South America, have been a staple food for thousands of years, with evidence suggesting cultivation dating back to at least 5000 BCE. Their journey across the globe, facilitated by explorers and traders, led to the development of countless regional variations, from savory dishes in Asia to the sweeter preparations more common in the Americas. The pancake itself, a globally prevalent food form, likely contributed its structure to the sweet potato preparation, creating a harmonious blend of cultures and culinary traditions.
The specific evolution of sweet potato pancakes into the recipe we know today is less documented, but it’s likely a product of both necessity and ingenuity. In regions where sweet potatoes were abundant, they provided a readily available and affordable source of carbohydrates and essential nutrients. The pancake format offered a convenient and palatable way to utilize this crop, particularly in times when other ingredients might have been scarce. This practicality likely led to widespread adoption within various communities, with each adapting the recipe to suit their unique tastes and available resources. The addition of spices, herbs, and other ingredients would have varied regionally, reflecting the diverse culinary landscapes where sweet potatoes thrived.
Today, sweet potato pancakes are experiencing a resurgence in popularity, driven by a growing awareness of the health benefits associated with sweet potatoes. These root vegetables are an excellent source of Vitamin A (in the form of beta-carotene), Vitamin C, and dietary fiber, contributing to improved immune function, digestive health, and overall well-being. According to the USDA, a single medium sweet potato provides over 400% of the recommended daily intake of Vitamin A. This nutritional powerhouse, combined with the versatility of the pancake form, makes it an attractive option for health-conscious individuals and families. Further enhancing their appeal, the naturally sweet flavor of sweet potatoes reduces the need for excessive added sugar, making them a guilt-free indulgence. The increasing popularity is also reflected in the rise of sweet potato pancake recipes online, with millions of searches and countless variations available to home cooks.
Beyond their nutritional value and delicious taste, sweet potato pancakes hold cultural significance in many communities. They often feature prominently in traditional breakfast menus, representing a comforting and familiar food that connects generations. In some cultures, sweet potato pancakes are associated with specific celebrations or holidays, further embedding them within the fabric of local traditions. Their adaptability allows for endless customization, reflecting the creativity and culinary heritage of diverse populations. From simple additions like cinnamon and maple syrup to more elaborate variations including nuts, seeds, and fruits, sweet potato pancakes continue to evolve, embodying the timeless appeal of a classic dish with a modern twist.
Ingredients and Measurements
This recipe for Healthy Sweet Potato Pancakes yields approximately 8-10 medium-sized pancakes, depending on the size of your pan and how thick you like them. Accurate measurements are crucial for achieving the perfect texture and sweetness. We recommend using a kitchen scale for the most precise results, particularly for the sweet potato and flour. However, volume measurements are provided as an alternative.
Sweet Potato (1 medium, about 200g): The star of the show! Choose a firm, medium-sized sweet potato. Avoid overly large potatoes as they may be too watery. Peel and grate the sweet potato finely using a box grater or food processor. If using a food processor, pulse until it’s finely grated but not pureed. The finer the grate, the better the texture of the pancakes will be. Do not skip grating; simply mashing the sweet potato will result in a dense, less fluffy pancake.
All-Purpose Flour (1 cup, 120g): This provides structure to the pancakes. You can substitute up to half of the all-purpose flour with whole wheat flour for added fiber and nutrients. However, using more than half whole wheat flour may result in slightly denser pancakes. Ensure your flour is properly measured using a kitchen scale or the spoon and level method (spoon flour into a measuring cup and level off with a straight edge). Scooping directly from the bag often results in packed flour, leading to denser pancakes.
Oat Flour (1/2 cup, 40g): This adds a slightly nutty flavor and extra heartiness to the pancakes. Oat flour is easily made by blending rolled oats in a high-speed blender or food processor until finely ground. If you don’t have oat flour, you can substitute with an equal amount of all-purpose flour, but the texture and flavor will differ slightly.
Baking Powder (1 1/2 teaspoons, 6g): This is the leavening agent that makes the pancakes light and fluffy. Make sure your baking powder is fresh. Old baking powder can lose its effectiveness, resulting in flat pancakes. Check the expiration date on the container.
Cinnamon (1 teaspoon, 3g): A warm and comforting spice that complements the sweetness of the sweet potato. Ground cinnamon is preferred for this recipe. You can adjust the amount to your taste preference. A dash of nutmeg or ginger can also be added for a more complex flavor profile.
Eggs (2 large): Bind the ingredients together and add richness to the pancakes. Large eggs are recommended for optimal results. If you’re vegan, you can substitute flax eggs (1 tablespoon flaxseed meal mixed with 3 tablespoons water per egg) or applesauce.
Milk (1/2 cup, 120ml): Adds moisture and helps create a tender crumb. Use your preferred milk – dairy milk, almond milk, soy milk, or oat milk will all work well. The type of milk may slightly affect the final texture; dairy milk will generally yield the richest pancakes.
Maple Syrup (2-4 tablespoons, 30-60ml): Sweetens the pancakes naturally. Start with 2 tablespoons and add more to taste, depending on the sweetness of your sweet potato. You can also substitute with honey or another liquid sweetener of your choice.
Oil or Butter (2 tablespoons, 30ml): For cooking the pancakes. Use your preferred cooking oil (coconut oil, olive oil, or vegetable oil) or unsalted butter. Use a non-stick pan to prevent sticking and ensure even cooking.
Equipment List
Making healthy sweet potato pancakes requires a relatively straightforward set of equipment, but the right tools can significantly improve the consistency and overall experience. This list details the essential items, along with recommendations for optimal performance and alternatives where possible.
1. Mixing Bowls (2): You’ll need at least two mixing bowls of different sizes. One large bowl (approximately 8-10 cup capacity) is crucial for combining the wet and dry ingredients. A smaller bowl (approximately 4-6 cup capacity) is helpful for whisking together dry ingredients separately before incorporating them into the wet ingredients. This method ensures even distribution and prevents lumps. Consider using stainless steel bowls for their durability and ease of cleaning; however, glass or ceramic bowls are equally suitable.
2. Measuring Cups and Spoons: Accurate measurements are key to achieving the perfect pancake consistency. Invest in a set of both dry and liquid measuring cups (preferably nested for space-saving) and a set of measuring spoons. Using different measuring tools for dry and liquid ingredients ensures accuracy. For example, use a dry measuring cup for flour and a liquid measuring cup for milk or oil. Avoid using kitchen spoons for measuring as they are inconsistent.
3. Whisk: A whisk is essential for thoroughly combining the wet ingredients, ensuring a smooth batter without lumps. A balloon whisk is ideal for its efficient blending action. A fork can be used as a substitute, but a whisk provides a more consistent and less labor-intensive result. Choose a whisk with a comfortable handle for efficient stirring.
4. Spatula (2): You will need two spatulas; a rubber spatula for scraping down the sides of the bowl during mixing and a metal or wooden spatula for flipping the pancakes on the griddle or frying pan. The rubber spatula prevents scratching the bowl and ensures all ingredients are incorporated. The metal or wooden spatula should be heat-resistant and sturdy enough to flip pancakes without tearing them. A thin, flexible spatula is recommended for easy flipping.
5. Griddle or Frying Pan (8-10 inch): A non-stick griddle or frying pan (8-10 inches in diameter) is ideal for cooking multiple pancakes simultaneously. Choose a pan with a flat, even cooking surface to ensure consistent browning and cooking. Ensure the pan is properly preheated before adding the batter. A cast iron pan, while requiring more maintenance, offers superior heat retention and distribution.
6. Pancake Turner (Optional but Recommended): A pancake turner, also known as a spatula, specifically designed for flipping pancakes, provides better control and reduces the risk of tearing the pancakes. While a regular spatula works, a dedicated pancake turner is often thinner and more flexible, making flipping easier.
7. Plate or Cooling Rack: Once cooked, transfer the pancakes to a plate or cooling rack to prevent them from becoming soggy. A cooling rack allows for better air circulation, preventing excess moisture.
8. Vegetable Peeler (if using fresh sweet potatoes): If you are using fresh sweet potatoes, a vegetable peeler will be needed to easily remove the skin. Choose a sharp peeler for efficient and clean peeling.
Preparation Phase: Washing and Peeling
Before you even think about grating or mashing those sweet potatoes for your delicious pancakes, the foundation of a great recipe lies in proper preparation. This begins with thorough washing and efficient peeling. Taking the time to do this correctly will significantly impact the final texture and taste of your pancakes.
Start by selecting approximately 1.5 pounds (680 grams) of sweet potatoes. The quantity can be adjusted based on your desired number of pancakes, but this amount is a good starting point for a serving of 4-6. Choose sweet potatoes that are firm to the touch, free from bruises, and have smooth skin. Avoid any sweet potatoes with soft spots or signs of decay, as these could compromise the taste and texture of your pancakes.
Next, thoroughly wash the sweet potatoes under cold running water. Scrub the skins gently with your hands or a vegetable brush to remove any clinging dirt or soil. Sweet potatoes often grow in the earth, so it’s crucial to eliminate any residual grit before proceeding. Pay particular attention to the crevices and nooks where dirt might accumulate.
Now comes the peeling. There are several methods you can employ, each with its own advantages. For the most efficient peeling, consider using a vegetable peeler. Hold the sweet potato firmly and run the peeler along its length, removing a thin layer of skin. Avoid peeling away too much of the sweet potato flesh, as this is where most of the nutrients and flavor reside. Aim for a consistent, thin peel throughout.
Alternatively, you can use a paring knife. This method requires a bit more skill and care but allows for more precise peeling. Hold the sweet potato securely and carefully peel away the skin using a sharp, paring knife. Again, be mindful of not removing too much of the sweet potato itself. A thin peel is sufficient to remove the outer layer.
Regardless of the method you choose, always dispose of the peelings responsibly. Composting is an excellent option, reducing food waste and enriching your garden soil. Once peeled, inspect the sweet potatoes for any remaining blemishes or imperfections. If necessary, use the paring knife to carefully trim these away.
Finally, after peeling and inspecting your sweet potatoes, rinse them once more under cold water to remove any loose potato particles. This final rinse ensures that your pancakes will be free from any unwanted debris. Now you’re ready to move on to the next stage of preparation, and your path towards deliciously healthy sweet potato pancakes is well underway!
Preparation Phase: Mashing Sweet Potatoes
This section details the crucial step of preparing your sweet potatoes for perfectly fluffy and delicious pancakes. The quality of your mashed sweet potatoes directly impacts the final texture and taste of your pancakes, so careful attention to this phase is essential.
Begin by selecting approximately 1 pound (450g) of sweet potatoes. Choose firm, well-shaped sweet potatoes without bruises or soft spots. The variety you select will influence the final flavor; consider using a mix of orange and purple sweet potatoes for a vibrant color and complex sweetness.
Thoroughly wash the sweet potatoes under cold running water, scrubbing away any lingering dirt or debris. Peeling is optional; leaving the skins on adds fiber and nutrients, resulting in a healthier pancake. If you choose to peel them, use a vegetable peeler for efficiency and to avoid wasting too much of the sweet potato flesh.
Next, you’ll need to cook the sweet potatoes. There are two primary methods: baking and boiling. Baking yields a sweeter, more intensely flavored result. To bake, pierce the sweet potatoes several times with a fork to allow steam to escape. Place them directly on the oven rack at 400°F (200°C) for approximately 45-60 minutes, or until a fork easily pierces the center. Boiling is faster, taking approximately 20-25 minutes in a pot of boiling water until tender. Ensure the sweet potatoes are fully submerged in water.
Once cooked, allow the sweet potatoes to cool slightly before handling. This prevents burns and makes them easier to mash. Once cool enough to handle, use a fork or potato masher to thoroughly mash the sweet potatoes. Avoid using a food processor or blender, as this can create a gummy texture. The goal is to achieve a smooth, yet slightly chunky consistency. If using a fork, you may need to exert some pressure to break down any remaining lumps.
For optimal flavor and moisture, consider adding a tablespoon or two of butter or coconut oil to the mashed sweet potatoes. This will enhance the richness and prevent the pancakes from becoming dry. You can also incorporate a pinch of salt and a dash of cinnamon or nutmeg at this stage for added warmth and complexity. Taste the mashed sweet potatoes and adjust seasonings as needed. Remember, the taste of your mashed sweet potatoes will directly influence the taste of your final pancakes.
Once you’ve achieved the desired consistency and flavor, set the mashed sweet potatoes aside while you prepare the remaining pancake ingredients. Keep them covered to prevent them from drying out.
Properly mashed sweet potatoes are the foundation of delicious sweet potato pancakes. Take your time with this step, and the results will be well worth the effort.
Mixing the Batter
Creating the perfect healthy sweet potato pancake batter requires a gentle hand and careful attention to detail. The following steps will guide you through the process, ensuring a smooth, lump-free batter that yields light and fluffy pancakes.
Begin by preparing your wet ingredients. We’ll be using 1 cup of cooked and mashed sweet potato. Ensure your sweet potato is completely smooth; any lumps will translate into lumps in your batter. You can achieve this easily using a potato masher or a food processor. To this, add 1 cup of milk (dairy or non-dairy). Almond milk, oat milk, or even unsweetened coconut milk work wonderfully and add subtle flavor notes. Whisk these two ingredients together thoroughly in a large bowl until completely combined and no streaks of sweet potato remain. This initial mixing helps to create a uniform base for the batter.
Next, incorporate the dry ingredients. In a separate bowl, whisk together 1 ½ cups of all-purpose flour (or a gluten-free blend), 2 teaspoons of baking powder, ½ teaspoon of baking soda, and ½ teaspoon of ground cinnamon. Sifting the dry ingredients is highly recommended. Sifting aerates the flour, preventing clumps and resulting in lighter, fluffier pancakes. If using a gluten-free blend, be sure to follow the package instructions regarding sifting, as some blends may not require it.
Now, it’s time to gently combine the wet and dry ingredients. Avoid overmixing at this stage. Gradually add the dry ingredients to the wet ingredients, whisking gently with a spatula or a large spoon. The goal is to incorporate the dry ingredients just until they are moistened and no dry flour remains. Overmixing develops the gluten in the flour (even in gluten-free blends), resulting in tough pancakes. A few small lumps are acceptable; they will disappear during cooking.
For extra flavor and moisture, consider adding 1 tablespoon of melted coconut oil or olive oil to the batter. This will also contribute to a slightly richer pancake. You can also incorporate a pinch of salt to enhance the overall flavor profile. Remember to taste and adjust seasoning as needed. Some people prefer a touch of sweetness, so feel free to add 1-2 tablespoons of maple syrup or honey, but remember this will slightly alter the nutritional profile.
Once the batter is fully combined, let it rest for about 5-10 minutes. This allows the gluten to relax and the baking powder to activate, resulting in even more tender pancakes. After resting, give the batter a gentle stir before beginning to cook. Now you’re ready to cook your delicious and healthy sweet potato pancakes!
Cooking Techniques: Pan Preparation
Proper pan preparation is crucial for achieving perfectly cooked, golden-brown sweet potato pancakes that don’t stick and cook evenly. This section details the steps to ensure your pancakes are a success every time.
Choosing the Right Pan: A non-stick skillet or griddle is highly recommended for sweet potato pancakes. These surfaces minimize sticking and make flipping easier. Cast iron pans also work well, offering excellent heat distribution, but require proper seasoning (see note below) to prevent sticking. The ideal size is 8-10 inches for making 2-3 pancakes at a time. Avoid using overly large pans, as this can lead to uneven cooking and thinner pancakes.
Preheating the Pan: Before adding any batter, thoroughly preheat your pan over medium heat. This is a vital step. A cold pan will result in soggy pancakes that stick. You’ll know your pan is ready when a drop of water sizzles immediately upon contact. For non-stick pans, this usually takes around 2-3 minutes. For cast iron, it might take slightly longer, 4-5 minutes.
Adding Cooking Fat: While non-stick pans require less fat, a light coating is still beneficial for preventing sticking and adding a touch of flavor. Use a high-smoke-point oil such as avocado oil, coconut oil (refined), or grapeseed oil. Avoid oils with low smoke points like olive oil, as they can burn at higher temperatures. Add approximately 1 teaspoon of oil to the preheated pan. Using a paper towel, gently spread the oil evenly across the entire surface of the pan, ensuring a thin, even coating. Too much oil will result in greasy pancakes.
Testing the Pan’s Readiness: After adding the oil and spreading it, give it another 30 seconds to heat up. Pour a small amount of batter (about a teaspoon) onto the hot surface. If the batter immediately sizzles and the edges begin to set within a few seconds, your pan is ready for the full batch. If the batter sits without sizzling, your pan needs more time to heat up. Adjust the heat as needed – you might need to slightly decrease the heat if it’s too high.
Cast Iron Pan Note: If using a cast iron skillet, ensure it’s properly seasoned. A well-seasoned cast iron pan will have a naturally non-stick surface. If your pan is new or poorly seasoned, you may need to use a slightly larger amount of oil (1.5-2 teaspoons) to prevent sticking. Seasoning involves applying a thin layer of oil and baking the pan at a high temperature to create a protective layer.
Cleaning Up: Once you’ve finished cooking your pancakes, allow the pan to cool slightly before cleaning. For non-stick pans, a gentle wipe with a soft sponge and warm soapy water is usually sufficient. For cast iron pans, allow them to cool completely, then wash with warm water and a stiff brush, avoiding harsh detergents. Dry thoroughly and lightly oil the surface to maintain the seasoning.
Healthy Sweet Potato Pancakes: Recommendations
These healthy sweet potato pancakes are a delicious and nutritious way to start your day or enjoy a wholesome snack. To maximize their flavor and nutritional benefits, we recommend following these guidelines.
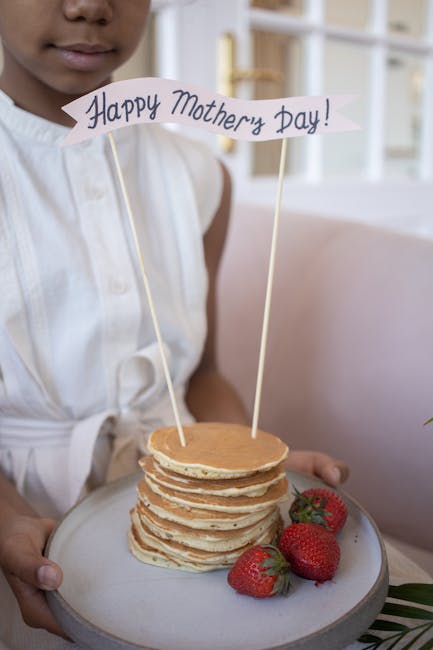
Serving Suggestions: These pancakes are incredibly versatile. Enjoy them as a classic breakfast treat with a dollop of plain Greek yogurt (for added protein) and a drizzle of pure maple syrup (use sparingly for a healthier option). You can also top them with fresh berries (strawberries, blueberries, raspberries) for added sweetness and antioxidants. A sprinkle of chopped nuts (walnuts, pecans) provides healthy fats and a delightful crunch. For a savory twist, consider topping them with a fried egg and a sprinkle of everything bagel seasoning.
Storage Conditions: For optimal freshness, store leftover pancakes in an airtight container in the refrigerator for up to 3 days. To reheat, simply microwave for 30-60 seconds, or gently heat in a non-stick pan over medium heat until warmed through. Avoid over-heating, as this can dry them out. You can also freeze the pancakes for longer storage. Place them in a freezer-safe bag or container and freeze for up to 3 months. To reheat frozen pancakes, thaw overnight in the refrigerator and then reheat as described above.
Complementary Dishes: These pancakes pair beautifully with a variety of dishes. For a complete breakfast, serve them alongside a side of scrambled eggs or a fresh fruit salad. They also make a great accompaniment to a light brunch spread, alongside avocado toast or smoked salmon. For a heartier meal, consider serving them with a side of sausage (choose lean options) or bacon (limit portion size). A side of sauteed spinach or kale provides additional vitamins and minerals, complementing the sweetness of the pancakes.
Nutritional Information (per pancake, approximate): The exact nutritional content will vary depending on the specific recipe and ingredients used. However, a typical serving of a healthy sweet potato pancake will contain approximately 150-200 calories. This includes a good source of carbohydrates from the sweet potato, providing sustained energy. They’re also a moderate source of fiber, promoting digestive health. The addition of ingredients like eggs and Greek yogurt can boost the protein content, contributing to satiety. The nutritional profile will also vary based on the toppings used; for example, adding nuts will increase the fat and calorie content, while berries will add vitamins and antioxidants. For precise nutritional information, we recommend using a nutrition calculator based on your specific recipe.
Important Note: While these pancakes are healthier than many traditional pancake recipes, they should still be consumed as part of a balanced diet. Be mindful of portion sizes and the addition of high-calorie toppings to maintain a healthy eating pattern. If you have any specific dietary concerns or allergies, please adjust the recipe accordingly and/or consult a registered dietitian or healthcare professional.