Oatmeal cookies, a seemingly simple treat, boast a surprisingly rich and varied history, far beyond their current status as a wholesome snack. While pinpointing the exact origin is difficult, evidence suggests that variations of oatmeal cookies emerged alongside the widespread cultivation and processing of oats. Oats, a staple grain for centuries, were particularly prevalent in Scotland and Northern Europe, making it likely that early forms of these cookies developed in these regions sometime before the 19th century. Their rise in popularity, however, is inextricably linked to the improvement in oat milling techniques. The ability to produce finer oat flour made it possible to create lighter, more palatable cookies than their coarser predecessors.
The late 19th and early 20th centuries saw oatmeal cookies truly take off in the United States, fueled by increased industrialization and the rise of readily available packaged ingredients. Recipes began appearing in popular cookbooks and magazines, solidifying their place in American kitchens. This period also saw the emergence of variations, with different additions like raisins, nuts, and spices finding their way into the mix, reflecting regional preferences and available ingredients. The iconic chewy texture, often associated with oatmeal cookies today, largely resulted from perfecting baking techniques and understanding the interaction between oats, butter, and other ingredients.
Today, oatmeal cookies hold a significant position in both culinary and cultural landscapes. They’re a staple in school lunchboxes, bake sales, and family gatherings, representing comfort, nostalgia, and a sense of home. Their adaptability is key to their enduring appeal; they can be easily customized to suit individual dietary needs and preferences, catering to both sweet and savory tastes. Interestingly, studies show that oats, a primary ingredient in these cookies, are a rich source of fiber, contributing to digestive health and potentially lowering cholesterol levels. This nutritional aspect, combined with their delicious taste, has helped propel them into the realm of healthy snacks, a far cry from their humble beginnings.
The seemingly simple oatmeal cookie is more than just a dessert; it’s a reflection of culinary evolution, cultural adaptation, and a testament to the enduring power of simple ingredients transformed into something delicious and satisfying. The global market for oatmeal cookies is substantial, with millions consumed annually, showcasing its continued popularity and widespread appeal across various demographics. Furthermore, the versatility of the recipe ensures that the oatmeal cookie will continue to evolve and adapt, maintaining its place in kitchens worldwide for generations to come.
Ingredients and Measurements
This recipe for Healthy Oatmeal Cookies prioritizes wholesome ingredients and precise measurements for optimal texture and flavor. We’ve carefully selected each component to balance sweetness, heartiness, and nutritional value. Accurate measuring is crucial for success; using a kitchen scale is highly recommended for the most consistent results.
Oats (Rolled Oats): 1 ½ cups (190g). We recommend using old-fashioned rolled oats for their texture and ability to absorb moisture, creating a chewy cookie. Avoid quick-cooking oats, as they can result in a slightly mushy cookie. Ensure your oats are dry before measuring; any moisture will affect the overall consistency of the dough.
Whole Wheat Flour: ½ cup (60g). Whole wheat flour adds fiber and a subtle nutty flavor, enhancing the nutritional profile of these cookies. Using freshly milled whole wheat flour will result in the best flavor and texture; however, store-bought is perfectly acceptable. If you are concerned about the texture, you can substitute half of the whole wheat flour with all-purpose flour.
Brown Sugar (Packed): ¾ cup (150g). Packed brown sugar provides moisture and a rich caramel flavor. Packing the brown sugar is essential to ensure accurate measurement; use a spoon to firmly press the sugar into the measuring cup. Light brown sugar is preferred for a lighter color and slightly less intense molasses flavor, but dark brown sugar can be used as a substitute.
Mashed Banana (Ripe): 1 medium (approximately 120g). A ripe banana adds natural sweetness and moisture to the cookies, reducing the need for added sugar. The riper the banana, the sweeter it will be. Select a banana with brown spots for optimal sweetness and moisture content. You can mash the banana with a fork until smooth.
Applesauce (Unsweetened): ¼ cup (60g). Applesauce contributes moisture and a subtle sweetness, further reducing the need for refined sugars. Using unsweetened applesauce is key to maintaining control over the sugar content of the cookies. If using sweetened applesauce, adjust the amount of brown sugar accordingly.
Eggs (Large): 2. Eggs bind the ingredients together and contribute to the texture of the cookies. Use large eggs at room temperature for optimal emulsification and a smoother dough consistency. Room temperature eggs also incorporate better into the batter.
Vegetable Oil (Unsweetened): ¼ cup (60ml). Vegetable oil adds moisture and richness to the cookies. Choose a neutral-flavored oil, such as canola or vegetable oil, to avoid overpowering the other flavors in the cookies. Olive oil can be used but imparts a stronger taste.
Baking Soda: 1 teaspoon (5g). Baking soda helps the cookies rise and creates a light and airy texture. Ensure the baking soda is fresh for optimum leavening power. Older baking soda may not work as effectively.
Cinnamon: 1 teaspoon (5g). Cinnamon adds warmth and a delightful spice to the cookies. Ground cinnamon is preferred for ease of use and even distribution throughout the cookies.
Salt: ½ teaspoon (3g). Salt enhances the flavors of the other ingredients and balances the sweetness. Do not omit the salt, as it plays a crucial role in the overall flavor profile.
Optional additions: Chopped nuts (walnuts, pecans, or almonds), raisins, cranberries, chocolate chips (dark chocolate preferred for a healthier option).
Equipment List
Baking healthy oatmeal cookies requires the right tools to ensure consistent results and efficient workflow. While some items might seem interchangeable, specific equipment choices can significantly impact the texture and overall quality of your cookies. This detailed list outlines the necessary equipment, including recommended materials and sizes, to guide you through the process.
Mixing Bowls: You’ll need at least two mixing bowls. One large bowl (approximately 5-quart capacity) is crucial for creaming together the wet ingredients and subsequently combining the wet and dry ingredients. A smaller bowl (approximately 2-quart capacity) is ideal for whisking together the dry ingredients separately, preventing lumps and ensuring even distribution of leavening agents. Stainless steel bowls are recommended for their durability, ease of cleaning, and resistance to discoloration.
Measuring Cups and Spoons: Accurate measurements are paramount in baking. Invest in a set of both dry and liquid measuring cups. Dry measuring cups should be used for accurately measuring dry ingredients like flour and oats, while liquid measuring cups are essential for precise measurements of liquids like milk and oil. Use a separate set of measuring spoons for smaller quantities of ingredients like baking soda and spices. Avoid using nested measuring cups as this can lead to inaccurate measurements.
Whisk: A balloon whisk is ideal for thoroughly combining the dry ingredients and ensuring there are no lumps. Its wire construction allows for efficient incorporation of air, resulting in lighter and fluffier cookies. A sturdy whisk, preferably made of stainless steel, will withstand repeated use without bending or breaking. A hand mixer can supplement the whisk for creaming butter and sugar, but a whisk is still essential for the dry ingredients.
Spatula/Scraper: A rubber spatula or silicone scraper is indispensable for scraping down the sides of the bowl during mixing. This ensures all ingredients are incorporated evenly, preventing dry patches or unevenly baked cookies. A flexible spatula is particularly useful for getting into the corners of the bowl and ensuring that no batter goes to waste. A metal spatula can also be used, but be careful not to scratch your bowls.
Baking Sheets: Two standard-sized baking sheets (approximately 18 x 13 inches) are recommended to accommodate the cookie dough efficiently. Non-stick baking sheets are highly recommended to prevent sticking and make cleanup easier. However, if using traditional baking sheets, line them with parchment paper to prevent sticking and for easier removal of cookies.
Oven: A standard oven is necessary for baking the cookies. Ensure your oven is properly calibrated for accurate baking temperatures. An oven thermometer can be used to verify the accuracy of the oven’s temperature reading.
Cooling Rack: A cooling rack is essential for allowing the cookies to cool completely after baking. This prevents them from becoming soggy and ensures they maintain their crisp texture. Wire cooling racks promote even air circulation, speeding up the cooling process and preventing moisture buildup.
Optional Equipment: While not strictly necessary, a food processor can simplify the process of chopping nuts or oats if using whole grain oats. A stand mixer can be used in place of a hand mixer for more efficient creaming of butter and sugar, though not strictly necessary for this recipe.
Preparation Phase: Oat Flour Making (if applicable)
This section details how to make oat flour from rolled oats, a crucial step if your healthy oatmeal cookie recipe calls for it instead of all-purpose flour. Using oat flour adds a delightful nutty flavor and boosts the nutritional value of your cookies. Note: If your recipe doesn’t specify oat flour, you can skip this section entirely.
The quality of your oat flour significantly impacts the texture of your cookies. Using freshly milled flour yields the best results. Avoid using pre-ground oat flour from the store unless your recipe specifically requests it, as the texture and moisture content can vary.
To make approximately 1 ½ cups of oat flour, you’ll need 2 cups of rolled oats (old-fashioned or quick-cooking). Avoid using steel-cut oats, as their coarser texture won’t produce the fine flour needed for most cookie recipes. Measure your rolled oats accurately using a kitchen scale for the most consistent results. A cup of rolled oats can vary in volume depending on how tightly it’s packed.
There are two primary methods for making oat flour: using a high-powered blender or a food processor. For a finer flour, a high-powered blender is recommended. If using a blender, add the rolled oats and pulse in short bursts until a fine, almost powdery consistency is achieved. Be careful not to over-process, as this can create a pasty texture. Scrape down the sides of the blender frequently to ensure even processing.
Alternatively, if you’re using a food processor, add the rolled oats and pulse until a similar fine flour consistency is reached. Again, avoid over-processing. Check the consistency frequently throughout the process. You might need to stop and scrape down the sides several times. The processing time will depend on the power of your food processor.
Once your oat flour is ready, sift it through a fine-mesh sieve to remove any larger oat pieces. This step is optional but highly recommended for creating a smoother cookie texture. Discard any larger pieces that don’t pass through the sieve. These can be used in other recipes, such as granola or oatmeal.
Store your freshly made oat flour in an airtight container in a cool, dry place. Oat flour tends to absorb moisture, so keeping it airtight is crucial to maintain its optimal texture and prevent it from becoming clumped. Proper storage extends its shelf life for approximately 2-3 months.
Now that your oat flour is ready, you can proceed to the next step in your healthy oatmeal cookie recipe. Remember that substituting oat flour for all-purpose flour might slightly alter the texture and moisture content of your cookies. You might need to adjust the amount of liquid in your recipe depending on the specific results you obtain.
Preparation Phase: Mixing Wet and Dry Ingredients
Creating delicious and healthy oatmeal cookies begins with the meticulous preparation of both wet and dry ingredients. This phase is crucial for achieving the perfect texture and flavor in your final product. We’ll be making a batch yielding approximately 24 cookies.
Let’s start with the wet ingredients: For this recipe, you will need 1/2 cup (113g) unsalted butter, softened to room temperature. This is paramount; using cold butter will result in uneven mixing and potentially a tough cookie. Next, add 1/2 cup (100g) packed light brown sugar and 1/4 cup (50g) granulated sugar. The combination of brown and granulated sugar provides both moisture and a balanced sweetness. Then, whisk in 1 large egg and 1 teaspoon of pure vanilla extract. The egg binds the ingredients together, while the vanilla adds a delightful aroma and flavor. Finally, add 1/4 cup (60ml) unsweetened applesauce. Applesauce adds moisture and subtly enhances the flavor profile, contributing to a healthier cookie.
Now, let’s prepare the dry ingredients: In a separate large bowl, whisk together 1 1/2 cups (190g) all-purpose flour, 1 teaspoon baking soda, 1 teaspoon ground cinnamon, 1/2 teaspoon ground nutmeg, and 1/4 teaspoon ground cloves. Thorough whisking is essential to ensure even distribution of the leavening agents and spices. This prevents pockets of baking soda from creating an uneven rise and bitter taste. We’re using a blend of warm spices that beautifully complement the oatmeal and sweetness of the cookies.
Combining wet and dry ingredients: Gradually add the dry ingredients to the wet ingredients, mixing on low speed with an electric mixer or by hand using a spatula. Avoid overmixing. Overmixing develops the gluten in the flour, resulting in tough cookies. Mix until just combined; a few small lumps of dry ingredients are acceptable. Once the dry and wet ingredients are incorporated, gently stir in 1 1/2 cups (150g) rolled oats. Using rolled oats, not quick-cooking oats, is recommended for optimal texture and a chewier cookie. Quick-cooking oats tend to become mushy.
Professional Tip: Before adding the oats, check the consistency of the dough. If it seems too dry, add a tablespoon of milk at a time until it reaches a desired consistency. Conversely, if it seems too wet, add a tablespoon of flour at a time until it comes together. The ideal consistency should be slightly sticky but manageable.
Once all ingredients are thoroughly combined, you’re ready to proceed to the next stage: shaping and baking your healthy oatmeal cookies. Remember, careful attention to detail during this preparation phase significantly impacts the final outcome, ensuring deliciously moist and flavorful cookies.
Baking Techniques: Oven Temperature and Baking Time
Achieving perfectly baked, healthy oatmeal cookies hinges on understanding and precisely controlling two crucial factors: oven temperature and baking time. Getting these right will determine the texture, flavor, and overall success of your cookies. While recipes often provide a suggested temperature and time, these are guidelines, and adjustments might be necessary depending on your specific oven and the recipe variations you’ve made.
Oven Temperature: Most recipes for oatmeal cookies call for baking at 350°F (175°C). This temperature is generally ideal for achieving a balance between evenly baked cookies and preventing burning. A lower temperature will result in longer baking times and potentially chewier cookies, while a higher temperature will lead to faster baking but could result in burnt edges and a dry center. Invest in an oven thermometer to ensure your oven is accurately calibrated. Ovens often fluctuate in temperature, and a thermometer will help you identify and compensate for any discrepancies. If your oven runs hot, you might need to reduce the temperature by 10-15°F (5-10°C) and monitor the cookies closely. Conversely, if it runs cool, you may need to increase the temperature slightly and extend the baking time.
Baking Time: The suggested baking time for oatmeal cookies is typically between 10-12 minutes. However, this is a very broad range, and the actual baking time will depend on several factors, including the size of your cookies, the ingredients used, and your oven’s efficiency. Start checking for doneness around the 10-minute mark. Overbaking is a common problem, resulting in dry, hard cookies. The best way to check for doneness is to gently press the center of a cookie. If it feels slightly soft but not doughy, it’s likely ready. The edges should be golden brown, and the bottoms should be lightly browned. If the cookies are still very soft and pale, continue baking in 1-minute intervals until they reach the desired consistency.
Practical Tips for Perfect Oatmeal Cookies:
- Use a baking sheet with a light color: Darker baking sheets absorb more heat and can lead to unevenly baked cookies or burnt bottoms.
- Don’t overcrowd the baking sheet: Leave adequate space between cookies to allow for even airflow and browning. Baking in batches is often necessary.
- Rotate the baking sheet halfway through: This ensures even baking, especially if your oven has hot spots.
- Cool completely on a wire rack: This prevents the cookies from becoming soggy and allows them to set properly. Leaving them on the baking sheet will trap heat and moisture.
- Experiment and adjust: Don’t be afraid to adjust baking times and temperatures based on your experiences. Keep notes on what works best for your oven and your preferred cookie texture.
Important Note: Remember that the recipe’s suggested baking time and temperature are merely starting points. Observing your cookies closely throughout the baking process is crucial for achieving the perfect results. Don’t hesitate to slightly adjust the time based on your oven’s quirks and your personal preference for texture. With practice, you’ll become adept at recognizing the signs of perfectly baked oatmeal cookies.
Cooling and Storage
Proper cooling and storage are crucial for maintaining the texture and flavor of your healthy oatmeal cookies. Improper handling can lead to soggy cookies or rapid staling, diminishing their overall enjoyment. Follow these guidelines for optimal results.
Cooling on the Baking Sheet: Once removed from the oven, leave the cookies on the baking sheet for at least 10-15 minutes. This allows them to firm up and prevents breakage when transferring them. The residual heat helps to set the edges and prevents them from becoming too delicate.
Transferring to a Cooling Rack: After the initial cooling period, carefully transfer the cookies to a wire cooling rack. This allows for even air circulation around each cookie, preventing moisture from accumulating on the bottom and leading to sogginess. Allow them to cool completely, which may take another 20-30 minutes depending on the thickness of the cookies and ambient temperature.
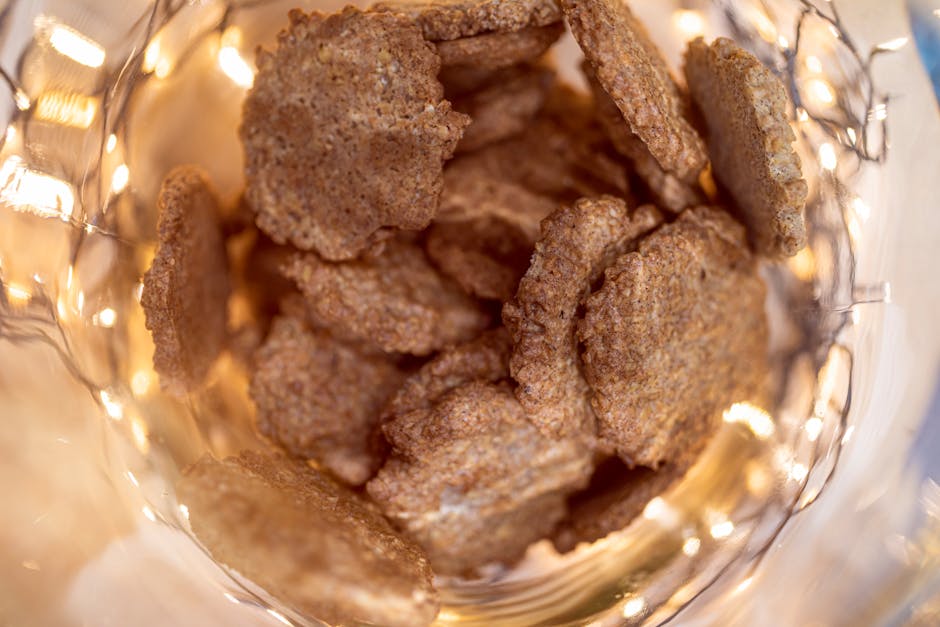
Room Temperature Storage (Short-Term): Once completely cooled, you can store the cookies at room temperature in an airtight container for up to 3 days. An airtight container helps to prevent them from drying out and absorbing odors from other foods in your pantry. Opt for a container with a tight-fitting lid to maintain optimal freshness.
Refrigerator Storage (Medium-Term): For longer storage, place the completely cooled cookies in an airtight container and refrigerate them. This method extends their shelf life to approximately 7-10 days. However, be aware that refrigeration can slightly alter the texture of the cookies, potentially making them slightly softer. Allow them to come to room temperature before serving to restore some of their original crispness.
Freezing for Extended Storage: For the longest shelf life, freezing your oatmeal cookies is the best option. Place the completely cooled cookies in a single layer on a baking sheet lined with parchment paper. Freeze them for at least 2 hours, or until solid. Once frozen, transfer the cookies to a freezer-safe, airtight container or a freezer bag, removing as much air as possible. Frozen cookies can be stored for up to 3 months, maintaining their quality and flavor. Thaw cookies at room temperature before serving for the best texture.
Important Note: The storage time recommendations are approximate and can vary depending on the ingredients used, the humidity of your environment, and the quality of the airtight container. Always inspect your cookies before consuming them. Discard any cookies that show signs of mold or spoilage.
Professional Recommendation: For optimal freshness and texture, it is recommended to store your cookies in smaller batches rather than one large batch. This ensures that the cookies at the bottom of the container are not crushed and do not absorb moisture from others above them.
Healthy Oatmeal Cookie Recommendations
These healthy oatmeal cookies are a delicious and nutritious treat, perfect for satisfying your sweet cravings without the guilt. Each cookie contains approximately 150 calories, 5g of fat, 25g of carbohydrates, 3g of protein, and 2g of fiber. Nutritional values may vary slightly depending on the specific ingredients used. For a more detailed nutritional breakdown, please refer to the full recipe.
Serving Suggestions: These cookies are delightful enjoyed on their own as a satisfying snack. Their wholesome nature pairs beautifully with a cup of your favorite beverage. Consider a warm cup of milk (dairy or non-dairy), herbal tea, or even a strong coffee to complement the flavors. For a more substantial treat, serve them alongside a dollop of plain Greek yogurt or a small scoop of unsweetened applesauce for added creaminess and a boost of protein.
Storage Conditions: For optimal freshness, store your healthy oatmeal cookies in an airtight container at room temperature. They should remain fresh and enjoyable for up to 5 days. To extend their shelf life, you can also store them in the refrigerator for up to 7 days. Avoid freezing these cookies, as this can affect their texture. For best results, consume within the recommended timeframe for peak flavor and texture.
Complementary Dishes: These cookies are incredibly versatile and can be incorporated into various meal occasions. They make a wonderful addition to a breakfast spread, paired with fresh fruit and a side of yogurt. They can also serve as a delightful dessert after a light lunch or dinner, especially if you’re craving something sweet but not overly indulgent. Consider serving them alongside a fruit salad for a balanced and refreshing combination. Their subtle sweetness also pairs well with savory dishes, such as a bowl of hearty oatmeal or a light salad with a vinaigrette dressing. Their nutty and slightly sweet profile provides a nice textural and flavor contrast.
Customization and Variations: Feel free to experiment with different add-ins to customize your cookies to your liking. Consider adding chopped nuts (walnuts, pecans, or almonds), dried fruits (raisins, cranberries, or chopped apricots), seeds (chia, flax, or sunflower), or spices (cinnamon, nutmeg, or ginger) for an extra layer of flavor and nutritional benefits. You can also adjust the sweetness by adding more or less sweetener, depending on your preference. Remember to adjust the nutritional information accordingly when making significant changes to the recipe.
Important Note: While these cookies are healthier than many traditional oatmeal cookies, they are still a treat and should be consumed in moderation as part of a balanced diet. Individuals with specific dietary restrictions or allergies should carefully review the ingredient list before consumption and make necessary substitutions. Always consult with a healthcare professional or registered dietitian before making significant dietary changes, especially if you have underlying health conditions.


