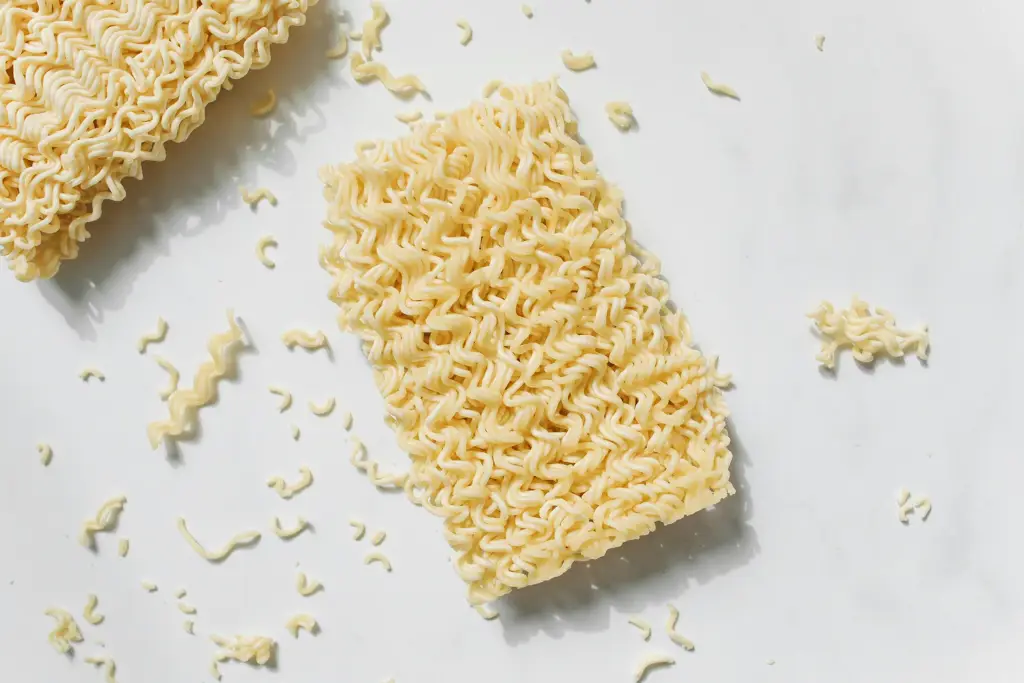
The humble pie crust: a seemingly simple concoction of flour, fat, and water, yet a cornerstone of countless culinary traditions worldwide. Its origins are shrouded in the mists of time, but evidence suggests that early forms of pastry existed as far back as ancient Egypt, with depictions of flatbreads baked in ovens appearing in archaeological records. These early versions likely lacked the delicate flakiness we associate with modern pie crusts, relying more on the availability of simple ingredients and rudimentary cooking techniques. The evolution of pie crust, however, is a testament to human ingenuity and our enduring desire for deliciousness.
The development of truly flaky pastry is more closely linked to the medieval and Renaissance periods in Europe. The introduction of new ingredients and techniques, such as the use of butter and lard, significantly improved the texture and flavor. The precise moment a perfect flaky crust emerged is debatable, but the 17th and 18th centuries saw the rise of sophisticated pastry-making in aristocratic kitchens, leading to the development of regional variations and the incorporation of pie into celebratory meals and everyday fare. The widespread availability of ovens and the increased use of butter and sugar in later centuries further contributed to the refinement of this culinary art.
Pie crust holds a significant cultural position across numerous societies. In North America, apple pie is practically synonymous with national identity, frequently cited in literature, songs, and popular culture. Statistics show that apple pie remains one of the top five most popular desserts in the United States, with millions of pies consumed annually. Similarly, in Britain, various savory and sweet pies represent a rich culinary heritage spanning centuries. From shepherd’s pie to steak and kidney pie, these dishes are deeply ingrained in British cuisine and cultural identity. In other parts of the world, pie-like dishes using different fillings and crust variations are equally cherished, demonstrating the global appeal and adaptability of this versatile pastry.
Today, the pursuit of the perfect pie crust remains a challenge and a source of culinary pride for home bakers and professional chefs alike. The seemingly simple ratio of ingredients allows for endless experimentation and variations. The key to achieving the coveted flaky texture lies in the careful handling of the fat, ensuring it remains cold and incorporated into the flour in a manner that promotes layering and separation during baking. This recipe aims to guide you through the process, offering tips and techniques to help you achieve a buttery, flaky crust that will elevate your pies to the next level of deliciousness. Let’s embark on this culinary journey together!
Ingredients and Measurements
Creating a flawlessly flaky and buttery pie crust hinges on precise measurements and the quality of your ingredients. Don’t skimp on the good stuff! We’ll be using a combination of all-purpose flour and pastry flour for the perfect texture. Pastry flour, with its lower protein content, contributes to a more tender crust, while all-purpose flour provides structure. The ratio is crucial; feel free to adjust slightly based on your preferred flour, but maintain the overall proportion.
Flour: We’ll use a blend of 2 ½ cups (300g) all-purpose flour and ½ cup (60g) pastry flour. Using a kitchen scale is highly recommended for accuracy. Measuring flour by volume can lead to inconsistencies, resulting in a tough or dry crust. Spooning the flour into your measuring cup, rather than scooping directly from the bag, ensures a more accurate volume. Lightly spoon the flour into the cup and level it off with a straight edge. This is especially important for the pastry flour, where even minor variations can significantly affect the outcome.
Fat: The fat is where the magic happens! We’ll use 1 cup (2 sticks, 227g) of unsalted butter, chilled and cut into ½-inch cubes. Using cold butter is paramount. The cold butter creates steam during baking, which leads to those desirable flaky layers. If your butter is too warm, it will incorporate too readily into the flour, preventing the formation of those crucial layers. Ensure your butter is truly cold, even slightly firm, before you begin. You can even chill the butter cubes for a few minutes in the freezer before incorporating them.
Salt: A teaspoon (5g) of fine sea salt enhances the buttery flavor and balances the sweetness of the filling. Don’t underestimate the power of salt in baking; it’s a crucial element for flavor development. Avoid using iodized salt, as the iodine can affect the color and flavor of the crust.
Ice Water: Approximately ¼ cup (60ml) of ice water will be needed to bring the dough together. Add the ice water gradually, a tablespoon at a time, while mixing the dough. The amount of water may vary depending on the humidity and the type of flour used. The dough should come together without being overly wet or sticky. It should be slightly shaggy and hold its shape when pressed gently. If it seems too dry, add a tablespoon of ice water at a time until the desired consistency is achieved. If it’s too wet, add a tablespoon of flour at a time.
Optional additions: For an even richer flavor, consider adding 1 tablespoon (15g) of granulated sugar to the flour mixture. This can also help with browning. Some recipes also call for a tablespoon of apple cider vinegar, which helps tenderize the gluten and contributes to a more delicate crust. Experiment and find your preferred variations to perfect your pie crust recipe.
Remember: Precise measurements are key to a successful pie crust. Weighing your ingredients is the most accurate method, but careful volume measurements, using the techniques described above, will also yield excellent results. Enjoy the process and the delicious reward of a perfectly flaky and buttery pie crust!
Instructions for the Dough
Making a truly flaky and buttery pie crust requires attention to detail and a gentle hand. This section will guide you through the process, ensuring you achieve the perfect foundation for your delicious pie.
Begin by ensuring your ingredients are very cold. This is crucial for achieving a tender, flaky crust. Chill your butter in the freezer for at least 30 minutes before starting. Likewise, use ice water – this prevents the gluten from developing too much, resulting in a tougher crust. Your flour should also be kept in a cool place.
In a large bowl, whisk together 2 ½ cups of all-purpose flour and 1 teaspoon of salt. Using a pastry blender or your fingertips, cut in 1 cup (2 sticks) of very cold, cubed butter. Work quickly and efficiently, aiming for a mixture that resembles coarse crumbs with some pea-sized pieces of butter remaining. Don’t overwork the dough at this stage; overmixing leads to tough, dense pastry.
Gradually add 6-8 tablespoons of ice water, one tablespoon at a time, mixing lightly with a fork after each addition. The dough should come together just enough to form a ball. Do not knead the dough. If it seems too dry, add another tablespoon of ice water; if it seems too wet, add a tablespoon of flour. The goal is a slightly shaggy dough that holds its shape.
Once the dough is formed, gently shape it into a disk. Wrap the disk tightly in plastic wrap, and flatten it slightly. This helps to prevent air pockets from forming. Refrigerate the dough for at least 30 minutes, or preferably for up to 2 hours. This chilling period allows the gluten to relax and the flavors to meld, resulting in a more tender and flavorful crust.
After chilling, turn the dough out onto a lightly floured surface. Gently roll out the dough, starting from the center and working outwards, using even pressure to prevent tearing. Rotate the dough frequently to ensure even thickness. Aim for a circle about ⅛ inch thick. Avoid excessive rolling, as this can also toughen the dough.
Carefully transfer the rolled-out dough to your pie plate. Gently press it into the bottom and up the sides of the plate, trimming any excess dough. Crimp the edges decoratively. You can either prick the bottom of the crust with a fork to prevent bubbling or partially bake it before adding the filling to prevent a soggy bottom.
Remember, patience and a light touch are key to making a perfect pie crust. Don’t rush the process, and enjoy the satisfaction of creating a beautiful, flaky, and buttery masterpiece!
Chilling the Dough (Importance of Resting)
Chilling your pie dough is not just a suggestion; it’s a crucial step that significantly impacts the final texture and quality of your pie crust. Many novice bakers skip or shorten this process, resulting in a tough, crumbly, or even soggy crust. Understanding why chilling is so important will help you achieve that coveted flaky, buttery masterpiece.
The primary reason for chilling the dough is to firm the fat. Your pie crust relies on the fat (typically butter or shortening, or a combination) to create those delicate layers that result in flakiness. When the fat is cold, it remains solid. During baking, this cold fat melts slowly, creating steam that separates the layers of dough, resulting in a perfectly flaky crust. If the fat is too warm or soft, it will melt too quickly, leaving you with a dense, tough crust lacking that desirable airy texture.
There are two chilling stages to this process: the initial chill and the final chill. The initial chill, after you’ve mixed the dough, typically lasts for at least 30 minutes, but ideally 1-2 hours. This allows the gluten to relax. Gluten is a protein in flour that creates elasticity. Over-mixing can develop too much gluten, making your dough tough. The initial chill gives the gluten time to rest, resulting in a more tender crust. Wrap your dough tightly in plastic wrap, pressing it into a flat disc about 1-inch thick. This helps ensure even chilling.
After the initial chill, you’ll likely be rolling out your dough. Once you’ve shaped your dough into your pie plate, the final chilling step is equally important. This is especially crucial if you’re making a double-crust pie. Before adding your filling, chill the unbaked pie crust for at least 30 minutes in the refrigerator. This prevents the crust from shrinking during baking. A cold crust will hold its shape better, resulting in a beautifully even edge and a more consistent thickness. For a double crust pie, chill the top crust separately before placing it on the pie.
How long is too long? While an extended chill is generally beneficial, chilling the dough for more than 24 hours can sometimes make it too hard to roll out. If you find your dough is exceptionally firm after the initial chill, let it sit at room temperature for 10-15 minutes before rolling. You should be able to easily work with the dough; it should not be overly crumbly or difficult to handle. If it is, add a teaspoon or two of ice water as needed.
Professional Tip: For the most flawlessly flaky crust, consider chilling your dough overnight. This extended chilling time allows for maximum gluten relaxation and ensures the fat remains perfectly cold during baking, leading to exceptional flakiness. Remember to always use cold ingredients (butter, water, and flour) from the start to maximize the chilling effect.
By following these chilling guidelines, you’ll significantly improve your chances of creating a truly exceptional, flaky, and buttery pie crust that will impress even the most discerning pie connoisseurs.
Rolling out the Dough (Techniques for even thickness)
Achieving a consistently even thickness in your pie crust is crucial for even baking and a flaky, tender result. Uneven thickness leads to some parts burning while others remain undercooked. This section will guide you through the techniques to ensure your pie crust is perfectly rolled.
Start with the right surface: Lightly flour a clean, flat work surface. Avoid using too much flour, as this can dry out the dough. A silicone mat is also an excellent option, as it provides a non-stick surface and prevents sticking without excessive flour. A lightly floured marble or granite countertop works beautifully as well.
Proper Dough Handling: Gently place your chilled disc of dough onto the prepared surface. Avoid aggressively kneading or pushing the dough, which can create tough gluten strands. Instead, use a light touch.
The Rolling Pin Technique: Use a well-constructed rolling pin, preferably one with bearings for smooth rolling. Begin rolling from the center of the dough, working your way outwards in all directions. Roll with light, even pressure, lifting and rotating the dough frequently to prevent sticking. Avoid pushing the dough around too much; aim for a gentle, even rolling motion.
Achieving Even Thickness: Aim for a thickness of approximately ⅛ inch (3mm) for a standard double crust pie. You can use a ruler or a rolling pin with thickness guides to check for consistency. Don’t worry about perfect circles; a slightly irregular shape is acceptable as long as the thickness is even. If the dough becomes difficult to roll, let it rest for a few minutes in the refrigerator to relax the gluten before continuing.
Dealing with sticking: If the dough starts to stick, gently lift and flip it over, adding minimal flour only to the sticky side. Avoid excessive flour, as this can create a tough crust. A pastry scraper or bench scraper is invaluable for this, helping you to lift the dough and reflour as needed.
Troubleshooting: If you find one area of the dough rolling thinner than others, simply fold that area over itself and gently roll again to even out the thickness. Patience is key! Don’t rush the rolling process; take your time and work methodically.
Transferring the Dough: Once rolled, carefully roll the dough around your rolling pin. This makes it easier to transfer to your pie plate. Gently unroll the dough into the plate, ensuring it covers the bottom and sides evenly. Trim any excess dough. You can use a sharp knife or pizza cutter for clean cuts.
By following these techniques, you’ll ensure your pie crust is evenly rolled, leading to a beautifully baked pie with a perfectly flaky and tender crust. Remember, practice makes perfect! Don’t be discouraged if your first attempt isn’t flawless. With a little patience and attention to detail, you’ll soon master the art of rolling out pie dough.
Blind Baking (if applicable, explanation of process)
Blind baking is a crucial step for many pie recipes, especially those with fillings that don’t require a lot of baking time, like custards, fruit fillings, or cheesecakes. It involves pre-baking the pie crust before adding the filling, preventing a soggy bottom and ensuring a beautifully crisp crust. This is particularly important when dealing with wet or delicate fillings.
Blind baking is essential when your filling doesn’t require high heat or long baking times. If you bake a pie crust with a wet filling at a high temperature for a long period, the crust will likely become soggy before the filling is cooked through. Blind baking solves this problem by pre-baking the crust, creating a sturdy base that can withstand the moisture from the filling.
The process involves several key steps:
1. Prepare the Crust: Once you’ve rolled out your pie crust to your desired thickness (approximately 1/8 inch), carefully transfer it to your pie plate. Gently press the dough into the bottom and up the sides of the plate, ensuring there are no air pockets. Trim any excess dough overhanging the edge of the plate. Use a fork to prick the bottom of the crust all over. This prevents air bubbles from forming and helps to ensure even baking and prevent bulging.
2. Weight the Crust: This is the critical step in preventing the crust from puffing up during baking. There are several methods to weigh the crust down. You can use pie weights, which are readily available at baking supply stores. Alternatively, you can use dried beans, rice, or even sugar. Spread the chosen weight evenly across the entire surface of the crust. Aim for a layer approximately 1/2 inch thick.
3. Blind Bake: Place the weighted pie crust on a baking sheet (this catches any spills) and bake in a preheated oven at 375°F (190°C) for 15-20 minutes. The exact baking time will depend on your oven and the thickness of your crust. The crust should be lightly golden brown around the edges. If using parchment paper under the weights, remove the weights and parchment paper after the first 15 minutes and continue baking for another 5 minutes to lightly brown the bottom of the crust.
4. Cool Completely: Once blind baked, remove the pie crust from the oven and carefully remove the weights. Allow the crust to cool completely on a wire rack before adding your filling. This prevents the filling from causing the crust to become soggy. Cooling the crust also allows it to firm up, making it easier to handle when adding the filling.
Professional Recommendations:
Using parchment paper: Lining the crust with parchment paper before adding the weights is highly recommended. This prevents the weights from sticking to the dough and makes cleanup easier. Simply cut a circle of parchment paper slightly larger than the pie plate and place it over the crust before adding the weights.
Don’t overbake: Overbaking will result in a dry, brittle crust. Keep a close eye on your pie crust during the blind baking process and remove it from the oven as soon as it is lightly golden brown.
Proper cooling: Allowing the crust to cool completely is crucial for preventing a soggy bottom. Be patient and let the crust cool thoroughly before adding the filling.
Filling Preparation (if applicable, linked to pie type)
The success of your pie hinges not only on a perfect crust, but also on a delicious and properly prepared filling. The following instructions offer guidance for several common pie fillings, but remember to always adjust sweetness and spice levels to your personal preference.
For Apple Pie: Begin by peeling, coring, and thinly slicing about 6-8 medium apples (approximately 3 pounds). Granny Smith, Honeycrisp, and Braeburn are excellent choices for their balance of tartness and sweetness. Toss the apples with 1/2 cup granulated sugar, 1/4 cup packed light brown sugar, 2 tablespoons all-purpose flour (to help thicken the filling), 1 teaspoon ground cinnamon, 1/2 teaspoon ground nutmeg, and a pinch of salt. Gentle handling is key to prevent the apples from becoming mushy. Let the mixture sit for at least 15 minutes to allow the sugars to draw out some of the apple’s moisture. This will help prevent a soggy bottom crust.
For Cherry Pie: Use about 4 cups (2 14.5-ounce cans) of pitted, sweet cherries. Drain the cherries well, reserving about 1/4 cup of the juice. Combine the cherries with 1/2 cup granulated sugar, 1/4 cup cornstarch, 1 tablespoon lemon juice, and 1/4 teaspoon almond extract. The cornstarch is crucial for thickening the cherry filling. Gently stir the mixture to combine. If you prefer a less sweet pie, reduce the sugar amount. Add the reserved cherry juice gradually, if needed, to achieve your desired consistency.
For Pumpkin Pie: This requires a smooth and creamy filling. In a large bowl, whisk together 1 (15-ounce) can of pumpkin puree, 1 (12-ounce) can of evaporated milk, 2 large eggs, 1 cup granulated sugar, 1 teaspoon ground cinnamon, 1/2 teaspoon ground ginger, 1/4 teaspoon ground cloves, and 1/4 teaspoon ground nutmeg. Ensure all ingredients are thoroughly combined to prevent lumps. Whisk vigorously for at least one minute to incorporate air and create a light and fluffy texture. Strain the mixture through a fine-mesh sieve for an exceptionally smooth filling (optional but recommended).
For Blueberry Pie: Fresh or frozen blueberries work well. If using frozen, thaw them completely and drain excess moisture before using. Combine 4 cups blueberries with 3/4 cup granulated sugar, 1/4 cup cornstarch, 1 tablespoon lemon juice, and 1 teaspoon lemon zest. Don’t overmix; a few gently folds are sufficient. The lemon juice and zest will brighten the flavor of the blueberries and prevent them from becoming too bland.
General Recommendations: Regardless of the pie type, always taste your filling before adding it to the crust. Adjust sweetness and spices as needed. For a richer flavor, consider adding a tablespoon or two of butter or cream to your filling. Remember that fillings will thicken further as they bake. Overfilling your pie crust can lead to spills and a soggy crust, so err on the side of caution.
Recommendations for Your Flaky and Buttery Pie Crust
This flaky and buttery pie crust recipe is incredibly versatile and can be used for a wide variety of sweet and savory pies. To ensure optimal results and enjoyment, please follow these recommendations:
Serving Suggestions: The possibilities are endless! For sweet pies, consider serving your creations with a scoop of vanilla ice cream, a dollop of whipped cream, or a dusting of powdered sugar. A drizzle of caramel or chocolate sauce can also elevate the experience. For savory pies, a simple side salad with a light vinaigrette complements the richness of the crust beautifully. A side of roasted vegetables or a hearty soup also pairs well. Consider the filling when choosing your accompaniments – a quiche might benefit from a side of crusty bread, while a chicken pot pie is perfect with a simple green salad.
Storage Conditions: For best results, store your unbaked pie crust in the refrigerator for up to two days, tightly wrapped in plastic wrap. Ensure the plastic wrap is pressed firmly against the dough to prevent air exposure and drying. Baked pies, on the other hand, should be stored in an airtight container at room temperature for up to two days, or in the refrigerator for up to four days. For longer storage, consider freezing your unbaked pie crust (wrapped tightly) for up to three months, or your baked pie (covered well) for up to two months. Remember to thaw completely before reheating.
Complementary Dishes: The versatility of this pie crust extends beyond the pie itself. Consider using leftover scraps to create delicious treats such as palmiers, or small savory tarts. The crust’s buttery flavor pairs well with both sweet and savory dishes. If you are making a fruit pie, a complementary dish could be a simple fruit compote or a light sorbet. For a savory pie, consider serving it with a side of roasted vegetables, a fresh salad, or a creamy soup. The options are truly limitless, allowing you to customize your meal to perfectly complement your pie.
Nutritional Information (per 100g of unbaked crust, approximate values): Please note that these values will vary slightly depending on the specific ingredients used. Calories: Approximately 450-500, Fat: Approximately 25-30g, Saturated Fat: Approximately 15-20g, Carbohydrates: Approximately 50-60g, Sugar: Approximately 2-5g, Protein: Approximately 5-7g. This information is an estimate and should not be considered a substitute for professional nutritional advice.
Important Note: Always handle the dough gently to prevent toughening. Ensure your butter is cold for a truly flaky crust. Don’t overwork the dough, as this can lead to a tough texture. Following these simple guidelines will help you create a perfect, melt-in-your-mouth pie crust every time!