Prepare to embark on a culinary journey to Vietnam with our recipe for Easy Vietnamese Pho! This iconic noodle soup, a cornerstone of Vietnamese cuisine, boasts a history as rich and flavorful as its broth. Pho (pronounced fuh ), far from being a simple dish, holds a significant place in Vietnamese culture, representing family, tradition, and national identity. Its origins are debated, with some tracing it back to northern Vietnam in the early 20th century, possibly influenced by French colonial influences and existing Chinese noodle soup traditions. However, its evolution and widespread popularity are undeniably a testament to Vietnamese ingenuity and culinary adaptation.
The exact origins remain shrouded in some mystery, but what is clear is the dish’s phenomenal growth. Today, Pho is arguably Vietnam’s most famous export, enjoying global recognition and a dedicated following worldwide. Millions of bowls are consumed daily across Vietnam alone, and its popularity has exploded internationally, with Pho restaurants thriving in major cities across the globe. This widespread appeal is a testament to its delicious simplicity and the comforting warmth it provides. While exact statistics on global Pho consumption are difficult to obtain, the sheer number of restaurants and the ubiquity of the dish in Vietnamese communities worldwide paint a picture of its immense popularity.
Beyond its deliciousness, Pho embodies a crucial aspect of Vietnamese culture: family and communal dining. Often prepared in large quantities for family gatherings and celebrations, sharing a bowl of Pho transcends the simple act of eating; it’s a shared experience that fosters connection and strengthens bonds. The preparation itself can be a family affair, with different generations contributing to the process, passing down recipes and techniques. This intergenerational sharing of knowledge and culinary heritage underscores the dish’s cultural significance. Moreover, Pho is incredibly versatile; regional variations abound, with differences in broth preparation, noodle types, and included herbs showcasing the diversity within Vietnamese culinary traditions.
Our Easy Vietnamese Pho recipe aims to provide an accessible entry point to this beloved dish, simplifying the process while preserving the authentic flavors that make it so iconic. While authentic Pho requires time and patience for the broth to properly simmer, this recipe offers a faster, more streamlined approach without compromising on taste. Get ready to experience the magic of Pho – a culinary masterpiece that’s both deeply rooted in history and wonderfully adaptable to modern kitchens.
Ingredients and Measurements
This recipe yields approximately 6-8 servings of delicious and aromatic Easy Vietnamese Pho. Accurate measurements are crucial for achieving the perfect balance of flavors. We’ll be using both weight and volume measurements where applicable, to cater to different kitchen preferences. Remember to adjust quantities based on your needs.
For the Broth:
- 2 lbs (approximately 900g) beef bones (oxtail, shanks, or a combination are ideal). Choose bones with marrow for richer flavor. If using only one type of bone, increase the quantity slightly.
- 1 large onion, roughly chopped. Roasting the onion before adding it to the broth will enhance its sweetness.
- 3 inches (7.5cm) piece of ginger, lightly smashed. Don’t peel the ginger; the skin adds flavor and color.
- 6 cloves garlic, lightly smashed. This helps release the garlic’s aroma more effectively.
- 2 star anise. Star anise is essential for authentic Pho flavor, don’t skip it!
- 4-5 cardamom pods, lightly crushed. These add warmth and complexity to the broth.
- 2 cinnamon sticks (about 3 inches/7.5cm total). Use good quality cinnamon for the best taste.
- 1 teaspoon black peppercorns. Freshly cracked peppercorns are preferred for a more vibrant flavor.
- 1 tablespoon fish sauce (adjust to taste). Start with a smaller amount and add more if needed, as fish sauce can be quite strong.
- 2 tablespoons brown sugar (adjust to taste). This balances the saltiness of the fish sauce.
- 12 cups (approximately 2.8 liters) water. Use filtered water for the best results. You may need to add more water during the simmering process.
For the Noodles and Toppings:
- 1 lb (approximately 450g) dried rice noodles (banh pho). Choose wide rice noodles specifically designed for Pho. Follow package instructions for cooking time.
- 1 lb (approximately 450g) thinly sliced beef (ribeye, sirloin, or flank steak are excellent choices). Ensure the beef is very thinly sliced for quick cooking.
- 1/2 cup fresh cilantro, chopped. Cilantro is a key element in the fresh and vibrant taste of Pho.
- 1/2 cup fresh basil leaves. Basil adds a lovely aromatic touch.
- 1/4 cup bean sprouts. Bean sprouts add a nice crunch to the dish.
- Lime wedges, for serving. Lime juice brightens up the flavors.
- Sriracha or other chili sauce, for serving (optional). This is for those who like a bit of heat.
- Hoisin sauce, for serving (optional). Adds a savory sweetness.
Note: These are approximate measurements. Feel free to adjust the ingredients according to your personal preferences and taste. Always taste and adjust seasoning as you go. Enjoy your homemade Pho!
Equipment List for Easy Vietnamese Pho
Making delicious Pho at home doesn’t require a professional kitchen, but having the right equipment will significantly enhance your experience and the quality of your final product. This list details the essential tools, with recommendations for optimal choices and alternatives where applicable.
Large Stockpot (8-12 quarts): This is arguably the most crucial piece of equipment. You’ll need ample space to simmer your broth for hours, allowing the flavors to meld beautifully. An 8-quart pot is sufficient for a smaller batch, while a 12-quart pot is ideal for larger quantities or if you prefer to have leftovers. Look for a heavy-bottomed pot made of stainless steel or enameled cast iron for even heat distribution and to prevent scorching. Avoid thin-walled pots, as they are prone to uneven heating and burning.
Large Skimmer/Ladle: You’ll need a large skimmer or ladle to remove impurities from the broth during the simmering process. A skimmer with a fine mesh is best for catching small particles. A 12-16 inch skimmer will be comfortably sized for an 8-12 quart pot. A ladle is useful for serving the finished Pho.
Fine-Mesh Sieve or Cheesecloth: After simmering, you’ll need to strain the broth to remove any remaining solids and achieve a perfectly clear and flavorful soup. A fine-mesh sieve is more efficient, but several layers of cheesecloth work well too. Ensure your sieve or cheesecloth is large enough to comfortably accommodate the contents of your stockpot.
Cutting Board & Sharp Knives: Properly prepping your ingredients is key. A large cutting board (at least 12×16 inches) will give you plenty of space to work. Invest in a good chef’s knife (8-10 inches) for efficient chopping of vegetables and herbs. A smaller paring knife will be helpful for more delicate tasks. Keep your knives sharp for clean cuts and safety.
Measuring Cups & Spoons: Accurate measurements are important for achieving consistent flavour. A set of standard measuring cups and spoons is essential. Consider a kitchen scale for more precise measurements, especially for spices and aromatics.
Large Bowls: You’ll need several large bowls for preparing ingredients, holding cooked noodles, and serving the Pho. At least three large mixing bowls (6-8 quart capacity) are recommended.
Slotted Spoon: A slotted spoon is vital for easily retrieving the cooked noodles from boiling water without losing any of the cooking liquid. A larger slotted spoon (8-10 inches) is preferable for handling a larger quantity of noodles.
Serving Bowls: Choose deep, wide bowls to comfortably serve your Pho. The size will depend on your serving preferences, but 12-16 ounce bowls are a good starting point.
Optional but Recommended: A thermometer for accurate temperature control of the broth, a mortar and pestle for grinding spices (for a more authentic flavour profile), and chopsticks for eating.
Cleaning Supplies: Don’t forget appropriate cleaning supplies to easily clean your equipment after cooking. Having the right tools will save you time and effort.
Preparation of Broth
The broth is the heart and soul of Pho, and creating a truly delicious one takes time and attention to detail. This recipe focuses on achieving a rich, balanced flavor profile without resorting to shortcuts. We’ll be using a combination of beef bones, aromatics, and spices to build a complex and deeply satisfying broth.
Ingredients:
- 3 lbs beef bones (a mix of marrow bones, knuckle bones, and oxtail is ideal)
- 1 large onion, charred
- 2 inches ginger, smashed
- 4 cloves garlic, smashed
- 2 star anise
- 4 cinnamon sticks (about 2 inches each)
- 1 teaspoon whole black peppercorns
- 1 teaspoon coriander seeds
- 1/2 teaspoon fennel seeds
- 1 (2-inch) piece rock sugar or brown sugar (adjust to your sweetness preference)
- 12 cups water (or more, as needed)
- 2 tablespoons fish sauce (optional, for umami depth)
- 1 tablespoon salt (or to taste)
Instructions:
1. Preparing the Bones: Rinse the beef bones thoroughly under cold water to remove any impurities. This step is crucial for a clear broth. If using marrow bones, you can crack them lightly to help release the marrow.
2. Charring the Onion: Place the whole onion directly over a gas flame or under a broiler until the skin is blackened and slightly charred. This adds a depth of flavor that can’t be replicated otherwise. Alternatively, you can roast the onion in a preheated oven at 400°F (200°C) for about 30 minutes, turning occasionally, until charred.
3. Building the Broth: In a large stockpot or Dutch oven, combine the bones, charred onion, ginger, garlic, star anise, cinnamon sticks, peppercorns, coriander seeds, fennel seeds, and rock sugar. Add the water, ensuring the bones are fully submerged. If necessary, add more water to cover the bones completely.
4. Simmering: Bring the mixture to a rolling boil over high heat. Once boiling, reduce the heat to the lowest setting, partially cover the pot, and let it simmer gently for at least 6 hours, or preferably 8-10 hours. The longer it simmers, the richer and more flavorful the broth will become. Skim off any foam or impurities that rise to the surface during the simmering process. Regular skimming is essential for a clear broth.
5. Seasoning and Finishing: After simmering, remove the pot from the heat and let the broth cool slightly. Strain the broth through a fine-mesh sieve or cheesecloth lined colander into a clean container, discarding the solids. Stir in the fish sauce (if using) and salt, adjusting the seasoning to your taste. Taste and adjust seasoning carefully – it’s better to add more later than to over-salt. Once seasoned, you can refrigerate the broth overnight to allow the fat to solidify, making it easier to remove before using.
Professional Recommendation: For an even richer flavor, consider adding a few tablespoons of dark soy sauce to the broth during the last hour of simmering. However, be mindful that this will darken the broth’s color.
Preparation of Meat and Toppings
The success of your Pho hinges not just on the broth, but also on the quality and preparation of your meat and toppings. This section details how to prepare delicious and visually appealing components to complement your flavorful broth.
For the Beef: We’ll focus on thinly sliced ribeye and beef balls for this recipe. Ribeye is ideal for its marbling and tenderness. For 4 servings, you’ll need approximately 8 ounces (225g) of ribeye steak. Ask your butcher to slice it paper-thin against the grain. This ensures a melt-in-your-mouth texture when added to the hot broth. If you can’t get it sliced thinly, freeze the steak for 30 minutes before slicing to make it easier to thinly slice. Beef balls (Bò viên) add a delightful textural contrast. You can either make them from scratch (many recipes are readily available online) or purchase pre-made ones from an Asian grocery store. For 4 servings, approximately 8-10 beef balls should suffice.
Preparing the Beef: Once your ribeye is thinly sliced, gently rinse it under cold water and pat it dry with a paper towel. This removes any excess blood and helps prevent the beef from becoming tough when cooked. For the beef balls, simply rinse them under cold water before adding them to the simmering broth. Do not overcook the beef; it should be gently warmed through in the hot broth, not boiled. Overcooked beef will be tough and chewy.
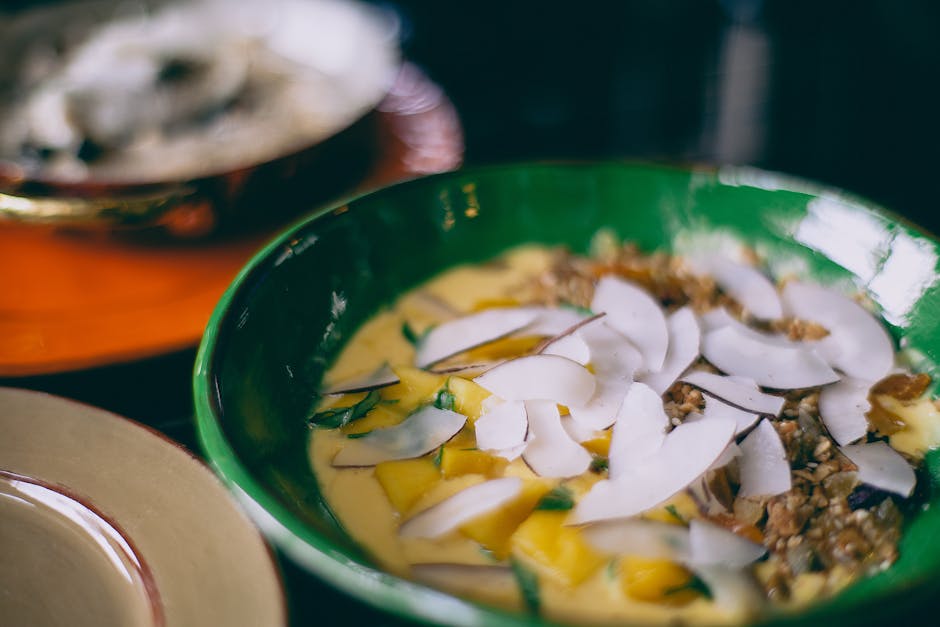
Toppings: The array of toppings is what truly elevates Pho. Freshness is key here. For 4 servings, you’ll need the following:
- Fresh Basil Leaves (Rau Húng Quế): 1 small bunch, roughly chopped. Choose leaves that are vibrant green and fragrant.
- Bean Sprouts (Giá Đỗ): 1 cup, rinsed thoroughly. Ensure the sprouts are crisp and free of any wilted or discolored pieces.
- Cilantro (Ngò Gai): ½ cup, chopped. Similar to basil, choose bright green, fresh cilantro.
- Lime Wedges: 1 lime, cut into 8 wedges. The acidity of the lime is crucial for balancing the richness of the broth.
- Thai Basil (Rau Ngò Om): (Optional) ½ cup, chopped. Thai basil offers a slightly different, more peppery flavour profile.
- Jalapeño Slices: (Optional) 1 jalapeño, thinly sliced. Use sparingly, as the heat can be intense. Remove seeds for less heat.
- Sriracha or other chili sauce: A small bowl for those who prefer extra spice.
Preparing the Toppings: Wash all the herbs thoroughly under cold running water. Gently pat them dry with paper towels to remove excess moisture. This helps prevent the herbs from wilting in the broth. Arrange the toppings attractively in small bowls for easy access when serving. Consider the visual appeal of your topping arrangement – it’s a significant part of the Pho experience.
Important Note: Prepare all your meats and toppings just before serving to maintain freshness and optimal flavor. The herbs and bean sprouts should be added to the bowl just before eating to prevent them from becoming soggy.
Cooking the Broth
The broth is the heart and soul of Pho, and creating a truly delicious one requires time and attention to detail. This recipe focuses on a balanced, flavorful broth without relying on excessive shortcuts. We’ll be using a combination of beef bones, aromatics, and spices to achieve a rich and complex taste.
Begin by gathering your ingredients: 2 lbs beef bones (a mix of marrow bones and knuckle bones is ideal), 1 large onion, quartered, 2-inch piece of ginger, smashed, 4 cloves garlic, smashed, 2 star anise, 4 cinnamon sticks (about 2 inches each), 1 tbsp black peppercorns, 1 tsp coriander seeds, 1/2 tsp fennel seeds, 1/2 tsp turmeric powder, and 8 cups of water. Using a combination of bones provides a deeper, more nuanced flavor. Marrow bones contribute richness, while knuckle bones offer a more gelatinous texture.
In a large stockpot or Dutch oven, combine the beef bones, quartered onion, smashed ginger, smashed garlic, star anise, cinnamon sticks, peppercorns, coriander seeds, fennel seeds, and turmeric powder. Add the 8 cups of water, ensuring the bones are fully submerged. If necessary, add more water to cover the bones completely.
Bring the mixture to a rolling boil over high heat. Once boiling, immediately reduce the heat to a low simmer. This is crucial to prevent the broth from becoming cloudy and to allow the flavors to develop gently. Skim off any foam or impurities that rise to the surface during the initial boil. This step helps to clarify the broth and improve its overall appearance and taste.
Now, the simmering begins. This process should ideally last for at least 4 hours, but 6-8 hours will yield an even richer and more flavorful broth. The longer you simmer, the more intense the flavor will become. Maintain a gentle simmer throughout the cooking process. Do not let the broth boil vigorously, as this can make it cloudy and bitter.
After the simmering is complete, carefully remove the bones and aromatics from the broth using a slotted spoon or strainer. Discard the solids. You can use tongs to handle the hot bones carefully. At this point, you can strain the broth through a fine-mesh sieve lined with cheesecloth for an exceptionally clear broth, though this step is optional.
Taste the broth and adjust the seasoning as needed. You might want to add a pinch more salt or pepper to enhance the flavor profile. Remember, you can always add more seasoning, but you can’t take it away. Once you’re satisfied with the flavor, your delicious Pho broth is ready to be used in your Pho recipe. Let it cool slightly before moving on to the next steps.
Pro Tip: For an even deeper flavor, consider roasting the bones in the oven at 400°F (200°C) for 30 minutes before adding them to the pot. This will caramelize the surface of the bones, adding a lovely depth of flavor to your broth.
Noodle Preparation
Choosing the right noodles is crucial for authentic Pho. While various noodles can be used, flat rice noodles (bánh phở) are traditional and essential for the best experience. These noodles are typically sold dried and require proper preparation to achieve the perfect texture – soft yet chewy, not mushy or brittle.
For this recipe, we’ll be using approximately 8 ounces (225 grams) of dried flat rice noodles. This quantity is sufficient for 2-4 servings, depending on appetite. Always check the package instructions for specific cooking times, as they can vary slightly between brands. However, the following steps provide a reliable guide for achieving perfectly cooked noodles.
Before you start cooking the noodles, ensure you have a large pot of boiling water ready. Using a large pot is important to prevent the noodles from sticking together. The water should be vigorously boiling before adding the noodles. This ensures even cooking and prevents a gummy texture. Add enough water to comfortably submerge the noodles with at least an inch of water above.
Gently add the dried noodles to the boiling water, stirring gently to separate them immediately. Avoid adding the noodles all at once, as this can cause clumping. Do not break the noodles before adding them to the boiling water; they will soften and become pliable during the cooking process. If the noodles are clumping together, gently use chopsticks or a large spoon to separate them.
Cook the noodles according to package directions, generally ranging from 5-8 minutes. Overcooking will result in mushy noodles, while undercooking will leave them hard and crunchy. Start checking for doneness around the minimum time suggested on the package. To test for doneness, remove a small noodle strand and taste it; it should be tender but still slightly firm to the bite.
Once the noodles are cooked, immediately drain them in a colander. Rinse the noodles under cold running water for about 30 seconds. This rinsing step is crucial for stopping the cooking process and preventing the noodles from sticking together. It also helps to remove excess starch, resulting in a smoother texture.
After rinsing, gently toss the noodles with a small amount of oil (about 1 teaspoon of neutral-flavored oil like vegetable or canola oil) to prevent them from sticking. This is particularly important if you are not serving the Pho immediately. The oil helps to coat the noodles, keeping them separated and preventing them from drying out.
Once the noodles are prepared, set them aside until you are ready to assemble your Pho bowls. Adding the noodles to the hot broth just before serving ensures they retain their ideal texture and temperature. Do not add the noodles to the broth too early, or they may become overly soft and lose their pleasing chewiness.
By following these steps carefully, you’ll achieve perfectly cooked rice noodles that complement the rich flavors of your homemade Vietnamese Pho. Remember, practice makes perfect! With a few attempts, you’ll master the art of preparing these essential noodles.
Easy Vietnamese Pho: Recommendations
Serving Suggestions
For the best experience, serve your Easy Vietnamese Pho piping hot, directly from the stovetop or slow cooker. Garnish generously with fresh herbs like cilantro, Thai basil, and mint. A squeeze of lime juice brightens the flavors beautifully. Thinly sliced fresh jalapeños or a drizzle of sriracha add a welcome kick for those who prefer a spicier broth. Consider adding a sprinkle of toasted sesame seeds for added texture and nutty flavor. Serve with a side of bean sprouts, thinly sliced red onions, and fresh lime wedges, allowing each diner to customize their bowl to their liking. Don’t forget the essential accompaniments: hoisin sauce, fish sauce, and chili garlic sauce, offering a range of flavor profiles to enhance the pho experience.
Storage and Reheating
Leftover pho is best stored in an airtight container in the refrigerator for up to 3 days. The broth will thicken slightly as it cools, but this is perfectly normal. When reheating, gently warm the broth on the stovetop over low heat, avoiding a rolling boil. Do not microwave the pho, as this can negatively impact the texture and flavor. For the best results, reheat in a saucepan on the stovetop, adding a little water if needed to adjust the consistency. Avoid over-reheating, as this can also alter the taste.
Complementary Dishes
Easy Vietnamese Pho is a versatile dish that pairs wonderfully with a variety of side dishes. Fresh spring rolls (Gỏi cuốn) provide a refreshing counterpoint to the warm broth, offering a delightful textural contrast. Vietnamese-style grilled meats, such as lemongrass chicken or grilled pork chops (Thịt nướng), add a smoky and savory element to the meal. A simple side salad with a light vinaigrette can also complement the richness of the pho. Consider offering banh mi sandwiches alongside the pho for a complete Vietnamese-inspired meal. These flavorful sandwiches with their various fillings make a perfect accompaniment to the fragrant broth.
Nutritional Information (per serving – approximate values will vary based on ingredients used)
Calories: Approximately 350-450 calories (depending on the amount of noodles and meat used)
Protein: 25-35 grams (depending on the type and amount of protein used)
Fat: 10-15 grams (depending on the type and amount of meat used)
Carbohydrates: 40-50 grams (primarily from rice noodles)
Sodium: Varies significantly based on the type and amount of broth and added sauces. Reduce sodium by using low-sodium broth and limiting added sauces.
Note: These are estimated values and can vary based on the specific ingredients and quantities used in your recipe. For precise nutritional information, use a nutrition calculator and input your exact ingredients.