The humble cupcake, a miniature testament to the joy of baking, boasts a surprisingly rich and varied history. While pinpointing its exact origin is difficult, the name itself suggests a connection to individual portions: early versions were baked in small cups, rather than a larger cake, allowing for easier distribution and portion control. The earliest documented recipes resembling cupcakes date back to the 18th century, appearing in cookbooks alongside other simpler baked goods. These early iterations, often lacking the refined frostings and flavor complexities we associate with modern cupcakes, were typically made with basic ingredients readily available at the time. The rise in popularity of baking powders and chemical leaveners in the 19th century significantly altered cupcake production, leading to lighter and fluffier textures.
Vanilla, the star flavor in our Easy Vanilla Cupcakes, holds a similarly captivating history. The vanilla bean, derived from the Vanilla planifolia orchid, originates from Mexico, where it was originally cultivated by the Totonac people. The Spanish conquistadors introduced vanilla to Europe in the 16th century, but its high cost initially limited its use to royalty and the wealthy. It wasn’t until the early 20th century, with advancements in cultivation and processing techniques, that vanilla became more widely accessible, transforming it from a luxury into a staple enjoyed by many. Today, vanilla remains one of the most popular flavorings globally, with an estimated annual global market worth billions of dollars.
The cultural significance of cupcakes extends beyond simple indulgence. They are frequently featured in celebrations, from birthdays and anniversaries to graduations and holidays, making them a ubiquitous symbol of festivity and shared joy. Statistics show that cupcakes are a top choice for birthday cakes, especially among younger demographics. The ease of individual serving and customization, with various frostings and decorations, also contributes to their popularity. Moreover, cupcakes have become a canvas for creativity, with bakers showcasing intricate designs and flavor combinations, transforming a simple treat into an artistic expression. The rise of cupcake bakeries and the increasing presence of cupcakes in pop culture, from television shows to movies, further solidifies their place as a beloved dessert with enduring appeal. Indeed, the simple vanilla cupcake, the focus of this recipe, represents the fundamental essence of this timeless treat, a blank canvas for both experienced and novice bakers alike.
Ingredients and Measurements
This recipe for Easy Vanilla Cupcakes yields approximately 12 standard-sized cupcakes. Accuracy in measuring is key to achieving the perfect texture and rise. We’ll be using both weight and volume measurements, as weight is more precise, but volume is more accessible to home bakers. Always use a kitchen scale if possible for the most consistent results.
For the Cupcakes:
- All-Purpose Flour: 2 cups (250g): Use a light and fluffy all-purpose flour. Spoon the flour into your measuring cup and level it off with a straight edge. Do not scoop directly from the bag, as this will pack the flour and result in a denser cupcake.
- Granulated Sugar: 1 ¾ cups (350g): Granulated white sugar is essential for sweetness and structure. Again, use a measuring cup and level it off for accurate measurement. Avoid using powdered sugar, as it will alter the texture.
- Baking Powder: 2 ½ teaspoons (12g): This is your leavening agent. Ensure it’s fresh; old baking powder will not rise properly. Check the expiration date on your container.
- Baking Soda: ½ teaspoon (3g): Baking soda works in conjunction with baking powder to create a light and airy crumb. Measure this carefully, as too much can result in a metallic taste.
- Salt: ½ teaspoon (3g): Salt enhances the flavors of the other ingredients and balances the sweetness. Don’t skip this crucial ingredient!
- Unsalted Butter: 1 cup (2 sticks, 227g): Use unsalted butter so you can control the salt level in your cupcakes. Ensure the butter is softened to room temperature; this is crucial for proper creaming with the sugar. If it’s too cold, the mixture will be lumpy. If it’s melted, the cupcakes might be flat.
- Large Eggs: 4 large eggs (200g): Large eggs are essential for binding and adding richness. Bring them to room temperature for optimal emulsification with the butter and sugar.
- Vanilla Extract: 2 teaspoons (10ml): Pure vanilla extract will give your cupcakes the best flavor. Avoid using imitation vanilla, as it will have a less desirable taste.
- Milk: 1 cup (240ml): Whole milk is recommended for the richest flavor and texture, but you can substitute with other types of milk such as 2% or skim milk if needed. Use room temperature milk for consistent batter consistency.
For the Frosting (optional): This recipe can be easily adapted to your favorite frosting recipe. We recommend using a simple buttercream frosting.
Important Note: These measurements are approximate. Slight variations may occur depending on your specific ingredients and equipment. Always taste and adjust to your preference.
Equipment List
Baking delicious vanilla cupcakes requires the right tools. This list details the essential equipment, along with recommendations for optimal results and alternative options where applicable. Having everything prepared beforehand will streamline your baking process and ensure a smoother, more enjoyable experience.
Mixing Bowls: You’ll need at least two mixing bowls of different sizes. A large bowl (approximately 3-quart capacity) is crucial for creaming together the butter and sugar, and a medium bowl (approximately 2-quart capacity) is perfect for whisking together the dry ingredients. Stainless steel bowls are recommended as they are durable, easy to clean, and don’t react with the ingredients. Glass bowls are also a good alternative. Avoid using plastic bowls, especially for creamy mixtures, as they can retain odors and scratches.
Measuring Cups and Spoons: Accurate measurements are key to successful baking. Invest in a set of both dry and liquid measuring cups. Use separate measuring cups for dry and liquid ingredients to avoid inaccurate measurements. Dry ingredients should be scooped into the measuring cup and leveled off with a straight edge (a butter knife works well). Liquid ingredients should be measured at eye level in a clear measuring cup. A set of measuring spoons (1/4 teaspoon, 1/2 teaspoon, 1 teaspoon, 1 tablespoon) is also essential for precise additions of baking powder, vanilla extract, and other minor ingredients.
Electric Mixer: A hand mixer or stand mixer is highly recommended for this recipe. Creaming butter and sugar together requires significant effort, and an electric mixer makes this process quick and efficient. A stand mixer is ideal for larger batches, offering greater power and consistency. However, a hand mixer is perfectly suitable for smaller quantities. Ensure your mixer is in good working order and has clean beaters before starting.
Rubber Spatula or Scraper: A rubber spatula, also known as a silicone spatula, is essential for scraping down the sides of the bowl and ensuring all ingredients are incorporated properly. This prevents dry patches in the batter and ensures a consistent texture in your cupcakes. Choose a flexible spatula that can reach the bottom and corners of the bowl effectively.
Muffin Tin: A standard 12-cup muffin tin is perfect for this recipe. Ensure your muffin tin is clean and free of any residue from previous baking sessions. Using a non-stick muffin tin can make removing the cupcakes easier, but greasing and flouring a standard tin is equally effective. Silicone muffin tins are also a good option, offering easy release and even baking.
Muffin Liners (Optional but Recommended): While not strictly necessary, muffin liners make for easier removal and cleaner cupcakes. Paper liners prevent sticking and contribute to a neater presentation. Choose liners that are appropriately sized for your muffin tin.
Baking Sheet: A baking sheet is recommended to place the muffin tin on during baking. This provides a stable base and even heat distribution. A half-sheet pan works perfectly.
Cooling Rack: After baking, transfer the cupcakes to a wire cooling rack to allow them to cool completely before frosting. This prevents condensation and ensures the frosting sets properly. Allow the cupcakes to cool completely before frosting to prevent the frosting from melting.
Other Useful Items: A whisk for whisking dry ingredients, a spatula for frosting (optional, depending on your preferred method), and parchment paper (optional, for lining the muffin tin if you don’t use liners).
Preparation of Ingredients
Before you even begin mixing your batter, proper ingredient preparation is crucial for achieving light, fluffy, and evenly textured vanilla cupcakes. This section details the essential steps to ensure your baking success.
Let’s start with the flour. For our recipe, we’ll need 2 cups of all-purpose flour. Sifting the flour is highly recommended. This simple step removes any lumps and aerates the flour, preventing dense cupcakes. Use a fine-mesh sieve and gently sift the flour directly into a large mixing bowl. This ensures a consistent texture throughout your batter and helps prevent pockets of flour from forming.
Next, we address the eggs. Our recipe calls for 3 large eggs, at room temperature. This is not just a suggestion; it’s vital for proper emulsification. Room temperature eggs blend more easily with the other wet ingredients, creating a smoother batter that incorporates air more effectively. Cold eggs can lead to a denser, less evenly textured cupcake. To bring your eggs to room temperature, simply remove them from the refrigerator about 30-60 minutes before you begin baking. Alternatively, you can gently immerse them in a bowl of warm (not hot) water for a few minutes.
The butter is another crucial ingredient. We need 1 cup (2 sticks) of unsalted butter, softened. Softened butter means it’s pliable but not melted. You should be able to easily press your finger into it, leaving a slight indentation. If your butter is too hard, it won’t cream properly with the sugar, resulting in a less airy batter. To soften butter quickly, you can cut it into smaller pieces and let it sit at room temperature for about 30 minutes, or grate it using a box grater. Avoid using the microwave to soften butter, as this can lead to uneven melting.
For sweetness, we’ll use 1 ½ cups of granulated sugar. Measure this accurately using a kitchen scale for the most precise results. While a measuring cup works, slight variations in packing can affect the final outcome. Accurate measurements are key to consistent baking.
Finally, we have the wet ingredients: 1 cup of milk (whole milk is recommended), 2 teaspoons of pure vanilla extract, and 2 teaspoons of baking powder. Ensure your milk is at room temperature for optimal incorporation into the batter. Measure the baking powder carefully using a level measuring spoon; too much baking powder can lead to tough cupcakes, while too little will result in flat ones. The vanilla extract adds that delightful vanilla flavor; use pure vanilla for the best results.
Once all these ingredients are prepared according to these instructions, you’re ready to move on to the next stage of making your delicious vanilla cupcakes. Remember, proper preparation is half the battle! Careful attention to these details will significantly improve the quality and consistency of your final product.
Mixing the Batter (wet vs. dry ingredients, avoiding overmixing)
Creating a light and fluffy vanilla cupcake batter hinges on the correct mixing technique. We’ll be using the creaming method, which ensures optimal texture and rise. This method involves combining the wet ingredients separately from the dry ingredients before gently combining them.
First, let’s prepare our wet ingredients. For this recipe, we’ll need:
- 1/2 cup (1 stick) unsalted butter, softened to room temperature. This is crucial; cold butter won’t cream properly.
- 1 3/4 cups granulated sugar
- 2 large eggs
- 1 teaspoon vanilla extract
- 1/2 cup buttermilk (or 1/2 cup milk + 1/2 teaspoon white vinegar or lemon juice)
In a large bowl, cream together the softened butter and sugar using an electric mixer on medium speed. This means beating them until the mixture is light, fluffy, and pale yellow – a process that takes about 3-5 minutes. Don’t rush this step! Proper creaming incorporates air into the batter, leading to a tender crumb. You should see a noticeable increase in volume.
Next, add the eggs one at a time, beating well after each addition. Scrape down the sides of the bowl to ensure everything is incorporated evenly. Then, stir in the vanilla extract.
Now, let’s prepare the dry ingredients. For this recipe, we need:
- 2 cups all-purpose flour
- 2 teaspoons baking powder
- 1/2 teaspoon baking soda
- 1/4 teaspoon salt
In a separate bowl, whisk together the flour, baking powder, baking soda, and salt. Whisking ensures the leavening agents are evenly distributed, preventing pockets of uneven rising in your cupcakes. This dry ingredient mixture should be light and airy, free from any lumps.
Gradually add the dry ingredients to the wet ingredients, mixing on low speed until just combined. Do not overmix! Overmixing develops the gluten in the flour, resulting in tough, dense cupcakes. Mix only until no streaks of dry ingredients remain. A few lumps are acceptable; they will disappear during baking.
Once the batter is just combined, gently fold in the buttermilk using a spatula. A few gentle folds are all that’s needed; avoid stirring vigorously. The batter should be smooth but not overly mixed. The goal is to create a batter that is just combined, not over-worked.
The key to success is to stop mixing as soon as the ingredients are incorporated. Overmixing will lead to tough, chewy cupcakes, so resist the urge to keep mixing! Now you’re ready to fill your cupcake liners and bake!
Filling the Cupcake Liners
With your batter prepared and ready, it’s time to fill those cupcake liners! This seemingly simple step is crucial for achieving perfectly baked, evenly risen cupcakes. Overfilling can lead to messy spills and uneven baking, while underfilling results in small, flat cupcakes. Let’s get it right.
The Golden Rule: Fill each liner about ⅔ full. This leaves enough room for the batter to rise without overflowing. Imagine the batter expanding about halfway up the liner – that’s your target. Using an ice cream scoop (a 1.5-ounce scoop is ideal) is a great way to ensure consistent portions and efficient filling.
If you don’t have an ice cream scoop, you can use a spoon or a large measuring spoon. Start by gently spooning the batter into the center of each liner. Avoid pressing the batter down; let it settle naturally. This helps to prevent air pockets and ensures even baking.
For optimal evenness, consider using a kitchen scale. Weigh your batter before you start filling. Divide the total weight by the number of cupcakes you’re making to calculate the ideal weight per cupcake. This method guarantees consistent cupcake size and baking time, especially helpful if you’re baking a large batch.
Don’t overfill! Overfilled cupcake liners result in several problems. Firstly, the batter will spill over during baking, creating a mess and potentially burning in the oven. Secondly, the excess batter will not cook evenly, leading to a soggy bottom or a raw center. Finally, the cupcakes may rise unevenly, resulting in a dome shape that’s less appealing.
Equally important is not underfilling. Underfilled liners produce small, flat cupcakes that lack the desired height and volume. They might also bake too quickly, resulting in dry, crumbly cupcakes. Aim for that sweet spot – about ⅔ full – for the best results.
Once all the liners are filled, gently tap the baking sheet against the counter a few times. This helps to release any large air bubbles trapped in the batter, ensuring even rising and a smoother top. This simple step can make a noticeable difference in the final product.
Before placing the tray in the oven, take a moment to visually inspect your cupcakes. Ensure all liners are consistently filled and that there are no significant variations in batter levels. Addressing any inconsistencies now will prevent baking problems later.
With your cupcake liners perfectly filled, you’re ready for the next step: baking! Remember, consistent filling is key to achieving perfectly baked, delicious, and visually appealing cupcakes.
Baking the Cupcakes
Preheat your oven to 350°F (175°C). This is a crucial step; an improperly preheated oven can lead to unevenly baked cupcakes, some raw in the center while others are overcooked on the outside. Use an oven thermometer to ensure accuracy, as oven temperatures can vary.
Once the oven is preheated, carefully place your filled cupcake liners into the muffin tin. Don’t overcrowd the tin; leave some space between each liner to allow for proper air circulation. Overcrowding can result in cupcakes that don’t bake evenly and may have flat tops.
Bake for 18-22 minutes, or until a wooden skewer inserted into the center of a cupcake comes out clean. This is the most reliable method for checking doneness. However, baking times can vary depending on your oven and the size of your cupcake liners. Smaller liners may bake faster, while larger ones may require a few extra minutes.
During the last 5 minutes of baking, keep a close eye on your cupcakes. They should be golden brown on top and spring back slightly when gently pressed. If the tops are browning too quickly, you can loosely tent the muffin tin with aluminum foil to prevent over-browning. Avoid opening the oven door frequently during baking, as this can cause the cupcakes to deflate.
The toothpick test, while commonly used, isn’t always foolproof. Sometimes, a slightly moist crumb can remain on the skewer even if the cupcake is baked through. If the skewer comes out with a few moist crumbs but the cupcake springs back and is golden brown, it’s likely done. Overbaking dry cupcakes can result in a dry, crumbly texture.
Once the cupcakes are baked, carefully remove the muffin tin from the oven using oven mitts. Let the cupcakes cool in the tin for 5-10 minutes before transferring them to a wire rack to cool completely. Cooling completely on a wire rack prevents condensation and ensures your frosting adheres properly. If you frost them while they are still warm, the frosting may melt or slide off.
If, after 22 minutes, a skewer inserted into the center still shows wet batter, continue baking in 1-minute increments, checking each time until the cupcakes are done. Remember, it’s better to slightly underbake than overbake. Slightly underbaked cupcakes will continue to cook from the residual heat, while overbaked ones cannot be salvaged.
Patience is key to perfectly baked cupcakes. Take your time, observe your cupcakes closely, and don’t be afraid to adjust baking time based on your oven and the specific recipe you’re using. These tips will help you achieve consistently moist and delicious vanilla cupcakes every time.
Recommendations for Easy Vanilla Cupcakes
These Easy Vanilla Cupcakes are a delightful treat perfect for any occasion, from casual afternoon tea to a celebratory birthday bash. To elevate your cupcake experience, we offer several recommendations for serving, storage, and pairing with complementary dishes. Remember to adjust baking time depending on your oven and desired level of doneness; a toothpick inserted into the center should come out clean.
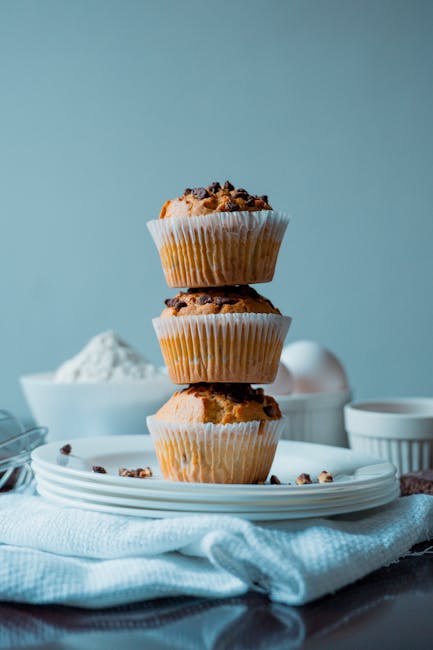
Serving Suggestions: For an elegant presentation, consider using cupcake liners in a variety of colors or patterns. A simple dusting of powdered sugar can enhance the visual appeal, or you can get creative with frosting and decorations. Classic vanilla buttercream is a perfect match, but you can also explore options like cream cheese frosting, chocolate ganache, or even a fresh berry topping. Individual serving sizes are ideal for portion control and easy handling. For a more substantial dessert, consider serving two cupcakes per person. You can also arrange the cupcakes on a tiered cake stand for a visually stunning centerpiece.
Storage Conditions: For optimal freshness, store your cupcakes in an airtight container at room temperature for up to 3 days. If you prefer to extend their shelf life, you can refrigerate them for up to a week. However, refrigeration may slightly alter the texture of the cake, making it slightly denser. If you’ve frosted your cupcakes, it’s best to store them in the refrigerator to prevent the frosting from melting or becoming too soft. Allow them to come to room temperature before serving for the best flavor and texture.
Complementary Dishes: These versatile cupcakes pair well with a variety of beverages and other desserts. A classic pairing is a tall glass of cold milk or a cup of strong coffee. For a more sophisticated touch, consider serving them with a fruit-infused iced tea or a glass of sparkling cider. They also complement light and refreshing fruit salads beautifully, providing a delightful contrast of textures and flavors. If you’re looking for a more substantial dessert spread, you could serve them alongside a scoop of vanilla ice cream or a slice of fresh fruit pie. The subtle sweetness of the cupcakes allows them to work harmoniously with a wide range of flavors.
Nutritional Information (per cupcake, approximate values may vary depending on ingredients and portion size):
Calories: Approximately 250-300 calories
Fat: 10-15 grams
Saturated Fat: 5-8 grams
Cholesterol: 20-30 mg
Sodium: 100-150 mg
Carbohydrates: 30-40 grams
Sugar: 15-20 grams
Protein: 3-5 grams
Note: This nutritional information is an estimate and may vary depending on the specific ingredients used and the size of the cupcake. For precise nutritional information, we recommend using a nutrition calculator with your exact recipe details.