Prepare your palates for a culinary journey into the delightful world of sushi rolls! These iconic dishes, far from being a recent culinary fad, boast a rich and fascinating history stretching back centuries. Originating in Southeast Asia, the earliest forms of sushi involved preserving fish in fermented rice. This technique, dating back to at least the 8th century, wasn’t the aesthetically pleasing, expertly crafted rolls we know today; it was a practical method of food preservation, crucial in a time before widespread refrigeration. The process involved packing fish in rice, the lactic acid produced by the fermentation preserving the fish and creating a unique flavour profile.
Over time, the method evolved. By the Edo period in Japan (1603-1868), the fermentation process was shortened, and rice became a key element of the dish, rather than simply a preservative. The modern form of sushi, featuring vinegared rice and various fillings, emerged in the early 19th century in Edo (present-day Tokyo). Hanaya Yohei is credited with popularizing the nigiri-zushi style, which involved placing small mounds of rice topped with fish or seafood. This marked a significant shift, transforming sushi from a humble preserved food into a sophisticated culinary art form.
The global popularity of sushi is undeniable. Today, it’s a multi-billion dollar industry, with countless sushi restaurants worldwide. The United States alone boasts tens of thousands of sushi restaurants, a testament to its widespread appeal. Interestingly, the California roll, an inside-out roll featuring avocado and crab, was invented in the United States, demonstrating the adaptability and evolution of sushi across cultures. It’s a testament to its versatility and capacity to adapt to local palates while retaining its core essence.
Beyond its deliciousness, sushi holds significant cultural importance. In Japan, it’s more than just food; it’s an art form, a reflection of Japanese culinary precision and aesthetics. The meticulous preparation, the balance of flavors and textures, and the presentation all contribute to its cultural significance. Sushi is often served during special occasions and celebrations, highlighting its social and ceremonial role. From simple maki rolls to elaborate nigiri creations, the world of sushi offers a diverse and delicious exploration of culinary history and cultural heritage.
Ingredients and Measurements
Creating delicious sushi rolls relies heavily on the quality and precise measurement of your ingredients. Using fresh, high-quality ingredients will significantly elevate the taste and texture of your final product. Below, we detail the ingredients needed for a classic California roll, along with recommended quantities for approximately 6-8 rolls.
Sushi Rice: 2 cups of short-grain Japanese sushi rice. Using Japanese sushi rice is crucial; its higher starch content is essential for achieving the characteristic stickiness and texture of sushi rice. Before cooking, rinse the rice thoroughly under cold water until the water runs clear. This removes excess starch and prevents the rice from becoming too sticky.
Rice Vinegar: 1/4 cup of rice vinegar. This is used to season the cooked rice, giving it its characteristic tangy flavor and shine. You can find rice vinegar in most Asian grocery stores or well-stocked supermarkets.
Sugar: 2 tablespoons of granulated sugar. The sugar balances the acidity of the rice vinegar, creating a harmonious flavor profile. Adjust the sugar to your preference; some prefer a slightly sweeter rice.
Salt: 1 teaspoon of salt. Salt enhances the overall flavor of the seasoned rice and complements the sweetness and acidity. Use fine sea salt or kosher salt for best results. Avoid using iodized salt, as it can impart a slightly bitter taste.
Nori Seaweed Sheets: 3-4 sheets of dried nori seaweed. These are the sheets that form the base of your sushi roll. Ensure they are fresh and stored properly to prevent them from becoming brittle or losing their flavor.
Avocado: 1 ripe but firm avocado. Choose an avocado that yields slightly to gentle pressure. Avoid overly ripe avocados as they will be too mushy for rolling. Cut the avocado into thin, long strips.
Cucumber: 1/2 English cucumber. English cucumbers have fewer seeds and a milder flavor, making them ideal for sushi. Peel the cucumber and cut it into thin, long strips. Remove excess water from the cucumber strips by gently pressing them with a paper towel to prevent the roll from becoming soggy.
Imitation Crab Meat (surimi): 6 ounces of imitation crab meat, drained. Choose a high-quality brand for the best flavor and texture. Make sure to drain any excess liquid before using to prevent the roll from becoming too watery.
Mayonnaise: 2 tablespoons of mayonnaise (Japanese mayonnaise is preferred, but regular mayonnaise will work). This is used as a binder and adds a creamy flavor to the filling.
Sesame Seeds (optional): 1 tablespoon of sesame seeds. These add a nice textural element and visual appeal to the finished roll. Lightly toast the sesame seeds in a dry pan before sprinkling them on the roll for enhanced flavor.
Water: A small bowl of water is needed for wetting your hands while handling the rice and nori sheets to prevent sticking.
Equipment Checklist: Mastering the Art of Sushi Rolls
Creating delicious sushi rolls requires the right tools. This checklist outlines the essential equipment, ensuring you’re well-prepared for a successful sushi-making experience. Investing in quality equipment will not only make the process easier but also improve the final presentation of your rolls.
Sushi Rolling Mat (Makisu): You’ll need a bamboo rolling mat, approximately 10 inches by 10 inches. The bamboo’s flexibility is crucial for shaping the sushi rice and fillings into a tight, even roll. Avoid mats that are brittle or splintery. A slightly dampened mat (not soaked!) helps prevent the rice from sticking.
Sharp, High-Quality Knife: A sharp knife is paramount for precise cutting and clean slices. A 6-8 inch long, very sharp chef’s knife (yanagiba is traditional but a good chef’s knife works well) is ideal. Regular sharpening is essential to maintain its cutting edge and avoid tearing the delicate sushi. A honing steel is recommended for daily maintenance.
Sushi Rice Paddle (Shamoji): This wide, flat, rice paddle is specifically designed for gently mixing and handling sticky sushi rice without damaging the grains. Its shape allows for even distribution of the rice and prevents clumping. A standard wooden spoon can be used in a pinch, but a shamoji provides superior control.
Large, Shallow Bowls: You’ll need several shallow bowls for preparing different components of your sushi. At a minimum, you’ll need one for the cooked sushi rice, one for the seasoned rice vinegar mixture, and several for your fillings (seafood, vegetables, etc.). Choose bowls that are wide enough to allow for easy access to the ingredients.
Measuring Cups and Spoons: Precise measurements are key to achieving the perfect balance of flavors in your sushi rice. Accurate measuring cups and spoons (both metric and imperial measurements are helpful) are essential for consistent results. This is especially important when preparing the rice vinegar mixture.
Small Knives and Utensils: A small paring knife is useful for preparing smaller ingredients and garnishes. Chopsticks are helpful for handling ingredients and arranging them on the rolling mat. A small serrated knife can be useful for cutting delicate ingredients.
Clean Work Surface: Ensure you have a clean, spacious work surface to prevent cross-contamination and maintain hygiene. A damp cloth is handy for wiping up any spills and keeping your work area tidy. Consider using a non-porous surface like a cutting board.
Optional but Recommended:
Sushi Rice Cooker: While you can cook rice on the stovetop, a rice cooker ensures perfectly cooked sushi rice every time. Look for a model with a keep-warm function.
Plastic Wrap: Use plastic wrap to cover your sushi rice while it cools and seasons to prevent a skin from forming.
Important Note: Always maintain a clean and sanitary work environment. Wash your hands thoroughly before and during the sushi-making process. Properly store all ingredients and equipment to prevent spoilage.
Sushi Rice Preparation
Making perfect sushi rice is the foundation of delicious sushi rolls. It requires attention to detail but is achievable with practice. The key is to achieve a slightly sticky, yet not mushy, texture that holds its shape when formed into rolls. This section will guide you through the process step-by-step.
Ingredients:
- 2 cups Japanese short-grain sushi rice (Kome)
- 2 1/4 cups water
- 1/4 cup rice vinegar
- 2 tablespoons sugar
- 1 teaspoon salt
Equipment:
- Medium saucepan with a tight-fitting lid
- Wooden rice paddle (shamoji) – highly recommended for even mixing
- Large, shallow bowl (preferably non-metallic)
- Whisk
Instructions:
1. Rinse the rice: This crucial step removes excess starch and prevents the rice from becoming gummy. Place the rice in a fine-mesh sieve and rinse under cold running water until the water runs almost clear. This usually takes about 5-7 minutes. Gently agitate the rice with your hand as you rinse.
2. Cook the rice: Combine the rinsed rice and water in the saucepan. Bring to a boil over high heat, then immediately reduce the heat to the lowest setting, cover tightly with the lid, and simmer for 15 minutes without lifting the lid. Do not stir the rice during cooking.
3. Rest the rice: After 15 minutes, remove the saucepan from the heat and let the rice steam, covered, for another 10 minutes. This allows the rice to fully absorb the water and achieve the correct texture.
4. Prepare the seasoning: While the rice is resting, whisk together the rice vinegar, sugar, and salt in a small saucepan over low heat until the sugar and salt are completely dissolved. Do not boil the mixture. Let it cool slightly.
5. Season the rice: Gently transfer the cooked rice to the large, shallow bowl. Using the wooden rice paddle (or a spatula), carefully fold the seasoned vinegar mixture into the rice. Use a gentle cutting motion, rather than stirring, to avoid breaking the rice grains. Fan the rice gently with a hand fan or a clean kitchen towel to cool it down, which helps to prevent it from becoming sticky.
6. Cool completely: Allow the rice to cool completely to room temperature before using it for making sushi. This is essential to ensure the rice sets properly and holds its shape.
Professional Recommendations:
- Use a high-quality Japanese short-grain rice for the best results.
- Don’t lift the lid during the cooking process; this will release steam and prevent the rice from cooking evenly.
- The ratio of rice to water is crucial. Adjust slightly based on your stove and altitude.
- Practice makes perfect! Don’t be discouraged if your first attempt isn’t perfect. With each batch, you’ll become more proficient in achieving the ideal texture.
Preparing the Fillings
The success of your sushi rolls hinges significantly on the quality and preparation of your fillings. Fresh, high-quality ingredients are paramount. Don’t skimp here – it will show in the final product. This section will guide you through preparing some popular sushi fillings.
Avocado: Choose ripe but firm avocados. Too ripe, and they’ll be mushy; too firm, and they’ll be difficult to roll. Cut the avocado in half lengthwise, remove the pit, and scoop out the flesh. Thinly slice the avocado using a sharp knife. Avoid over-slicing as this can lead to the avocado breaking apart during the rolling process. Aim for slices approximately 1/8 inch thick and 2-3 inches long. Gently pat the slices dry with a paper towel to remove excess moisture, which can make the rice soggy.
Cucumber: Select firm, crisp cucumbers. Peel the cucumber and halve it lengthwise. Using a vegetable peeler or a sharp knife, create thin ribbons of cucumber. Avoid the seeds in the center, as they can add a slightly bitter taste and excessive moisture. Similar to avocado, pat the cucumber ribbons dry before using them in your rolls.
Carrot: Use fresh, vibrant carrots. Peel and julienne the carrots using a mandoline slicer or a sharp knife for consistent thin strips. Aim for approximately 1/8 inch thick strips. Blanching the carrots for a minute or two in boiling water followed by an ice bath will help to soften them slightly and improve their texture and color; however, this step is optional.
Cooked Shrimp or Crab Meat: For cooked shrimp, ensure they are thoroughly cooked and peeled. If using pre-cooked crab meat, drain any excess liquid. Choose high-quality, pasteurized crab meat to avoid potential food safety issues. Cut the shrimp into bite-sized pieces, approximately 1 inch long. Gently flake the crab meat with a fork, removing any large lumps or shells. Season lightly with a pinch of salt and white pepper if desired.
Spicy Tuna (or Salmon): For spicy tuna or salmon, start with high-quality sushi-grade tuna or salmon. Dice the fish into small, roughly 1/2 inch cubes. In a small bowl, combine 1 tablespoon of mayonnaise, 1/2 teaspoon of sriracha (or more, to taste), and a pinch of sesame oil. Gently fold the diced tuna or salmon into the spicy mayonnaise mixture until evenly coated. Don’t overmix; you want the fish to retain its texture. Taste and adjust the seasoning as needed.
Preparing your fillings in advance: While some ingredients like avocado are best prepared just before rolling, others like cooked shrimp or carrots can be prepared ahead of time and stored in an airtight container in the refrigerator. Remember to always maintain proper food safety standards, ensuring ingredients are kept chilled and handled hygienically.
Rolling the Sushi
Rolling sushi, or maki-zushi, is a skill that takes practice, but with patience and the right technique, you’ll be creating beautiful, perfectly rolled sushi in no time. This section will guide you through the process, from preparing your ingredients to achieving that tight, elegant roll.
Preparation is key. Before you even begin rolling, ensure all your ingredients are ready. Have your sushi rice perfectly seasoned and slightly cooled. Your fillings should be neatly prepared and cut into consistent, thin strips – approximately ¼ inch thick and 2-3 inches long. This ensures even distribution and prevents bulging in your rolls. Keep a bowl of lightly salted water nearby for wetting your hands – this prevents the rice from sticking.
Using a bamboo rolling mat (makisu): Place a sheet of nori seaweed (shiny side down) on your bamboo mat. The nori should be slightly larger than the mat itself. Using damp hands, spread a thin, even layer of sushi rice over the nori, leaving about ½ inch of space at the top edge. Avoid pressing too hard, as this can crush the rice. Aim for a consistent thickness of about ⅔ inch.
Adding the fillings: Place your chosen fillings in a neat line across the center of the rice, about ⅓ of the way up from the bottom edge. Don’t overcrowd the roll; too many fillings will make it difficult to roll and may cause it to break. A good starting point is 3-4 strips of filling for a standard roll. Experiment with different combinations to find your favorites!
The rolling technique: Using the bamboo mat, gently lift the bottom edge of the nori over the fillings. Tuck the filling securely within the rice. Continue rolling tightly and evenly, using your thumbs and fingers to guide the mat and maintain a firm, cylindrical shape. Keep consistent pressure as you roll to prevent gaps. Moisten the top edge of the nori with a little water to seal the roll completely.
Finishing the roll: Once you’ve completed the roll, gently press it to ensure it’s compact and firm. Use the mat to shape the roll into a neat cylinder, pressing gently but firmly. Then, using a sharp, wet knife, slice the roll into 6-8 equal pieces. Wipe the knife clean between each cut to prevent the rice from sticking.
Professional recommendations: Practice makes perfect! Don’t be discouraged if your first few attempts aren’t flawless. Use high-quality ingredients for the best flavor and texture. Experiment with different fillings to discover your favorite combinations. And finally, have fun! Making sushi should be an enjoyable experience.
Troubleshooting: If your rice is too sticky, add a little more rice vinegar. If your roll is breaking, your rice may be too dry or you may be rolling too tightly. If your fillings are falling out, you haven’t sealed the roll properly or have used too much filling. Don’t be afraid to adjust your technique and ingredients as needed.
Cutting and Serving Delicious Sushi Rolls
Cutting your sushi rolls perfectly is as crucial as the rolling process itself. A clean, sharp knife is paramount for achieving neat, even slices that showcase your culinary skills. Using a dull knife will crush the rice and fillings, resulting in unattractive and messy rolls. Invest in a good quality, very sharp sushi knife (Yanagiba) for optimal results. Before you begin, ensure your knife is thoroughly cleaned and very slightly dampened with water – this prevents the rice from sticking.
The ideal thickness for sushi rolls is approximately ¾ inch (2cm). To achieve this consistency, practice makes perfect. Begin by placing your sushi roll on a clean, damp cutting board. Using your sharp knife, make a single, firm cut through the center of the roll. This creates two equal halves. Then, carefully cut each half in half again, resulting in four equal quarters. Continue cutting each quarter into two, creating eight equal pieces. For larger rolls, you may want to cut them into 6-8 pieces initially, depending on the size.
Avoid sawing back and forth with your knife. This will damage the roll’s structure and create uneven slices. Instead, use a single, smooth, and firm slicing motion, guiding the knife through the roll with a gentle push. Wipe your knife clean with a damp cloth after each cut to prevent sticking. If the rice is sticking excessively, you can lightly dampen your knife with water between cuts.
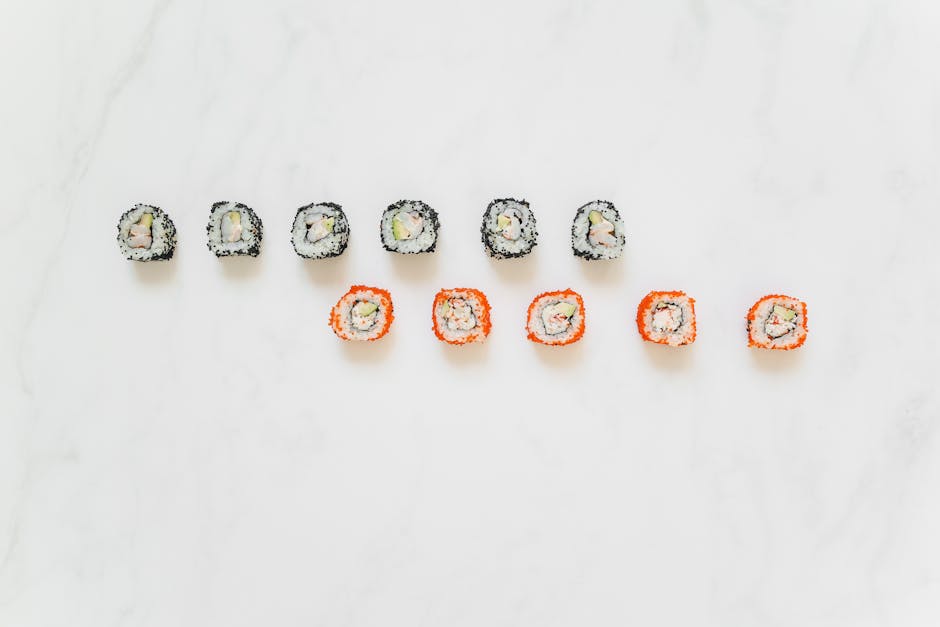
The number of pieces you cut your sushi roll into depends on the size of the roll and your personal preference. Smaller rolls, such as California rolls, can be cut into 6-8 pieces, while larger, more substantial rolls might be better cut into 8-12 pieces. Consider the size and type of fillings; larger or firmer fillings might require slightly fewer cuts to maintain structural integrity.
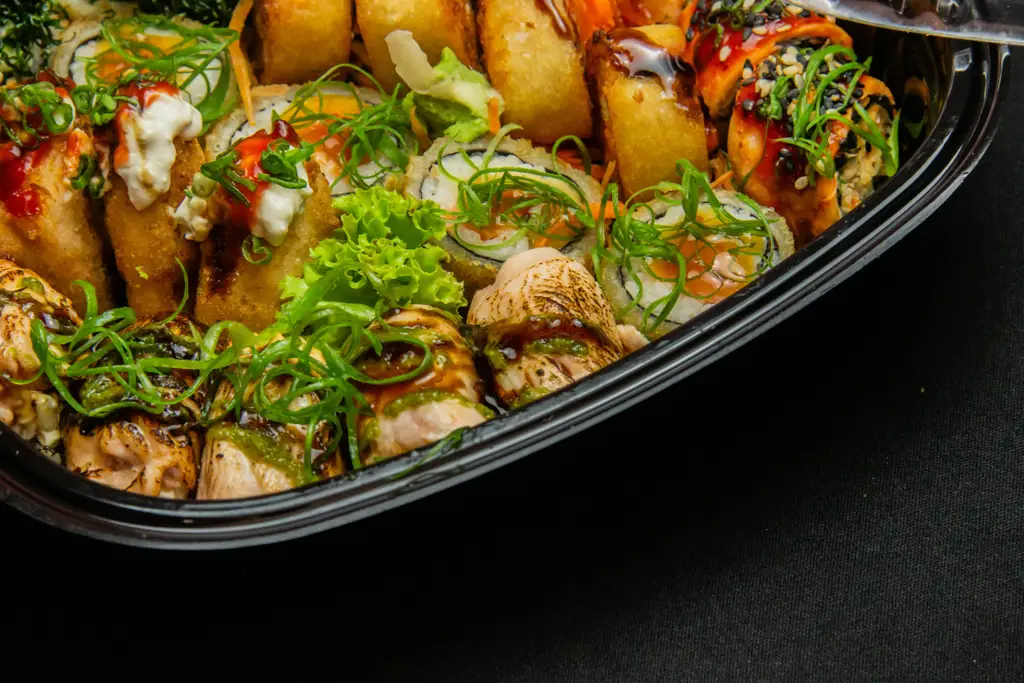
Once cut, arrange your sushi rolls attractively on a serving plate. Presentation is key! Consider using a decorative plate and garnishing the plate with wasabi, pickled ginger (gari), and soy sauce in small dishes. You can also add a sprinkle of sesame seeds or finely chopped scallions for added visual appeal. Remember to serve your sushi rolls immediately after cutting for optimal freshness and flavor. Do not let the sushi sit for too long, as the rice can become dry and the fillings can lose their vibrancy.
For a truly professional presentation, consider using a sushi cutting board with a groove at the edge. This helps to catch any stray rice or filling and keeps your workspace clean. Practice your knife skills regularly to improve your speed and precision. With a little practice, you’ll be able to create beautifully cut sushi rolls that are as impressive to look at as they are delicious to eat.
Delicious Sushi Rolls: Recommendations
Serving Suggestions
For the best enjoyment, serve your Delicious Sushi Rolls immediately after preparation. The fresher, the better! Arrange the rolls attractively on a platter, garnished with a sprinkle of sesame seeds, finely shredded daikon radish, or a small sprig of wasabi. Consider using different types of soy sauce dishes – a classic soy sauce, a sweet soy sauce, or even a ponzu sauce – to allow guests to customize their experience. Provide chopsticks and small plates for individual servings. For a truly elegant presentation, accompany the sushi with small bowls of pickled ginger (gari) to cleanse the palate between bites and a small bowl of wasabi for those who enjoy a fiery kick.
Storage & Handling
If you have leftover sushi, it is crucial to store it properly to maintain its quality and safety. Leftover sushi should be refrigerated promptly within two hours of preparation or consumption. Wrap the sushi tightly in plastic wrap, ensuring no air enters the packaging to prevent drying. Do not store sushi at room temperature for extended periods, as this can lead to rapid bacterial growth. Ideally, consume leftover sushi within 24 hours of preparation. After 24 hours, the quality and texture will significantly degrade, and it is best to discard it. Always ensure the sushi is thoroughly chilled before consuming it after refrigeration.
Complementary Dishes
Delicious Sushi Rolls pair wonderfully with a variety of complementary dishes. A light and refreshing miso soup is a classic accompaniment, providing a savory broth that contrasts beautifully with the delicate flavors of the sushi. A simple Japanese salad with a light vinaigrette can add a fresh and crisp element to your meal. For a more substantial pairing, consider serving edamame (steamed soybeans) or tempura (lightly battered and deep-fried seafood or vegetables). A selection of pickled vegetables, such as Japanese pickles (tsukemono), can also add a delightful tangy counterpoint to the richness of the sushi. Finally, a chilled sake or a crisp green tea makes for excellent beverages to enjoy alongside your sushi.
Nutritional Information (Per Roll – Approximate Values)
Please note: Calorie and nutritional information varies significantly depending on the specific ingredients and quantity used in each roll. The values below are estimates and may not be entirely accurate. For precise nutritional information, consult a registered dietitian or nutritionist who can analyze the specific recipe.
Approximate Calorie Count: 250-400 calories per roll.
Approximate Macronutrient Breakdown (Per Roll): Carbohydrates: 30-50g, Protein: 10-20g, Fat: 5-15g.
Vitamins & Minerals: Sushi rolls can be a good source of Vitamin B12 (from fish), omega-3 fatty acids (from fish), and various minerals depending on the ingredients used.
Important Note:
Always check for any allergies or dietary restrictions before serving. Sushi can contain common allergens such as fish, shellfish, soy, and wheat. Individuals with allergies should exercise caution and check the ingredients carefully.