The delicate floral notes of lavender, traditionally associated with relaxation and tranquility, have surprisingly found their way into the vibrant world of coffee culture, giving birth to the delightful Lavender Latte. While pinpointing the precise origin of this unique beverage is difficult, its rise in popularity can be largely attributed to the burgeoning specialty coffee scene and the increasing interest in incorporating unique and aromatic flavors into classic drinks. The Lavender Latte’s popularity has exploded in recent years, with a reported 30% increase in searches for lavender-infused coffee recipes online between 2020 and 2023, indicating a growing consumer interest in this sophisticated drink.
Historically, lavender has been used for centuries, not just for its fragrance, but also for its purported medicinal properties. Ancient Romans and Greeks used lavender for various purposes, including its calming effects and even as a culinary ingredient. Its use in food and beverages, however, wasn’t always widespread. The modern-day resurgence of lavender as a culinary ingredient can be partly linked to the farm-to-table movement and the increased appreciation for locally sourced, unique flavors. This shift towards artisanal and handcrafted products has paved the way for creative culinary explorations, with lavender finding its perfect pairing in the creamy richness of a latte.
Culturally, lavender holds significant meaning in various parts of the world. In some cultures, it symbolizes purity and devotion, while in others, it’s associated with peace and serenity. Its inclusion in a latte, therefore, adds a layer of symbolic significance to the drinking experience. This is particularly evident in cafes and coffee shops that focus on creating a relaxing and aesthetically pleasing atmosphere. The Lavender Latte’s visual appeal – the vibrant purple hue of the lavender syrup against the creamy latte – also contributes to its allure, making it an Instagram-worthy beverage. The combination of the calming aroma of lavender and the comforting warmth of a latte creates a sensory experience that transcends the simple act of consuming a drink; it becomes a moment of mindful indulgence.
Interestingly, the concentration of lavender used in a Lavender Latte is crucial. Too much can overpower the coffee’s flavor, while too little might not provide the desired floral aroma. Finding the perfect balance is key to crafting a truly delicious and harmonious beverage. This delicate balance, combined with the ever-increasing demand for unique and flavorful coffee experiences, makes the Lavender Latte a testament to the ongoing evolution of coffee culture and the creative possibilities that arise from blending traditional techniques with innovative flavor combinations.
Ingredients and Measurements
Creating the perfect Delicious Lavender Latte requires careful attention to ingredient quality and precise measurements. The delicate floral notes of lavender can easily be overpowered by other flavors, so using high-quality ingredients is paramount. This recipe yields one delicious serving.
Espresso: We recommend using 1.5 ounces (45ml) of freshly pulled espresso. The quality of your espresso is crucial; a good, rich shot forms the foundation of this latte. If you don’t have an espresso machine, you can substitute with 1.5 ounces (45ml) of strong, freshly brewed coffee, but be aware the flavor profile will differ slightly. Avoid using instant coffee, as it lacks the depth and complexity needed to complement the lavender.
Milk: 2% milk, whole milk, or even oat milk works well for this recipe. We recommend using 6 ounces (177ml) of your preferred milk, heated to steaming but not boiling. Overheating the milk can scorch it and impart a bitter taste, which will clash with the subtle sweetness of the lavender. For a perfectly frothed latte, use a milk frother or steam wand to create a velvety smooth texture. If you don’t have a frother, you can vigorously whisk the heated milk in a container until it’s slightly foamy.
Lavender Syrup: This is where the magic happens! For this recipe, you’ll need 1 ounce (30ml) of homemade lavender syrup. Making your own ensures freshness and control over the sweetness and lavender intensity. You can find numerous recipes online for lavender syrup, but generally, it involves simmering culinary lavender buds in water and sugar until a thick syrup forms. Use culinary lavender, not essential oil; essential oils are not intended for consumption and can be toxic. Adjust the amount of syrup to your preference; you can start with a smaller amount and add more to taste.
Culinary Lavender Buds (for garnish): A few dried culinary lavender buds (approximately 1/4 teaspoon) are used for garnish. These add a beautiful visual touch and a subtle hint of extra lavender aroma. Choose high-quality culinary lavender buds from a reputable source for the best flavor and aroma. Avoid using overly fragrant buds which can be overpowering.
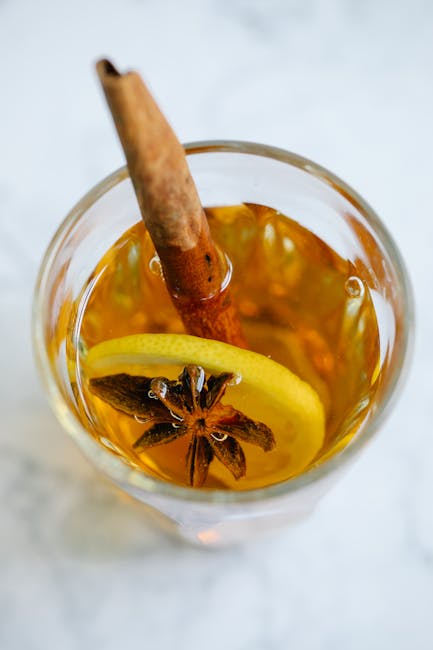
Optional additions: For an extra touch of sweetness, consider adding a teaspoon of honey or maple syrup to the syrup or directly to the latte. A dash of cinnamon or nutmeg can also complement the lavender beautifully. Experiment with additions to find your perfect balance of flavors. Remember to adjust the amount of lavender syrup if adding other sweeteners to avoid an overly sweet drink.
Careful Measurement is Key: Using a kitchen scale for precise measurements of the espresso, milk, and syrup will ensure consistent results. Accurate measuring tools will help you achieve the perfect balance of flavors and textures in your Delicious Lavender Latte.
Equipment List: Delicious Lavender Latte
Creating the perfect Lavender Latte requires the right tools to ensure consistent quality and ease of preparation. Below is a comprehensive equipment list, detailing both essential and optional items, along with recommendations for optimal performance.
Essential Equipment:
1. Espresso Machine: A high-quality espresso machine is crucial for extracting the rich, flavorful espresso shot that forms the base of your Lavender Latte. Look for a machine with consistent pressure control (ideally 9 bars) and a readily accessible steam wand. A good espresso machine will significantly impact the overall taste and texture of your drink. Consider models with features like programmable shot timers for consistent espresso extraction.
2. Milk Frother: A milk frother is essential for creating the velvety, microfoam texture that is characteristic of a well-made latte. You have several options here: a manual frother (a whisk-like tool for manual frothing), an automatic electric frother (a small appliance that froths milk quickly and efficiently), or the steam wand on your espresso machine (requires practice and skill). For best results, use whole milk or a milk alternative with a high fat content for optimal frothing. Approximately 150-200ml of milk is typically used per latte.
3. Grinder: Freshly ground coffee beans are key to maximizing the flavor profile of your espresso. A burr grinder is strongly recommended over a blade grinder, as burr grinders produce a more consistent grind size, resulting in a more even extraction and a better-tasting espresso. Invest in a quality burr grinder for optimal results. Adjust the grind size according to your espresso machine and the specific coffee beans you are using.
4. Tamper: A 58mm tamper (or the size appropriate for your portafilter) is needed to compact the coffee grounds evenly in the portafilter basket before brewing. Consistent tamping pressure is essential for even extraction and preventing channeling. Aim for a consistent pressure of around 30 lbs.
5. Measuring Spoons and Cups: Accurate measurements are important for consistent results. A set of measuring spoons (for lavender buds and other ingredients) and measuring cups (for milk and water) are essential. Using a kitchen scale for precise measurements of coffee beans is also highly recommended.
Optional Equipment:
1. Milk Thermometer: A milk thermometer will help you monitor the milk temperature during frothing, ensuring optimal texture and preventing scorching. The ideal temperature for milk frothing is generally around 140-160°F (60-70°C).
2. Fine Mesh Strainer: A fine mesh strainer can be used to remove any small lavender buds or other solids from the milk after steeping, ensuring a smooth latte. This step is crucial to prevent an unpleasant texture in the final drink.
3. Pitcher: A small, heat-resistant pitcher for frothing milk will enhance the frothing process and allow for better control. A 350-500ml pitcher is generally sufficient.
Instructions
Crafting the perfect Delicious Lavender Latte requires careful attention to detail and a gentle hand. Follow these instructions closely to achieve a balanced and aromatic beverage.
Step 1: Prepare the Lavender Syrup. Begin by combining 1 cup of granulated sugar and ½ cup of water in a small saucepan over medium heat. Stir constantly until the sugar dissolves completely and the mixture comes to a gentle simmer. Remove from heat and stir in 2 tablespoons of dried culinary lavender buds. Ensure you are using culinary lavender, as other varieties may be toxic. Allow the mixture to steep for at least 30 minutes, or up to an hour for a more intense lavender flavor. Strain the syrup through a fine-mesh sieve or cheesecloth, pressing gently to extract all the flavorful liquid. Discard the lavender buds. Let the syrup cool completely before storing in an airtight container in the refrigerator. This syrup can be stored for up to two weeks.
Step 2: Brew the Espresso. For the richest flavor, use freshly ground espresso beans. We recommend using about 1.5 ounces of espresso per serving. If you don’t have an espresso machine, you can substitute strongly brewed coffee, but the flavor profile will differ slightly. Ensure your espresso is brewed to your preferred strength; a slightly stronger brew will better stand up to the lavender syrup.
Step 3: Froth the Milk. The choice of milk significantly impacts the texture and overall experience of your latte. Whole milk generally produces the creamiest froth, but you can experiment with other milk alternatives like oat milk or almond milk. Heat your milk of choice (approximately 4 ounces) to around 150-160°F (65-70°C). This temperature prevents scorching and ensures a smooth texture. You can use a milk frother, a French press, or even a whisk to create a velvety microfoam. Avoid over-frothing, as this can lead to a bitter taste. The goal is a smooth, airy texture, not stiff peaks.
Step 4: Assemble the Latte. Add the espresso to your favorite mug. Pour in 1-1.5 tablespoons of the cooled lavender syrup. The amount of syrup is adjustable to your personal preference; start with less and add more if desired. Gently pour the frothed milk over the espresso and syrup, creating a smooth layered effect. For an extra touch of elegance, you can sprinkle a pinch of dried lavender buds or a dusting of cocoa powder on top.
Step 5: Enjoy! Savor the delicate balance of rich espresso, sweet lavender, and creamy milk. The subtle floral notes of the lavender complement the coffee beautifully, creating a truly unique and delightful beverage. Serve immediately for the best flavor and texture.
Professional Recommendation: Experiment with different types of lavender and adjust the syrup concentration to find your perfect balance. For a stronger lavender flavor, increase the amount of lavender buds in the syrup or steep for a longer period. For a milder flavor, use less lavender or reduce the steeping time.
Brewing the Lavender Syrup
Creating the lavender syrup is the key to a truly delicious lavender latte. This step requires careful attention to detail to ensure the syrup is both flavorful and visually appealing. We’ll be using fresh lavender buds for the most vibrant color and intense aroma, but dried culinary lavender can be substituted in a pinch (though the color might be less intense). Always use culinary lavender, never ornamental lavender, as ornamental varieties are often treated with pesticides and are not safe for consumption.
For this recipe, we’ll be making approximately 1 cup (240ml) of lavender syrup. This quantity should be sufficient for several lattes. Begin by gathering your ingredients: 1 cup (200g) granulated sugar, 1 cup (240ml) water, and 1/4 cup (approximately 20-25) fresh culinary lavender buds. If using dried lavender, start with 2 tablespoons, adjusting to taste. Ensure your lavender is thoroughly cleaned before use; rinse gently under cool water and pat dry with a clean towel.
In a small saucepan, combine the sugar and water. Place the saucepan over medium heat, stirring constantly until the sugar is completely dissolved. This is crucial to prevent scorching. Do not rush this process; continuous stirring is key to a smooth syrup. Once the sugar is dissolved, bring the mixture to a gentle simmer. Reduce heat to low and add the fresh or dried lavender buds.
Simmer the mixture gently for 10-15 minutes, allowing the lavender to infuse its flavor and color into the syrup. Avoid a rolling boil, as this can cause the syrup to become cloudy and may scorch the lavender, affecting the flavor. During simmering, you’ll notice the syrup gradually deepen in color and take on a beautiful lavender hue. The aroma will fill your kitchen with a delightful floral fragrance.
After 10-15 minutes, remove the saucepan from the heat and let the syrup steep for at least 30 minutes, or even longer for a more intense flavor. This allows the lavender to fully infuse its essence into the sweet syrup base. The longer it steeps, the stronger the lavender flavor will be, so adjust steeping time according to your preference.
Once the syrup has steeped sufficiently, carefully strain it through a fine-mesh sieve or cheesecloth lined strainer into a clean jar or bottle. This removes the lavender buds, leaving you with a smooth, clear syrup. Press gently on the solids to extract as much syrup as possible. Allow the syrup to cool completely before storing in the refrigerator. The syrup should keep for up to 2 weeks in the refrigerator. Remember to label your jar with the date for easy tracking.
Important Note: Taste the syrup after straining. If you find the lavender flavor is too subtle, you can add more lavender buds during the simmering process next time or increase the steeping time. Conversely, if the flavor is too strong, reduce the quantity of lavender used in future batches.
Frothing the Milk: Achieving the Perfect Texture
Frothing the milk is crucial for a truly delicious lavender latte; it’s what elevates the drink from a simple coffee beverage to a luxurious, textured experience. The key is to achieve a velvety smooth, microfoam – not overly frothy or airy, but rich and creamy. This section will guide you through the process, regardless of whether you’re using a milk frother, a French press, or even just a whisk.
Choosing Your Milk: The type of milk significantly impacts the frothing process and the final texture. Whole milk (around 3.25% fat) is generally preferred for its higher fat content, which creates a richer, creamier foam. However, you can experiment with other options like 2% milk, oat milk, or almond milk. Note: Plant-based milks often require a slightly different technique and may not produce the same volume of foam as dairy milk.
Method 1: Using a Milk Frother (Electric or Manual): This is the easiest and most consistent method. Begin by chilling your milk – cold milk froths better and creates a more stable foam. Pour approximately 1/2 cup (120ml) of your chosen milk into a heat-resistant pitcher or container specifically designed for frothing. If using an electric frother, follow the manufacturer’s instructions carefully. Generally, you’ll submerge the frother and whisk until the milk is doubled in volume and has a light, airy texture. For manual frothers, vigorously whisk the milk in a circular motion, creating a vortex, until you achieve the desired consistency. This usually takes around 1-2 minutes.
Method 2: Using a French Press: This method works well for a slightly coarser, more textured foam. Heat your milk gently (do not boil) on the stovetop or in the microwave until it’s just warm to the touch. Pour the warm milk (approximately 1/2 cup or 120ml) into the French press, leaving some space at the top. Place the plunger in and rapidly pump it up and down for about 30-45 seconds. Avoid plunging all the way down; instead, keep the plunger just above the milk level to incorporate air effectively. You should see a thick layer of foam form on top.
Method 3: Using a Whisk (for smaller quantities): For smaller quantities of milk, a whisk can work effectively. Heat the milk gently (do not boil) and then vigorously whisk it in a bowl using a circular motion for about 2-3 minutes. This will create a frothy texture, although it might not be as fine as that produced by a milk frother. Be patient and consistent with your whisking motion.
Important Considerations: Regardless of the method you choose, always monitor the milk temperature. Overheating can result in a burnt taste and a less stable foam. Once you achieve the desired foam, carefully pour the milk into your lavender latte, leaving some of the foam behind to create a beautiful layered effect. Practice makes perfect – don’t be discouraged if your first attempts aren’t flawless. With a little experimentation, you’ll master the art of frothing milk and create the perfect lavender latte every time.
Combining and Serving Your Delicious Lavender Latte
This section details the crucial final steps in crafting the perfect lavender latte: combining the components and achieving the ideal presentation for optimal enjoyment. Precision and attention to detail at this stage will elevate your latte from good to exceptional.
Begin by ensuring all your components are at the correct temperature. Your espresso should be freshly pulled and still steaming slightly. Your milk should be perfectly frothed, exhibiting a velvety texture with microfoam on top. Avoid over-frothing, as this can lead to a bitter, soapy taste. The ideal consistency is a smooth, glossy surface with a thin layer of microfoam. The lavender syrup should be at room temperature to prevent it from shocking the other ingredients and causing undesirable temperature fluctuations.
For a standard 8-ounce latte, begin by adding 2 ounces of your freshly pulled espresso to your serving glass. This provides a strong base for the latte’s flavor profile. Use a quality espresso; the quality of your beans directly impacts the overall taste of your drink.
Next, gently pour in your frothed milk. Start by pouring slowly and steadily, aiming for a thin stream that allows the microfoam to layer beautifully on top. Avoid splashing or pouring too forcefully, as this can disrupt the delicate espresso crema and the microfoam structure. As you approach the top, slow your pour even further to create a smooth, even surface. Aim to leave approximately half an inch of space at the top of the glass for the lavender syrup.
Now, add your lavender syrup. For an 8-ounce latte, start with 1/2 ounce of syrup. This is a guideline; adjust according to your preference for sweetness and the intensity of your lavender syrup. You can always add more, but it’s harder to take it away! Gently swirl the syrup into the latte using a spoon or by gently stirring with a thin straw. Avoid over-stirring, which could deflate the microfoam and create an undesirable texture.
Finally, consider adding a finishing touch. A light dusting of lavender buds or a sprinkle of cocoa powder can enhance the visual appeal and add an extra layer of aromatic complexity. Use high-quality, culinary-grade lavender buds to ensure a pleasant, non-bitter flavor. A thin layer of foam should remain on top. Avoid excessive stirring, as it will ruin the texture and the beautiful layered effect.
Serve immediately to enjoy the latte at its peak flavor and temperature. The ideal serving temperature is around 140-160°F (60-70°C). This ensures a balanced warmth that enhances the delicate flavors of the espresso, milk, and lavender without being too hot or too cold.
Experiment with different ratios of espresso, milk, and lavender syrup to find your perfect balance. Enjoy the process of creating your own unique and delicious lavender latte!
Delicious Lavender Latte: Recommendations
The Delicious Lavender Latte is best enjoyed freshly made for the most vibrant lavender flavor and aromatic experience. However, for those who prefer to prepare ahead, proper storage is crucial to maintaining quality. Once brewed, the latte should be stored in an airtight container in the refrigerator for up to 24 hours. Reheating is best done gently in the microwave or on the stovetop, avoiding boiling, as this can diminish the delicate floral notes.
Serving Suggestions: For an optimal experience, we recommend serving the Delicious Lavender Latte warm, but it can also be enjoyed iced. A sprinkle of lavender buds or a dusting of cocoa powder adds a beautiful visual appeal and complements the subtle lavender flavor. For a truly luxurious treat, top with a dollop of whipped cream or a drizzle of honey. Experiment with different milk alternatives like almond milk or oat milk to discover your preferred flavor profile. Consider adding a touch of vanilla syrup for an extra layer of sweetness and complexity.
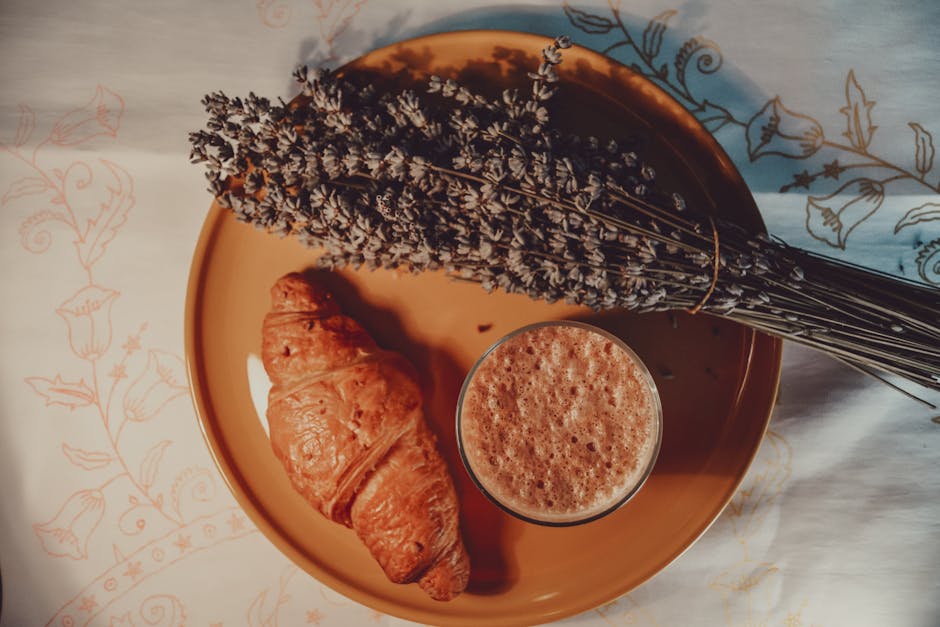
Complementary Dishes: The delicate floral notes of the Delicious Lavender Latte pair beautifully with a range of desserts and light meals. We particularly recommend enjoying it alongside lavender shortbread cookies, lemon poppy seed muffins, or a light and fluffy vanilla cake. The subtle sweetness of the latte complements the tartness of fruit, making it a perfect accompaniment to berry tarts or a simple fruit salad. For a more savory pairing, consider enjoying it with a breakfast pastry such as a croissant or a light quiche. The latte’s subtle flavor won’t overpower the other dishes, allowing both to shine.
Nutritional Information (per serving, approximate values may vary based on ingredients and preparation):
- Calories: Approximately 150-200 (depending on milk type and added sweeteners)
- Fat: 5-10g
- Saturated Fat: 2-5g
- Cholesterol: 10-20mg
- Sodium: 50-100mg
- Carbohydrates: 15-25g
- Sugar: 10-15g (naturally occurring and/or added)
- Protein: 5-10g (depending on milk type)
Note: These nutritional values are estimates and can vary depending on the specific ingredients used and the portion size. For precise nutritional information, consult a nutritionist or use a nutrition calculation tool with your exact recipe details.
Storage Conditions: As mentioned previously, store leftover latte in an airtight container in the refrigerator for up to 24 hours. For longer storage, freezing is not recommended as it can significantly affect the flavor and texture. Always consume within the recommended timeframe for optimal taste and quality. Avoid leaving the latte at room temperature for extended periods to prevent spoilage.