Ginger ale, a seemingly simple beverage, boasts a surprisingly rich and complex history, far exceeding its bubbly, refreshing nature. Its origins are murky, with claims tracing back centuries, but the most widely accepted narrative points to 19th-century England. The exact inventor remains unknown, but the concoction likely emerged as a medicinal drink, leveraging ginger’s well-known anti-nausea and digestive properties. Early versions were far from the sweet, carbonated drink we know today; they were often potent mixtures of ginger, water, and alcohol, sometimes with added spices and herbs. This early medicinal focus is crucial to understanding its cultural significance.
The global popularity of ginger ale exploded in the late 19th and early 20th centuries, largely thanks to improved carbonation techniques and mass production. The advent of commercially produced ginger ale transformed it from a niche remedy to a widely accessible beverage. The United States became a major player in the market, with various brands emerging and competing fiercely. This period saw the shift from the stronger, more medicinal versions towards the sweeter, less alcoholic profiles preferred by the general public. Interestingly, the ale in ginger ale is a misnomer; the drink rarely contains alcohol in modern formulations. This is a crucial distinction, as the original recipes often did include alcohol.
Beyond its commercial success, ginger ale holds a significant place in various cultures. In some Caribbean nations, it’s a staple, often served alongside spicy food to soothe the palate. Its association with relief from nausea and upset stomachs has cemented its place in home remedies across the globe. According to a 2022 market research report, the global ginger ale market is valued at billions of dollars, showcasing its enduring appeal. This widespread popularity is not merely a matter of taste; it reflects a long-standing cultural trust in ginger’s health benefits, a tradition that has shaped the evolution of the beverage.
Today, ginger ale continues to evolve, with artisanal producers experimenting with unique flavor profiles and organic ingredients. While mass-produced versions dominate supermarket shelves, the craft ginger ale movement is gaining traction, reflecting a renewed interest in natural and flavorful beverages. This recipe aims to capture the essence of both tradition and innovation, offering a homemade ginger ale that is both refreshing and authentic, allowing you to experience the history and versatility of this beloved drink firsthand. We will delve into the details of achieving a perfectly balanced, zesty, and naturally sweet ginger ale, drawing upon traditional methods and modern techniques to create a truly exceptional beverage.
Ingredients and Measurements
Crafting the perfect ginger ale requires careful attention to ingredient quality and precise measurements. The success of your homemade ginger ale hinges on using fresh, high-quality ingredients. Don’t skimp on this aspect; it will significantly impact the final flavor profile.
Ginger: The star of the show! You’ll need approximately 1 pound (450g) of fresh ginger root. Choose ginger that’s firm, plump, and has a vibrant aroma. Avoid pieces that are shriveled or have soft spots. The amount of ginger directly correlates with the strength and spiciness of your ginger ale. If you prefer a milder ginger ale, you can reduce the amount to 12 ounces (340g). Conversely, for a more intense ginger flavor, feel free to increase it to 1.25 pounds (570g). Remember to thoroughly wash the ginger before using it.
Water: We’ll be using filtered water for the cleanest flavor profile. You’ll need a total of 1 gallon (3.8 liters) of water, divided into two portions: one for the ginger syrup and one for carbonation. Using filtered or spring water is highly recommended to avoid any off-flavors that might be present in tap water. The water quality plays a significant role in the final taste of your ginger ale.
Sugar: Granulated white sugar is the preferred sweetener for this recipe. You will need 1.5 cups (300g) of granulated sugar for the ginger syrup. Adjust the sugar according to your preference, but be mindful that too little sugar might result in a weakly flavored ginger ale, while too much can make it overly sweet and mask the ginger’s subtle notes. You can substitute with other sugars like brown sugar or honey, but keep in mind that this will alter the final flavor.
Lemon Juice: A splash of fresh lemon juice adds brightness and complements the ginger’s spicy notes. Use the juice of one large lemon (approximately 2 tablespoons or 30ml). Freshly squeezed lemon juice is paramount; bottled lemon juice often lacks the vibrancy of fresh-squeezed juice. If you don’t have a lemon, you can substitute with lime juice, but the flavour profile will slightly change.
Yeast (Optional): For naturally carbonated ginger ale, you’ll need 1 teaspoon of active dry yeast (such as Saf-Instant). This will ferment the sugar and create carbonation. This step is optional; if you prefer a non-alcoholic, non-carbonated ginger ale, skip the yeast and proceed directly to bottling. If using yeast, ensure it’s fresh and properly activated according to package instructions.
Bottles: You’ll need strong glass bottles designed for carbonation. Do not use plastic bottles as they may explode under pressure during fermentation. Make sure to thoroughly clean and sanitize your bottles before using them to prevent unwanted bacteria or mold growth.
Note: All measurements provided are approximate. Feel free to adjust the quantities of ingredients to your liking, but remember that substantial deviations can alter the final taste and carbonation level. Always prioritize using fresh, high-quality ingredients for the best results. Good luck and enjoy your homemade ginger ale!
Equipment List
Crafting the perfect ginger ale requires the right tools. While you can improvise with some items, having the proper equipment ensures a smoother, more efficient, and ultimately more delicious process. This list details the necessary equipment, categorized for clarity, along with recommendations and explanations for each item.
I. Fermentation Vessels: The choice of fermentation vessel significantly impacts the final product. For smaller batches (1-2 gallons), a food-grade 1-gallon glass jar with a wide mouth is ideal. Wide mouths facilitate easier cleaning and additions of ingredients. Avoid using plastic containers, as they can leach chemicals into your brew and may not be as durable for repeated use. For larger batches, consider a food-grade glass carboy (3-5 gallons). These larger vessels provide more space for fermentation and minimize the risk of overflow.
II. Measuring and Mixing Tools: Accuracy is paramount in brewing. Invest in a reliable digital kitchen scale capable of measuring in grams and ounces. This is crucial for precise measurement of sugar and ginger. A large mixing bowl (at least 4 quarts) is essential for combining ingredients before transferring them to your fermentation vessel. A measuring cup (liquid and dry) and a set of measuring spoons are also necessary for accurate ingredient measurements. A long-handled spoon or spatula will assist in stirring the mixture thoroughly without scratching the glass.
III. Filtration and Bottling Equipment: Depending on your desired level of clarity, you may need filtration equipment. A fine-mesh sieve or cheesecloth can remove larger ginger particles. For a clearer ginger ale, consider using a secondary fermentation vessel and a siphon tube to transfer the fermented liquid without disturbing the sediment. For bottling, you will need glass bottles (12 oz. or 16 oz.) that are designed to withstand carbonation pressure. Ensure the bottles are thoroughly cleaned and sanitized before use. A bottle filler will make this process quicker and less messy. Bottle caps and a capping machine are also essential for securely sealing your bottles.
IV. Other Essential Tools: A large saucepan or pot is needed for heating water to dissolve the sugar. A clean, lint-free cloth or paper towels are helpful for cleaning and wiping spills. A thermometer is useful for monitoring water temperature during the sugar dissolving process. Rubber bands or clips can be used to secure cheesecloth during filtration. Finally, a sanitizing solution (such as Star San or a similar product) is crucial for sterilizing all your equipment to prevent unwanted bacteria or mold growth, ensuring a safe and delicious final product. Gloves are recommended to protect your hands from potential irritation.
V. Optional Equipment: While not strictly necessary, a pressure release valve for your fermentation vessel can be beneficial, especially for larger batches. An airlock is another helpful addition, allowing CO2 to escape while preventing outside contaminants from entering during fermentation. A hydrometer can provide more precise measurements of sugar content and fermentation progress.
Important Note: Always prioritize food-grade materials for all equipment that will come into contact with your ginger ale. Thoroughly clean and sanitize all equipment before use to prevent contamination and ensure the safety and quality of your homemade ginger ale.
Preparation of Ingredients
Before you embark on making your delicious homemade ginger ale, meticulous preparation of the ingredients is crucial for achieving the best flavor and texture. This section details the steps involved in prepping the key ingredient: ginger.
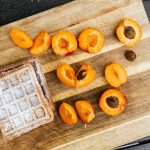
For this recipe, we’ll be using approximately 1 cup of fresh ginger root, which translates to roughly 150-200 grams. The exact amount can be adjusted to your preference; more ginger will result in a stronger, spicier ginger ale. Start by selecting fresh, firm ginger roots with smooth skin and a vibrant aroma. Avoid any roots that appear shriveled, soft, or have dark spots, as these may indicate poor quality or spoilage.
Peeling the ginger is the next step. While you can use a vegetable peeler, I find that a spoon works best for removing the ginger’s thin, papery skin. Simply use the edge of a teaspoon or tablespoon to gently scrape the skin away. This method is less likely to remove excessive amounts of the ginger flesh, preserving as much of the pungent flavor as possible. Avoid using a knife, as it can be difficult to control and may result in significant ginger loss.
Once peeled, you’ll need to finely mince or grate the ginger. For a smoother ginger ale with less visible ginger bits, mincing is recommended. Use a sharp knife and carefully chop the ginger into very small pieces. Aim for a consistency of roughly 1/8 inch (3mm) or smaller. If using a food processor, pulse the ginger briefly to avoid over-processing and releasing excessive moisture. Over-processing can lead to a bitter taste in your final product.
If you prefer a more rustic ginger ale with visible ginger pieces, grating is an alternative. Use a fine grater to achieve a fine texture. However, keep in mind that grating can release more ginger juice, potentially altering the final sweetness and consistency of your drink. Strain the grated ginger mixture if you prefer a clearer ginger ale without sediment.
After mincing or grating, you should have approximately 1 cup of prepared ginger. This measured amount ensures the correct ginger-to-liquid ratio for optimal flavor. Remember to wash your hands thoroughly after handling the ginger to remove any lingering aroma.
Proper ginger preparation is key to a successful ginger ale. Taking the time to meticulously peel and finely chop or grate the ginger will significantly enhance the overall quality and taste of your final product. Don’t rush this step; it’s a crucial foundation for a truly exceptional homemade ginger ale.
Brewing Process (including fermentation if applicable)
This recipe outlines a method for creating a naturally fermented ginger ale, offering a more complex and nuanced flavor profile than commercially produced versions. While you can opt for a non-fermented method (detailed below), the fermentation process is key to achieving a truly authentic ginger ale experience. Safety is paramount when working with fermentation; ensure all equipment is thoroughly sanitized.
For the Ginger Beer Starter (Fermentation):
Begin by preparing a ginger bug, a symbiotic culture of bacteria and yeast that will ferment your ginger beer. Combine 100g finely grated fresh ginger (about 1 cup packed) with 1 cup of sugar and 4 cups of filtered water in a clean glass jar. Stir well to dissolve the sugar. Cover loosely with a cloth or cheesecloth secured with a rubber band. Let this mixture sit at room temperature (ideally 70-75°F / 21-24°C) for 2-7 days, stirring once or twice a day. You’ll know it’s ready when the mixture is bubbly and slightly foamy, with a pleasant, slightly vinegary aroma. Discard any moldy or foul-smelling batches.
Preparing the Ginger Ale (Fermentation):
Once your ginger bug is ready, strain it through a fine-mesh sieve or cheesecloth into a clean container. You should have approximately 3-4 cups of ginger bug liquid. In a large, sanitized fermenting vessel (glass is ideal), combine the strained ginger bug with 4 cups of filtered water, 1 cup of sugar (adjust to your sweetness preference), and the juice of 2-3 lemons (optional, for added tartness). Stir well until the sugar dissolves.
Bottling and Carbonation (Fermentation):
Carefully bottle the mixture, leaving about an inch of headspace in each bottle. Use strong glass bottles designed for carbonation. Seal tightly with air-tight caps. Over-carbonation can cause bottles to explode, so be cautious. Let the bottles ferment at room temperature for 2-3 days, or longer depending on your desired level of carbonation and tartness. You’ll notice increasing pressure in the bottles. Once the desired carbonation is reached, refrigerate the bottles to halt fermentation. Allow the ginger ale to chill for at least 24 hours before serving.
Non-Fermented Method (No Fermentation):
For a non-fermented ginger ale, skip the ginger bug process entirely. Simply combine 4 cups of filtered water, 1 cup of sugar, the juice of 2-3 lemons (optional), and the juice from approximately 100g of finely grated fresh ginger in a saucepan. Heat gently until the sugar dissolves, then remove from heat and let it cool completely. Bottle and refrigerate. This method will produce a sweeter, less complex flavor profile than the fermented version. Consider adding a few dashes of your favorite bitters for depth.
Important Note: The flavor and carbonation of your ginger ale will depend on the amount of ginger used, the fermentation time, and the temperature. Experiment to find your ideal balance. Always practice safe food handling techniques.
Bottling/Carbonation (if applicable)
This section details the bottling and carbonation process for your homemade ginger ale. While you can enjoy your ginger ale uncarbonated, the fizz adds a delightful sparkle and elevates the overall drinking experience. Proper sanitation is paramount throughout this process to prevent spoilage and unwanted bacterial growth. Thoroughly sanitize all equipment, including bottles, caps, and bottling equipment, using a solution of hot, soapy water followed by a rinse with a sanitizer solution (like Star San or a similar product) according to the manufacturer’s instructions.
For carbonation, you have two primary options: bottle conditioning (natural carbonation) or using a carbonation system (forced carbonation). Bottle conditioning is a simpler method, while forced carbonation offers more control over the carbonation level.
Bottle Conditioning (Natural Carbonation): This method relies on the natural fermentation of residual sugars in your ginger ale to produce carbon dioxide. It’s a slower process, but yields a naturally bubbly drink. After the initial fermentation is complete (usually 2-3 weeks), carefully siphon your ginger ale, leaving behind any sediment, into sanitized glass bottles. Leave approximately 1 inch of headspace at the top of each bottle to allow for expansion during carbonation. Add 1/2 teaspoon of granulated sugar to each 12-ounce bottle. This sugar will feed the yeast and produce the carbonation. Cap the bottles tightly and store them in a cool, dark place (ideally around 70°F) for 2-3 weeks. Check the bottles regularly for pressure buildup. If the bottles feel overly firm or bulge, release the pressure carefully by slightly loosening the cap under cold running water (this is crucial to prevent bottle explosions). After the desired carbonation is reached, refrigerate the bottles to slow down further fermentation.
Forced Carbonation: This method uses a carbonation system (like a soda maker or a kegerator) to inject CO2 directly into the ginger ale. This provides more control over the carbonation level and time. After the initial fermentation is complete, chill your ginger ale thoroughly. Use a sanitized bottling wand or similar device to transfer the chilled ginger ale into your chosen dispensing system (bottles or keg). Follow the instructions provided with your specific carbonation system regarding the pressure and time required to achieve your desired level of carbonation. Generally, this ranges from 20-30 PSI for a few hours to overnight. Always release pressure slowly and carefully when handling carbonated beverages under pressure.
Regardless of the method chosen, always prioritize safety. Work in a well-ventilated area and wear appropriate safety glasses. Over-carbonated bottles can explode, so proper headspace, careful monitoring, and slow pressure release are essential. Remember that the level of carbonation will depend on several factors, including temperature, sugar content, and the activity of the yeast. Experiment to find the perfect balance for your taste preferences. Enjoy your homemade, bubbly ginger ale responsibly!
Troubleshooting: If your ginger ale is flat after bottle conditioning, it may be due to insufficient sugar, insufficient yeast activity, or excessively high temperatures during fermentation. If your bottles are exploding, you may have over-carbonated them or left insufficient headspace. If you experience any issues, refer to brewing resources or consult with experienced homebrewers.
Flavor Adjustments and Testing
Once your ginger ale has finished its fermentation and carbonation process, it’s time for the crucial step of flavor adjustments and thorough testing. This is where you refine your ginger ale to perfection, achieving the balance of sweetness, spice, and fizz that you desire. Remember, taste is subjective, so these are guidelines – feel free to adjust to your preferences.
Initial Taste Test: Before making any adjustments, conduct a thorough tasting. Note the intensity of the ginger flavor, the level of sweetness, and the carbonation. Is it too gingery, too sweet, or lacking fizz? Identify the specific aspects that need tweaking.
Adjusting Sweetness: If your ginger ale is too tart, you can add simple syrup to adjust the sweetness. Start with small increments. A good starting point is 1/4 cup of simple syrup (equal parts sugar and water, heated until dissolved) per quart of ginger ale. Stir gently and taste again. Avoid adding too much at once, as it’s easier to add more than to take it away. Continue adding simple syrup in 1/8 cup increments until the desired sweetness is achieved. For a less sweet ginger ale, simply reduce the initial amount of sugar in the recipe.
Adjusting Ginger Intensity: If the ginger flavor is too subtle, you can add a ginger syrup to boost it. This can be made by simmering 1/2 cup grated fresh ginger in 1 cup of water for 15 minutes, straining it, and then combining it with an equal amount of sugar to make a syrup. Add this ginger syrup in small amounts (1-2 tablespoons at a time) to the ginger ale, tasting after each addition. Conversely, if the ginger is overpowering, you may need to start over with a smaller amount of ginger in the initial recipe. Fresh ginger varies in intensity, so always taste test before committing to large quantities.
Addressing Carbonation Levels: If your ginger ale is lacking in carbonation, ensure the fermentation process was completed correctly and that the bottles were properly sealed during carbonation. Low carbonation can be due to insufficient yeast or improper bottling techniques. If the carbonation is excessive and potentially dangerous, carefully release the pressure by slowly opening the bottle under cool water. Do not shake or open forcefully. For future batches, ensure proper priming sugar amounts and fermentation conditions are met.
Final Taste Test and Bottling: Once you’ve made your flavor adjustments, conduct a final taste test. Ensure the balance of sweetness, spice, and fizz aligns with your preference. If satisfied, carefully bottle your ginger ale, ensuring the bottles are tightly sealed to maintain carbonation. Allow the ginger ale to rest for at least 24 hours before chilling and serving to allow the flavors to meld and the carbonation to settle.
Professional Recommendation: Keep detailed notes of each batch, including the exact amounts of ingredients, fermentation times, and any adjustments made. This will help you fine-tune your recipe over time and achieve consistent results. Experimentation is key! Don’t be afraid to try different types of ginger, sweeteners, and even add other complementary flavors such as citrus or herbs to create your signature ginger ale.
Recommendations for the Best Ginger Ale Recipe
This homemade ginger ale recipe offers a superior flavor profile compared to commercially available options, boasting a vibrant, spicy kick with a delightful sweetness. To maximize your enjoyment and ensure the best possible outcome, consider the following recommendations.
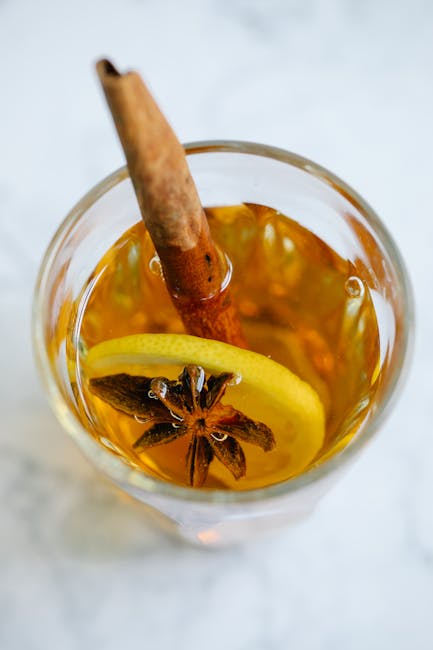
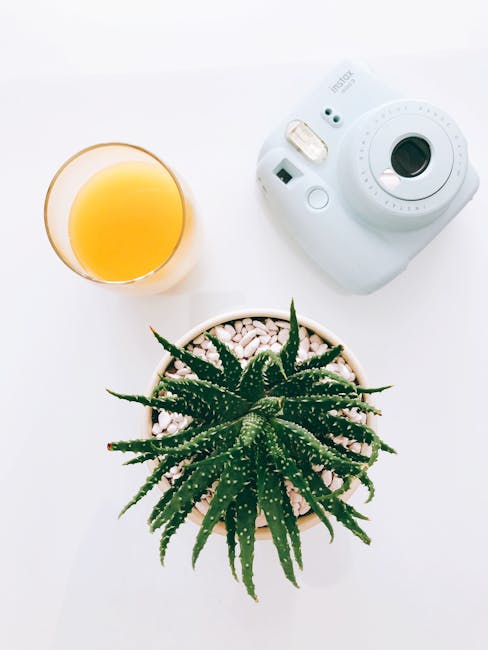
Serving Suggestions: This ginger ale is incredibly versatile. Enjoy it chilled straight from the refrigerator as a refreshing beverage on its own. For a sophisticated touch, serve it over ice with a thin lime wedge or a sprig of fresh mint. It also makes a fantastic mixer for cocktails. Consider using it as the base for a Moscow Mule, Dark ‘n’ Stormy, or a simple Gin & Ginger. Experiment with adding a splash of your favorite fruit juice for a unique twist, such as cranberry or pomegranate. A splash of orange liqueur adds a delightful complexity.
Storage Conditions: Proper storage is crucial for maintaining the quality and freshness of your homemade ginger ale. Store the ginger ale in airtight glass bottles in the refrigerator. This will help to prevent oxidation and maintain the vibrant flavor and carbonation. It should ideally be consumed within 7-10 days for optimal taste. Do not freeze the ginger ale, as this can cause the flavors to become muted and potentially damage the bottles.
Complementary Dishes: The spicy and slightly sweet nature of this ginger ale makes it a perfect pairing for a wide variety of dishes. It complements spicy Indian cuisine beautifully, cutting through the richness of curries and tandoori dishes. It’s also an excellent accompaniment to lighter fare, such as salads with ginger-based dressings, grilled seafood, or even a simple cheese and cracker platter. The subtle sweetness also pairs well with desserts such as ginger cakes or fruit tarts.
Nutritional Information (per 8-ounce serving, approximate values may vary based on specific ingredients used):
- Calories: Approximately 80-100 calories
- Carbohydrates: Approximately 20-25 grams
- Sugar: Approximately 15-20 grams (depending on the amount of sweetener used)
- Sodium: Very low
- Fat: Negligible
Note: These nutritional values are estimates and can vary depending on the specific ingredients and quantities used in your recipe. For precise nutritional information, use a nutrition calculator with your exact ingredient list and measurements.
Important Considerations: Always ensure your ginger is thoroughly cleaned before using. Adjust the amount of sugar and ginger to your personal preference. If you prefer a less spicy ginger ale, reduce the amount of ginger. Conversely, for a spicier beverage, increase the amount of ginger. Experiment with different types of sweeteners, such as honey or maple syrup, to achieve your desired level of sweetness and flavor complexity. Enjoy the process of creating your own unique and delicious ginger ale!