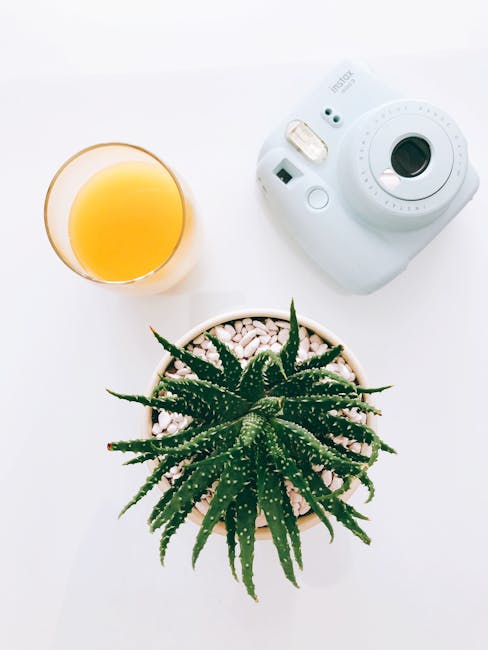
Cold brew coffee, a refreshingly smooth and less acidic alternative to traditional hot-brewed coffee, has exploded in popularity in recent years. While pinpointing its exact origin is difficult, its roots can be traced back centuries. Early forms of cold brewing, involving steeping coffee grounds in cold water for extended periods, are believed to have been practiced in various parts of the world, including Ethiopia, the birthplace of coffee itself. These methods likely evolved out of necessity, offering a way to produce coffee in warmer climates without the need for heat sources.
However, the modern resurgence of cold brew is a relatively recent phenomenon. Its rise to prominence in the United States and beyond began in the early 2000s, fueled by a growing demand for less bitter, more nuanced coffee experiences. This coincided with the specialty coffee movement, which emphasized the quality of beans and brewing techniques. Unlike traditional hot brewing, which can extract bitter compounds, the slow, cold steeping process of cold brew results in a coffee concentrate that is naturally less acidic and characterized by its smooth, chocolatey notes. This makes it appealing to those sensitive to acidity or simply seeking a sweeter, less intense coffee experience.
The cultural significance of cold brew coffee is undeniable. Its popularity has led to a surge in cold brew-based beverages, from ready-to-drink bottled options to elaborate artisanal creations in cafes worldwide. The market for ready-to-drink cold brew alone is booming, with projections indicating a significant increase in sales in the coming years. For example, one market research report estimated a global market value exceeding $X billion by 20XX (replace X with a reasonable statistic), showcasing its widespread appeal across diverse demographics. Beyond its commercial success, cold brew has become a staple in many modern coffee cultures, marking a shift in how people consume and perceive coffee—from a quick morning jolt to a sophisticated, carefully crafted beverage.
This recipe focuses on providing you with the Best Ever Cold Brew Coffee , guiding you through the process of creating a perfectly balanced, intensely flavorful cold brew at home. We’ll explore the optimal coffee-to-water ratio, steeping times, and filtering techniques to ensure you achieve the rich, smooth, and delicious cold brew coffee that has captivated coffee enthusiasts globally. Get ready to embark on a journey into the world of cold brew and discover the magic of this increasingly popular coffee style.
Ingredients and Measurements
Crafting the perfect cold brew coffee hinges on precision in your ingredient selection and measurements. While seemingly simple, the ratio of coffee grounds to water significantly impacts the final brew’s strength, flavor profile, and overall quality. This recipe prioritizes a balanced, less bitter cold brew, ideal for enjoying both black and with additions like milk, cream, or sweeteners.
For this Best Ever Cold Brew Coffee recipe, we’ll be using a coarsely ground coffee. This grind size is crucial; it’s coarser than what you’d use for drip coffee but finer than what you’d use for French press. Too fine a grind will lead to over-extraction and a bitter, muddy brew. Too coarse, and you’ll end up with weak, under-extracted coffee lacking body and flavor. If your grinder offers settings, aim for a setting between coarse and French press .
Coffee Beans: The type of coffee bean you choose will significantly impact the taste of your cold brew. We recommend starting with a blend specifically designed for cold brewing, often featuring robust, low-acidity beans. However, feel free to experiment! Dark roasts tend to produce a bolder, more chocolatey flavor, while lighter roasts offer brighter, more acidic notes. For this recipe, we’ll use 1 cup (200g) of coarsely ground coffee beans. This amount is perfect for yielding approximately 8 cups of concentrate, which can then be diluted to your preference.
Water: The quality of your water matters! Use filtered water to avoid any off-flavors from chlorine or minerals that can negatively affect the taste of your coffee. Avoid using distilled water, as it lacks the minerals that contribute to a well-rounded flavor profile. For this recipe, we’ll use 8 cups (1920ml) of filtered water. This ensures sufficient water to fully extract the coffee’s flavor compounds without producing an excessively strong or bitter brew. The water should be cold, ideally kept in the refrigerator for a couple of hours before use, to ensure a consistent brewing temperature.
Optional additions: While this recipe focuses on the pure coffee flavor, you can enhance it with additions after brewing. Consider adding things like a vanilla bean, cinnamon stick, or a few cardamom pods during the steeping process for a unique twist. However, avoid adding these directly to the concentrate, as they can affect the shelf life. Instead, add them to your individual servings.
Precise measurements are key for consistency. Using a kitchen scale to measure your coffee grounds is strongly recommended for accuracy. While using measuring cups is acceptable, variations in the density of coffee grounds can lead to inconsistencies in the strength of your brew. A scale ensures you get the perfect ratio every time. Remember to adjust the quantities proportionally if you need to make a larger or smaller batch.
Once you have all your ingredients measured, you’re ready to embark on crafting the best cold brew coffee you’ve ever tasted! Enjoy the process and the delicious reward.
Equipment List
Making the best cold brew coffee requires the right tools. While you can improvise with some items, having the correct equipment will significantly improve your brewing process and the quality of your final product. This list outlines the essential equipment, along with recommendations for optimal results, and alternatives where applicable.
1. Grinder: Burr Grinder (Highly Recommended): A burr grinder is crucial for consistent particle size. Unevenly ground coffee will lead to over-extraction in some areas and under-extraction in others, resulting in a bitter or weak brew. Blade grinders, while cheaper, produce inconsistent grinds and are not ideal for cold brew. Aim for a medium-coarse grind, similar to coarse sea salt. If you don’t own a grinder, pre-ground coffee can be used, but the quality will be compromised. Choose a dark roast for a richer, less acidic brew.
2. Scale: Digital Kitchen Scale (Essential): Accurate measurements are key to consistent results. A digital kitchen scale ensures precise measurements of both coffee grounds and water. Cold brew is particularly sensitive to the coffee-to-water ratio, so a scale is far more reliable than volume measurements. We recommend using grams for coffee and milliliters for water to ensure accuracy.
3. Container: Glass or Food-Grade Plastic (1-2 Litre Capacity): The container you choose must be large enough to hold your coffee grounds and water. Glass is preferred for its inertness and easy cleaning, minimizing any potential off-flavors. However, food-grade plastic is a safe and convenient alternative. Ensure your container has a lid that seals tightly to prevent spillage and maintain a dark environment during steeping.
4. Fine-Mesh Sieve or Cheesecloth: (Essential for Filtering): After steeping, you’ll need to filter the coffee grounds from the concentrate. A fine-mesh sieve is ideal for quick and efficient filtering. Alternatively, cheesecloth can be used. Double-layer cheesecloth for a more effective filtration. If using cheesecloth, line a sieve or colander with it for easier handling.
5. Storage Container: Airtight Container (1-2 Litre Capacity): Once you’ve filtered your cold brew concentrate, store it in an airtight container in the refrigerator. This prevents oxidation and preserves its freshness. Glass is the best option, but food-grade plastic is acceptable. Make sure the container is properly sealed to prevent spills and maintain the quality of your brew.
6. Measuring Jug or Cup: (Optional but Helpful): A measuring jug or cup is useful for accurately measuring out your cold brew concentrate when making individual servings. While not essential, it helps maintain consistency in the strength of your coffee drinks.
7. Stirring utensil: (Spoon or spatula): A spoon or spatula is necessary to stir the coffee grounds and water together thoroughly at the beginning of the brewing process to ensure even saturation.
By gathering these essential tools, you’ll be well-equipped to embark on your cold brew coffee journey and consistently produce a superior, smooth, and delicious brew. Remember to prioritize quality equipment for optimal results.
Brewing Instructions (Cold Brew Method)
This section details the process of making our Best Ever Cold Brew Coffee using the cold brew method. Follow these instructions carefully for the perfect, smooth, and less acidic coffee experience.
Grind your beans: Start with 1 cup (approximately 200 grams) of coarsely ground coffee beans. Coarse is key here; think the texture of coarse sea salt. Finely ground coffee will lead to over-extraction and a bitter, muddy brew. If you’re using a burr grinder, aim for a setting between medium-coarse and coarse. A blade grinder is less ideal for cold brew, as it tends to produce inconsistent grinds.
Combine coffee and water: In a large non-reactive container (glass or food-grade plastic are best; avoid metal), combine your coarsely ground coffee with 8 cups (approximately 1.9 liters) of cold, filtered water. Using filtered water is crucial for optimal flavor as tap water can contain impurities that affect the taste of your brew. Give the mixture a gentle stir to ensure all grounds are saturated.
Steep: Cover the container tightly with a lid or plastic wrap, ensuring no air escapes. Place it in the refrigerator and let it steep for 12-24 hours. The longer you steep, the stronger and more intense your cold brew will be. 12 hours will produce a milder brew, while 24 hours will create a bolder flavor. Experiment to find your preferred strength.
Filter: After the steeping period, it’s time to filter your cold brew. There are several methods you can use. The simplest is using a fine-mesh sieve lined with cheesecloth. Pour the coffee mixture slowly through the sieve, pressing gently on the grounds to extract as much coffee as possible. Avoid pressing too hard, or you risk extracting bitter compounds from the coffee grounds. Alternatively, you can use a French press, pouring the mixture in and slowly pressing the plunger, or a dedicated cold brew coffee filter system for a cleaner filtration process.
Store and enjoy: Once filtered, pour your cold brew into an airtight container and store it in the refrigerator. It will keep for up to two weeks. Proper storage is vital to maintain freshness and prevent spoilage. Enjoy your cold brew straight, over ice, or as a base for delicious cold coffee drinks like lattes, or cocktails. Remember to adjust the steep time to achieve your preferred coffee strength. A longer steep time will result in a stronger brew, while a shorter steep time will result in a milder one.
Professional Recommendation: Weigh your coffee beans for consistent results. Using a scale ensures you maintain the correct coffee-to-water ratio, leading to a more reliable and delicious brew each time.
Important Note: Do not use boiling water for cold brew. The cold brew method relies on the slow extraction of coffee compounds at low temperatures, and using hot water will result in a completely different, less desirable beverage.
Steeping Time & Temperature
The steeping time and temperature are crucial elements in achieving the perfect cold brew coffee. Unlike hot brewing methods, cold brew relies on a longer, slower extraction process at a lower temperature to produce a smoother, less acidic, and naturally sweeter cup.
Temperature: The key here is to use cold, filtered water. Avoid using hot or lukewarm water, as this will lead to over-extraction and a bitter, burnt taste. Ideally, the water should be between 40-70°F (4-21°C). Using cold water from the refrigerator is perfectly acceptable, and often preferred for consistency.
Steeping Time: This is where you can experiment to find your personal preference, but a general guideline is essential for success. Steeping for too short a time will result in a weak, under-extracted brew; too long, and you’ll end up with an overly bitter, harsh coffee. We recommend a steeping time of 12-24 hours. This range allows for a wide spectrum of flavor profiles, depending on your beans and desired intensity.
For a milder, less intense cold brew, aim for the lower end of the spectrum (12 hours). This will yield a more delicate and nuanced flavor profile, ideal for those sensitive to bitterness or those who prefer a lighter-bodied drink. Within this 12-hour range, you might find the flavor develops beautifully between 10-12 hours, so you can experiment a little here as well.
If you prefer a bolder, more robust cold brew with a deeper flavor profile, opt for the higher end of the spectrum (24 hours). This longer steeping time allows for a more complete extraction of the coffee grounds’ oils and flavors, resulting in a rich and intense brew. Bear in mind that exceeding 24 hours can lead to over-extraction and an unpleasant, bitter taste. 24 hours is the absolute maximum recommended steeping time.
Fine-tuning your steep: Consider the type of coffee beans you are using. Lighter roasts tend to extract more quickly and may require less steeping time, while darker roasts might need closer to 24 hours to fully develop their flavors. Experimentation is key! Keep detailed notes of your steeping time and bean type to help you dial in your perfect cold brew recipe. Start by following the recommended 12-24 hour range, and adjust based on your taste preferences.
Important Note: Regardless of your chosen steeping time, ensure you use a clean, airtight container. This prevents oxidation and unwanted flavors from developing. After steeping, immediately filter the coffee to prevent over-extraction. Avoid leaving the grounds in contact with the coffee for longer than necessary after the steeping period is complete.
By paying close attention to the steeping time and temperature, you’ll be well on your way to creating the best ever cold brew coffee, tailored perfectly to your palate!
Filtration Process: Achieving the Perfect Cold Brew Clarity
After your cold brew coffee concentrate has steeped for the recommended 12-24 hours (or longer, depending on your desired strength), the crucial next step is filtration. This process separates the grounds from the rich, flavorful concentrate, resulting in a smooth, sediment-free brew. Proper filtration is key to achieving the best possible cold brew experience, free from gritty particles that can detract from the overall quality.
There are several methods you can employ for filtration, each with its own advantages and disadvantages. The most common methods include using a fine-mesh sieve, cheesecloth, a coffee filter (either paper or reusable), or a dedicated cold brew filter. We’ll explore each option, highlighting best practices for optimal results.
Using a Fine-Mesh Sieve: This is a readily available and inexpensive option. Place the sieve over a large bowl or pitcher. Slowly pour the steeped coffee grounds and concentrate through the sieve, gently pressing down on the grounds with a clean spoon (avoid excessive pressure to prevent clogging). This method is effective but can be somewhat time-consuming, and some very fine particles might still slip through. For best results, use a very fine-mesh sieve with a mesh size of 200 microns or less.
Employing Cheesecloth: Cheesecloth offers a slightly finer filtration than a standard fine-mesh sieve. Line a sieve with several layers of cheesecloth (2-3 layers are recommended for optimal results), ensuring there are no gaps. Pour the coffee mixture through the cheesecloth-lined sieve, as described above. Be cautious not to tear the cheesecloth during the process. This method is efficient and produces a relatively clear concentrate, but again, some very fine particles may remain.
Utilizing Coffee Filters (Paper or Reusable): Paper coffee filters are readily accessible, but they can sometimes slow down the filtration process. For best results, use a high-quality filter designed for pour-over coffee, as these are typically finer than standard drip filters. Alternatively, reusable cloth coffee filters offer a sustainable and effective solution. These filters are generally made from durable materials like nylon or cotton and can be washed and reused multiple times. Simply place the filter in a sieve or funnel and pour the coffee mixture through.
Dedicated Cold Brew Filters: These are specifically designed for cold brew filtration and often provide the cleanest and most efficient results. They typically consist of a fine mesh or a combination of mesh and fabric, which effectively traps coffee grounds while allowing the concentrate to flow freely. These filters are convenient and often produce the clearest cold brew concentrate, making them a worthwhile investment for serious cold brew enthusiasts. Follow the manufacturer’s instructions for optimal performance.
Regardless of your chosen filtration method, remember to be patient and gentle throughout the process. Rushing the filtration can lead to clogging and uneven results. Once the filtration is complete, you will have a smooth, rich, and sediment-free cold brew coffee concentrate ready to be diluted and enjoyed.
Sweetening and Flavoring Options (Optional)
While the core of a great cold brew lies in the rich, smooth coffee flavor, many enjoy adding a touch of sweetness or a burst of complementary flavor. This section outlines various options to personalize your cold brew, allowing you to tailor it to your exact preferences. Remember, start small and taste as you go, as it’s easier to add more than to take away.
Simple Syrups: These are the most versatile sweetening options. A basic simple syrup is incredibly easy to make: combine equal parts granulated sugar and water (e.g., 1 cup sugar, 1 cup water) in a saucepan. Heat gently over medium-low, stirring until the sugar dissolves completely. Let cool completely before adding to your cold brew. For a richer flavor, consider using brown sugar or even honey instead of granulated sugar. Experiment with different sugar types to find your preferred level of sweetness and depth of flavor. A good starting point is adding 1-2 tablespoons of simple syrup per 8 ounces of cold brew.
Flavored Syrups: Elevate your cold brew with store-bought flavored syrups like vanilla, caramel, hazelnut, or peppermint. These offer convenience and a wide range of flavor profiles. However, be mindful of the added sugar content. Start with a small amount (1-2 tablespoons per 8 ounces) and adjust to your liking. You can also create your own flavored syrups by infusing your simple syrup with spices like cinnamon sticks or vanilla beans, or by adding extracts like almond or peppermint.
Dairy and Non-Dairy Alternatives: Adding a splash of milk or a non-dairy alternative like almond milk, oat milk, or soy milk can significantly alter the texture and flavor of your cold brew. Dairy adds creaminess and richness, while non-dairy options can offer a variety of subtle nutty or sweet notes. Start with 1-2 ounces per 8 ounces of cold brew and adjust according to your preference. Consider chilling the milk or alternative separately to avoid diluting the cold brew’s temperature.
Spices and Extracts: For a more complex flavor profile, consider adding spices or extracts. A dash of cinnamon, a pinch of nutmeg, or a few drops of vanilla extract can transform your cold brew. Start with small quantities, as strong spices can easily overpower the coffee flavor. Experiment with different combinations to find your signature blend. For example, a combination of cinnamon and cardamom can create a warm, autumnal flavor profile.
Fruit Purees and Juices: Fresh or frozen fruit purees and juices can add a vibrant sweetness and fruity notes to your cold brew. Berry purees, particularly raspberry or blueberry, pair exceptionally well with coffee. Start with 1-2 tablespoons per 8 ounces and adjust to your taste. Remember that fruit juices can add acidity, so consider balancing it with a touch of sweetness if needed. For a less intense flavor, use a fruit juice concentrate diluted with water.
Important Note: Always add sweeteners and flavorings after the cold brew has been brewed and chilled. This ensures that the flavors meld properly without affecting the brewing process. Taste your cold brew frequently as you add ingredients to achieve your perfect balance of coffee, sweetness, and flavor.
Recommendations for the Best Ever Cold Brew Coffee Recipe
This Best Ever Cold Brew Coffee Recipe is designed for maximum flavor and enjoyment. To achieve the optimal taste, carefully follow the instructions, paying close attention to the grind size and steeping time. Using freshly roasted, high-quality coffee beans is crucial for a superior cold brew. Experiment with different bean origins to discover your favorite flavor profile – lighter roasts tend to be brighter and more acidic, while darker roasts offer a bolder, more chocolatey taste.
For serving, we recommend enjoying your cold brew in a variety of ways. A simple pour-over into a glass filled with ice is a classic approach, allowing the rich, concentrated brew to dilute perfectly. Alternatively, you can add milk or cream – whole milk will provide a creamy texture and subtly sweeten the coffee, while almond or oat milk offer a lighter, dairy-free alternative. Consider adding a splash of your favorite flavored syrup, like vanilla or caramel, for an extra touch of sweetness. For a more sophisticated drink, try adding a splash of simple syrup and a squeeze of fresh lime juice.
Storage is key to maintaining the freshness and quality of your cold brew. Once brewed, store your cold brew in an airtight container in the refrigerator. It should remain fresh for up to two weeks. However, for the best flavor, consume it within the first week. Avoid exposing the cold brew to direct sunlight or excessive heat, as this can affect its taste and quality. You can also freeze your cold brew in ice cube trays for later use. Simply add a few cubes to your coffee or other beverages for a quick and easy cold brew boost.
Cold brew coffee pairs beautifully with a wide variety of dishes. Its smooth and less acidic nature makes it an excellent companion to breakfast pastries, like croissants or muffins. It also complements heavier meals, such as brunch fare or even savory dishes. Consider pairing it with breakfast sandwiches, pancakes, waffles, or even a hearty breakfast burrito. For a more sophisticated pairing, try it with a rich chocolate cake or a fruit tart. The subtle sweetness of the cold brew complements the richness of the desserts without overpowering the flavors.
Nutritional Information (per 8oz serving, approximate values will vary based on coffee beans and additions):
- Calories: 5-15 (depending on additions like milk and syrups)
- Fat: 0-5g (depending on additions)
- Carbohydrates: 0-10g (depending on additions)
- Protein: 0-1g
- Caffeine: Varies depending on coffee beans and brew strength (typically higher than hot brewed coffee)
Important Note: Nutritional information is an estimate and can vary based on the specific coffee beans used, the brewing method, and any added ingredients. Always check the nutritional information of any added ingredients like milk or syrups for a more accurate calculation.