The quest for the perfect chocolate cake is a journey as old as civilization itself. While pinpointing the exact origin of chocolate cake is impossible, we can trace its evolution through history. Early forms, relying on less refined chocolate and rudimentary baking techniques, likely emerged centuries ago in various cultures independently. The use of cacao beans, the base of chocolate, dates back millennia to the Olmec civilization in Mesoamerica, where it held significant ritual and cultural importance. These early preparations, however, were vastly different from the decadent desserts we enjoy today. The development of modern chocolate processing and baking methods, particularly in Europe after the Columbian Exchange, played a crucial role in shaping the chocolate cake we know and love.
The rise of chocolate cake to its current status as a global culinary icon is a testament to its enduring appeal. Statistics show that chocolate cake consistently ranks among the top three most popular cake flavors worldwide, a position it fiercely defends against contenders like vanilla and red velvet. Its popularity isn’t solely based on taste; it’s deeply intertwined with celebrations and cultural traditions. Birthday parties, weddings, and countless other festive occasions are often incomplete without a majestic chocolate cake as the centerpiece. This cultural significance is reflected in countless songs, poems, and even movies that feature chocolate cake as a symbol of joy, indulgence, and shared experiences.
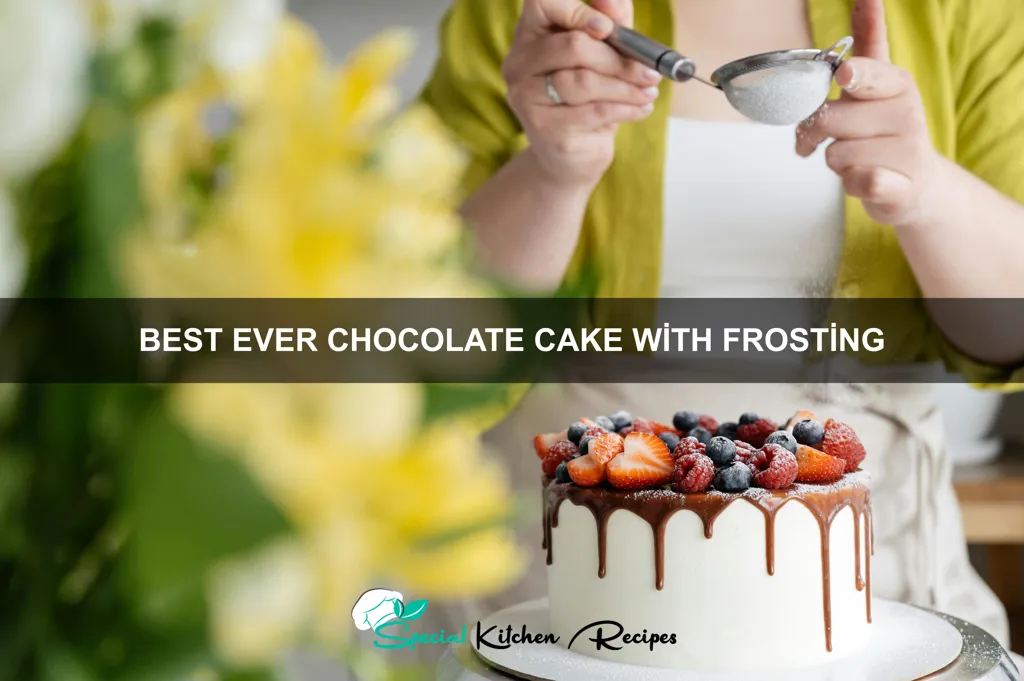
The recipe presented here, “Best Ever Chocolate Cake with Frosting,” aims to capture the essence of this beloved dessert. We’ve meticulously crafted this recipe to deliver an unparalleled chocolate experience, balancing rich, deep chocolate flavor with a moist, tender crumb. This recipe incorporates techniques honed over years of baking and testing, resulting in a cake that’s consistently praised for its superior texture and taste. From the carefully chosen cocoa powder to the precise baking time, every detail has been considered to ensure a result that surpasses expectations. We believe this recipe represents the pinnacle of chocolate cake artistry, a culmination of centuries of culinary innovation and a celebration of one of the world’s most cherished desserts.
Ingredients and Measurements
This recipe yields a decadent, two-layer 9-inch chocolate cake with enough frosting to generously cover it. Accurate measurements are crucial for achieving the perfect texture and rise. Use a kitchen scale for the most precise results, especially for the flour and cocoa powder. If you don’t have a scale, use a light and fluffy measuring technique, spooning the flour and cocoa into the measuring cup and leveling it with a straight edge, rather than scooping directly from the bag.
For the Cake:
- 2 cups (250g) all-purpose flour – Using cake flour will result in a slightly more tender crumb, but all-purpose works perfectly well.
- 2 cups (400g) granulated sugar – Do not substitute with powdered sugar. Granulated sugar provides the necessary structure and browning.
- ¾ cup (60g) unsweetened cocoa powder – Choose a high-quality Dutch-processed cocoa powder for a richer, deeper chocolate flavor.
- 1 ½ teaspoons baking powder – Ensure your baking powder is fresh for optimal leavening. Check the expiration date.
- 1 ½ teaspoons baking soda – Baking soda reacts with the acidic ingredients (buttermilk and cocoa) to create lift.
- 1 teaspoon salt – Salt enhances the chocolate flavor and balances the sweetness.
- 1 cup (240ml) buttermilk – Buttermilk adds moisture and tanginess to the cake. If you don’t have buttermilk, you can substitute by adding 1 tablespoon of white vinegar or lemon juice to 1 cup of regular milk and letting it sit for 5 minutes.
- 2 large eggs – Room temperature eggs incorporate better into the batter, leading to a smoother texture.
- 1 cup (240ml) vegetable oil – Oil adds moisture and keeps the cake tender. Don’t substitute with butter, as it will alter the texture and moisture content significantly.
- 2 teaspoons vanilla extract – Pure vanilla extract is highly recommended for the best flavor.
- 1 cup (240ml) freshly brewed hot coffee – The hot coffee enhances the chocolate flavor and adds moisture.
For the Chocolate Frosting:
- 1 cup (2 sticks) unsalted butter, softened – Make sure the butter is truly softened, not melted. This ensures proper creaming with the sugar.
- 3 cups (360g) powdered sugar – Sift the powdered sugar before adding it to prevent lumps.
- ¾ cup (60g) unsweetened cocoa powder – Use the same cocoa powder as for the cake.
- ½ cup (120ml) milk – Whole milk is preferred for a richer frosting, but you can use any milk you prefer.
- 1 teaspoon vanilla extract – Again, pure vanilla extract is best.
Note: All measurements are in US customary units unless otherwise specified. Adjust quantities proportionally if you wish to make a smaller or larger cake.
Equipment List
Baking the best ever chocolate cake requires the right tools. Having the correct equipment not only ensures a smooth baking process but also contributes to the final cake’s texture and appearance. This list details the essential equipment, with recommendations for optimal results.
Mixing Bowls: You will need at least three mixing bowls of varying sizes. A large bowl (approximately 5-quart capacity) is crucial for creaming together the butter and sugar. A medium bowl (approximately 3-quart) is ideal for whisking together the dry ingredients, and a small bowl (approximately 2-quart) can be used for preparing the chocolate mixture or for separating eggs.
Measuring Cups and Spoons: Accurate measurements are paramount in baking. Invest in a set of both liquid and dry measuring cups. Dry measuring cups should be used for dry ingredients like flour and cocoa powder, while liquid measuring cups are essential for liquids like milk and oil. A set of measuring spoons – teaspoons and tablespoons – is also crucial for precise ingredient additions. Use a kitchen scale for the most accurate measurements, especially for flour.
Whisk: A balloon whisk is perfect for whisking together dry ingredients and incorporating air into the batter. A sturdy whisk is essential for preventing lumps and ensuring a smooth batter. A smaller whisk can be helpful for mixing smaller batches of ingredients.
Spatula/Scraper: A rubber spatula or scraper is invaluable for scraping down the sides of the bowl, ensuring all ingredients are incorporated. This is especially important when creaming butter and sugar together. Choose a durable spatula that can withstand both use in the bowl and for frosting.
9×13 inch Baking Pan: This size pan is ideal for this recipe, providing ample space for the cake to rise evenly. Ensure your pan is ungreased and floured (or lined with parchment paper) to prevent sticking.
Electric Mixer (Stand or Handheld): An electric mixer, either a stand mixer or a handheld mixer, is highly recommended for this recipe. The creaming process is crucial for achieving a light and airy texture, and an electric mixer greatly streamlines this step. A hand mixer is suitable for smaller batches while a stand mixer can handle larger volumes with ease.
Cooling Rack: A wire cooling rack is essential for cooling the cake evenly after baking. This prevents moisture buildup and ensures the cake doesn’t become soggy. Allow the cake to cool completely before frosting.
Offset Spatula: This is ideal for applying the frosting evenly and smoothly, creating a professional-looking finish. A bench scraper can also be utilized for achieving perfectly straight sides on your frosted cake.
Optional: Parchment paper for lining the baking pan to prevent sticking and easier removal, piping bag and tips for decorative frosting.
Cake Batter Preparation (including mixing techniques and batter consistency)
Creating the perfect chocolate cake batter is key to achieving that melt-in-your-mouth texture and rich chocolate flavor. This section details the precise steps and techniques for achieving batter perfection. We’ll be using the creaming method, which is ideal for creating a light and airy cake.
Begin by preheating your oven to 350°F (175°C) and greasing and flouring two 9-inch round cake pans. This prevents sticking and ensures easy removal of your beautifully baked cakes. Proper pan preparation is crucial for even baking.
In a large bowl, cream together 2 sticks (1 cup) of unsalted butter and 2 cups of granulated sugar until the mixture is light and fluffy. This usually takes about 3-5 minutes with an electric mixer on medium-high speed. Don’t rush this step! Proper creaming incorporates air into the butter, creating a tender crumb. The mixture should be pale and noticeably increased in volume.
Next, beat in 4 large eggs one at a time, ensuring each egg is fully incorporated before adding the next. Add a teaspoon of vanilla extract at this stage for enhanced flavor. Scrape down the sides of the bowl as needed to ensure everything is evenly mixed. Overmixing can lead to a tough cake, so mix only until just combined.
In a separate bowl, whisk together 2 cups of all-purpose flour, ¾ cup unsweetened cocoa powder, 1 ½ teaspoons of baking soda, and 1 teaspoon of baking powder. Sifting the dry ingredients helps prevent lumps and ensures even distribution of leavening agents.
Gradually add the dry ingredients to the wet ingredients, alternating with 1 cup of buttermilk. Begin and end with the dry ingredients. Mix on low speed until just combined. Do not overmix! A few lumps are okay; overmixing develops gluten, resulting in a dense cake. The batter should be smooth but not overly thick. It should have a pourable consistency, similar to thick pancake batter.
The ideal batter consistency is smooth and slightly thick, dropping readily from the spoon but not runny. If the batter seems too thick, add a tablespoon or two of buttermilk at a time until you achieve the desired consistency. If it’s too thin, add a tablespoon of flour at a time until it thickens slightly.
Once the batter is ready, divide it evenly between the prepared cake pans. Bake for 30-35 minutes, or until a wooden skewer inserted into the center comes out clean. Let the cakes cool in the pans for 10 minutes before inverting them onto a wire rack to cool completely before frosting.
Baking the Cake
Preheat your oven to 350°F (175°C). This is crucial for even baking. Ensure your oven rack is positioned in the center of the oven to prevent uneven browning. Lightly grease and flour two 9-inch round cake pans. You can also line the bottoms with parchment paper for easier removal – this is highly recommended for a clean release.
Gently pour the prepared batter evenly into the prepared cake pans. Divide the batter as equally as possible between the two pans; a kitchen scale can be helpful for precision. Tap the pans lightly on the countertop a few times to release any trapped air bubbles, which can lead to uneven rising.
Bake for 30-35 minutes, or until a wooden skewer inserted into the center comes out clean. Overbaking is a common mistake, resulting in a dry cake. Start checking for doneness around the 30-minute mark. If the skewer comes out with a few moist crumbs attached, that’s okay; it’s better to slightly underbake than overbake.
Another reliable sign of doneness is the cake pulling away from the sides of the pan. A gentle wiggle of the pan should show a slight gap between the cake and the pan’s edges. The top of the cake should also be springy to the touch, not jiggly.
Once baked, let the cakes cool in the pans for 10 minutes before inverting them onto a wire rack to cool completely. Cooling completely is essential before frosting; otherwise, the frosting will melt. Allow at least 30-45 minutes for complete cooling. If you’re short on time, you can speed up the cooling process slightly by placing the cakes on a wire rack set over a baking sheet and fanning them gently.
While the cakes are cooling, prepare your frosting. Having the frosting ready ensures you can frost the cakes while they are still slightly warm, which helps the frosting adhere better. Once completely cool, you are ready to frost your masterpiece and enjoy the best ever chocolate cake!
Important Note: Oven temperatures can vary, so keep a close eye on your cakes during the last 5-10 minutes of baking time. If the edges are browning too quickly, you can tent the pans loosely with aluminum foil to prevent over-browning.
Cooling the Cake (proper cooling methods to prevent cracking)
Cooling your chocolate cake properly is crucial for preventing cracks and ensuring a beautifully smooth surface ready for frosting. Improper cooling can lead to shrinkage and stress on the cake layers, resulting in unsightly cracks. Follow these steps for perfect results.
The first 10 minutes are critical. Immediately after removing your chocolate cake from the oven, let it cool in the pan for 10 minutes. This allows the internal structure to set slightly, preventing collapse as it cools further. Don’t rush this step!
Use a cooling rack: After the initial 10 minutes, carefully invert the cake onto a wire cooling rack. This allows air to circulate around the entire cake, promoting even cooling and preventing moisture buildup, which can lead to cracking. If using multiple layers, cool each layer separately on its own rack.
Avoid drastic temperature changes: Don’t place the hot cake directly onto a cold surface like a marble countertop. The sudden temperature difference can cause rapid shrinkage and cracking. The wire rack provides the perfect balance of support and air circulation.
Gentle handling is key: Once inverted, resist the urge to jiggle or move the cake. Let it cool completely undisturbed for at least 30-45 minutes, or until completely cool to the touch. Avoid touching the cake during this time to prevent damage.
Layer cooling: If baking multiple layers, cool each one separately before stacking. This ensures even cooling and prevents the bottom layers from becoming soggy from the heat of the upper layers. Allow each layer to cool completely before frosting.
Recipe-Specific Considerations: Some recipes, particularly those with a high fat content, may benefit from a slightly longer cooling time. Observe your cake – if it feels very soft or jiggly after 45 minutes, allow it to cool for another 15-20 minutes.
Sign of proper cooling: A properly cooled cake will feel firm to the touch, with no noticeable give when gently pressed. If you’re still unsure, you can carefully insert a toothpick into the center of the cake. If it comes out clean, your cake is fully cooled.
Preventative Measures: Using the correct amount of baking powder and ensuring your oven temperature is accurate will also contribute to a less prone-to-cracking cake. Over-baking can also contribute to cracking, so always check for doneness using a toothpick.
By following these steps, you’ll ensure your delicious chocolate cake cools evenly, preventing cracks and resulting in a flawlessly smooth surface, ready for your amazing frosting.
Frosting Preparation (including mixing techniques and desired consistency)
This recipe uses a classic American buttercream frosting, known for its creamy texture and rich chocolate flavor. To achieve the perfect frosting, precise measurements and the right mixing technique are crucial. We’ll be making enough frosting to generously cover a 9-inch double-layer cake.
Ingredients:
- 1 cup (2 sticks) unsalted butter, softened to room temperature. This is vital! Cold butter will result in a grainy frosting.
- 3 cups powdered sugar, sifted. Sifting removes lumps and ensures a smooth frosting.
- 1/2 cup unsweetened cocoa powder, sifted. Using sifted cocoa powder prevents clumps and ensures a consistent chocolate flavor.
- 1/4 cup milk (whole milk recommended for richness).
- 1 teaspoon pure vanilla extract
- Pinch of salt
Instructions:
1. Beat the butter: In a large bowl, using an electric mixer on medium speed, beat the softened butter until it’s light and fluffy. This usually takes about 2-3 minutes. Don’t rush this step; properly creamed butter is key to a smooth frosting.
2. Gradually add the powdered sugar and cocoa powder: With the mixer on low speed, gradually add the sifted powdered sugar and cocoa powder, alternating with the milk, beginning and ending with the powdered sugar mixture. Add a small amount at a time, mixing well after each addition. This prevents a sugar cloud from forming and ensures even incorporation.
3. Increase speed and incorporate flavorings: Once all the dry ingredients are incorporated, increase the mixer speed to medium-high and beat for another 2-3 minutes until the frosting is light, fluffy, and completely smooth. Add the vanilla extract and salt and beat for another minute to combine.
4. Adjust consistency: If the frosting is too thick, add a teaspoon of milk at a time until you reach your desired consistency. If it’s too thin, add a tablespoon of powdered sugar at a time until it thickens. The ideal consistency is spreadable but firm enough to hold its shape and pipe decorations.
5. Taste and adjust: Taste the frosting and adjust the sweetness or vanilla as needed. You can add more powdered sugar for sweetness or more vanilla extract for a stronger flavor.
Professional Tip: For an extra-rich and decadent frosting, use high-quality dark cocoa powder. Also, chilling the frosting for about 30 minutes before using will make it easier to pipe and create decorative elements.
Recommendations for the Best Ever Chocolate Cake with Frosting
This decadent chocolate cake is best enjoyed at room temperature for optimal flavor and texture. Allow the cake to sit for at least 30 minutes after frosting before slicing and serving. For the richest chocolate experience, serve it slightly warmed. You can achieve this by briefly microwaving individual slices for 10-15 seconds.
Serving Suggestions: This cake is incredibly versatile. Serve it plain for a classic indulgence, or elevate it with fresh berries (strawberries, raspberries, blueberries), a scoop of vanilla bean ice cream, or a dollop of whipped cream. A drizzle of chocolate sauce or caramel adds an extra layer of decadence. Consider serving individual slices with a small glass of cold milk or a strong cup of coffee to complement the rich chocolate flavor.
Storage: Store leftover cake in an airtight container at room temperature for up to 3 days. For longer storage (up to a week), refrigerate the cake. Allow the cake to come to room temperature before serving again. Freezing is not recommended, as it can affect the texture of both the cake and the frosting.
Complementary Dishes: This chocolate cake pairs beautifully with lighter, contrasting flavors. A simple fruit salad or a light and refreshing citrus sorbet would make a delightful accompaniment. For a more substantial pairing, consider serving it alongside a scoop of vanilla ice cream and a cup of strong coffee. A light, non-alcoholic beverage like sparkling water or iced tea can also help cut through the richness of the cake.
Nutritional Information (per slice, approximate): Calories: Approximately 450-500 (depending on slice size and frosting amount). Fat: 25-30g. Saturated Fat: 15-20g. Cholesterol: 50-75mg. Sodium: 150-200mg. Carbohydrates: 60-70g. Sugar: 40-50g. Protein: 5-7g. Note: These are estimates and can vary depending on specific ingredients used. For precise nutritional information, use a nutritional calculator with your exact recipe details.
Enjoy responsibly! This cake is incredibly rich, so a smaller slice can be just as satisfying.