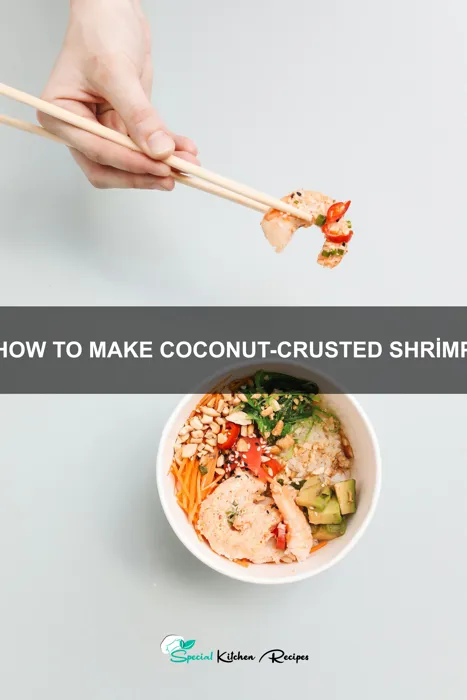
Coconut-crusted shrimp, a seemingly simple dish, boasts a surprisingly rich and diverse culinary history. While pinpointing its exact origin is difficult, its popularity is undeniably linked to the global embrace of coconut and shrimp as staple ingredients. The widespread availability of both ingredients in coastal regions, particularly in Southeast Asia and the Caribbean, suggests its evolution likely involved independent development in various cultures. In these regions, coconut, in its many forms, is a cornerstone of cuisine, used in both sweet and savory dishes, while shrimp provides a readily available, lean protein source. The precise moment when someone first had the inspired idea to combine the two, creating this delightful textural contrast, remains shrouded in culinary mystery.
The rise of coconut-crusted shrimp in modern Western cuisine is, however, far more traceable. Its popularity exploded alongside the increasing accessibility of tropical ingredients and a growing fascination with globally inspired dishes. The shrimp industry alone is a multi-billion dollar global enterprise, with over 4 million tons of shrimp produced annually, according to the Food and Agriculture Organization of the United Nations. This abundance of shrimp, coupled with a growing demand for flavorful, easy-to-prepare recipes, propelled coconut-crusted shrimp into the mainstream. Its appeal lies not only in its taste but also its versatility; it can be served as an appetizer, a main course, or even incorporated into larger meals.
Culturally, coconut-crusted shrimp reflects a fascinating fusion of culinary traditions. It blends the tropical flavors of Southeast Asia and the Caribbean with Western cooking techniques, demonstrating the interconnectedness of global gastronomy. The dish’s adaptability also speaks to its cultural significance; it can be customized to incorporate various spices and sauces, reflecting individual preferences and regional variations. Whether served with a spicy mango salsa, a creamy coconut dipping sauce, or a simple lime wedge, coconut-crusted shrimp offers a delicious and adaptable culinary experience that continues to captivate palates worldwide. This recipe will guide you through creating your own version of this globally-inspired delight.
Ingredients and Measurements
This recipe yields approximately 24 coconut-crusted shrimp, perfect for a party appetizer or a light dinner for two to four people. Adjust quantities as needed for larger or smaller batches. Accuracy in measurements is crucial for achieving the perfect balance of flavors and textures.
Shrimp: You’ll need 1 pound (450g) of large shrimp, peeled and deveined. Choosing the right shrimp is key. Look for shrimp that are firm to the touch, with a translucent appearance and a fresh, slightly sweet smell. Avoid shrimp that are mushy or have a strong fishy odor. For ease of cooking and even browning, it’s recommended to use shrimp that are roughly uniform in size. If using frozen shrimp, ensure they are completely thawed and patted dry before proceeding.
Coconut Flakes: Use 1 ½ cups (150g) of unsweetened shredded coconut flakes. The type of coconut flakes matters. Fine-shredded coconut will create a finer, more even crust, while larger flakes will result in a chunkier texture. Choose based on your preference. If using sweetened coconut flakes, reduce the amount of added sugar in the recipe.
Breadcrumbs: ½ cup (60g) of panko breadcrumbs are ideal. Panko breadcrumbs are highly recommended as they create a lighter, crispier crust compared to regular breadcrumbs. However, if panko is unavailable, you can substitute with regular breadcrumbs but expect a slightly denser result.
Binding Agents: We’ll use two binding agents to help the coconut mixture adhere to the shrimp. First, 1 large egg, lightly beaten. This provides moisture and helps bind the dry ingredients. Second, 2 tablespoons of all-purpose flour, which acts as a thickening agent and further assists in creating a cohesive coating.
Seasoning: For optimal flavor, use ½ teaspoon of salt and ¼ teaspoon of freshly ground black pepper. You can also add other seasonings to customize the taste, such as garlic powder (½ teaspoon), onion powder (¼ teaspoon), or paprika (¼ teaspoon). Adjust seasoning to your liking; taste and adjust as needed before proceeding.
Cooking Oil: You will need approximately ½ cup (120ml) of vegetable oil or your preferred high-heat cooking oil for frying. Use enough oil to submerge the shrimp halfway, ensuring even cooking and browning. Avoid overcrowding the pan, which can lower the oil temperature and result in soggy shrimp.
Garnish (Optional): Lime wedges are a refreshing garnish that complements the coconut shrimp perfectly. Consider adding a sprinkle of fresh cilantro for an extra layer of flavor and visual appeal.
Equipment List
Making delicious coconut-crusted shrimp requires the right tools to ensure a smooth and efficient cooking process. This equipment list details everything you’ll need, from prep to plating.
For Preparation: You’ll need three shallow dishes of approximately 8-inch diameter. One will hold the beaten eggs (approximately 1 cup), another will contain the shredded coconut (about 2 cups, unsweetened is recommended), and the third will be for the seasoned shrimp. Using shallow dishes allows for even coating and prevents excess batter from accumulating.
Measuring Utensils: Accurate measurements are crucial for optimal flavor. Invest in a set of measuring cups (1 cup, ½ cup, ¼ cup, and 1 tablespoon) and measuring spoons (1 teaspoon, ½ teaspoon, ¼ teaspoon). A kitchen scale is also beneficial for precise measurements of ingredients like the shrimp (approximately 1 pound). Using a scale ensures consistency in your recipe.
Mixing and Coating Tools: A whisk is essential for thoroughly beating the eggs, creating a light and airy coating. A sturdy fork or spatula is needed for gently tossing the shrimp in the egg wash and coconut. Avoid overcrowding the dishes during the coating process to prevent clumping.
Cooking Equipment: A large skillet (12-inch diameter) is ideal for cooking the shrimp. Ensure your skillet is oven-safe if you plan to finish the shrimp in the oven for extra crispy texture. You will also need tongs for carefully flipping and handling the shrimp during cooking. A paper towel-lined plate or tray is necessary for draining excess oil from the cooked shrimp.
Optional Equipment: While not strictly necessary, a meat thermometer allows for precise cooking of the shrimp to ensure it reaches a safe internal temperature of 145°F (63°C). A pastry brush can be used to lightly brush oil onto the skillet before cooking, preventing sticking. Using a Parchment paper liner in your baking sheet will make clean up easier if baking your shrimp.
Serving Utensils: Finally, you’ll need a serving dish or platter to present your beautiful, golden-brown coconut-crusted shrimp. Serving spoons or tongs are also helpful for easy portioning.
Shrimp Preparation (Cleaning and Deveining)
Before you begin the delightful process of creating coconut-crusted shrimp, proper preparation of the shrimp is crucial for both flavor and texture. We’ll be working with approximately 1 pound (450g) of raw, peeled and deveined shrimp for this recipe, but you can adjust the quantity as needed. However, it’s best to work with shrimp that are already peeled and deveined to save time, especially if you’re making a large batch.
If you’re starting with raw shrimp that are *not* peeled and deveined, here’s how to proceed: First, rinse the shrimp thoroughly under cold running water. This removes any surface debris or grit. Then, using your fingers or a small, sharp knife, carefully peel off the outer shell. Be gentle to avoid tearing the delicate shrimp flesh. Starting from the head and working your way down towards the tail is generally the easiest method.
Next, locate the dark vein running along the back of each shrimp. This is the digestive tract and should be removed for optimal taste and appearance. Using the tip of a small, sharp knife or a toothpick, gently make a shallow cut along the back of the shrimp, exposing the vein. Then, carefully pull or scrape out the vein. Don’t worry if a tiny bit remains; it won’t affect the flavor significantly. For larger shrimp, you may need to make a slightly deeper cut to fully remove the vein.
Once all the shrimp are peeled and deveined, rinse them again under cold water to remove any lingering shell fragments or vein remnants. Pat the shrimp thoroughly dry with paper towels. This is a critical step; excess moisture will prevent the coconut coating from adhering properly. If the shrimp are still damp, the coconut will fall off during cooking.
Finally, if you prefer, you can butterfly the shrimp by making a shallow lengthwise cut almost all the way through the shrimp, leaving the tail intact. This helps them cook more evenly and allows for better absorption of flavor. Butterflying is optional, but recommended for larger shrimp. Once prepared, your shrimp are ready for the next stage: the delicious coconut coating!
Coconut Crumb Coating Preparation
Creating the perfect coconut crumb coating is crucial for achieving that delightful crunch and golden-brown color on your shrimp. This section details the process, ensuring you produce a consistently delicious coating every time. We’ll be making enough for approximately 1 pound of shrimp, but you can easily adjust the quantities based on your recipe needs.
First, gather your ingredients: You’ll need 1 cup unsweetened shredded coconut (finely shredded is best for optimal adhesion), 1/4 cup all-purpose flour (this helps the coconut adhere to the shrimp and creates a crispier crust), 1/4 teaspoon salt, 1/4 teaspoon black pepper, and 1/4 teaspoon paprika (optional, but adds a lovely color and subtle smoky flavor). If you prefer a sweeter coating, you can add 1-2 tablespoons of sugar.
In a medium-sized bowl, combine the shredded coconut, flour, salt, pepper, and paprika (if using). Thoroughly whisk these dry ingredients together to ensure even distribution of seasonings and to break up any clumps in the coconut. This step is essential for a consistent coating. If you’re adding sugar, now is the time to incorporate it.
Consider the moisture content of your coconut. If it seems particularly dry, you might consider adding a teaspoon or two of oil (vegetable or coconut oil works well) to help the crumbs bind better and prevent them from becoming too dry and crumbly. This is especially helpful in humid climates.
Once everything is well mixed, taste the mixture to adjust seasonings as needed. You might want to add a bit more salt or pepper depending on your preference. Remember, the flavor of the coating will be subtly present, so don’t be afraid to experiment with other spices like garlic powder, onion powder, or cayenne pepper for a spicier kick.
Before proceeding to coat your shrimp, ensure your shrimp are thoroughly patted dry with paper towels. Excess moisture will prevent the coconut coating from adhering properly, resulting in a soggy, uneven finish. Having the coating mixture ready in a shallow dish will streamline the coating process, making it quick and efficient.
Now you’re ready to coat your shrimp! Follow the instructions in the next section for a perfectly crispy, coconut-crusted delight.
Cooking Method
This recipe utilizes pan-frying, a method that delivers perfectly crispy coconut-crusted shrimp while retaining their juicy interior. Deep-frying would achieve similar crispiness, but pan-frying offers a healthier alternative with less oil usage. Baking is also possible, but it will result in a less crisp exterior.
For optimal results, ensure your shrimp are completely dry before coating. Pat them thoroughly with paper towels to remove excess moisture. This is crucial for achieving a proper crust; moisture will cause the coconut to steam instead of crisp.
Heat 1 tablespoon of vegetable oil (or your preferred high-heat oil like canola or avocado oil) in a large skillet over medium-high heat. The oil is ready when a pinch of coconut flakes sizzles immediately upon contact. Avoid overcrowding the pan; work in batches if necessary to ensure even cooking. Overcrowding will lower the temperature of the oil and result in soggy shrimp.
Carefully place approximately 6-8 shrimp (depending on the size of your skillet) into the hot oil. Do not move the shrimp for 2-3 minutes to allow the bottom to form a golden-brown crust. Then, gently flip the shrimp and cook for another 2-3 minutes on the other side, until they are pink and cooked through. The internal temperature should reach 145°F (63°C).
Adjust cooking time based on the size of your shrimp. Larger shrimp will require slightly longer cooking time. Smaller shrimp will cook more quickly. Use a meat thermometer to ensure they are cooked through but not overcooked. Overcooked shrimp will become rubbery.
Once cooked, remove the shrimp from the skillet and place them on a wire rack or paper towel-lined plate to drain excess oil. Avoid piling the shrimp on top of each other as this will trap steam and make them less crispy. Serve immediately and enjoy your delicious coconut-crusted shrimp!
Professional Recommendation: For extra flavor, consider adding a small knob of butter to the skillet during the last minute of cooking. Tilt the pan and spoon the melted butter over the shrimp for a rich and decadent finish.
Important Cooking Temperatures and Times
Achieving perfectly cooked coconut-crusted shrimp hinges on precise temperature and timing. Undercooked shrimp can be dangerous, while overcooked shrimp becomes rubbery and loses its delicate flavor. This section details the crucial temperature and time ranges for achieving succulent, golden-brown shrimp.
Oil Temperature: For optimal results, use a high-heat oil with a high smoke point, such as vegetable oil, canola oil, or peanut oil. Heat the oil in a large skillet over medium-high heat. The ideal temperature is between 350°F (175°C) and 375°F (190°C). Do not exceed 375°F (190°C) as this can lead to burning the coconut flakes before the shrimp is cooked through. A reliable way to check the oil temperature is using a deep-fry thermometer. If you don’t have one, carefully drop a small piece of coconut crust into the oil; it should sizzle gently and immediately begin to brown – indicating the correct temperature.
Shrimp Cooking Time: The cooking time depends on the size of your shrimp. For large shrimp (21-25 per pound), aim for 2-3 minutes per side. For medium shrimp (26-30 per pound), 1.5-2 minutes per side is sufficient. Smaller shrimp will cook even faster, typically within 1-1.5 minutes per side. Overcrowding the pan will lower the oil temperature and lead to uneven cooking, so cook the shrimp in batches if necessary, ensuring there’s enough space between each shrimp for proper heat circulation.
Internal Temperature: The safest and most accurate way to ensure your shrimp are cooked through is to use a food thermometer. The internal temperature should reach 145°F (63°C). This ensures that any potential bacteria are eliminated. Once the shrimp reaches this temperature, immediately remove them from the oil and place them on a wire rack to drain excess oil. This prevents further cooking and helps maintain a crispy texture.
Important Note: Cooking times can vary slightly depending on the thickness of your shrimp and the heat of your stovetop. Always monitor the shrimp closely, and adjust cooking time as needed. It’s better to slightly undercook the shrimp than to overcook them. Remember, the residual heat will continue to cook the shrimp slightly even after you remove them from the oil.
Professional Tip: For perfectly even cooking, ensure your shrimp are uniformly sized and roughly the same thickness. This allows for consistent cooking throughout the batch. Patting the shrimp dry before breading helps the coconut flakes adhere better and promotes crispier results.
Recommendations
For the best results when making Coconut-Crusted Shrimp, ensure your shrimp are completely dry before dredging. Excess moisture will prevent the coconut from adhering properly. Pat the shrimp thoroughly with paper towels before proceeding to the breading station. Also, don’t overcrowd the pan when frying; this will lower the oil temperature and result in greasy shrimp. Work in batches for optimal browning and crispiness.
Serving Suggestions: These delectable coconut shrimp are incredibly versatile. Serve them as an appetizer with a tangy dipping sauce like mango salsa, sweet chili sauce, or a creamy remoulade. They also make a fantastic addition to a seafood platter or a light lunch paired with a fresh salad. For a more substantial meal, consider serving them over rice or quinoa with a side of grilled vegetables.
Storage: Leftover coconut shrimp can be stored in an airtight container in the refrigerator for up to 3 days. For longer storage, freeze them in a freezer-safe bag for up to 3 months. Reheat gently in the oven or air fryer to avoid overcooking and maintain their crispy texture. Avoid reheating in a microwave, as this will make them soggy.
Complementary Dishes: The sweet and savory flavors of coconut-crusted shrimp pair beautifully with a variety of dishes. Consider serving them with a vibrant tropical fruit salad, a refreshing cucumber and avocado salad, or a zesty lime slaw. For a more substantial meal, a side of coconut rice or a light and flavorful Thai-inspired noodle dish would complement the shrimp perfectly.
Nutritional Information (Approximate per serving, based on a 4-shrimp serving): Calories: 250-300 (depending on oil used and portion size), Fat: 15-20g, Protein: 15-20g, Carbohydrates: 10-15g. Note: This is an estimate and the actual nutritional content may vary depending on the specific ingredients used and portion sizes. For precise nutritional information, use a nutrition calculator with the exact ingredients and quantities used in your recipe.
Important Note: Always ensure the oil is at the correct temperature before frying to prevent burning and ensure even cooking. Use a thermometer to monitor the oil temperature. Enjoy your delicious and crispy coconut-crusted shrimp!


