The humble beef slider, a culinary titan in miniature, boasts a history surprisingly rich for such a seemingly simple dish. While pinpointing its exact origin is difficult, the concept of small, handheld burgers traces back to the early 20th century, likely emerging from roadside diners and county fairs across the United States. White Castle, founded in 1921, is often credited with popularizing the smaller-sized burger, serving their iconic square patties in a streamlined, efficient manner. This was a crucial development, as it allowed for faster service and higher turnover, ultimately making burgers more accessible to the masses.
The slider’s diminutive size wasn’t just a matter of convenience; it also contributed to its affordability and appeal. Smaller patties meant lower costs for both the restaurant and the consumer, making them a popular choice during times of economic hardship. This accessibility helped establish the slider as a quintessential American comfort food, firmly embedded in the nation’s cultural identity. The rise of fast-food chains further cemented its place in the culinary landscape, with millions of sliders sold annually worldwide. Statistics suggest the fast-food industry alone sells billions of burgers annually, a significant portion of which are likely sliders or slider-sized patties in various forms.
Beyond its convenient size and affordability, the slider’s enduring popularity stems from its adaptability and versatility. While the classic version features a simple beef patty on a small bun, the possibilities are endless. From gourmet toppings and artisanal cheeses to regional variations incorporating local ingredients, the slider offers a canvas for culinary creativity. Its cultural significance is evident in its presence at sporting events, backyard barbecues, and countless other social gatherings, serving as a unifying food that brings people together. This recipe focuses on crafting the perfect classic beef slider, a foundational recipe from which countless variations can spring.
Ingredients and Measurements
Creating delicious beef sliders hinges on using high-quality ingredients and precise measurements. Below is a detailed list of everything you’ll need, along with recommendations for achieving optimal results.
For the Beef Patties:
- 1 lb (450g) Ground Beef: Choose a blend with at least 80% lean meat for juicy, flavorful patties. Avoid overly lean ground beef, as it can become dry during cooking. A blend of chuck and sirloin is ideal.
- 1 teaspoon Salt: Use kosher salt or sea salt for the best flavor. Table salt is often more concentrated, so you may need to adjust the quantity slightly.
- 1/2 teaspoon Black Pepper: Freshly ground black pepper is always preferred.
- 1/4 teaspoon Garlic Powder: This adds a subtle savory note that complements the beef.
- 1/4 teaspoon Onion Powder: Similar to garlic powder, onion powder enhances the overall flavor profile.
- 1 tablespoon Worcestershire Sauce (optional): Adds a touch of umami and depth of flavor. Use a high-quality Worcestershire sauce for the best results.
For the Slider Buns:
- 6-8 Slider Buns: Choose your favorite brand or make your own! Ensure the buns are soft and slightly sweet to balance the savory beef.
For Assembly (Optional additions):
- Mayonnaise: Classic choice for a creamy base.
- Ketchup: Adds a tangy sweetness.
- Mustard: Choose your preferred type – yellow, Dijon, or even spicy brown.
- Pickles: Dill pickles are traditional, but bread and butter or other varieties work well.
- Lettuce: Crisp lettuce adds freshness and texture.
- Tomato: Slices of ripe tomato provide juiciness and color.
- Onion: Thinly sliced red onion adds a nice bite.
- Cheese: Cheddar, Swiss, or provolone are all popular choices. Add cheese during the last minute of cooking to allow it to melt properly.
Important Note: These measurements are for approximately 6-8 sliders, depending on the size of your patties and buns. You may need to adjust quantities based on the number of sliders you are making. Always measure your ingredients accurately for consistent results.
Equipment List
Creating perfect classic beef sliders requires the right tools. Having the appropriate equipment on hand will streamline the process and ensure a superior result. This list details the essential items, along with some helpful recommendations for optimal performance.
Meat Grinder: A sturdy meat grinder is essential for achieving the ideal texture in your slider patties. A hand-crank grinder works well for smaller batches, but an electric grinder is preferable for larger quantities and greater efficiency. Choose a grinder with a coarse die plate for a slightly textured patty—finer grinds can result in denser, less juicy sliders.
Mixing Bowls (2): You’ll need at least two mixing bowls – one large (approximately 4-quart capacity) for mixing the ground beef and seasonings, and a smaller one (approximately 2-quart capacity) for preparing any sauces or toppings. Stainless steel bowls are recommended for their durability and ease of cleaning.
Measuring Cups and Spoons: Accurate measurements are crucial for consistent results. Invest in a reliable set of measuring cups and spoons to ensure the correct proportions of seasonings and other ingredients. Use dry measuring cups for dry ingredients and liquid measuring cups for liquids.
Large Skillet or Griddle: A large, heavy-bottomed skillet (cast iron is ideal) or griddle is essential for cooking the slider patties evenly. The surface area should be large enough to accommodate all the patties without overcrowding, allowing for proper browning and cooking. A 12-inch skillet or a comparable griddle is a good starting point.
Spatula: A wide, sturdy spatula is necessary for flipping and maneuvering the patties during cooking. A flexible spatula is recommended to prevent tearing the patties. Avoid using thin, flimsy spatulas as they may not provide sufficient support.
Thermometer (Instant-Read): An instant-read thermometer is crucial for ensuring the beef is cooked to a safe internal temperature of 160°F (71°C). This prevents undercooking and ensures food safety.
Slider Buns: Don’t forget the buns! Choose high-quality slider buns that are soft and slightly sweet to complement the savory beef. Allow for approximately 2-3 buns per person, depending on appetite.
Serving Platter and Utensils: Finally, you’ll need a serving platter to present your delicious sliders and appropriate utensils for serving. Consider using tongs or a spatula to avoid touching the cooked patties directly.
Preparation of Beef Patties (including seasoning and shaping)
Creating delicious beef patties is crucial for the success of your sliders. We’ll start with 1 pound (450g) of ground beef, ideally a blend of 80/20 lean-to-fat ratio for optimal juiciness and flavor. Avoid overworking the meat, as this can result in tough patties. Gently combine the ground beef with your chosen seasonings in a large bowl.
For seasoning, we recommend a simple yet effective blend: 1 teaspoon of kosher salt, ½ teaspoon of freshly ground black pepper, and ¼ teaspoon of garlic powder. Adjust seasoning to your preference; some prefer a bolder flavor profile. You can also experiment with other spices like onion powder, paprika, or even a pinch of cayenne pepper for a subtle kick. Remember, it’s easier to add more seasoning than to take it away.
Once seasoned, gently mix the ingredients using your hands. Avoid vigorous mixing or kneading, as this will develop the gluten in the meat and result in tough patties. Just enough to distribute the seasoning evenly throughout the ground beef is all that’s needed.
Now, it’s time to shape the patties. For classic sliders, aim for patties that are approximately 3-4 inches in diameter and about ½ inch thick. Consistency in size and thickness is key for even cooking. Using a kitchen scale to weigh each patty (approximately 3-4 ounces each) ensures uniformity. This is especially important if you’re making a large batch of sliders.
To help prevent shrinkage during cooking, gently create a slight indentation in the center of each patty using your thumb. This will help the patties cook more evenly and prevent them from bulging in the middle. Place the formed patties on a plate or baking sheet, and refrigerate them for at least 15 minutes before cooking. This chilling step helps the patties firm up, making them easier to handle and reducing shrinkage during cooking. Refrigerating also allows the flavors to meld, enhancing the overall taste of your sliders.
Pro Tip: For perfectly round patties, use a cookie cutter or a ramekin as a guide. This will ensure consistent size and presentation.
Preparing the Slider Buns (Toasting or Warming)
Perfectly toasted slider buns are crucial for a truly exceptional slider experience. They provide a delightful textural contrast to the juicy beef and complement the overall flavor profile. There are several methods to achieve that perfect toast, each offering slightly different results. Choose the method that best suits your equipment and time constraints.
Method 1: Oven Toasting (for even toasting of multiple buns) Preheat your oven to 350°F (175°C). Arrange your slider buns cut-side up on a baking sheet. For optimal results, lightly brush the cut surfaces with melted butter or a mixture of melted butter and garlic powder for added flavor. Bake for 5-7 minutes, or until lightly golden brown and warmed through. Keep a close eye on them to prevent burning. Over-toasting will result in dry, hard buns.
Method 2: Broiler Toasting (for quick toasting, ideal for smaller batches) Preheat your broiler. Place the slider buns cut-side up on a broiler pan or baking sheet. Broil for 1-2 minutes, watching carefully to prevent burning. Broiling offers a faster toasting method but requires more attention to avoid charring. Again, brushing with melted butter enhances both flavor and texture.
Method 3: Skillet Toasting (for a rustic, slightly crispy texture) Heat a large skillet over medium-low heat. Add a pat of butter to the skillet and let it melt. Place the slider buns cut-side down in the skillet. Cook for 1-2 minutes per side, or until lightly golden brown and warmed through. This method is excellent for adding a bit of a crispy edge to your buns.
Method 4: Microwave Warming (quickest method, but least desirable for texture) If you’re short on time, you can warm the slider buns in the microwave. Wrap the buns in a damp paper towel and microwave on high for 15-20 seconds. This method is the least ideal as it will not achieve the same level of toasting or textural enhancement as the other methods. It’s best reserved for situations where time is extremely limited.
Regardless of the method you choose, remove the buns from the heat immediately once they reach the desired level of toasting. Allow them to cool slightly before assembling your sliders to prevent the buns from becoming soggy from the juicy beef.
Cooking the Beef Sliders
There are several excellent methods for cooking beef sliders, each offering a unique flavor profile and texture. We’ll explore pan-frying and grilling, two popular and readily accessible options.
Pan-Frying: This method is ideal for weeknight cooking, requiring minimal equipment and offering excellent control over the cooking process. For 4-6 sliders (using 1/4 lb patties), heat 1 tablespoon of high-smoke-point oil, such as canola or vegetable oil, in a large skillet over medium-high heat. Ensure the skillet is hot before adding the patties; this prevents sticking and promotes a good sear. Gently place the patties in the hot skillet, leaving some space between each.
Cook for approximately 3-4 minutes per side for medium-rare, or longer depending on your desired doneness. Use a meat thermometer for accuracy; aim for 130-135°F (54-57°C) for medium-rare, 140-145°F (60-63°C) for medium, and 160°F (71°C) for well-done. Avoid pressing down on the patties while they cook, as this will release juices and result in dry sliders. During the last minute of cooking, you can add a pat of butter to the pan and baste the patties for enhanced flavor and richness.
Grilling: Grilling imparts a smoky char and enhances the flavor of the beef. Preheat your grill to medium-high heat (around 375-400°F/190-205°C). Clean the grates thoroughly to prevent sticking. Lightly oil the grates to prevent sticking. Place the patties on the preheated grill, leaving some space between each. Close the grill lid to ensure even cooking.
Cook for approximately 4-5 minutes per side for medium-rare, adjusting cooking time as needed depending on the thickness of your patties and desired doneness. Use a meat thermometer for accurate internal temperature. Grilling times may vary depending on your grill’s heat, so keep a close eye on your patties and adjust accordingly. For the last minute of cooking, you can add a slice of cheese to each patty and close the lid to allow it to melt completely.
Regardless of your chosen cooking method, remember to let the patties rest for 5-7 minutes after cooking. This allows the juices to redistribute, resulting in more tender and flavorful sliders. Serve immediately on your favorite slider buns with your preferred toppings.
Important Note: Always handle raw beef with care and wash your hands thoroughly after handling.
Preparing Toppings and Condiments
The success of a classic beef slider hinges not just on the patty, but also on the quality and preparation of its toppings and condiments. Taking the time to properly prepare these elements will elevate your sliders from good to gourmet.
Let’s start with the onions. For a classic caramelized onion topping, thinly slice one large red onion (approximately 1 cup sliced). Sauté the onions in 2 tablespoons of butter over medium-low heat for about 20-25 minutes, stirring occasionally, until they are deeply caramelized and softened. This slow cooking process develops a rich sweetness that perfectly complements the savory beef. Avoid high heat, as this will burn the onions before they caramelize properly.
Next, prepare your pickles. While dill pickle slices are traditional, you can experiment with bread and butter pickles, sweet gherkins, or even homemade pickled onions for a unique twist. For a slider, thinly sliced pickles (about 1/4 inch thick) work best. Aim for approximately 4-6 pickle slices per slider, depending on your preference. Ensure your pickles are well-drained to avoid excess moisture on your slider.
Now for the cheese. Sharp cheddar, American cheese, or even pepper jack are all excellent choices. Use pre-shredded cheese for convenience, or grate your own for a fresher flavor. Plan for approximately 1-2 ounces of cheese per slider. If adding cheese after cooking, you’ll want to allow the patties to rest for a couple of minutes before topping with the cheese to allow it to melt properly. For a more intense cheese flavor, you can add the cheese during the last minute of cooking the patties.
Finally, prepare your condiments. Classic choices include mayonnaise, ketchup, and mustard. Consider preparing a special sauce – a simple mix of mayonnaise, ketchup, and a touch of sweet pickle relish can add a delightful twist. You can also experiment with other sauces such as BBQ sauce or a spicy sriracha mayo. Keep your condiments in separate containers for easy serving and to allow your guests to customize their sliders to their preference. Remember to keep your condiments chilled until serving.
Once all your toppings and condiments are prepared, arrange them neatly in separate bowls or containers for easy access when assembling your sliders. This organized approach will make the slider assembly process smoother and more efficient.
Recommendations
For the best flavor, allow your beef sliders to rest for 5-10 minutes after cooking before serving. This allows the juices to redistribute, resulting in a more tender and flavorful patty. Serve immediately on toasted brioche buns with your favorite toppings. We recommend classic options like lettuce, tomato, onion, pickles, and cheese (cheddar, Swiss, or pepper jack work well).
To enhance the slider experience, consider adding a flavorful spread to your buns. Aioli, creamy horseradish sauce, or even a simple mayonnaise-ketchup mixture can elevate the taste profile. Experiment with different combinations to find your perfect slider! Don’t forget crispy bacon for an extra layer of indulgence.
Leftover sliders can be stored in an airtight container in the refrigerator for up to 3 days. To reheat, gently warm them in a non-stick pan or microwave until heated through. Avoid overcooking, as this can dry out the patties. For optimal texture, it’s best to eat them fresh.
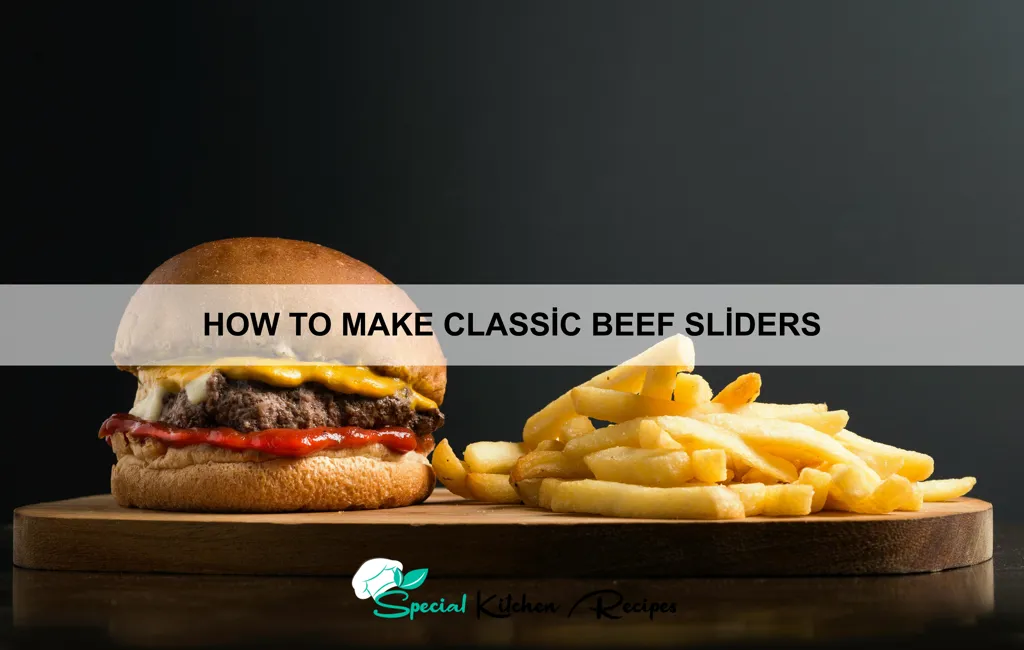
Beef sliders pair perfectly with a variety of side dishes. Classic choices include crispy french fries, potato wedges, onion rings, or a fresh coleslaw. A simple green salad with a light vinaigrette provides a refreshing counterpoint to the richness of the beef. For a more substantial meal, consider serving them with potato salad or macaroni and cheese.
Approximate Nutritional Information (per slider, based on a 4oz patty): Calories: 350-450 (depending on toppings and bun), Fat: 20-25g, Saturated Fat: 8-10g, Cholesterol: 80-100mg, Sodium: 500-700mg (depending on toppings and bun), Carbohydrates: 30-40g, Protein: 25-30g. *Note: This is an estimate and can vary based on ingredients used and portion sizes.
Important Note: Always ensure your beef is cooked to a safe internal temperature of 160°F (71°C) to prevent foodborne illnesses. Adjust cooking times based on the thickness of your patties and your preferred level of doneness.


