The humble chicken breast, a staple in kitchens worldwide, boasts a surprisingly rich history and cultural significance. While pinpointing the exact origin of roasting chicken is difficult, evidence suggests that humans have been cooking poultry for millennia. Archaeological findings point to the domestication of chickens in Southeast Asia as early as 4,000 years ago, with their spread across the globe facilitated by trade and migration. The practice of roasting, a simple yet effective cooking method, likely emerged alongside early forms of oven technology, allowing for even cooking and the development of flavor profiles we still appreciate today.
In many cultures, roasted chicken holds a prominent place in celebratory meals and everyday family dinners. It’s a versatile protein, easily adaptable to various cuisines and flavor profiles. From the classic herb-roasted chicken of European traditions to the spice-laden preparations found in Middle Eastern and Asian cooking, the adaptability of the chicken breast has ensured its enduring popularity. Interestingly, according to the USDA, chicken is the most consumed meat in the United States, with an average American consuming approximately 90 pounds of chicken annually. This statistic underscores its widespread appeal and accessibility.
The appeal of roasted chicken breasts, in particular, lies in their leanness and relative ease of preparation. Unlike whole chickens, which require longer cooking times, breasts cook quickly, making them ideal for busy weeknights. However, mastering the art of perfectly roasted chicken breasts, achieving that juicy, tender interior with a beautifully crisp exterior, requires attention to detail and a nuanced understanding of cooking temperatures and timing. This guide will equip you with the knowledge and techniques to consistently produce restaurant-quality roasted chicken breasts, transforming a simple protein into a culinary masterpiece. We’ll explore various methods, seasonings, and tips to help you achieve your perfect roasted chicken breast, every time.
Ingredients and Measurements
The success of perfectly roasted chicken breasts hinges on using high-quality ingredients and precise measurements. Don’t skimp on the details; they make all the difference!
For this recipe, you will need:
- 2 boneless, skinless chicken breasts: Approximately 6 ounces (170 grams) each. Choosing breasts of similar size ensures even cooking. If one breast is significantly larger, consider slicing it in half horizontally to achieve uniformity.
- 2 tablespoons olive oil: Use extra virgin olive oil for the best flavor. Avoid using overly strong flavored oils as they can overpower the delicate taste of the chicken.
- 1 teaspoon salt: Kosher salt is recommended for its even grain and less intense flavor compared to table salt. Adjust to your preference, but don’t be afraid to season generously.
- 1/2 teaspoon black pepper: Freshly ground black pepper offers a superior flavor compared to pre-ground. Grind just before using to maximize aroma and potency.
- 1/2 teaspoon garlic powder: This adds a subtle savory depth. Avoid using granulated garlic as it can burn easily during roasting.
- 1/4 teaspoon paprika (smoked or sweet): Paprika adds a beautiful color and subtle smoky or sweet flavor depending on your preference. A pinch of cayenne pepper can be added for a touch of heat.
- Optional additions: Consider adding other herbs and spices to personalize your recipe. Popular choices include dried thyme, rosemary, oregano, or lemon zest. Start with small amounts and adjust to taste. Remember that strong flavors can easily overpower the chicken’s natural taste.
Measurement Notes: Using a kitchen scale is highly recommended for accuracy, especially when dealing with ingredients like salt and spices. However, if you don’t have a scale, use standard measuring spoons and cups. Be mindful of packing ingredients when using volume measurements, ensuring they are level in the spoon or cup.
Ingredient Quality: The quality of your chicken breasts will directly impact the final product. Look for plump, firm breasts with a pale pink color and no unpleasant odors. Fresh, high-quality ingredients always lead to better results.
Preparation of Chicken Breasts
Proper preparation is key to achieving perfectly roasted chicken breasts. Begin by selecting high-quality, boneless, skinless chicken breasts. Aim for breasts that are roughly the same size for even cooking. About 6 ounces (170 grams) per breast is ideal for a single serving.
Remove any visible fat or silver skin from the chicken breasts. While some fat adds flavor, excess fat can lead to uneven browning and potentially greasy results. Use a sharp paring knife to carefully trim away the fat, being mindful not to remove too much meat in the process. Silver skin, a thin membrane often found on the surface, should also be removed; it can toughen the chicken and prevent proper browning.
Next, we’ll address the often-overlooked step of patting the chicken dry. Using paper towels, thoroughly dry the surface of each breast. This is crucial for achieving a nicely browned, crispy exterior. Excess moisture will steam the chicken instead of browning it, resulting in a less appealing texture and flavor.
Now, consider the thickness of your chicken breasts. For even cooking, it’s important to achieve uniform thickness. If your breasts are uneven, you can gently pound them to a more consistent thickness using a meat mallet or the bottom of a heavy pan. Avoid pounding too hard, as this can damage the meat fibers and make the chicken tough. Aim for a thickness of about ¾ to 1 inch (2-2.5 cm).
Finally, before seasoning, consider a brief brining or marinating step (optional but highly recommended). A simple brine of salt and water for 30 minutes to an hour will significantly improve the moisture and flavor of your chicken. Alternatively, a marinade with herbs, spices, and a touch of acidity (like lemon juice) can add depth and complexity. This step is particularly beneficial for lean chicken breasts, which can sometimes dry out during roasting.
Once the chicken is prepared to your liking, season generously with salt and freshly ground black pepper. Feel free to experiment with other seasonings to suit your taste, such as garlic powder, paprika, or onion powder. Remember to season both sides evenly.
Preheat Oven and Prepare Pan
Before you even think about seasoning your chicken breasts, the first step to achieving perfectly roasted chicken is proper oven preparation. This seemingly simple step significantly impacts the final result, ensuring even cooking and a beautifully browned exterior. We’ll start by preheating your oven to 400°F (200°C). This temperature is ideal for roasting chicken breasts, allowing for a quick cooking time without drying them out. Allow at least 15-20 minutes for your oven to reach the desired temperature; using an oven thermometer is highly recommended for accuracy.
While the oven is preheating, it’s time to prepare your roasting pan. The right pan makes all the difference. A heavy-bottomed roasting pan, such as cast iron or stainless steel, is best because it distributes heat evenly, preventing hot spots that can lead to unevenly cooked chicken. Avoid using non-stick pans for roasting, as they are not designed for high heat and may be damaged. A 9×13 inch baking dish or a similar sized roasting pan will comfortably accommodate 4-6 chicken breasts, depending on their size. Do not overcrowd the pan; this will lower the temperature and result in steaming rather than roasting.
Next, we’ll prepare the pan for roasting. Lightly grease your chosen pan with about 1 tablespoon of olive oil or your preferred cooking oil. This prevents the chicken from sticking and allows for easy removal once cooked. You can use a paper towel or a pastry brush for even distribution. Alternatively, you can line your pan with parchment paper for easier cleanup; this is particularly useful if you’re dealing with messy marinades or sauces. If using parchment paper, ensure it extends slightly over the sides of the pan for easier lifting.
For added flavor and to prevent sticking, consider adding some aromatics to the bottom of the pan before placing the chicken breasts. A few sprigs of fresh rosemary or thyme, or even a few slices of lemon or onion, will infuse the chicken with delicious herbs and enhance the overall flavor profile. Remember to arrange the chicken breasts in a single layer, leaving some space between each breast for even air circulation. This is crucial for achieving a crispy skin and juicy interior. Now that your oven is preheated and your pan is prepared, you’re ready to season and roast your chicken breasts for perfect results!
Seasoning the Chicken
Seasoning your chicken breasts properly is crucial for achieving that perfectly juicy and flavorful roast. Don’t underestimate this step; it’s the foundation of a great dish. We’ll be using a simple yet effective blend of seasonings that enhances the natural chicken flavor without overpowering it.
Begin by patting your chicken breasts completely dry with paper towels. This is extremely important. Damp chicken will steam instead of brown, resulting in a less appealing texture and flavor. Make sure to remove any excess moisture from all surfaces.
For two average-sized chicken breasts (about 1 pound total), you’ll need the following seasonings: 1 teaspoon kosher salt, ½ teaspoon freshly ground black pepper, ½ teaspoon garlic powder, ¼ teaspoon onion powder, and ¼ teaspoon paprika. Adjust these measurements proportionally if you’re using more or fewer chicken breasts. For a more intense flavor, you can increase the amount of salt and pepper slightly.
In a small bowl, combine all the dry seasonings. This allows for even distribution across the chicken. Alternatively, you can use a spice grinder to create a custom blend for a finer texture. Avoid using pre-ground blends, as they tend to lose their flavor over time.
Generously season both sides of the chicken breasts with the spice mixture. Don’t be shy! Use your fingers to rub the seasoning into the meat, ensuring it adheres evenly. Pay special attention to the edges and any thicker parts of the breast. Pressing the seasoning into the meat helps to develop flavor and ensures that the chicken is seasoned throughout.
After seasoning, let the chicken rest for at least 15 minutes at room temperature. This allows the salt to penetrate the meat, breaking down the muscle fibers and tenderizing the chicken. This step is key for optimal juiciness. You can even season the chicken the night before and refrigerate it, covered, for even more flavor development.
Finally, before roasting, you can optionally add a thin layer of olive oil (about 1 tablespoon) to the chicken. This will help the seasoning adhere better and contribute to a beautifully browned crust. Ensure the oil is evenly distributed across the surface of the chicken breast.
Roasting the Chicken Breasts
Roasting chicken breasts yields succulent, juicy results when done correctly. This section details the process, ensuring you achieve perfectly cooked breasts every time. We’ll be focusing on bone-in, skin-on breasts for maximum flavor and moisture retention, but the principles can be adapted for boneless, skinless breasts as well.
Preparation is key. Begin by preheating your oven to 400°F (200°C). Pat 2 (6-ounce) bone-in, skin-on chicken breasts dry with paper towels. This is crucial for achieving crispy skin. Season generously with salt and freshly ground black pepper. Consider adding other seasonings such as paprika, garlic powder, onion powder, or herbs like rosemary or thyme for enhanced flavor. About 1 teaspoon of salt and ½ teaspoon of pepper per breast is a good starting point, but adjust to your taste.
Proper placement in the pan is important for even cooking. Place the chicken breasts skin-side up in a roasting pan. You can add a little oil (about 1 tablespoon) to the bottom of the pan, but it’s not strictly necessary if your chicken is well-seasoned and the skin has enough fat. Avoid overcrowding the pan; if necessary, roast the breasts in batches to ensure even browning and cooking.
Roasting time is dependent on thickness. For 6-ounce breasts, roasting time will typically be between 30-40 minutes. However, use a meat thermometer to ensure accuracy. The internal temperature should reach 165°F (74°C) in the thickest part of the breast. A meat thermometer is the most reliable way to guarantee your chicken is cooked through and safe to eat. Avoid relying solely on visual cues.
Basting is optional but recommended. For extra juicy and flavorful chicken, you can baste the breasts halfway through cooking with pan drippings. Simply spoon the melted fat and juices over the chicken. This helps keep the meat moist and adds flavor.
Resting is crucial for juicy chicken. Once the chicken reaches the desired internal temperature, remove it from the oven and let it rest for 5-10 minutes before carving. This allows the juices to redistribute throughout the meat, resulting in a more tender and flavorful final product. Never cut into the chicken immediately after removing it from the oven; this will release the juices and leave you with dry chicken.
Adjusting for boneless, skinless breasts: If using boneless, skinless breasts, reduce the cooking time significantly. They will cook much faster. Aim for an internal temperature of 165°F (74°C), but expect the cooking time to be closer to 15-20 minutes. Keep a close eye on them to prevent overcooking.
Checking for Doneness
Achieving perfectly roasted chicken breasts requires careful monitoring and accurate doneness testing. Overcooked breasts are dry and tough, while undercooked ones are unsafe to eat. There are several methods you can use to ensure your chicken is cooked through without sacrificing its juiciness.
The most reliable method is using a meat thermometer. Insert the thermometer into the thickest part of the chicken breast, avoiding the bone if present. The thermometer should read 165°F (74°C). This internal temperature guarantees that the chicken has reached a safe temperature to eliminate harmful bacteria. Don’t rely on visual cues alone; chicken can appear cooked on the outside while still being raw inside.
While a thermometer provides the most accurate reading, you can also employ other methods to gauge doneness. The finger test is a common, albeit less precise, technique. Gently press the center of the chicken breast with your finger. If it feels firm and springy, it’s likely cooked through. If it feels soft and gives easily, it needs more cooking time. However, this method requires experience and is not as reliable as using a thermometer.
Another visual cue, although not definitive, is the color of the juices. When you pierce the chicken with a fork, clear juices indicate that the chicken is fully cooked. Pinkish or red juices suggest undercooking. Again, this should be used in conjunction with other methods, particularly the thermometer, to ensure safety.
Avoid overcooking your chicken breasts. Once the chicken reaches 165°F (74°C), remove it immediately from the oven. The residual heat will continue to cook the chicken slightly, preventing it from becoming dry. Allow the chicken to rest for 5-10 minutes before slicing and serving. This resting period allows the juices to redistribute throughout the breast, resulting in a more tender and flavorful final product. Resting is crucial for optimal texture and juiciness.
Remember, consistency is key. Use a reliable meat thermometer, understand the limitations of visual cues, and always prioritize food safety. With practice, you’ll become adept at perfectly roasting chicken breasts every time, achieving that ideal balance of tender, juicy meat and safe consumption.
Recommendations for Perfect Roasted Chicken Breasts
For the most succulent and flavorful roasted chicken breasts, ensure your chicken is completely thawed and patted dry before seasoning. This helps the skin crisp up beautifully. Don’t overcrowd the pan; allow space between the breasts for even cooking. Using a meat thermometer is crucial; aim for an internal temperature of 165°F (74°C) to ensure the chicken is cooked through and safe to eat. If you prefer a juicier breast, remove it from the oven a few degrees below this temperature, as it will continue to cook slightly from residual heat.
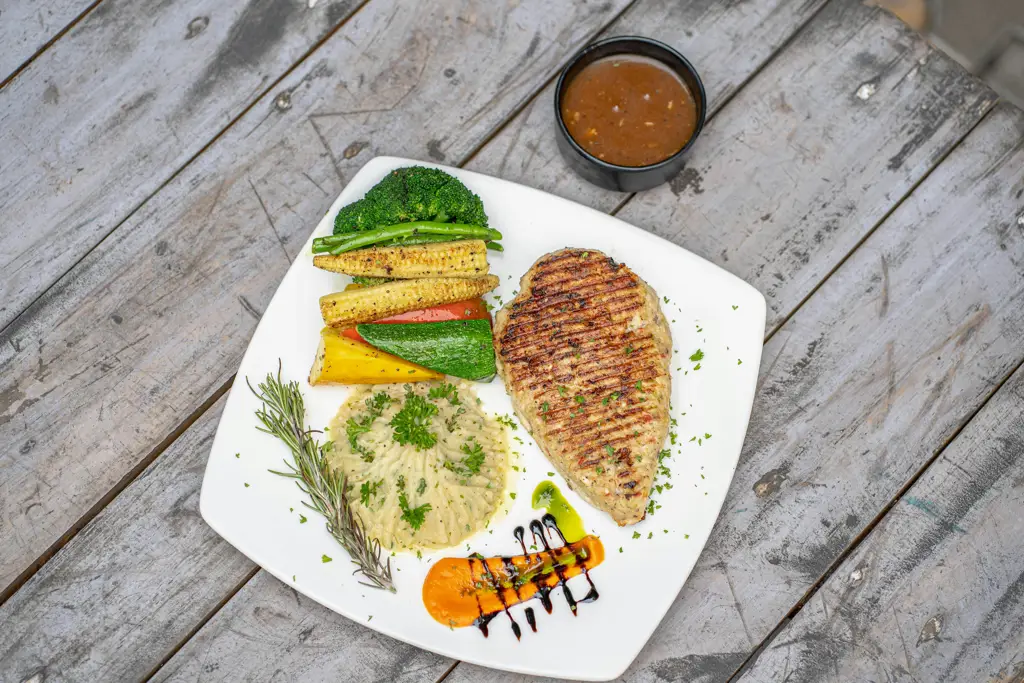
Serving Suggestions: Roasted chicken breasts are incredibly versatile. Serve them sliced over a bed of fresh greens for a light salad, or alongside roasted vegetables like asparagus, broccoli, or Brussels sprouts for a complete and healthy meal. They also pair wonderfully with creamy mashed potatoes, rice pilaf, or quinoa. Consider using the pan drippings to create a delicious gravy or sauce to enhance the flavor profile of your dish.
Storage: Properly stored, leftover roasted chicken breasts can last for 3-4 days in the refrigerator. Ensure they are completely cooled before storing them in an airtight container. You can also freeze the chicken for up to 3 months. When freezing, wrap the breasts tightly in plastic wrap, then place them in a freezer-safe bag or container to prevent freezer burn.
Complementary Dishes: To complement the richness of the chicken, consider serving it with a vibrant side salad featuring citrus fruits and a light vinaigrette. A side of crusty bread is also a perfect accompaniment for soaking up the delicious pan juices. For a more substantial meal, a creamy mushroom sauce or a lemon-herb butter sauce would elevate the dish.
Nutritional Information (per serving, approximate): The nutritional content will vary depending on the size of the chicken breast and added seasonings. However, a typical 4-ounce serving of roasted chicken breast contains approximately 150-200 calories, 25-35 grams of protein, and low in fat. This makes it a great source of lean protein for a balanced diet. Remember that added sauces and sides will increase the overall calorie and fat content.
Important Note: Always ensure your chicken is cooked to a safe internal temperature to prevent foodborne illnesses. Nutritional information is an estimate and may vary.