Few desserts evoke as much comfort and joy as a classic chocolate cake. Its rich, decadent history stretches back centuries, though pinpointing a precise origin is difficult. Early forms of chocolate cake likely emerged in the 18th century, coinciding with the increased availability of cocoa powder following European colonization of the Americas. While specific recipes varied based on regional ingredients and culinary traditions, the fundamental elements – chocolate, flour, sugar, butter, and eggs – remained consistent, forming the foundation for countless variations enjoyed globally today.
The 19th and 20th centuries witnessed a surge in chocolate cake’s popularity, fueled by technological advancements in food production. The invention of baking powder in the mid-1800s revolutionized baking, allowing for lighter, fluffier cakes. This, combined with the mass production of chocolate and readily available ingredients, made chocolate cake accessible to a much wider population. In the United States, chocolate cake became a staple at celebrations and family gatherings, its association with birthdays and special occasions solidifying its place in American culture. In fact, according to a recent survey, chocolate cake remains one of the top three most popular cake flavors in the US, with an estimated 75% of Americans reporting consuming it at least once a year.
Beyond its ubiquity in the West, chocolate cake holds cultural significance worldwide. Variations exist across continents, reflecting local tastes and traditions. From the intensely rich German Sachertorte to the lighter, fluffier Japanese chocolate sponge cakes, the adaptability of the basic recipe has led to a diverse array of interpretations. This global appeal speaks to the universal love of chocolate and the inherent comfort associated with this classic dessert. The simple act of baking and sharing a chocolate cake transcends cultural boundaries, fostering a sense of community and celebration wherever it’s enjoyed. This recipe will guide you through the creation of a truly timeless and delicious classic chocolate cake, a treat that continues to captivate palates and hearts across generations.
Ingredients and Measurements
This recipe yields a classic, moist, and delicious 9-inch two-layer chocolate cake. Accurate measurements are crucial for baking success, so please use a kitchen scale for the best results. If using volume measurements, use properly leveled cups and spoons.
For the Cake:
- 2 cups (250g) all-purpose flour: Using cake flour will result in a more tender crumb, but all-purpose works well too. Ensure your flour is properly spooned and leveled, avoiding scooping directly from the bag, which can compact the flour and lead to a denser cake.
- 2 cups (400g) granulated sugar: Granulated sugar is essential for sweetness and structure. Don’t substitute with powdered sugar unless you have a specific recipe designed for it.
- ¾ cup (60g) unsweetened cocoa powder: Choose a good quality cocoa powder for the best chocolate flavor. Dutch-processed cocoa powder will give a richer, darker color but may result in a slightly less intense chocolate taste compared to natural cocoa powder.
- 1 ½ teaspoons baking powder: Fresh baking powder is crucial for proper leavening. Check the expiration date on your baking powder; if it’s old, it may not work effectively.
- 1 ½ teaspoons baking soda: Baking soda reacts with the acidic ingredients to create lift.
- 1 teaspoon salt: Salt enhances the flavors of the other ingredients. Don’t skip it!
- 1 cup (240ml) buttermilk: Buttermilk adds moisture and tanginess. If you don’t have buttermilk, you can make a substitute by adding 1 tablespoon of white vinegar or lemon juice to 1 cup of milk and letting it sit for 5 minutes.
- 2 large eggs: Use large eggs at room temperature for optimal emulsification. Room temperature eggs incorporate better into the batter, resulting in a smoother texture.
- 1 cup (240ml) vegetable oil: Vegetable oil adds moisture and keeps the cake tender. You can substitute with canola oil or melted unsalted butter, but the texture might be slightly different.
- 2 teaspoons vanilla extract: Pure vanilla extract is recommended for the best flavor.
- 1 cup (240ml) freshly brewed hot coffee or boiling water: The hot liquid activates the cocoa powder and adds moisture. Let the coffee cool slightly before adding it to the batter to avoid cooking the eggs.
- 1 cup (2 sticks) unsalted butter, softened to room temperature. This is crucial; cold butter will result in a grainy frosting.
- 3 cups powdered sugar, sifted. Sifting removes lumps and ensures a smooth texture.
- ¾ cup unsweetened cocoa powder. Use a high-quality cocoa powder for the best flavor.
- ½ cup milk (whole milk recommended for richness). You can adjust this depending on your desired consistency.
- 1 teaspoon vanilla extract
- Pinch of salt
For the Frosting (optional, but highly recommended!): This recipe will require a separate frosting recipe, which can be chocolate buttercream, cream cheese frosting, or any other frosting of your choice. Ensure your frosting recipe complements the chocolate cake flavor.
Important Note: Always preheat your oven to the temperature specified in the baking instructions. Using a kitchen scale for measuring ingredients will ensure the most consistent results.
Equipment Preparation
Before you even think about cracking an egg, preparing your equipment is crucial for a smooth and successful chocolate cake baking experience. This seemingly small step significantly impacts the final product’s quality and consistency. Proper preparation ensures even baking and prevents frustrating mishaps.
First, gather all your baking equipment. You’ll need two 9-inch round cake pans. Invest in good quality, heavy-duty pans; they distribute heat evenly, preventing hot spots and resulting in a consistently baked cake. Grease and flour these pans thoroughly. Use 1 tablespoon of unsalted butter or shortening and 1 tablespoon of all-purpose flour per pan. Don’t skimp on the greasing and flouring; this is your insurance against sticking. After greasing, rotate the pan to coat the entire surface evenly. Then, add the flour, rotating and tapping the pan to create a thin, even coating. This will prevent the cake from sticking and make for easier removal.
Next, prepare your mixing bowls. You’ll need at least three: one large bowl for creaming the butter and sugar, one medium bowl for whisking the dry ingredients, and one smaller bowl for combining the wet ingredients (eggs, milk, etc.). Choose bowls that are large enough to accommodate your ingredients without overcrowding, allowing for proper mixing and aeration. Stainless steel or glass bowls are ideal, as they are non-reactive and easy to clean.
You’ll also need measuring cups and spoons for accurate ingredient measurement. Use separate sets for dry and wet ingredients to prevent inaccurate measurements. For instance, a wet spoon used to scoop out sugar will result in less sugar than intended. A kitchen scale is highly recommended for even more precise measurements, especially for baking.
Don’t forget your other essential tools: a rubber spatula or wooden spoon for scraping down the sides of the bowl, a whisk for blending dry and wet ingredients smoothly, and electric hand mixer or stand mixer for creaming the butter and sugar. Ensure your mixer is clean and in good working order. Having a clean workspace will also minimize the risk of contamination and contribute to a more organized baking process. Preheating your oven to 350°F (175°C) is also a crucial step that should be done early in the process, allowing it to reach the correct temperature by the time the batter is ready.
Finally, line the bottoms of your prepared cake pans with parchment paper circles. This added layer of protection against sticking will make removing the cakes much easier. Cut the parchment circles slightly smaller than the pan’s diameter to prevent them from extending over the sides and interfering with the baking process. With all your equipment prepared, you’re ready to start baking your classic chocolate cake!
Cake Batter Preparation (including creaming butter and sugar)
The success of a classic chocolate cake hinges significantly on properly creaming together the butter and sugar. This crucial first step incorporates air into the batter, resulting in a light and fluffy texture. We’ll be using 1 cup (2 sticks) of unsalted butter, softened to room temperature, and 1 ¾ cups of granulated sugar. Make sure your butter is truly soft; you should be able to easily press your finger into it. If it’s too cold, the sugar won’t incorporate properly, and if it’s melted, the cake will be dense.
Begin by adding the softened butter to a large mixing bowl. Using an electric mixer fitted with the paddle attachment (or a hand mixer), beat the butter on medium speed for about 1-2 minutes until it’s smooth and creamy. Don’t rush this step! The goal is to aerate the butter, creating tiny air pockets that will expand during baking, leading to a tender crumb.
Gradually add the granulated sugar to the creamed butter, a little at a time. Avoid dumping all the sugar in at once as this can make it difficult to incorporate evenly. Continue beating on medium speed, scraping down the sides of the bowl occasionally, until the mixture is light, fluffy, and pale yellow in color. This process should take approximately 3-5 minutes. You’ll notice a significant increase in volume.
The mixture should resemble a smooth, almost whipped consistency. If it’s still grainy, keep beating! The sugar crystals should be fully dissolved and incorporated into the butter, creating a smooth base for the rest of your ingredients. This thorough creaming is essential for achieving a moist and tender cake. You’ll know it’s ready when the mixture is light and fluffy and leaves a trail on the surface as you lift the beaters.
Once the butter and sugar are perfectly creamed, you’re ready to add the remaining wet and dry ingredients according to your recipe. Remember to always scrape down the sides of the bowl between additions to ensure everything is evenly distributed. This meticulous approach will result in a perfectly consistent and delicious chocolate cake.
Baking the Cake
Preheat your oven to 350°F (175°C). This is crucial for even baking. Using a thermometer to verify the oven temperature is highly recommended, as ovens can vary in accuracy. Ensure your oven rack is positioned in the center of the oven to allow for consistent heat distribution around the cake.
Grease and flour two 9-inch round cake pans. This prevents sticking and ensures easy removal of the baked cake. You can use baking spray with flour, or alternatively, grease the pans with butter or shortening and then dust them thoroughly with all-purpose flour. Tap out any excess flour to avoid a thick crust on the bottom of the cake.
Gently pour the prepared chocolate cake batter evenly into the prepared pans. Divide the batter as equally as possible between the two pans to ensure even rising and baking. A kitchen scale can be helpful for precise measurement of the batter in each pan. Avoid overfilling the pans; fill them about two-thirds full to allow for rising.
Bake for 30-35 minutes, or until a wooden skewer inserted into the center comes out clean. Do not open the oven door frequently during baking, as this can cause the cake to collapse. Start checking for doneness around the 30-minute mark. If a toothpick inserted into the center still has moist crumbs attached, bake for a few more minutes and check again.
Once baked, let the cakes cool in the pans for 10 minutes before inverting them onto a wire rack to cool completely. Cooling the cakes completely before frosting is essential to prevent the frosting from melting and creating a soggy cake. Using a wire rack allows for air circulation, promoting even cooling and preventing moisture build-up.
Professional Tip: For a perfectly level cake, use a serrated knife to carefully trim the tops of the cooled cakes if they are domed. This creates a smooth, even surface for frosting.
Important Note: Baking times can vary depending on your oven and the altitude. If your cake is browning too quickly on top, tent it loosely with aluminum foil during the last 10-15 minutes of baking. Always refer to your oven’s instructions and adjust baking time accordingly.
Cooling the Cake
Cooling your chocolate cake correctly is crucial for achieving a moist, stable, and easily-frosted result. Improper cooling can lead to cracks, crumbling, and a soggy bottom. This process requires patience and attention to detail.
Once your cake is removed from the oven, let it sit in the pan for 10-15 minutes. This allows the internal structure to firm up slightly, preventing it from collapsing when you invert it. Resist the urge to rush this step; patience is key here.
After the initial resting period, run a thin, flexible spatula or offset spatula around the edges of the cake to loosen it from the pan. This prevents sticking and ensures a clean release. Do not force the cake; if it’s sticking, let it sit for a few more minutes.
Place a wire rack on a flat, heat-resistant surface. This is important for even cooling and to prevent condensation from accumulating on the bottom of the cake. Carefully invert the cake onto the wire rack. If using a springform pan, carefully release the sides before inverting.
Allow the cake to cool completely at room temperature. This usually takes about 1-2 hours, depending on the size and thickness of the cake. A completely cooled cake is much easier to frost and will hold its shape better. Avoid placing the cake in the refrigerator during this stage, as this can cause condensation and make the frosting difficult to adhere.
To check if the cake is completely cool, gently touch the top. It should be completely cool to the touch. If there’s any residual warmth, allow it to cool for a bit longer. Do not attempt to frost a warm cake, as the frosting will melt and slide off.
Once the cake is completely cool, you can carefully transfer it to a serving plate or cake board, ready for frosting. If you’re concerned about the cake crumbling during transfer, slide a large, flat spatula or cake lifter underneath to provide extra support. Remember, a little patience during the cooling process will result in a beautifully finished chocolate cake.
Important Note: The cooling time may vary depending on your oven, the size of your cake pan, and the recipe. Always prioritize complete cooling before frosting for best results.
Frosting Preparation
The luscious chocolate frosting is just as crucial as the cake itself! This recipe uses a classic buttercream, providing a rich and creamy complement to the chocolate cake. We’ll be making enough frosting to generously coat a two-layer 9-inch cake.
Ingredients:
Instructions:
1. Begin by beating the softened butter in a large bowl using an electric mixer on medium speed. Beat until light and fluffy, about 2-3 minutes. This incorporates air and creates a lighter frosting.
2. Gradually add the sifted powdered sugar and cocoa powder, alternating with the milk, beginning and ending with the dry ingredients. Beat on low speed until just combined, then increase to medium speed and beat for another 2-3 minutes until light and fluffy. Adding the ingredients gradually prevents lumps from forming.
3. Stir in the vanilla extract and salt. Beat for another minute to combine. Taste and adjust sweetness or cocoa intensity as needed. You can add more powdered sugar for a thicker frosting or a little more milk for a thinner consistency.
4. Once the desired consistency is reached, transfer the frosting to a piping bag fitted with a large round tip (or a zip-top bag with a corner snipped off) for easy application. If you’re not piping, simply spread the frosting with a spatula or offset spatula.
5. Before frosting the cake, ensure the cake layers are completely cool. Frosting a warm cake will cause the frosting to melt and become runny.
Professional Tip: For a truly decadent frosting, add a tablespoon or two of strong brewed coffee or espresso to enhance the chocolate flavor.
Recommendations
For the best results, ensure all your ingredients are at room temperature before beginning. This allows for even mixing and a smoother batter. Using fresh, high-quality cocoa powder will significantly impact the flavor of your cake. Don’t overmix the batter; overmixing can lead to a tough cake. Mix until just combined.
Let the cake cool completely in the pan before frosting. This prevents the frosting from melting and ensures a clean, even finish. A wire rack is ideal for cooling. Once cooled, store the cake in an airtight container at room temperature for up to 3 days, or in the refrigerator for up to 5 days. Freezing is also an option; wrap the cake tightly in plastic wrap and then foil, and freeze for up to 2 months.
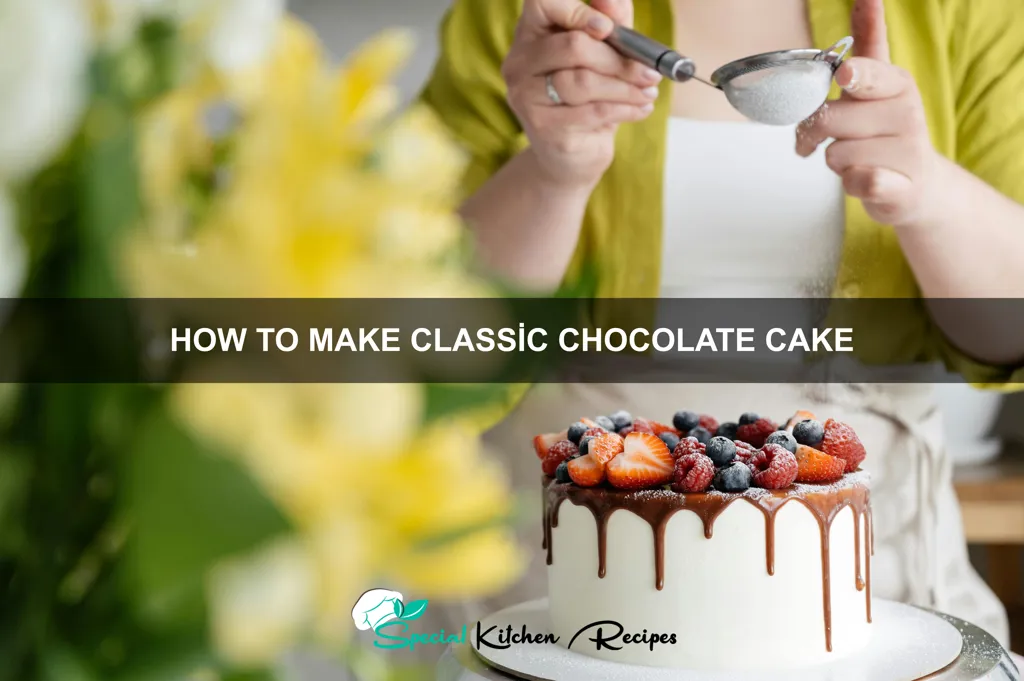
Serving suggestions abound! A classic chocolate cake is delicious on its own, but it also pairs beautifully with fresh berries, whipped cream, or a scoop of vanilla ice cream. For a more decadent treat, consider adding chocolate shavings or a drizzle of chocolate ganache. A dusting of powdered sugar provides an elegant finishing touch.
This cake complements a variety of dishes. It’s a perfect accompaniment to a light and fruity dessert wine, such as a Moscato d’Asti. For a more substantial meal, it pairs well with creamy soups or a light salad. It’s also a wonderful addition to afternoon tea or a celebratory gathering.
Nutritional Information (per serving, approximate): Calories: 350-400, Fat: 18-22g, Saturated Fat: 10-14g, Cholesterol: 50-70mg, Sodium: 200-250mg, Carbohydrates: 45-55g, Sugar: 25-35g, Protein: 4-6g. *Note: Nutritional information will vary depending on the specific ingredients used and serving size.
Important Note: These nutritional values are estimates and may vary based on the specific ingredients and portion sizes used. For accurate nutritional information, use a nutrition calculator with your exact recipe details.