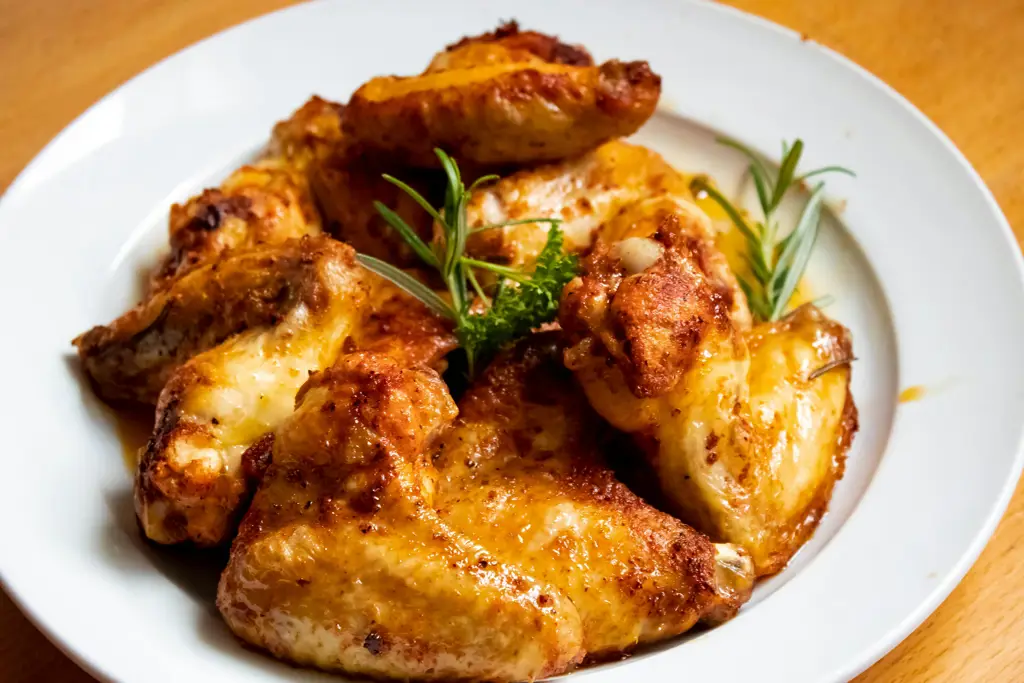
Crispy chicken cutlets: a seemingly simple dish, yet one with a surprisingly rich and complex history. While pinpointing an exact origin is difficult, the concept of breading and frying thin slices of meat dates back centuries. Ancient civilizations, from the Greeks and Romans to various cultures across Asia, employed similar techniques to prepare meats, often using readily available ingredients like flour and oil. These early preparations, while not identical to the modern chicken cutlet, laid the groundwork for the culinary evolution that led to this popular dish. The specific iteration we know today, however, is likely a product of various culinary influences across different regions and cultures, with the modern form potentially gaining traction in Europe and then spreading globally.
The rise of the chicken cutlet as a popular dish is intrinsically linked to the increasing accessibility of chicken. In the United States, for example, chicken consumption has drastically increased over the past century, surpassing beef in per capita consumption in the 1990s. This shift in dietary habits, coupled with the convenience and versatility of chicken as a protein source, propelled the chicken cutlet into the mainstream. Its adaptability also played a crucial role – it’s easily incorporated into various cuisines, from Italian-American parmigiana to Asian-inspired stir-fries, demonstrating its remarkable flexibility and cultural significance.
The cultural significance of the chicken cutlet is multifaceted. It’s a staple in many households, representing a comforting and familiar meal. It’s also a popular item on restaurant menus worldwide, appearing in diverse settings from casual diners to upscale eateries. Furthermore, the chicken cutlet has proven its adaptability to various dietary needs and preferences. Variations abound, catering to vegetarian diets with substitutes such as tofu or eggplant, or embracing gluten-free options with alternative breading techniques. This adaptability ensures its continued relevance and widespread appeal, solidifying its position as a truly global culinary icon. Beyond its versatility, the satisfying crunch and juicy interior of a perfectly prepared chicken cutlet provide a sensory experience that contributes to its enduring popularity. There’s a reason why this seemingly simple dish continues to be a favorite for millions worldwide.
Ingredients and Measurements
Creating perfectly crispy chicken cutlets hinges on selecting the right ingredients and measuring them accurately. Don’t skimp on quality; the better your ingredients, the better your final product will be. This recipe yields approximately 4 servings.
Chicken Breasts: You’ll need 1.5 lbs (approximately 4 large) boneless, skinless chicken breasts. Choose breasts that are relatively uniform in size for even cooking. If some are significantly larger than others, consider pounding them to an even thickness to ensure consistent crispiness throughout. Aim for a thickness of about ½ inch after pounding.
All-Purpose Flour: Use 1 ½ cups of all-purpose flour. This acts as the base for our breading system, adhering to the chicken and providing a foundation for the crispy coating. Using a good quality flour is important as it will directly impact the texture of the final product. Make sure your flour is fresh and free of any lumps.
Eggs: We need 2 large eggs. These act as a binder, helping the flour adhere to the chicken and the bread crumbs adhere to the eggs. Whisk the eggs thoroughly before using to ensure a smooth, even coating. A splash of milk or water (about 1 tablespoon) can be added to the eggs to help create a thinner, more easily spreadable mixture.
Breadcrumbs: Use 2 cups of panko breadcrumbs. Panko breadcrumbs are Japanese-style breadcrumbs that are known for their larger, crispier texture, perfect for achieving that extra-crispy exterior. If you can’t find panko, you can use regular breadcrumbs, but the result may be slightly less crispy. Consider adding some grated Parmesan cheese (about ¼ cup) to your breadcrumbs for extra flavor and a savory edge.
Seasonings: Seasoning is crucial for flavor. Use 1 teaspoon of salt, ½ teaspoon of black pepper, and ½ teaspoon of paprika. Don’t be afraid to experiment with other seasonings! Garlic powder, onion powder, cayenne pepper, or even a blend of Italian herbs can all add delicious complexity to your chicken cutlets. Season generously, but avoid over-salting.
Cooking Oil: You’ll need about ½ cup of vegetable oil or another high-heat cooking oil (like canola or grapeseed oil) for frying. Use enough oil to submerge the chicken cutlets about halfway, ensuring even cooking and browning. Avoid overcrowding the pan; this will lower the oil temperature and result in greasy, soggy chicken. Work in batches if necessary.
Optional additions: Consider adding a pinch of baking powder to the flour mixture for extra lift and crispiness. A teaspoon of lemon zest can also brighten the flavor profile. Remember to adjust measurements according to the number of servings you are preparing, while maintaining the ratios of ingredients for optimal results.
Equipment Preparation
Proper equipment preparation is crucial for achieving perfectly crispy chicken cutlets. Before you even begin prepping your chicken, ensure you have everything organized and ready to go. This will streamline your cooking process and prevent any delays or mishaps. A smooth workflow is key to crispy, juicy results.
First, gather your essential equipment: You’ll need three shallow dishes or pie plates, ideally approximately 9-10 inches in diameter. These will be used for dredging your chicken. Choose dishes that are wide enough to comfortably accommodate your chicken cutlets without overcrowding. Overcrowding can lead to steaming rather than crisping.
Next, consider your cooking tools: A meat mallet is essential for tenderizing the chicken cutlets to ensure even cooking and a consistent texture. Select a mallet with a flat, smooth surface to avoid tearing the meat. You will also need tongs for safely maneuvering the chicken through the breading process and transferring them to the hot oil. Sturdy tongs are vital to prevent dropping the cutlets and maintaining a consistent cooking rhythm.
Prepare your cooking surface: Ensure you have sufficient counter space for your three breading stations and the cooking area. Line a baking sheet or large plate with paper towels to drain excess oil from the cooked chicken cutlets. This is important for both presentation and to prevent a greasy end product. Having this ready beforehand will make the post-cooking cleanup much more efficient.
Measuring tools are also critical: You’ll need measuring cups and spoons for accurately measuring your flour, eggs, breadcrumbs, and seasonings. Inaccurate measurements can impact the final texture and flavor of your chicken cutlets. Using a kitchen scale for measuring flour can ensure consistent results, especially for those new to cooking.
For frying, you’ll need a large, heavy-bottomed skillet or pot, preferably at least 3 quarts in capacity. A heavy-bottomed pan distributes heat evenly, preventing hot spots that could burn the chicken before it’s cooked through. The depth of the pan should allow for at least 2 inches of oil, allowing for complete immersion of the chicken cutlets. Avoid using non-stick pans for deep frying, as high temperatures can damage the coating.
Finally, consider your safety: Before you begin cooking, make sure you have a thermometer to monitor the oil temperature. Maintaining the correct oil temperature (around 350°F or 175°C) is absolutely crucial for achieving perfectly crispy cutlets. Using a deep-fry thermometer will prevent guesswork and ensures even cooking. Also, remember to have a fire extinguisher nearby for safety precautions, especially when working with hot oil.
With all your equipment prepared and organized, you’re now ready to move on to the next stage of preparing your delicious and crispy chicken cutlets!
Chicken Preparation (Tenderizing and Seasoning)
The key to achieving incredibly crispy and juicy chicken cutlets lies in proper preparation. This involves both tenderizing the chicken breasts to ensure even cooking and consistent texture, and applying a flavorful seasoning blend that will enhance the overall taste and create a delicious crust.
Begin by selecting approximately 1.5 lbs of boneless, skinless chicken breasts. Ensure the chicken is uniformly thick; otherwise, thinner portions will overcook before thicker parts are fully done. To achieve even thickness, you can gently pound the breasts to about 1/4 inch thickness. This is best accomplished using a meat mallet or the flat side of a heavy pan. Place the chicken between two sheets of plastic wrap or inside a zip-top bag to prevent splatter and keep the chicken contained while pounding. Work from the center outwards, using even pressure to avoid tearing the meat.
Once the chicken is uniformly pounded, it’s time to season. The seasoning blend is crucial for creating a flavorful and crispy crust. For this recipe, we’ll use a classic combination. In a medium bowl, whisk together the following: 1/2 cup all-purpose flour, 1 teaspoon paprika (smoked paprika adds a delicious depth of flavor), 1 teaspoon garlic powder, 1 teaspoon onion powder, 1/2 teaspoon salt, and 1/4 teaspoon black pepper. Adjust seasoning to your preference; you might want to add a pinch of cayenne pepper for a little heat, or some dried herbs like thyme or oregano for a more complex flavor profile.
Now, dredge each chicken breast thoroughly in the seasoned flour mixture, ensuring both sides are completely coated. Press gently to help the flour adhere to the chicken. This step is vital for creating a crispy crust. Don’t be shy with the flour; a generous coating is key. You can even repeat the dredging process for extra crispy results. If you find the flour mixture is too dry, you can add a tablespoon or two of milk or buttermilk to create a slightly wetter, more clinging dredge.
Proper tenderizing is crucial for even cooking. Overly thick chicken breasts will cook unevenly, resulting in dry, tough meat on the inside. Conversely, overly thin chicken breasts may become overcooked and dry before developing a proper crust. Aim for a consistent thickness throughout the breast for optimal results. If you prefer a more tender texture, you can marinate the chicken for 30 minutes to an hour before breading. A simple marinade of buttermilk and your favorite herbs can add extra flavor and moisture.
After dredging, set the seasoned chicken aside while you prepare your breading station. Avoid overcrowding the pan when cooking, as this can lower the temperature and prevent proper browning. Work in batches if necessary to ensure each cutlet cooks evenly and achieves that signature crispy texture.
Breading Process (Flour, Egg Wash, Breadcrumbs)
Achieving perfectly crispy chicken cutlets hinges significantly on the breading process. A well-executed breading creates a flavorful, protective shell that allows for even cooking and prevents the chicken from drying out. This three-step process – flour, egg wash, and breadcrumbs – is crucial for success. Let’s break down each step in detail.
Step 1: The Flour Dredge. Begin by placing approximately 1 ½ cups of all-purpose flour in a shallow dish. You can adjust this amount depending on the quantity of chicken you are breading. Ensure your flour is seasoned. A simple blend of salt and black pepper works wonders, but you can also add paprika, garlic powder, onion powder, or even a pinch of cayenne pepper for extra flavor. Gently dredge each chicken cutlet in the seasoned flour, ensuring it’s fully coated on all sides. Press gently to help the flour adhere to the chicken. Avoid overcrowding the dish; work in batches if necessary to maintain a good coating.
Step 2: The Egg Wash. In a separate shallow dish, whisk together 2 large eggs with 2 tablespoons of milk or water. The milk or water helps thin the egg wash, allowing for better adhesion of the breadcrumbs. The key here is to create a consistent, slightly runny wash. Too thick, and the breadcrumbs won’t stick properly; too thin, and you’ll end up with a soggy coating. After dredging in flour, dip each chicken cutlet into the egg wash, ensuring it’s completely coated. Let any excess egg wash drip off before proceeding to the next step.
Step 3: The Breadcrumb Coating. Choose your breadcrumbs wisely! Panko breadcrumbs are a popular choice for their airy texture, which leads to extra crispiness. However, regular breadcrumbs also work well. Place about 2 cups of your chosen breadcrumbs in another shallow dish. For extra flavor and crispiness, consider adding grated Parmesan cheese, herbs, or spices to your breadcrumbs. Again, avoid overcrowding. Gently press the egg-washed chicken cutlet into the breadcrumbs, ensuring a complete and even coating. Use your fingers or a spatula to press the breadcrumbs firmly onto the chicken, helping them adhere better. A good, even coating is vital for achieving that desirable crunchy texture. If you notice any bare spots, repeat steps 2 and 3.
Professional Tip: For an even crispier result, allow the breaded chicken cutlets to rest for at least 15-20 minutes before cooking. This allows the breading to set and helps prevent it from falling off during cooking. Also, avoid pressing down on the chicken cutlets while cooking, as this can release moisture and reduce crispiness. Fry or bake according to your recipe instructions, and enjoy your perfectly crispy chicken cutlets!
Cooking Method (Pan-frying, Baking, Air-frying)
Choosing the right cooking method for your chicken cutlets is crucial for achieving that perfect crispy exterior and juicy interior. Here’s a breakdown of three popular methods: pan-frying, baking, and air-frying, each with its own advantages and nuances.
Pan-frying
Pan-frying delivers a wonderfully crispy, browned crust and a quick cooking time. For optimal results, use a high-quality oil with a high smoke point, such as canola or vegetable oil. Heat the oil in a large skillet over medium-high heat. You should see a faint shimmer in the oil – this indicates it’s ready. Add your seasoned chicken cutlets to the skillet, ensuring not to overcrowd the pan (work in batches if necessary). Avoid moving the cutlets for the first 3-4 minutes to allow a good sear to develop. Then, carefully flip them and cook on the other side for another 3-4 minutes, or until the internal temperature reaches 165°F (74°C).
Important Note: Overcrowding the pan will lower the oil temperature, resulting in greasy, not crispy, cutlets. Use tongs to flip the cutlets; a spatula may break the crust. For extra crispiness, consider dredging the cutlets in a mixture of flour, cornstarch, and spices before pan-frying.
Baking
Baking offers a healthier alternative to pan-frying, producing crispy cutlets with less added fat. Preheat your oven to 400°F (200°C). Line a baking sheet with parchment paper for easy cleanup. Arrange the seasoned chicken cutlets in a single layer on the baking sheet, ensuring they are not touching. Baking time will vary depending on the thickness of your cutlets, but generally, it will take 20-25 minutes, or until the internal temperature reaches 165°F (74°C). For extra crispiness, you can broil the cutlets for the last 2-3 minutes, keeping a close eye to prevent burning.
Professional Tip: To promote even cooking and crispiness, lightly brush the cutlets with oil before baking. Consider using a wire rack placed on top of the baking sheet to allow air circulation underneath the cutlets.
Air-frying
Air-frying provides a quick and relatively healthy way to achieve crispy chicken cutlets. Preheat your air fryer to 400°F (200°C). Arrange the seasoned chicken cutlets in a single layer in the air fryer basket, ensuring they are not overcrowded. Air-fry for 10-12 minutes, flipping halfway through, until the cutlets are golden brown and cooked through. The cooking time may vary depending on your air fryer model and the thickness of the cutlets. Always check the internal temperature to ensure it reaches 165°F (74°C).
Important Consideration: Overcrowding the air fryer basket will result in uneven cooking and less crispiness. If necessary, cook the cutlets in batches. A light spray of cooking oil before air-frying can enhance the crispiness.
No matter which method you choose, always use a meat thermometer to ensure the chicken reaches a safe internal temperature of 165°F (74°C) to prevent foodborne illnesses. Enjoy your perfectly crispy chicken cutlets!
Checking for Doneness
Determining the perfect doneness for your crispy chicken cutlets is crucial for achieving that ideal balance of juicy interior and crisp exterior. Overcooked cutlets will be dry and tough, while undercooked ones pose a food safety risk. There are several methods you can employ to ensure your chicken reaches the safe internal temperature while maintaining its texture.
The most reliable method is using a meat thermometer. Insert the thermometer into the thickest part of the cutlet, avoiding the bone if using bone-in pieces. The internal temperature should reach 165°F (74°C). This ensures the chicken is cooked thoroughly and safe to eat. Don’t rely solely on visual cues, as the browning of the exterior doesn’t always guarantee the interior is fully cooked.
While a thermometer provides the most accurate reading, visual cues can offer supplemental information. The chicken should be no longer pink inside. The juices should run clear when pierced with a fork or knife. If the juices are still pink or bloody, the chicken needs more cooking time. However, never rely solely on color as a determinant of doneness; always use a thermometer to confirm.
The texture of the chicken also plays a role in determining doneness. A properly cooked cutlet will feel firm to the touch, not jiggly or soft. Gently press on the center of the cutlet; it should spring back slightly. If it feels mushy or gives way easily under pressure, it’s likely undercooked. Avoid over-handling the chicken while checking for doneness, as this can damage the delicate crispy coating.
Timing is also a factor, but it’s less reliable than using a thermometer. Cooking times vary depending on the thickness of the cutlets, the type of cooking method (pan-frying, baking, etc.), and the temperature of your cooking equipment. As a general guideline, thin cutlets (about ½ inch thick) may take 5-7 minutes per side when pan-fried over medium-high heat. Thicker cutlets will require longer cooking times. Always adjust cooking times based on your specific setup and the thickness of your chicken.
Important Note: If you’re unsure about the doneness of your chicken cutlets, it’s always better to err on the side of caution and cook them for a longer period. Undercooked chicken can cause foodborne illnesses, so using a meat thermometer and checking for a clear internal temperature of 165°F (74°C) is paramount.
Once your chicken cutlets reach the desired temperature and exhibit the characteristics described above, carefully remove them from the heat and allow them to rest for a few minutes before serving. This allows the juices to redistribute, resulting in more tender and flavorful chicken. Enjoy your perfectly cooked, crispy chicken cutlets!
Recommendations for Crispy Chicken Cutlets
Serving Suggestions
These crispy chicken cutlets are incredibly versatile and can be served in a multitude of ways. For a classic approach, serve them on a toasted bun with your favorite condiments like mayonnaise, lettuce, tomato, and onion for a delicious chicken sandwich. You can also elevate the experience with a flavorful aioli or a spicy sriracha mayo.
For a lighter meal, pair the cutlets with a fresh salad. A simple green salad with a vinaigrette dressing or a more substantial salad with roasted vegetables and a creamy dressing would both complement the chicken beautifully. Consider adding some crumbled feta cheese or toasted nuts for extra texture and flavor.
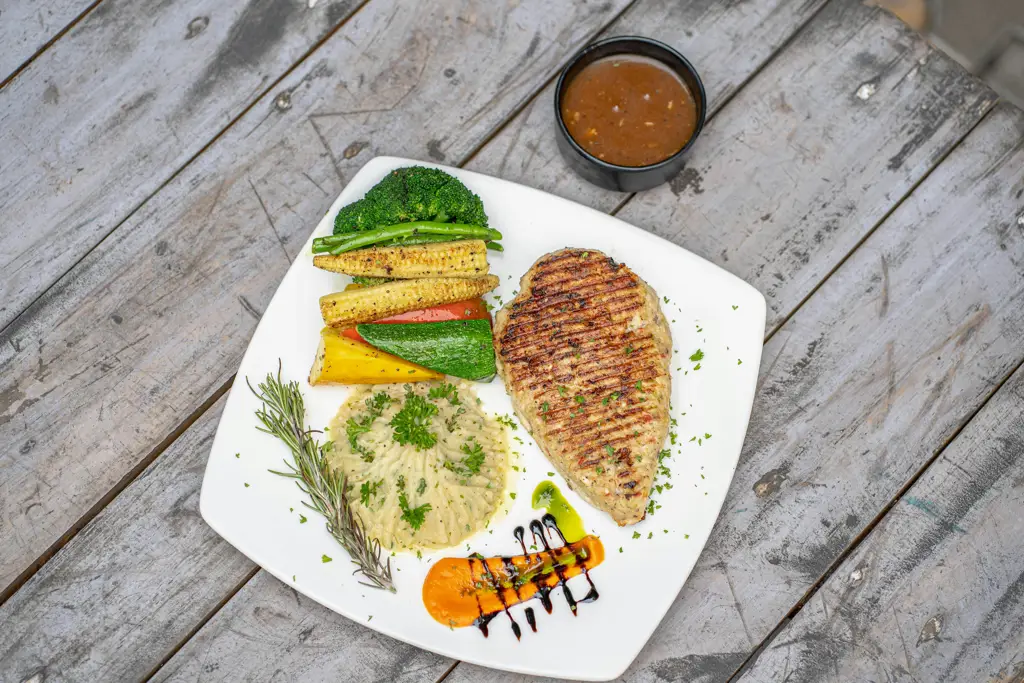
As a main course, serve the chicken cutlets alongside your favorite sides. Mashed potatoes, roasted vegetables (such as broccoli, asparagus, or carrots), or a simple rice pilaf are all excellent choices. For a more complete meal, consider adding a gravy or pan sauce made from the chicken drippings.
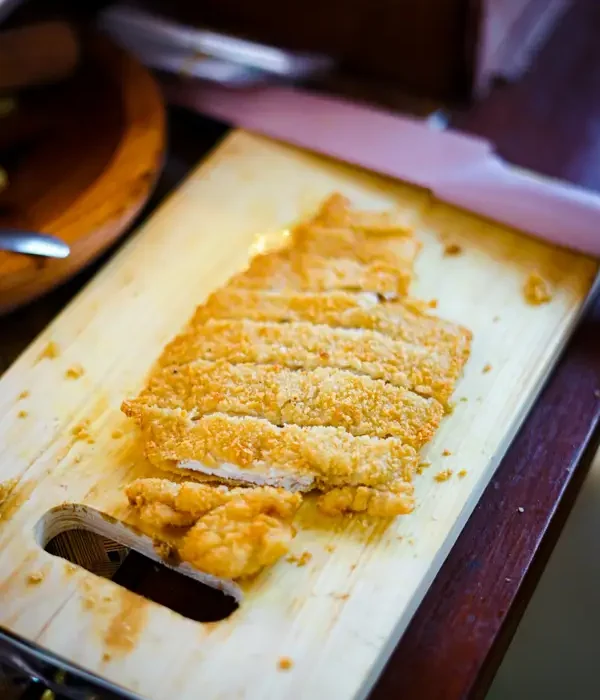
Get creative with your presentation! You can slice the cutlets and arrange them in a fan shape on a plate, or serve them whole with a decorative garnish. The possibilities are endless!
Storage and Reheating
Proper storage is crucial for maintaining the quality and safety of your chicken cutlets. Allow the cutlets to cool completely before storing them in an airtight container in the refrigerator. They will stay fresh for up to 3 days. To freeze the cutlets, place them in a freezer-safe bag or container and freeze for up to 3 months.
When reheating, avoid microwaving, as this can make the chicken rubbery. The best way to reheat chicken cutlets is in a skillet over medium heat with a little bit of oil or butter until heated through and crispy again. You can also reheat them in a preheated oven at 350°F (175°C) for about 10-15 minutes.
Complementary Dishes
To enhance your chicken cutlet experience, consider pairing them with dishes that offer contrasting flavors and textures. A creamy pasta dish, a vibrant salsa, or a tangy coleslaw would create a delicious and balanced meal. The richness of the chicken cutlet is well-balanced by the freshness of a light salad or the sharpness of a lemon-herb sauce.
Think about the overall flavor profile you’re aiming for. If you want a spicy kick, serve the cutlets with a jalapeño-lime crema or a spicy dipping sauce. For a more subtle flavor, a simple herb butter or a Dijon mustard sauce would be ideal.
Nutritional Information (per cutlet, approximate)
This nutritional information is an estimate and may vary depending on the ingredients used and portion size.
Calories: Approximately 250-350 calories
Protein: Approximately 25-35 grams
Fat: Approximately 15-25 grams
Carbohydrates: Approximately 5-10 grams
Note: This information does not include the calories or nutritional content of any accompanying sides or sauces.