Garlic bread, a seemingly simple dish, boasts a surprisingly rich and complex history, far exceeding its humble ingredients. While pinning down its exact origin is difficult, its widespread popularity suggests an evolution across multiple cultures. Its roots likely lie in the Mediterranean, where garlic and bread have been staples for millennia. Ancient civilizations utilized both extensively, with evidence suggesting bread-like products existed in Egypt as far back as 3000 BC and garlic’s use dating even further back. The combination, however, likely emerged gradually as culinary traditions evolved and spread through trade and migration. There’s no single inventor of garlic bread, but rather a collective culinary development across cultures.
Its journey to global fame is a testament to its inherent deliciousness and adaptability. While precise historical accounts are scarce, the popularity of garlic bread significantly increased in the 20th century, particularly in North America and Europe. Its association with Italian-American cuisine solidified its place in many Western cultures. The rise of pizza parlors and Italian restaurants in the mid-20th century played a significant role in popularizing garlic bread as a side dish, often served alongside pizzas and pasta. This association cemented its image as a comforting and delicious addition to any meal, contributing to its enduring appeal. Today, it’s a staple in countless homes and restaurants worldwide.
The cultural significance of garlic bread is multifaceted. In many cultures, bread itself holds symbolic weight, representing nourishment, community, and even religious significance. Garlic, in contrast, carries a more complex image, historically associated with both healing and warding off evil in various traditions. Its strong aroma and pungent flavor have made it a featured ingredient in diverse cuisines, from the Mediterranean to East Asia. The simple combination of these two elements—bread and garlic—creates a dish that is both familiar and comforting, yet capable of evoking a sense of cultural richness and history. The ease of preparation further contributes to its widespread appeal, allowing it to be enjoyed across socioeconomic groups. Recent surveys, although not readily available in consolidated form, suggest garlic bread remains among the top five most popular side dishes in many Western countries, highlighting its ongoing cultural relevance.
This recipe focuses on crafting a simple yet delicious version of garlic bread, showcasing the core elements that have made this dish a global favorite for generations. We’ll explore techniques to achieve perfectly toasted bread with a balanced, flavorful garlic butter, emphasizing the simplicity and accessibility at the heart of this culinary classic.
Ingredients and Measurements
Creating the perfect garlic bread hinges on using high-quality ingredients and precise measurements. The following recipe yields approximately 8 servings of delicious, garlicky goodness. Feel free to adjust quantities based on your needs, but maintaining the ratios is key for optimal flavor.
Bread: The foundation of your garlic bread is, of course, the bread itself. We recommend using a crusty loaf, such as a baguette, Italian loaf, or even a sourdough. A good crust provides the perfect texture for absorbing the garlic butter and achieving that delightful crunch. Choose a loaf weighing approximately 1 pound (450g). Avoid using overly soft or dense breads, as they may become soggy during baking.
Butter: Unsalted butter is crucial here. Salted butter can sometimes overpower the delicate garlic flavor. Use 1/2 cup (113g) of unsalted butter, softened to room temperature. Softened butter is essential for easy spreading and even distribution across the bread. If your butter is too hard, microwave it in short bursts until it reaches the desired consistency. Be careful not to melt it completely.
Garlic: Fresh garlic provides the best flavor. Use 4-6 large cloves of garlic, depending on your preference for garlic intensity. More garlic equals more intense flavor, so adjust according to your taste. If you prefer a milder flavor, start with 4 cloves and add more to taste. Remember to peel and mince the garlic finely for even distribution in the butter mixture. A garlic press can be helpful for achieving a smooth, even mince.
Fresh Parsley (Optional): A sprinkle of fresh parsley adds a touch of freshness and visual appeal. Use 2 tablespoons of finely chopped fresh parsley. Fresh parsley is preferable to dried, as it provides a brighter, more vibrant flavor. If you don’t have fresh parsley, you can omit it entirely, or substitute with a teaspoon of dried parsley.
Olive Oil (Optional): Adding a tablespoon of olive oil to the garlic butter mixture enhances the flavor and adds a touch of richness. Extra virgin olive oil is recommended for its superior taste. This ingredient is optional, but it does elevate the overall flavor profile of the garlic bread.
Salt and Pepper: A pinch of salt and freshly ground black pepper enhance the overall flavor. Start with 1/4 teaspoon of salt and 1/8 teaspoon of freshly ground black pepper. Adjust to your taste – some may prefer a bit more salt to balance the richness of the butter.
Other potential additions: For those seeking to elevate their garlic bread, consider adding other ingredients such as grated Parmesan cheese (1/4 cup), dried oregano (1/2 teaspoon), or red pepper flakes (a pinch) for a spicy kick. Remember to adjust the quantities based on your preferences.
Equipment List
Making delicious garlic bread requires surprisingly little equipment, but the right tools can make the process smoother and the end result even more impressive. This list details the essential equipment, along with some optional additions that can elevate your garlic bread game.
1. Baking Sheet: A standard baking sheet (approximately 12 x 16 inches) is crucial. Choose one that’s sturdy and non-stick for easy cleanup. If you’re making a large batch of garlic bread, consider using two baking sheets to ensure even cooking. Avoid using warped baking sheets, as they can lead to uneven browning.
2. Loaf of Bread: You’ll need a suitable loaf of bread. A baguette is the classic choice, offering a long, crusty exterior and soft interior perfect for absorbing the garlic butter. Alternatively, a sourdough loaf, a ciabatta, or even a rustic Italian loaf can also work wonderfully. Aim for a loaf weighing approximately 1 pound (450g) for a standard recipe. Consider the size and shape of your loaf when choosing your baking sheet.
3. Chef’s Knife: A sharp chef’s knife (8-10 inches) is needed for slicing the bread. A sharp knife ensures clean, even slices, preventing ragged edges and promoting even cooking. Dull knives can crush the bread, compromising the texture. Remember to always use a cutting board to protect your work surface.
4. Small Mixing Bowl: You’ll need a small mixing bowl (approximately 6-8 inches in diameter) to prepare the garlic butter mixture. This bowl should be large enough to comfortably accommodate the ingredients without overflowing. A glass or stainless steel bowl is recommended for easy cleaning.
5. Whisk or Fork: A whisk or a fork is essential for thoroughly combining the ingredients in your garlic butter mixture. A whisk is ideal for creating a smooth and emulsified mixture, ensuring even distribution of flavor throughout the bread. A fork works well too, but may not create as smooth a consistency.
6. Measuring Spoons and Cups: Accurate measurements are key to achieving the perfect balance of flavors. Use standard measuring spoons and cups to measure the butter, garlic, parsley, and other seasonings. Precision in measuring ensures consistent results.
7. Rubber Spatula or Silicone Brush: A rubber spatula or a silicone pastry brush is helpful for spreading the garlic butter evenly over the bread slices. A spatula allows for more controlled spreading, while a pastry brush is great for ensuring the butter reaches every nook and cranny. Avoid using metal utensils, as they can scratch non-stick surfaces.
8. Oven Mitts or Gloves: Essential for safely removing the hot baking sheet from the oven. Always use oven mitts or gloves to protect your hands from burns. Never handle hot baking sheets without proper protection.
Optional Equipment: A garlic press can be used to mince the garlic more efficiently, though finely chopping by hand works just as well. A pastry scraper can assist with spreading the garlic butter smoothly and evenly. A cooling rack allows the garlic bread to cool evenly and prevents sogginess.
Preparation of Garlic Butter
Creating the perfect garlic butter is crucial for achieving truly delicious garlic bread. This seemingly simple step requires attention to detail to balance the flavors and achieve the right consistency. We’ll guide you through a foolproof method to ensure your garlic butter is a culinary triumph.
Start with high-quality ingredients. This is paramount. Use unsalted butter so you can control the salt level. The best butter will have a rich, creamy flavor that will enhance the garlic. We recommend using 1 stick (1/2 cup or 113 grams) of unsalted butter, softened to room temperature. This is crucial; if the butter is too cold, it will be difficult to incorporate the garlic and other ingredients smoothly. If it’s too warm, it will be too soft and difficult to spread.
Prepare your garlic. The amount of garlic is a matter of personal preference, but we recommend using 4-6 cloves of garlic for a stick of butter. Too little, and the garlic flavor will be subtle; too much, and it can overpower the other flavors. Peel the garlic cloves and finely mince them. A garlic press can be helpful for achieving a consistent, fine mince, which helps prevent large chunks of garlic from ending up in your finished garlic bread. Avoid using pre-minced garlic from a jar, as it often has a less fresh and more pungent flavor.
Combine the ingredients. In a medium-sized bowl, combine the softened butter and minced garlic. Using a fork or a spatula, gently mix the two until they are thoroughly combined and the garlic is evenly distributed throughout the butter. Don’t overmix, as this can incorporate too much air and result in a less smooth, spreadable butter. A gentle folding motion is best.
Enhance the flavor profile. To elevate your garlic butter beyond the basic, consider adding some complementary ingredients. A pinch of salt (about 1/4 teaspoon) will enhance the flavors of the garlic and butter. Freshly ground black pepper (about 1/8 teaspoon) adds a touch of spice and complexity. For a more herbaceous note, consider adding 1-2 tablespoons of finely chopped fresh parsley or chives. Experiment with different herbs and spices to find your perfect combination. Some people also like a touch of lemon zest for brightness.
Adjust consistency (optional). If you find your garlic butter is too firm, you can gently warm it in the microwave for short intervals (5-10 seconds at a time) until it reaches your desired consistency. Be careful not to overheat it, as this can melt the butter and make it difficult to spread. Conversely, if it’s too soft, you can chill it in the refrigerator for 15-20 minutes to firm it up.
Store properly. Once prepared, your garlic butter can be stored in an airtight container in the refrigerator for up to a week. For longer storage, consider freezing it in ice cube trays or small containers. This allows you to easily portion it out as needed.
Bread Selection and Preparation
Choosing the right bread is crucial for achieving perfectly delicious garlic bread. The ideal loaf should be sturdy enough to hold the garlic butter without becoming soggy, yet soft enough to provide a pleasing texture. Avoid overly dense or crusty breads that might be difficult to slice evenly or absorb the butter unevenly.
Recommended Bread Types: A classic choice is a French baguette. Its long, slender shape is perfect for easy slicing and its airy crumb provides a light, flavorful base. A sourdough loaf, with its tangy flavor and slightly chewy texture, also makes an excellent option. For a softer, more buttery garlic bread, consider using a round Italian loaf or even a good quality ciabatta. Avoid using overly sweet breads like brioche, as the sweetness might clash with the savory garlic butter.
Quantity: The amount of bread you’ll need depends on the number of servings. For a small gathering of 4-6 people, one standard-sized baguette (approximately 14-16 inches long) or a small round loaf (8-10 inches in diameter) will suffice. For larger groups, adjust the quantity accordingly. It’s always better to have a little extra than to run short.
Slicing the Bread: Even slicing is key to ensuring each piece of garlic bread is evenly coated and cooked. Use a serrated knife for the cleanest cuts, especially with crusty breads. Aim for slices about ½ to ¾ inch thick. Thicker slices will take longer to toast and might not become as crispy, while thinner slices may burn easily. If using a round loaf, cut it in half horizontally, then slice each half into wedges.
Preparing the Bread: Once sliced, you have a couple of options for preparing the bread before adding the garlic butter. For a crispier garlic bread, you can lightly toast the slices in a toaster oven or under a broiler for approximately 1-2 minutes per side. This helps to dry out the bread slightly and prevents it from becoming too soggy when the butter is added. Be careful not to burn the bread! Alternatively, you can skip this step and proceed directly to brushing the garlic butter onto the slices. This method results in a slightly softer garlic bread.
Important Note: If using a very fresh loaf, allowing it to sit at room temperature for 30-60 minutes before slicing can help prevent the bread from becoming overly compressed during slicing, leading to more even results. This is particularly beneficial for softer breads.
By carefully selecting your bread and paying attention to the slicing and preparation techniques, you’ll ensure a consistently delicious and enjoyable garlic bread experience. Remember to adjust the bread type and quantity based on your personal preferences and the number of servings required.
Baking or Toasting the Bread
The success of your garlic bread hinges significantly on how you bake or toast the bread. While toasting offers a quicker method, baking provides a more evenly cooked and potentially crispier result, especially for thicker slices of bread. The choice depends on your preference and the type of bread you’re using.
For Toasting (Best for thinner slices): This method is ideal for quickly preparing garlic bread, particularly when using thinner slices of bread like baguette slices or sandwich bread. Preheat your broiler to high. Arrange the prepared garlic bread slices in a single layer on a baking sheet lined with parchment paper. This prevents sticking and ensures even browning. Avoid overcrowding the baking sheet; leave some space between the slices for optimal airflow. Place the baking sheet under the broiler and watch closely! Broiling can happen very quickly, so keep a close eye to prevent burning. Toast for 2-3 minutes per side, or until golden brown and the garlic is fragrant and slightly caramelized. The exact timing will depend on your broiler’s intensity and the thickness of your bread.
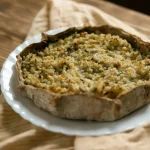
For Baking (Best for thicker slices and even cooking): Baking is recommended for thicker slices of bread, such as sourdough or country loaves, as it ensures the garlic butter permeates the bread evenly and the interior gets thoroughly heated. Preheat your oven to 375°F (190°C). Arrange the prepared garlic bread slices in a single layer on a baking sheet, again using parchment paper to prevent sticking. For even cooking, use a baking sheet that allows for good air circulation around each slice. Baking time will vary depending on the thickness of your bread slices and your oven. For example, 1/2-inch thick slices might take 8-10 minutes, while thicker slices may require 12-15 minutes. Keep a close eye on the bread, beginning to check for doneness around the 8-minute mark. You’ll know it’s ready when the bread is golden brown, crispy on the edges, and the garlic butter is visibly melted and slightly browned.
Important Considerations for Both Methods:
- Don’t overcrowd the baking sheet: Overcrowding restricts airflow, resulting in uneven cooking and potentially soggy bread.
- Use parchment paper: This prevents sticking and makes cleanup a breeze.
- Keep a close eye: Broiling and baking times can vary depending on your oven and the thickness of the bread. It’s crucial to monitor the bread closely to prevent burning.
- Adjust cooking time: If your bread is browning too quickly, reduce the temperature or move the baking sheet further from the heat source (for broiling). If it’s not browning enough, increase the temperature or move it closer.
- Experiment with different breads: Different types of bread will have different cooking times. A baguette will toast much faster than a thick slice of sourdough.
Professional Recommendation: For the best results, use a good quality bread with a sturdy crust. This will help the garlic bread maintain its shape and texture during baking or toasting. Also, don’t be afraid to experiment with different types of garlic butter – adding herbs like parsley or rosemary can elevate the flavor profile.
Serving Suggestions
Your freshly baked garlic bread is incredibly versatile and can be served in a multitude of ways, depending on the occasion and your personal preference. From simple appetizers to sophisticated side dishes, the possibilities are endless. Here are a few ideas to inspire your next garlic bread adventure.
As a Starter: For a casual gathering or a family dinner, serve warm garlic bread slices alongside a simple soup or salad. A classic tomato soup paired with crusty garlic bread is a timeless combination. Consider serving 2-3 slices per person as an appetizer, depending on the size of the bread and the rest of the meal. For a more elegant presentation, cut the bread into smaller, bite-sized pieces, arranging them attractively on a platter.
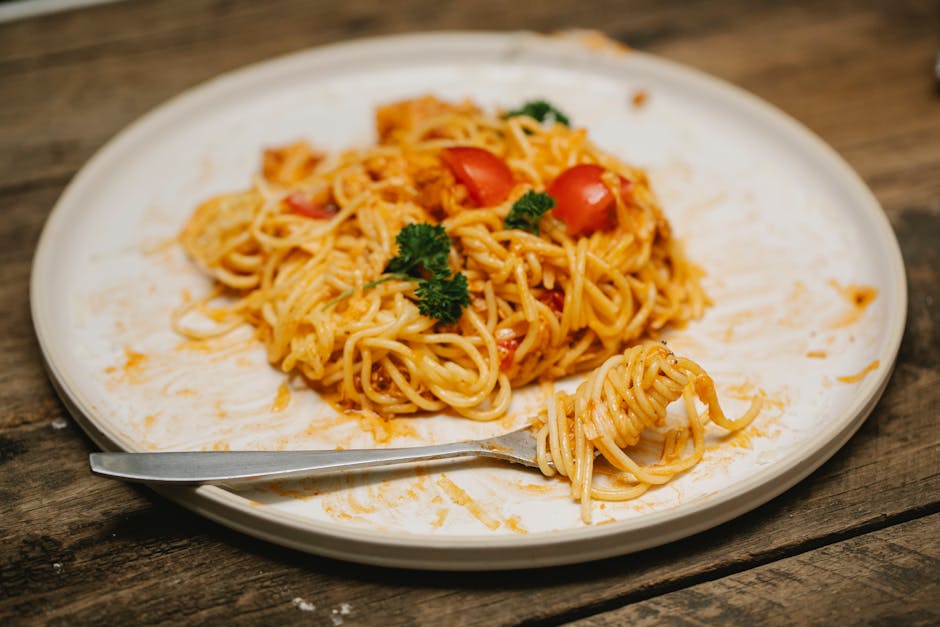
Alongside Main Courses: Garlic bread is a fantastic accompaniment to numerous main courses. Its savory flavor complements pasta dishes perfectly. Consider serving 4-6 slices of garlic bread per person with dishes such as spaghetti Bolognese, lasagna, or creamy Alfredo pasta. Grilled meats, such as steak or chicken, also pair exceptionally well with garlic bread, cutting through the richness of the protein. For a heartier meal, you could even use the garlic bread as a base for a bruschetta-style topping, adding diced tomatoes, basil, and balsamic glaze.
Creative Serving Ideas: Don’t be afraid to experiment! Cut the garlic bread into croutons and toss them in a Caesar salad for an extra layer of flavor and texture. For a fun twist, create garlic bread soldiers by cutting the bread into long strips and serving them alongside dips like French onion soup or creamy spinach and artichoke dip. This is a great option for parties or gatherings.
Temperature is Key: Serving your garlic bread warm is crucial for optimal flavor and texture. Reheat leftover bread in a toaster oven or a regular oven at 350°F (175°C) for 5-7 minutes, until heated through and slightly crispy. Avoid microwaving, as this can make the bread soggy. If serving immediately after baking, ensure you have a warm serving platter to maintain the temperature.
Presentation Matters: Even a simple dish like garlic bread can be elevated with thoughtful presentation. Arrange the slices on a nice platter or serving board. Consider garnishing with fresh herbs, such as parsley or chives, for a touch of color and freshness. A sprinkle of grated Parmesan cheese can also add a delightful salty and savory element. A drizzle of olive oil over the warm bread before serving enhances the flavor and adds a beautiful sheen.
Quantity Considerations: When planning how much garlic bread to make, consider the number of guests and the rest of your menu. A good rule of thumb is to calculate 2-3 slices per person as an appetizer, and 4-6 slices per person as a side dish. If you’re unsure, it’s always better to err on the side of making a little extra, as leftover garlic bread can be enjoyed the next day (or reheated and served with breakfast!).
Recommendations for the Perfect Garlic Bread
To elevate your simple garlic bread experience, consider these recommendations. For the most flavorful results, use high-quality ingredients. Freshly baked bread provides a superior texture and taste compared to store-bought options that may be stale. Opt for a crusty loaf like a baguette or sourdough for optimal garlic butter absorption and a satisfying crunch. Don’t be afraid to experiment with different types of garlic – roasted garlic offers a sweeter, milder flavor, while raw garlic provides a more pungent kick. You can also infuse your butter with herbs like parsley, rosemary, or thyme for additional aromatic depth.
Regarding the garlic butter itself, ensure the butter is softened but not melted. This allows for even distribution and prevents the bread from becoming soggy. For a more intense garlic flavor, finely mince the garlic cloves instead of using a press, as this releases more of the aromatic compounds. Consider adding a pinch of salt and freshly ground black pepper to the garlic butter mixture to balance the flavors. A squeeze of lemon juice can also brighten the overall taste.
For optimal browning and crispness, broil the garlic bread for the last few minutes of cooking. Keep a close eye on it to prevent burning; the bread should be golden brown and slightly crispy on top. Alternatively, you can pan-fry the bread in a little butter until golden brown on both sides. This method yields a softer interior.
Serving Suggestions: Garlic bread is incredibly versatile. It’s a perfect accompaniment to soups, stews, pasta dishes, and salads. Serve it alongside a hearty bowl of tomato soup, a creamy mushroom risotto, or a vibrant Caprese salad. It also makes a delicious side dish for grilled meats, roasted vegetables, or pizzas. Consider cutting the bread into smaller pieces for appetizers or serving it whole as part of a larger meal.
Storage: Store leftover garlic bread in an airtight container at room temperature for up to 2 days. For longer storage, wrap it tightly in plastic wrap and then aluminum foil, and freeze it for up to 3 months. To reheat, simply toast it in a toaster oven or oven until warmed through. Avoid microwaving, as this can make the bread soggy.
Complementary Dishes: Garlic bread pairs beautifully with dishes that feature contrasting flavors. The richness of the garlic butter complements the acidity of tomatoes, the earthiness of mushrooms, and the freshness of herbs. Consider serving it with dishes featuring robust flavors like a hearty beef stew, a spicy marinara sauce, or a creamy Alfredo sauce. It’s also a great match for dishes with a hint of sweetness, such as roasted butternut squash or honey-glazed carrots.
Nutritional Information (per serving, approximate): The nutritional content varies greatly depending on the size of the bread and the amount of butter used. A typical serving (approximately 50g) might contain roughly 200-250 calories, 10-15g of fat, 20-25g of carbohydrates, and 3-5g of protein. This is a rough estimate, and the actual values may vary. Consult a nutrition calculator for more precise information based on your specific recipe.
Important Note: While delicious, garlic bread is relatively high in calories and fat. Enjoy it in moderation as part of a balanced diet.