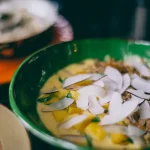
The creamy, dreamy coconut milk smoothie—a seemingly modern concoction—actually boasts a history as rich and layered as the drink itself. While the exact origins are difficult to pinpoint, the individual components have deep roots in diverse cultures. Coconut, a fruit revered for millennia, holds significant cultural importance across Southeast Asia, the Pacific Islands, and parts of South America. Its use extends far beyond culinary applications; in many cultures, the coconut tree symbolizes life, fertility, and prosperity. The earliest evidence suggests coconuts were cultivated in the Western Pacific thousands of years ago, spreading gradually through trade routes and migration patterns. The nutritional value of coconut – rich in healthy fats, fiber, and electrolytes – has long been recognized, leading to its incorporation into numerous traditional dishes and beverages.
The concept of smoothies, while enjoying a surge in popularity in recent decades, also boasts a surprisingly long history. While the modern blender revolutionized smoothie making, the principle of blending fruits and liquids for a refreshing drink has existed for centuries. Ancient civilizations, lacking modern technology, often utilized mortars and pestles to create similar concoctions. In many cultures, these blended drinks served not only as a refreshing treat but also as a way to incorporate essential nutrients, especially in regions where access to fresh produce was seasonal. The modern smoothie boom, however, can largely be attributed to the rise of health and wellness trends in the late 20th century. The convenience and perceived health benefits of smoothies fueled their rapid ascension in the global food scene.
The marriage of coconut milk and the smoothie format represents a particularly delicious and globally appealing fusion. Coconut milk’s naturally sweet and subtly creamy texture makes it an ideal base for smoothies, lending a unique tropical twist. According to a recent report by the Global Market Insights, the global smoothie market is projected to exceed USD 150 billion by 2028. The increasing demand for convenient and healthy food options, coupled with rising awareness of the benefits of plant-based diets, is driving this growth. Coconut milk, with its rich nutritional profile and versatile nature, is contributing significantly to this trend. Its adaptability allows for countless variations – from the simple addition of banana and mango to more complex blends incorporating spinach, protein powder, or even ginger and turmeric, demonstrating its versatility and culinary appeal.
This recipe for a coconut milk smoothie will delve into the simple yet satisfying process of creating this delicious and nutritious beverage. We will explore the best types of coconut milk to use, discuss the importance of choosing ripe fruit, and demonstrate techniques for achieving the perfect smoothie consistency. Get ready to embark on a tropical culinary adventure as we unlock the secrets to making a truly exceptional coconut milk smoothie.
Ingredients and Measurements
Creating the perfect coconut milk smoothie hinges on the precise measurement and quality of your ingredients. This recipe yields approximately 16 fluid ounces (two cups) of delicious, creamy smoothie. Feel free to adjust quantities to suit your needs, but remember that altering ingredient ratios significantly may affect the texture and taste.
Coconut Milk: We’ll be using full-fat coconut milk for its rich creaminess and inherent sweetness. 1 can (13.5 ounces) of full-fat coconut milk is ideal. Avoid using light coconut milk or coconut cream alone, as they will result in a thinner, less satisfying smoothie. Using light coconut milk will require you to add more liquid to achieve the desired consistency, potentially diluting the flavor.
Frozen Mango Chunks: Mango provides natural sweetness and a vibrant tropical flavor. We recommend using 1 ½ cups of frozen mango chunks. Frozen mango is crucial for achieving a thick, cold smoothie without the need for excessive ice. If using fresh mango, you will need to add more ice to compensate for the lack of freezing, potentially diluting the flavor.
Banana: Bananas add creaminess, sweetness, and a thickening agent to the smoothie. Use 1 medium ripe banana, frozen. Freezing the banana is essential for the desired consistency. A ripe banana will contribute more natural sweetness, while a less ripe banana will result in a slightly tart flavor profile. Adjust the quantity depending on your preferred level of sweetness.
Pineapple Juice: A splash of pineapple juice enhances the tropical flavor profile and adds a touch of acidity to balance the sweetness. Use ¼ cup of unsweetened pineapple juice. You can substitute this with other fruit juices like orange juice or even a little lime juice for a different flavor twist, but be mindful that the sweetness and acidity levels will vary.
Optional Ingredients: To elevate your smoothie, consider adding these optional ingredients. Remember to adjust the quantity based on your preference and the overall consistency you want to achieve. For extra protein, add 1 scoop (approximately 30 grams) of your favorite protein powder. For added health benefits, consider incorporating 1 tablespoon of chia seeds or 1 tablespoon of flax seeds. A pinch of ground cinnamon can add warmth and complexity to the flavor.
Important Note on Measurements: Accuracy in measurements is vital for achieving the desired texture and taste. Use a kitchen scale for precise weighing, especially for the frozen fruits and protein powder. For liquids, use measuring cups to ensure accurate pouring. Consistency is key; if your smoothie is too thick, add a little more pineapple juice or water. If it’s too thin, add more frozen fruit.
By following these precise measurements and recommendations, you’re well on your way to creating a truly exceptional coconut milk smoothie.
Preparation of Ingredients
Before you even think about blending, proper preparation of your ingredients is key to a smooth, delicious coconut milk smoothie. This stage significantly impacts the final texture and taste, so don’t rush it! We’ll be focusing on chilling, chopping, and measuring for optimal results.
Chilling your ingredients is crucial, especially the coconut milk. Cold ingredients blend better, creating a smoother, more consistent texture. A cold smoothie is also far more refreshing, especially on a warm day. Ideally, chill your coconut milk (1 can, 13.5 oz/397ml full-fat recommended for optimal creaminess), banana (1 medium, ripe but firm), and any other liquid components (like ice or coconut water) for at least 30 minutes before blending. If time allows, chilling for several hours will yield even better results.
Now, let’s tackle the chopping. While many smoothie ingredients don’t require extensive chopping, preparation still matters. For this coconut milk smoothie, we’ll focus on the banana. Avoid simply throwing in a whole banana. This can lead to uneven blending and potentially clog your blender. Instead, chop the banana into roughly 1-inch pieces. This ensures even distribution within the smoothie and facilitates smoother blending. This is especially important if you’re using a less powerful blender.
Measuring your ingredients accurately is another vital step often overlooked. Precise measurements ensure consistency and help you fine-tune the recipe to your preference. For this recipe, we’ll use a kitchen scale for accuracy, though measuring cups can work as well. Using a scale is particularly beneficial for measuring frozen ingredients, as their volume can vary. We will use the following measurements: 1 medium banana (approximately 120-150g), 1 can (13.5 oz/397ml) full-fat coconut milk, and 1/2 cup (120ml) of ice (adjust to your desired thickness).
If adding other ingredients, such as spinach or mango, preparation is also important. For leafy greens like spinach (approximately 1 cup packed), thoroughly wash and roughly chop them before adding to the blender. This helps prevent large pieces from getting stuck in the blades and ensures even distribution. For mango (approximately 1/2 cup chopped), choose a ripe but firm mango, peel it, remove the pit, and chop it into bite-sized pieces. Again, this aids in blending and prevents large chunks from compromising the smoothie’s texture.
Finally, remember to prepare your blender. Ensure it’s clean and ready to go. Having everything prepped and measured before you start blending will make the process smooth and efficient. This organized approach will maximize your time and minimize cleanup. Enjoy your delicious and perfectly textured coconut milk smoothie!
Blending Instructions
Creating the perfect coconut milk smoothie involves a strategic blending process. Follow these steps carefully to achieve a smooth, creamy, and delicious result. The key is to add ingredients in the correct order and blend in stages to prevent clumping and ensure optimal texture.
Step 1: Prepare your ingredients. Before you begin blending, ensure all your ingredients are ready. This includes chilling your coconut milk (for a colder, creamier smoothie), measuring out your fruits, and having your liquid (water or more coconut milk) measured and at hand. Pre-cutting your fruits into smaller pieces will significantly aid the blending process, resulting in a smoother final product. Aim for chunks no larger than 1 inch.
Step 2: Base Layer – Liquids First. Begin by adding your liquid base to the blender. For a 16-ounce smoothie, we recommend starting with approximately 1 cup (8 ounces) of chilled coconut milk. You can adjust this amount depending on your desired consistency. If you prefer a thinner smoothie, add more liquid; for a thicker smoothie, use less. Adding liquid first helps lubricate the blender and prevents the blades from getting stuck.
Step 3: Add Frozen Fruits. Next, add your frozen fruits. If your recipe calls for 1 cup of frozen mango and 1/2 cup of frozen pineapple, add these to the blender. The frozen fruit acts as a natural thickener and helps create a cold, refreshing smoothie. Avoid overcrowding the blender jar. Overfilling can hinder the blades’ ability to effectively mix the ingredients, resulting in a less smooth final product.
Step 4: Incorporate Remaining Ingredients. Now, add any other ingredients called for in your recipe, such as sweeteners (honey, maple syrup, or agave nectar – use sparingly!), nut butters (peanut butter, almond butter), protein powder, chia seeds, or other supplements. Add these ingredients gradually, starting with smaller amounts and adding more to your liking as you blend. This allows for better control over the final consistency and flavor.
Step 5: Blend in Stages. Begin blending on a low speed for about 15-20 seconds. This initial low-speed blending helps to incorporate the ingredients evenly and prevents splashing. Then, gradually increase the speed to medium and finally to high. Blend on high speed for another 30-45 seconds, or until the smoothie reaches your desired consistency. Scrape down the sides of the blender jar with a spatula halfway through to ensure all ingredients are thoroughly blended.
Step 6: Adjust Consistency. If your smoothie is too thick, add a little more coconut milk or water, one tablespoon at a time, while blending on low speed. If it’s too thin, add a few more ice cubes or frozen fruit. Taste and adjust sweetness as needed. Remember, it’s easier to add more liquid than to take it away.
Step 7: Serve Immediately. Pour your delicious coconut milk smoothie into a glass and enjoy immediately for the best flavor and texture. If you have leftover smoothie, store it in an airtight container in the refrigerator for up to 24 hours. However, the texture might slightly change after refrigeration.
Professional Recommendation: Invest in a high-quality blender with powerful blades for optimal results. A blender with a tamper will also be helpful for pushing down ingredients during the blending process.
Troubleshooting (e.g., too thick, too thin)
Achieving the perfect consistency in your coconut milk smoothie is key to a delightful drinking experience. Sometimes, despite following the recipe, you might end up with a smoothie that’s too thick or too thin. This section will guide you through troubleshooting these common issues and achieving that creamy, dreamy texture you desire.
Too Thick: A smoothie that’s too thick can be difficult to drink and may lack the smooth, flowing texture you’re aiming for. This usually happens when you’ve used too much frozen fruit or not enough liquid. Here’s how to fix it:
- Add more liquid: Gradually add more coconut milk, water, or even a little juice (like pineapple or mango juice to complement the coconut flavor) until you reach your desired consistency. Start with 1-2 tablespoons at a time and blend again thoroughly. Don’t add too much at once, or you risk making it too thin.
- Less frozen fruit: If you’re using a lot of frozen fruit, try reducing the quantity by about ¼ cup next time. Remember, frozen fruit is your primary thickener. Using slightly less firm frozen fruit can also help.
- Check your coconut milk: Ensure you’re using full-fat coconut milk. Light coconut milk will result in a thinner smoothie compared to full-fat. If you are already using full-fat, perhaps a slight increase in quantity is needed.
- Adjust blending time: Over-blending can sometimes make a smoothie thicker due to increased friction and heat. Try blending for shorter intervals with pauses in between.
Too Thin: A smoothie that’s too thin lacks body and can feel watery. This often occurs when you’ve used too much liquid or not enough frozen ingredients. Here’s how to resolve this:
- Add more frozen fruit: The easiest solution is to add more frozen fruit, a few ice cubes, or even a frozen banana. Start with ½ cup of frozen fruit and blend until smooth. Frozen bananas are particularly effective for thickening and adding creaminess.
- Reduce liquid: If you’ve used a significant amount of liquid, try reducing the quantity next time. Begin by reducing the liquid by 1-2 tablespoons and assess the consistency. Remember that the type of liquid also affects consistency; coconut cream will be thicker than water.
- Use less liquid ingredients: If your recipe includes other liquid ingredients like yogurt or juice, consider reducing their quantities slightly to achieve a thicker texture. A tablespoon at a time is a good starting point.
- Consider a thickening agent: As a last resort, you can add a small amount (1-2 tablespoons) of a thickening agent like chia seeds or rolled oats. Blend thoroughly to incorporate them evenly. Note that this will slightly alter the flavor profile.
Important Note: The ideal consistency is subjective. Experiment with different ratios of liquid to frozen fruit to find your perfect balance. Keep a record of your adjustments to refine your recipe over time. Don’t be afraid to taste-test as you go to ensure you’re achieving your desired consistency and flavor.
Professional Recommendation: Always start with the base recipe and make adjustments gradually. This allows you to better control the outcome and avoid over-correcting. It’s always easier to add more than to take away!
Serving Suggestions
Your creamy, delicious coconut milk smoothie is ready! But how you serve it can elevate the experience from good to unforgettable. Here are some serving suggestions to help you present your smoothie perfectly and maximize its enjoyment.
For the Classic Presentation: Simply pour your smoothie into a tall glass. Aim for about 8-10 ounces, leaving a little space at the top. A chilled glass will keep your smoothie colder for longer. Consider using a glass with a wide base for stability and a narrow top to showcase the beautiful color and texture of your smoothie. A straw is a must for easy sipping, and a reusable stainless steel or bamboo straw is a more environmentally friendly option.
Garnishing Your Masterpiece: A simple garnish can make a big difference. A few fresh berries (about 1/4 cup of raspberries, blueberries, or strawberries) nestled on top add a pop of color and a burst of fresh flavor. A sprinkle of shredded coconut (approximately 1 tablespoon) adds a delightful textural contrast and enhances the coconut flavor. For a more sophisticated touch, consider a thin slice of lime or a sprig of mint. Avoid over-garnish; less is often more. The focus should remain on the smoothie itself.
Temperature Control: The ideal serving temperature for a coconut milk smoothie is cold, but not icy. If your smoothie is too thick, a splash of additional coconut milk or water (start with 1-2 tablespoons and add more as needed) can thin it to the desired consistency. Conversely, if it’s too thin, you can add a few ice cubes (1-2 small cubes) to chill it and thicken it slightly, but blend again briefly to ensure even consistency. Avoid adding too much ice, as this can make the smoothie watery and dilute the flavor.
Creative Serving Vessels: Step outside the traditional glass! Serve your coconut milk smoothie in a coconut shell for a truly tropical experience (ensure it’s properly cleaned and prepared). Mason jars are another charming option, especially for to-go smoothies. For a fun and festive occasion, consider using colorful, reusable smoothie cups with lids and straws. The choice of vessel should complement the overall aesthetic you’re aiming for.
Accompanying Treats: Consider serving your coconut milk smoothie with complementary snacks. A small bowl of granola (about 1/4 cup) offers a satisfying crunch and adds extra texture. A piece of fresh fruit, such as a mango or pineapple, complements the tropical flavors beautifully. For a more substantial pairing, a small coconut macaroon or a slice of healthy banana bread can provide a delightful balance of sweet and creamy.
Presentation Matters: Remember, presentation enhances the overall enjoyment of your smoothie. A clean and well-lit setting, perhaps with a nice tablecloth and napkin, can elevate the simple act of drinking a smoothie into a more mindful and enjoyable experience. Don’t underestimate the power of a beautiful presentation; it can transform a simple drink into a memorable treat.
Optional Additions/Variations
The beauty of a coconut milk smoothie lies in its adaptability. While the basic recipe provides a delicious foundation, countless variations cater to different tastes and dietary needs. This section explores exciting optional additions and creative twists to elevate your smoothie experience.
Boosting the Protein: For a more substantial and filling smoothie, consider adding a protein source. A scoop (approximately 30g) of your favorite protein powder – whey, casein, soy, brown rice, or pea – blends seamlessly into the coconut creaminess. Remember to choose a protein powder that complements the overall flavor profile. For example, vanilla or unflavored protein powder works well with most additions. Alternatively, a tablespoon of nut butter (peanut, almond, cashew) adds healthy fats and protein, creating a richer texture.
Fruit Fiesta: Experiment with different fruits to customize sweetness and flavor. A half cup of frozen mango chunks adds tropical sweetness and vibrant color. Similarly, a quarter cup of frozen berries (strawberries, blueberries, raspberries) introduces antioxidants and a tartness that balances the coconut’s richness. Avoid over-adding fruit, as excessive sweetness can overpower the delicate coconut flavor. Start with smaller quantities and adjust to your preference.
Green Goodness: Incorporate leafy greens for a nutritional boost. A cup of packed spinach or kale adds vitamins and minerals without significantly altering the smoothie’s flavor. Blend thoroughly to ensure a smooth consistency; otherwise, you may end up with noticeable green bits. Consider adding a small amount of liquid (water or coconut water) if necessary to aid in blending.
Spice it Up: A pinch of cinnamon, nutmeg, or ginger adds warmth and complexity. A quarter teaspoon of each spice is a good starting point. Experiment with different spice combinations to discover your favorite flavor profile. A dash of cardamom or even a tiny pinch of chili powder (for those who like a kick) can create unique and exciting taste experiences.
Creamy Enhancements: For an extra creamy texture, consider adding a tablespoon of Greek yogurt or a few ice cubes. Greek yogurt adds a tangy note and extra protein. Ice cubes will make the smoothie colder and thicker, especially if using fresh, rather than frozen, ingredients. Adjust the amount of ice depending on your desired consistency and the temperature of your other ingredients.
Healthy Fats: Avocado (1/4 of a medium avocado) adds healthy monounsaturated fats and a creamy texture. Chia seeds (1 tablespoon) or flax seeds (1 tablespoon) contribute fiber and omega-3 fatty acids. Add these ingredients towards the end of blending to prevent them from clumping. Remember that adding too many seeds can alter the texture, so start with small quantities.
Sweetener Alternatives: If you prefer a less sweet smoothie, reduce the amount of coconut milk or omit the sweetener altogether. Alternatively, use natural sweeteners like honey (1-2 teaspoons) or maple syrup (1-2 teaspoons) in moderation. Always taste and adjust the sweetness as needed, keeping in mind the natural sweetness of the fruits you’ve added.
Remember to always wash and prepare your ingredients thoroughly before blending. Enjoy experimenting with these optional additions and creating your own signature coconut milk smoothie!
Recommendations for Your Delicious Coconut Milk Smoothie
This coconut milk smoothie recipe is a fantastic base for customization and experimentation. To enhance your enjoyment and ensure the best possible experience, consider these recommendations:
Serving Suggestions: For a truly decadent treat, serve your smoothie immediately after blending for maximum creaminess and flavor. Consider adding a few extra touches to elevate the experience. A sprinkle of toasted coconut flakes adds delightful texture and a subtle sweetness. A drizzle of honey or maple syrup can further enhance the sweetness, while a dash of cinnamon provides warmth and spice. For a more refreshing feel, serve your smoothie in a chilled glass with a straw. Alternatively, you can freeze the smoothie into popsicles for a cool summer treat. Experiment with different garnishes such as fresh berries, a sprig of mint, or a wedge of lime to add visual appeal and complementary flavors.
Storage Conditions: While it’s best enjoyed fresh, leftover smoothie can be stored in an airtight container in the refrigerator for up to 24 hours. However, the texture and consistency may change slightly over time as the ice melts and the ingredients separate. We recommend shaking or blending gently before consuming from storage to restore a smooth consistency. Avoid freezing the smoothie, as this can significantly alter its texture and potentially affect the flavor.
Complementary Dishes: This smoothie pairs beautifully with a variety of breakfast and brunch items. It complements lighter fare such as yogurt parfaits, fresh fruit salads, or whole-wheat toast with avocado. Alternatively, it can be a delicious and refreshing accompaniment to more substantial meals like light salads or breakfast burritos. The creamy coconut flavor is particularly well-suited to dishes with tropical influences, such as mango salsa or grilled pineapple. Consider it a perfect post-workout recovery drink or a light and healthy snack between meals. Avoid pairing it with very heavy or rich foods, as this might overwhelm the palate.
Nutritional Information (Approximate values per serving, may vary based on ingredients used): This is a rough estimate and will depend heavily on the specific ingredients you use and their quantities. Always check individual ingredient labels for accurate nutritional data. A typical serving of this smoothie might contain approximately 250-350 calories. The calorie count can vary significantly based on the addition of fruits, sweeteners, and other ingredients. Nutritional content will include a good source of healthy fats from coconut milk, fiber from fruits and vegetables (if added), and vitamins and minerals depending on the ingredients. It’s important to note that this is not a complete nutritional analysis and consulting a registered dietitian or nutritionist can provide more tailored information.
Important Note: This recipe is a guideline; feel free to adjust the ingredients and quantities to suit your personal preferences and dietary needs. If you have any allergies or dietary restrictions, please ensure all ingredients are suitable for you. Always practice safe food handling techniques, and ensure all ingredients are fresh and properly stored.