The banana split sundae: a quintessential American dessert, a monument to creamy indulgence, and a testament to the power of simple ingredients elevated to the realm of delicious artistry. Its origins, while shrouded in some debate, are most commonly credited to David Evans Strickler, a Latrobe, Pennsylvania pharmacist, in 1904. Legend has it that Strickler, seeking a more visually appealing and substantial dessert than the then-popular ice cream sodas, devised the banana split as a way to showcase his pharmacy’s ice cream selection. He cleverly split a banana lengthwise, filled the halves with scoops of different ice cream flavors, topped it with whipped cream, nuts, and a cherry, and served it in a long stemmed dish – a far cry from the humble beginnings of simpler ice cream treats.
The banana split’s rapid rise in popularity speaks volumes about its irresistible appeal. It quickly transcended its humble origins in a small Pennsylvania town, spreading across the United States and beyond. Its success can be attributed to several factors: the customizable nature of the dessert allowed for endless variations, catering to individual preferences. The visual spectacle of the colorful ice cream, ripe banana, and vibrant toppings was undeniably appealing. Moreover, its generous portion size made it a satisfying and sharable treat, perfect for social gatherings and family outings. While precise statistics on annual banana split consumption are difficult to obtain, its enduring presence on diner menus and continued popularity in homes suggests it remains a beloved dessert.
Beyond its deliciousness, the banana split holds a significant place in American cultural history. It’s become a symbol of classic Americana, often associated with nostalgic images of soda fountains, family diners, and simpler times. Its presence in countless films, television shows, and popular culture further cemented its iconic status. The banana split embodies a specific era of American life, reflecting a time when simple pleasures and communal gatherings were highly valued. Its enduring appeal suggests a deeper connection to shared experiences and a sense of collective nostalgia, making it more than just a dessert; it’s a cultural artifact.
Furthermore, the banana split’s impact extends beyond its cultural significance. Its popularity has contributed to the economic success of numerous ice cream parlors, diners, and restaurants. The dessert’s continued relevance in the 21st century demonstrates its adaptability and enduring charm. From classic variations to modern twists incorporating unique ice cream flavors and toppings, the banana split continues to evolve, ensuring its place as a timeless and beloved treat. It’s a testament to the power of a simple, yet brilliantly conceived, dessert that has captured the hearts – and taste buds – of generations.
Ingredients and Measurements
Creating the perfect Banana Split Sundae hinges on using high-quality ingredients and precise measurements. While flexibility exists in some areas, adhering to these guidelines will ensure a consistently delicious result. We’ll be making three individual Banana Splits.
Bananas: You’ll need three ripe, but firm bananas. Avoid overly ripe bananas as they can become mushy and difficult to handle. Look for bananas with a few brown spots, indicating optimal sweetness and flavor. The ideal size is around 7-8 inches long. If your bananas are smaller, you might need to adjust the amount of other ingredients slightly. Before splitting, gently peel the bananas completely.
Vanilla Ice Cream: A high-quality vanilla ice cream is essential. We recommend using at least 3 cups of premium vanilla ice cream, enough for approximately 1 cup per banana split. Choose an ice cream with a smooth texture and a rich, creamy flavor. If you prefer, you can substitute with other flavors like chocolate, strawberry, or even a coffee-flavored ice cream, but vanilla provides a classic and versatile base.
Chocolate Sauce: For a truly decadent Banana Split, use a good quality chocolate sauce. You can either purchase a pre-made chocolate sauce (aim for at least 1½ cups total) or make your own. Homemade chocolate sauce offers superior flavor and control over sweetness and thickness. If making your own, adjust the recipe to yield approximately 1½ cups.
Strawberry Sauce: Similarly, you’ll need approximately 1½ cups of strawberry sauce. Fresh strawberry sauce is ideal, made by pureeing fresh strawberries with a touch of sugar and lemon juice. However, store-bought options are perfectly acceptable if time is limited. Ensure the sauce is not too runny.
Pineapple Sauce (Optional): While not traditional, pineapple sauce adds a wonderful tropical twist. If you choose to include it, aim for about 1 cup of pineapple sauce. Again, homemade is best for flavor control, but canned crushed pineapple, drained well, can be pureed into a sauce if needed.
Whipped Cream: A generous dollop of whipped cream is crucial for textural contrast. You’ll need approximately 1 cup of freshly whipped heavy cream. For best results, whip the cream until soft peaks form, avoiding over-whipping which can make it grainy.
Toppings (Optional): The possibilities are endless! Consider chopped nuts (walnuts, pecans, or peanuts – about ½ cup total), maraschino cherries (6-9 cherries), sprinkles (2-3 tablespoons), chocolate shavings (1-2 tablespoons), or even a drizzle of caramel sauce. Adjust the quantity of toppings based on your preference.
Serving Dishes: You will need three long, narrow dishes or bowls, ideally banana split bowls, to accommodate the banana and all the toppings.
Important Note: These are guidelines. Adjust the ingredient quantities according to your preferences and the size of your bananas and serving dishes. The key is to ensure you have enough of each component to create a satisfying and visually appealing Banana Split Sundae.
Preparation of Bananas
The success of a truly spectacular banana split hinges on the quality and preparation of the bananas themselves. Choosing the right bananas and preparing them correctly will elevate your sundae from good to unforgettable.
Selecting the Perfect Bananas: Begin by selecting ripe, but firm bananas. Avoid bananas that are overly green (they’ll be too tart and hard) or overly brown (they’ll be mushy and lack sweetness). The ideal banana will have a bright yellow peel with just a few brown speckles. Aim for bananas that are slightly yielding to gentle pressure. This indicates the perfect balance of sweetness and firmness.
Quantity: For a classic banana split serving two generously, you’ll need two medium-sized bananas. If you’re making larger portions or serving more people, adjust the quantity accordingly. Remember to always buy a few extra bananas, just in case some are bruised or damaged upon arrival.
Washing and Peeling: Before you begin, thoroughly wash the bananas under cool running water. This removes any pesticides or dirt that might be present on the peel. Always wash your produce before handling. Once washed, gently peel the bananas. Start at the stem end and carefully peel down the length of the banana, avoiding any unnecessary tearing or bruising of the fruit. A sharp knife can be helpful for removing any stubborn bits of peel.
Slicing and Presentation: The way you slice your bananas significantly impacts the visual appeal and eating experience of your banana split. Avoid simply chopping the bananas into uneven chunks. Instead, lengthwise slice each banana in half. Then, depending on your preference and the size of your dish, you can either further slice each half into thirds or leave them as halves. If using halves, gently curve them slightly to fit the dish better. This will create a more elegant and visually appealing presentation.
Dealing with Browning: Bananas tend to brown quickly once peeled. To prevent excessive browning, you can quickly dip the cut sides of the banana in a mixture of lemon juice and water (1 tablespoon lemon juice to 1/4 cup water). This will help preserve the banana’s fresh color and prevent enzymatic browning. Alternatively, you can prepare the bananas just before assembling your sundae. If you must prepare them ahead of time, store them in an airtight container in the refrigerator, but be aware that they may brown slightly.
Professional Tip: For an extra touch of elegance, consider using a melon baller to create small banana spheres. These can be arranged along the banana split for a visually stunning and fun twist. This technique works especially well with slightly firmer, less ripe bananas.
By following these steps, you’ll ensure that your bananas are not only perfectly ripe and delicious but also beautifully presented, contributing to a truly memorable banana split experience.
Scooping and Preparing Ice Cream
The success of a banana split sundae hinges significantly on the quality and presentation of the ice cream. Choosing the right ice cream flavors and scooping them correctly are crucial steps. We recommend using three distinct flavors, offering a variety of tastes and textures. Popular choices include vanilla, chocolate, and strawberry; however, feel free to experiment with more adventurous options like coffee, mint chocolate chip, or even a fruity sorbet.
Choosing your ice cream is the first important decision. Aim for high-quality ice cream with a smooth, creamy texture. Avoid ice cream that’s overly icy or has large ice crystals, as this will detract from the overall experience. Consider the temperature of your ice cream. Slightly softened ice cream scoops more easily, but be careful not to let it become too soft, as it will become difficult to manage and may melt too quickly.
To achieve perfectly formed scoops, ensure your ice cream is properly chilled. If it’s too hard, let it sit at room temperature for 5-10 minutes before scooping. Use a high-quality ice cream scoop. A good scoop will make all the difference. Look for one with a comfortable handle and a sturdy, well-formed bowl. Before scooping, consider briefly running your scoop under hot water and then wiping it dry. This will help prevent the ice cream from sticking.
For a classic banana split, you’ll need approximately 3 cups of ice cream in total; about 1 cup per flavor. Scoop each flavor into its designated section of the split banana. Aim for even-sized scoops for consistent presentation, approximately 1/2 cup per scoop. To achieve perfectly rounded scoops, press the scoop firmly into the ice cream container, twist gently, and lift upward. Avoid packing the scoops too tightly, as this could cause the ice cream to melt faster. Gently place the scoops onto the banana, creating three distinct mounds of ice cream.
Proper placement is key to a visually appealing sundae. Arrange the scoops in a way that maximizes visual appeal. Each scoop should be neatly formed and sit comfortably within its designated space, maintaining its shape without collapsing. Avoid overcrowding the banana, as this can lead to messy spillage and an unpleasant eating experience. If your ice cream is particularly soft, consider placing it in the banana immediately after scooping to prevent melting.
Consider the order of placement. If you are using ice cream that melts quickly, consider placing the flavors that melt faster, such as strawberry, towards the end to prevent them from becoming too soft before serving. Finally, once the ice cream is in place, you can begin adding your other toppings! Remember, the beauty of a banana split is in its customization, so feel free to experiment with different flavors and arrangements to create your perfect sundae.
Preparing Toppings
The success of a truly magnificent banana split hinges not just on the ice cream, but on the vibrant array of toppings that complement it. Careful preparation of these toppings elevates this classic dessert from good to unforgettable. Let’s explore how to best prepare each component.
Chocolate Sauce: For a rich and decadent chocolate sauce, I recommend using high-quality dark chocolate (at least 70% cacao) for a deep, intense flavor. Melt 4 ounces of finely chopped dark chocolate with 2 tablespoons of heavy cream in a double boiler or microwave in 30-second intervals, stirring until smooth. Avoid burning the chocolate by using low heat and stirring constantly. For a thinner consistency, add a teaspoon of warm water at a time until you reach your desired viscosity. Let the sauce cool slightly before serving to prevent it from melting the ice cream too quickly.
Strawberry Topping: Fresh strawberries are ideal, but frozen will work in a pinch. If using frozen, thaw them completely and drain off any excess liquid. For a simple yet elegant topping, hull and slice 1 cup of strawberries. For a more intense strawberry flavor, you can macerate the strawberries. This involves gently tossing the sliced strawberries with 2 tablespoons of sugar and 1 tablespoon of lemon juice. Let this mixture sit for at least 15 minutes to allow the strawberries to release their juices and soften. This maceration process enhances the sweetness and brightens the flavor of the strawberries.
Whipped Cream: Homemade whipped cream provides a superior texture and flavor compared to store-bought varieties. In a chilled bowl, beat 1 cup of heavy cream with 2 tablespoons of powdered sugar and 1 teaspoon of vanilla extract until stiff peaks form. Be careful not to over-whip, as this can result in a grainy texture. For extra stability, you can add a pinch of cream of tartar before whipping. Keep the whipped cream chilled until ready to serve.
Nuts: Chopped nuts add a delightful crunch and nutty flavor. Use your favorite variety, such as pecans, walnuts, or almonds. Roughly chop 1/4 cup of your chosen nuts. Toasting the nuts before chopping enhances their flavor and aroma. Spread them on a baking sheet and toast them in a preheated oven at 350°F (175°C) for 5-7 minutes, or until fragrant and lightly browned, stirring occasionally to prevent burning. Let them cool completely before adding them to your banana split.
Cherries (Optional): Maraschino cherries are a classic banana split topping, but fresh cherries, pitted and halved, provide a more natural sweetness. Use about 4-6 cherries, depending on size and preference. If using maraschino cherries, drain them well to avoid excess sugary syrup diluting the other toppings or the ice cream.
Other Toppings: Feel free to get creative and add other toppings, such as sprinkles, chocolate shavings, caramel sauce, or even a scoop of different flavored ice cream. The possibilities are endless! Remember to prepare all your toppings ahead of time and keep them chilled until assembly to ensure they remain fresh and delicious.
Assembling the Banana Split
Now that you have all your ingredients prepped and ready, it’s time to assemble the star of the show: your magnificent banana split! This seemingly simple step holds the key to a truly visually appealing and delicious dessert. Take your time and enjoy the process – it’s part of the fun!
First, choose your banana. Ideally, select a ripe but firm banana, avoiding those that are overly soft or bruised. A slightly underripe banana will hold its shape better in the split. Peel the banana completely, leaving no remnants of the peel. Then, carefully slice the banana lengthwise, creating three roughly equal sections. You may need to gently adjust the slices to get them as even as possible.
Next, select your serving dish. A long, narrow dish or boat-shaped bowl works best. These allow for optimal showcasing of the banana and toppings. Avoid using a bowl that’s too shallow or too wide, as this can make the arrangement messy and difficult.
Gently place the three banana slices side-by-side in your chosen serving dish. Ensure they are spaced evenly to create a visually pleasing foundation. Try to arrange them so the cut sides are facing upwards, creating a smooth, even surface for your toppings.
Now for the ice cream! We recommend using three scoops of ice cream, approximately 1/2 cup each, for a balanced and satisfying dessert. Each scoop should be a different flavor, creating a beautiful color contrast and a variety of tastes. Popular combinations include strawberry, chocolate, and vanilla; or chocolate chip cookie dough, mint chocolate chip, and butter pecan. Experiment with your favorite flavors to discover your ultimate banana split combination! Place one scoop of each ice cream flavor in between each banana slice.
Once the ice cream is in place, it’s time to add your toppings. Be generous, but mindful of not overloading the dessert. Start with the main toppings: a generous drizzle of chocolate syrup (approximately 2 tablespoons per scoop of ice cream), followed by a similar amount of strawberry syrup. Consider the flavor profiles of your ice cream when choosing syrups – contrasting flavors often work best.
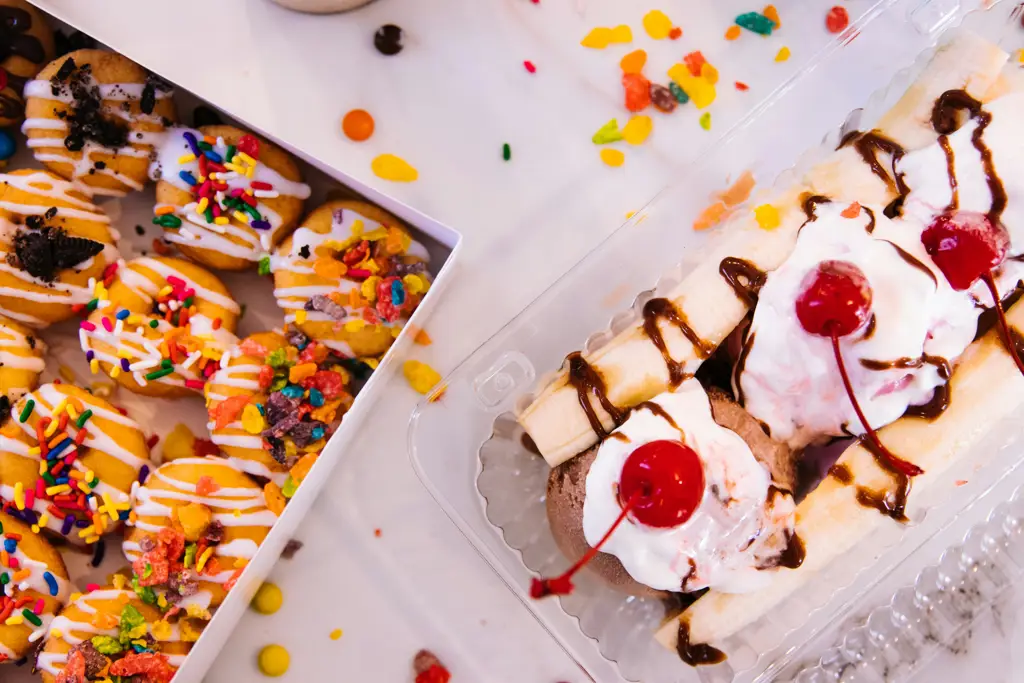
Next, add your sprinkles, nuts, and whipped cream. A generous dollop of whipped cream (approximately 1/4 cup) on top of each scoop of ice cream creates a fluffy, visually appealing element. Sprinkle chopped nuts (approximately 1 tablespoon per scoop) and colorful sprinkles liberally across the entire dessert. Don’t be afraid to get creative here – the more colorful and textured, the better! A cherry on top of each scoop of ice cream completes the classic banana split look.
Finally, admire your handiwork! You’ve successfully assembled a stunning and delicious banana split sundae. Serve immediately and enjoy this classic treat.
Serving the Banana Split
The final stage, serving your masterpiece, is just as crucial as the preparation. A beautifully presented banana split elevates the entire experience, transforming it from a simple dessert into a delightful treat. Here’s how to serve your creation like a pro.
Presentation is Key: Start with a clean, chilled dessert plate or bowl. The size should comfortably accommodate the banana and all the toppings without looking overcrowded. A long, rectangular plate works best for the classic presentation.
Gently Place the Banana: Carefully place the halved banana lengthwise onto the plate. Ensure it’s positioned centrally and lies flat. A slightly curved banana can add a touch of rustic charm, but avoid any excessively bent or damaged pieces.
Scooping the Ice Cream: Use a small ice cream scoop (around 1/4 cup or 60ml scoop) to create even scoops of ice cream. Three generous scoops are traditional, one of each flavour, neatly placed along the banana. Avoid overfilling; the scoops should fit comfortably without spilling over the sides of the banana. Aim for a height of approximately 2-2.5 inches (5-6 cm) per scoop.
Strategic Topping Placement: Now comes the fun part – the toppings! Start with the chocolate sauce, drizzling it generously over the ice cream and slightly down the sides of the banana. Use a zigzag pattern for a visually appealing drizzle. Next, add the strawberry topping, aiming for a similar distribution. Avoid overdoing it; you want a flavorful coating, not a drowning in sauce. A good rule of thumb is to have the sauce visible but not obscuring the ice cream.
Sprinkle with Flair: Next, add your chopped nuts, sprinkles, and whipped cream. Use a light hand with the whipped cream; a generous dollop on each scoop is sufficient. Too much whipped cream can make the dessert messy and overly sweet. Sprinkle the nuts and sprinkles evenly across the entire dessert.
Maraschino Cherries: Finally, place a maraschino cherry on top of each scoop of ice cream. These provide a vibrant pop of color and a sweet, slightly tart counterpoint to the rest of the dessert. Consider the visual appeal; a slightly off-center placement can create a more dynamic look.
Immediate Serving is Recommended: Banana splits are best enjoyed immediately. The ice cream will melt, and the toppings may soften, affecting the overall texture and presentation if left to sit for too long. Serve immediately after assembling to your guests.
Garnish with a flourish: Consider adding a sprig of mint or a chocolate shavings for an extra touch of elegance. These small details can make a significant difference in the overall presentation and elevate your banana split from good to exceptional.
Enjoy! Your perfectly crafted banana split is ready to be savored. Remember to take a moment to appreciate the artistry of your creation before digging in!
Recommendations for the Perfect Banana Split Sundae
To elevate your banana split experience beyond the ordinary, consider these recommendations. For optimal flavor and texture, use very ripe, but not bruised, bananas. The sweetness of the banana will complement the other ingredients beautifully. Allow the ice cream to soften slightly before scooping to prevent it from being too hard and difficult to manage.
Regarding toppings, don’t be afraid to experiment! While the classic combination is fantastic, consider adding other elements to personalize your sundae. Chopped nuts (like pecans, walnuts, or peanuts) add a delightful crunch and healthy fats. A drizzle of chocolate or caramel sauce provides extra richness and sweetness. Consider incorporating fresh berries (strawberries, blueberries, raspberries) for a burst of juicy sweetness and antioxidants. A sprinkle of shredded coconut adds tropical flair and texture. For a more sophisticated touch, try a swirl of flavored liqueur (like coffee or hazelnut) or a dollop of whipped cream infused with vanilla extract or a touch of cinnamon.
Serving suggestions are key to enhancing the overall experience. Serve your banana split immediately after assembling to prevent the ice cream from melting excessively. Use a long, shallow dish or a banana boat for optimal presentation. Garnish the finished sundae with a maraschino cherry and a sprig of mint for an elegant touch. Consider serving it in individual portions for a more manageable and aesthetically pleasing presentation, especially for a party or gathering. For a truly memorable experience, serve your banana splits alongside a selection of complementary beverages such as sparkling water, lemonade, or even a scoop of your favorite ice cream in a separate dish.
Storage of leftover ingredients is crucial. Any leftover ice cream should be tightly sealed and stored in the freezer. Bananas that are not immediately used for the sundae should be stored in a plastic bag in the refrigerator to slow down the ripening process. Toppings like nuts, chocolate sauce, and whipped cream should be stored according to their individual packaging instructions.
Complementary dishes can expand your dessert menu. A light and refreshing fruit salad or a small portion of angel food cake would complement the richness of the banana split. If you’re planning a more elaborate dessert spread, consider pairing your banana split with a selection of cookies or brownies. However, keep in mind that the banana split is already a rich and decadent dessert, so choosing complementary dishes that are not overly heavy is recommended.
Nutritional Information (approximate, per serving): The nutritional content of a banana split sundae varies greatly depending on the ingredients and portion sizes. However, a typical banana split can contain anywhere from 600-1000 calories. This is a rough estimate and can be significantly higher or lower depending on the type and amount of ice cream, toppings, and other ingredients used. A banana split will be high in sugar and fat, and may contain a moderate amount of protein depending on the toppings. For a healthier version, consider using low-fat ice cream, reducing the amount of sugary toppings, and adding more fruits and nuts for added nutrients.
Important Note: These recommendations are suggestions and can be adapted to your personal preferences. Feel free to experiment with different toppings and serving styles to create your perfect banana split sundae. Remember to always enjoy your creation responsibly!