Crispy pork belly, with its shatteringly crisp skin and meltingly tender meat, is a culinary delight enjoyed across the globe. Its origins are ancient and varied, with evidence suggesting preparations similar to modern pork belly dishes dating back thousands of years. Ancient Chinese cuisine, for example, features numerous pork belly recipes, showcasing its importance in their culinary tradition. The versatility of the cut, its rich flavor profile, and its ability to render copious amounts of delicious fat have ensured its enduring popularity. While precise origins are difficult to pinpoint, its presence in various cultures throughout history points to a dish that transcends geographical boundaries and reflects diverse culinary approaches to utilizing this flavorful cut of meat.
The cultural significance of pork belly is immense, varying greatly depending on the region. In East Asian cuisine, particularly in China, Vietnam, and Korea, it’s a staple ingredient in numerous dishes, often slow-cooked or braised until incredibly tender, sometimes with the addition of soy sauce, ginger, garlic, and five-spice powder. Statistics show that pork is one of the most consumed meats globally, and a significant portion of that consumption involves pork belly in its various forms. In the Philippines, lechon, a whole roasted pig, features crispy pork belly as a prized part of the dish, often served during special occasions and feasts. Similarly, in the West, particularly in European countries, pork belly has experienced a recent surge in popularity, featuring prominently in high-end restaurants and home kitchens alike. This renewed interest highlights its adaptability to various culinary styles, from traditional roasts to modern fusion creations.
The appeal of crispy pork belly lies not only in its taste but also in the technique required to achieve that perfect balance of crisp skin and tender meat. Achieving that coveted crackling requires careful attention to detail, from selecting the right cut of pork belly with sufficient skin thickness to mastering the precise cooking techniques, often involving scoring the skin, drying it thoroughly, and then slowly roasting or deep-frying it until the skin is golden brown and intensely crisp. This process, while demanding, is undeniably rewarding, resulting in a dish that delivers a satisfying textural contrast and an explosion of savory flavors. The rendered fat, collected during the cooking process, adds another layer of richness and flavor, often used to enhance other dishes or simply enjoyed as a delicious byproduct. Interestingly, the fat content of pork belly is a key factor in its ability to render crispy skin, so choosing a cut with an adequate layer of fat is paramount to success.
Ingredients and Measurements
The success of crispy pork belly hinges on the quality of your ingredients and the precision of your measurements. Don’t skimp on the good stuff – a higher fat content belly will yield a more succulent and wonderfully crispy result. Here’s a detailed breakdown of what you’ll need for approximately 2 lbs (900g) of pork belly:
Pork Belly: 2 lbs (900g) – Choose a piece with a good balance of meat and fat. Look for a piece with an even layer of fat, about ½ inch (1.25cm) thick. A thicker layer of fat will render down beautifully and give you that ultimate crackling. Avoid pork belly that’s excessively lean, as it may dry out during cooking.
Salt: 2 tablespoons (30g) coarse sea salt – Coarse sea salt is crucial. Finer salts can dissolve too quickly and won’t provide the same level of crispiness. Kosher salt is also an excellent choice. Don’t be afraid of the salt; it’s essential for drawing out moisture and creating that delicious crispy skin.
Black Pepper: 1 teaspoon (5g) freshly ground black pepper – Freshly ground black pepper adds a touch of aromatic spice. Avoid pre-ground pepper as it loses its flavor and aroma over time. Feel free to experiment with other spices, such as smoked paprika or garlic powder, but start with a small amount to avoid overpowering the natural pork flavor.
Optional Aromatics (for enhanced flavor): These are optional but highly recommended. They infuse the pork belly with wonderful flavor during the cooking process.
- Garlic Cloves: 4-6 large cloves, smashed – Adds a pungent and savory note.
- Fresh Rosemary Sprigs: 2-3 sprigs – Provides a fragrant herbaceous element.
- Fresh Thyme Sprigs: 2-3 sprigs – Contributes a subtle earthy flavor.
Water: Approximately 1 cup (240ml) – This is used for the initial blanching process to help remove impurities and tighten the skin, resulting in crispier crackling. You may not use all of it, depending on your pork belly.
Oil: 2 tablespoons (30ml) high-heat cooking oil (such as vegetable oil or canola oil) – This is used for searing the pork belly skin. Avoid olive oil for high-heat searing, as it has a lower smoke point and can burn easily.
Measuring Tools: Accurate measurements are essential. Having a kitchen scale for weighing the pork belly and salt is highly recommended for consistency. Measuring spoons and cups are also necessary for accurately measuring the spices and oil.
Important Note: These measurements are guidelines. Adjust the quantities of salt and spices according to your personal preference and the size of your pork belly. Always taste and adjust seasoning as needed throughout the cooking process.
Equipment List
Crafting perfectly crispy pork belly requires the right tools. While you can adapt, having the correct equipment significantly improves your chances of success and makes the process easier. This list details the essential items, their purpose, and recommendations for optimal results.
Large, Heavy-bottomed Pot (8-12 quarts): This is crucial for the initial boiling stage. A heavy bottom prevents scorching and ensures even heat distribution throughout the large volume of water needed to blanch the pork belly. Avoid non-stick pots for this step as they can be damaged by high heat and the potential for sticking during the blanching process. A stainless steel pot of at least 8 quarts is recommended.
Large Roasting Pan (at least 15 x 10 inches): This will house your pork belly during the roasting process. Choose a pan with relatively high sides to contain any rendered fat. A roasting pan with a rack is highly preferable as it allows air to circulate underneath the belly, promoting even crisping. If you don’t have a rack, you can improvise by using a bed of roughly chopped onions or carrots.
Meat Thermometer: This is non-negotiable. A reliable meat thermometer is essential for ensuring the pork belly reaches a safe internal temperature while preventing overcooking. An instant-read digital thermometer is ideal for quick and accurate readings. Aim for a temperature between 190-200°F (88-93°C) for tender, juicy meat.
Sharp Knife (Chef’s Knife): You’ll need a sharp knife for scoring the pork belly’s skin. A dull knife will tear the skin rather than creating clean, even cuts, which are vital for optimal crackling. A chef’s knife (8-10 inches) with a sharp blade is ideal. Before scoring, ensure your knife is properly sharpened to avoid any accidents.
Tongs: A sturdy pair of tongs will be needed to safely handle the hot pork belly during the boiling and roasting stages. Long, heat-resistant tongs are preferable to maintain a safe distance from the heat source.
Baking Sheet (Optional but Recommended): If your roasting pan doesn’t have a significant lip, a baking sheet placed underneath can catch any spills or rendered fat, making cleanup significantly easier. A standard size baking sheet (18 x 13 inches) should suffice.
Kitchen Paper Towels or Clean Cloths: You’ll need these for patting the pork belly skin dry before roasting. Thoroughly drying the skin is crucial for achieving maximum crispiness. Use several layers of paper towels for optimal absorption.
Measuring Cups and Spoons: For accurate measurements of salt and any other seasonings you might use during the preparation and seasoning stages. A basic set of measuring cups and spoons will be adequate.
Optional: A Basting Brush: While not strictly necessary, a basting brush can be useful for applying additional oil or seasonings to the pork belly during roasting. A silicone basting brush is easy to clean.
Important Note: Always prioritize safety when working with hot oil and sharp knives. Ensure your equipment is in good condition and handle it carefully to prevent accidents.
Preparation of the Pork Belly
Selecting the right pork belly is crucial for achieving that perfect crispy skin and tender meat. Look for a piece of pork belly that’s approximately 2-3 pounds, with a thick layer of skin and a good amount of fat. Avoid pieces with too much lean meat, as they tend to dry out during cooking. The skin should be relatively smooth and pale, with minimal blemishes.
Once you’ve chosen your pork belly, the first step is to thoroughly rinse it under cold running water. This removes any loose debris and helps ensure a cleaner cooking process. Pat the pork belly completely dry with paper towels. Thoroughly drying the skin is paramount for achieving crispy skin; any remaining moisture will hinder the crispiness.
Next, score the skin of the pork belly. Using a sharp knife, make shallow, criss-cross cuts about ½ inch apart, being careful not to cut into the meat. Scoring allows the fat to render properly and the skin to crisp up evenly. If you’re feeling adventurous, you can create a more intricate pattern, but consistency is key.
Now, it’s time to season the pork belly. Generously rub the skin and the meat with 2 tablespoons of kosher salt. Kosher salt is preferred for its larger crystals, which draw out moisture more effectively. You can also add other spices at this stage, such as freshly ground black pepper (1 teaspoon), garlic powder (1 teaspoon), and paprika (½ teaspoon). Rub the seasoning into the skin and the meat thoroughly, ensuring even coverage.
After seasoning, place the pork belly skin-side up on a wire rack set inside a roasting pan. The wire rack allows air to circulate underneath the pork belly, facilitating even cooking and crisping. This is a crucial step for achieving optimal results. Do not place the pork belly directly on the bottom of the pan.
Now, refrigerate the seasoned pork belly, uncovered, for at least 4 hours, or preferably overnight. This extended refrigeration period allows the salt to draw out excess moisture from the skin and the meat, promoting crispier skin and more flavorful meat. The longer it sits, the better the results, but 4 hours is the minimum.
Before cooking, pat the skin dry once more with paper towels. Any remaining moisture will hinder the crisping process. This final drying step is just as important as the initial drying. You’re now ready to proceed to the cooking stage, where the magic of crispy pork belly will unfold.
Seasoning and Marinating
Seasoning and marinating your pork belly are crucial steps for achieving that ultimate crispy skin and tender, flavorful meat. A well-seasoned and marinated belly will render fat beautifully and infuse the meat with delicious depth. Don’t skimp on this stage – it’s the foundation of your crispy pork belly masterpiece!
For a 2-3 lb pork belly, you’ll need a generous amount of seasoning. We recommend starting with a basic salt and pepper cure, which is incredibly effective. Use about 2 tablespoons of kosher salt and 1 tablespoon of freshly cracked black pepper. The kosher salt is preferred because of its larger crystals, which help to draw out moisture more effectively than fine table salt. This process, known as a dry brine, helps to season the meat deeply and create a crispier skin.
Rub the salt and pepper liberally all over the pork belly, making sure to get into all the nooks and crannies, including the skin. Don’t be shy with the seasoning! Pat the salt and pepper into the skin thoroughly. Then, place the seasoned pork belly in a shallow dish or on a rack set over a baking sheet. Refrigerate uncovered for at least 4 hours, or preferably overnight. This allows the salt to work its magic and draw out excess moisture, leading to a crispier result. Longer is generally better, up to 24 hours.
While a simple salt and pepper cure is excellent, you can elevate the flavor profile with additional seasonings. Consider adding spices like 1 teaspoon of garlic powder, 1 teaspoon of onion powder, ½ teaspoon of paprika (smoked paprika is particularly good), and a pinch of cayenne pepper for a little heat. You can also incorporate fresh herbs like rosemary or thyme, roughly chopped. Remember to adjust the quantities based on your personal preference and the size of your pork belly.
For a more intense flavor, consider marinating the pork belly before seasoning. A simple marinade could include soy sauce (1/4 cup), rice wine vinegar (2 tablespoons), brown sugar (1 tablespoon), and grated ginger (1 tablespoon). Marinate for 2-4 hours in the refrigerator. After marinating, pat the pork belly dry with paper towels before applying the dry rub. This step is optional, but it adds a lovely depth of flavor.
Important Note: Regardless of whether you choose to marinate or just dry brine, ensuring the pork belly is completely dry before roasting is paramount. Excess moisture will prevent the skin from crisping properly. Patting it dry thoroughly with paper towels before roasting is a crucial final step.
Experiment with different seasoning combinations to find your perfect flavor profile. Whether you opt for a simple salt and pepper cure or a more complex marinade, remember that proper seasoning is key to unlocking the deliciousness of crispy pork belly.
Searing the Pork Belly
Searing the pork belly is a crucial step in achieving that coveted crispy skin and tender, flavorful meat. This process renders the fat, creating a crackling texture, and deeply colors the skin for enhanced aesthetics and flavor. Proper searing requires attention to detail and a well-prepared surface.
Before you begin, ensure your pork belly is completely dry. Pat it down thoroughly with paper towels, removing any excess moisture. Even a small amount of moisture will prevent proper browning and lead to steaming instead of searing. This is arguably the most important step in achieving crackling skin.
Season generously with salt. For a 2-3 lb pork belly, use approximately 2-3 tablespoons of kosher salt. Don’t be shy with the salt! It draws out moisture and helps create that crispy skin. You can also add freshly cracked black pepper at this stage, along with other spices like five-spice powder or smoked paprika, if desired. Rub the salt and spices evenly all over the skin and the meat.
Now, for the searing itself. A heavy-bottomed pan, preferably cast iron, is ideal for even heat distribution. Heat the pan over medium-high heat. Avoid high heat initially, as this can burn the skin before the fat renders. Let the pan heat up thoroughly; it should be hot enough that a drop of water sizzles violently on contact.
Carefully place the pork belly skin-side down in the hot pan. You should hear an immediate and satisfying sizzle. Do not move the pork belly for at least 5-7 minutes, allowing the skin to render and begin to crisp. Resist the urge to check on it too early; patience is key. You’re aiming for a deep golden brown color, almost mahogany in some areas.
After 5-7 minutes, reduce the heat to medium. Continue to sear the skin for another 10-15 minutes, or until it is deeply golden brown and starting to puff up slightly. Use a spatula to carefully check for crispness; the skin should be firm and slightly crackling. If not, continue searing at a slightly lower temperature.
Once the skin is sufficiently seared, carefully flip the pork belly and sear the meaty sides for 2-3 minutes per side, just enough to brown them slightly. This step adds flavor and color to the meat. Be careful when flipping, as the hot fat may splatter.
Remove the seared pork belly from the pan and set it aside. You can now proceed with the next steps of your recipe, which may involve roasting or braising the pork belly to achieve the desired tenderness. The perfectly seared skin will provide a delicious contrast in texture to the tender meat once the cooking process is complete. Remember, a well-seared pork belly is the foundation of a truly exceptional dish.
Slow Cooking/Roasting the Pork Belly
The key to incredibly tender and flavorful pork belly lies in the slow cooking process. This method renders the fat beautifully, resulting in a succulent and juicy final product. We’ll be using a combination of low-and-slow roasting followed by a high-heat crisping, ensuring maximum deliciousness.
Begin by preheating your oven to 325°F (160°C). Ensure your oven is calibrated correctly for even cooking. Variations in temperature can significantly impact the cooking time and final result.
Take your approximately 2-pound pork belly (skin scored, as described in the previous section) and place it in a roasting pan. Use a roasting pan that’s large enough to accommodate the pork belly comfortably, allowing for even heat distribution. Avoid overcrowding the pan.
Season generously with salt and freshly ground black pepper. About 1 ½ teaspoons of salt and ½ teaspoon of black pepper per pound of pork belly is a good starting point, but adjust to your taste. You can also add other seasonings at this stage, such as garlic powder, onion powder, paprika, or your favorite spice blend. Don’t be shy with the seasoning – the fat will help carry the flavor.
Add about 1 cup of water or chicken broth to the bottom of the roasting pan. This helps to create moisture and prevent the pork belly from drying out during the long cooking process. Don’t submerge the pork belly; simply create a shallow pool in the bottom of the pan.
Cover the roasting pan tightly with foil. This is crucial for maintaining moisture and ensuring even cooking. A tightly sealed foil cover is essential for this stage. Transfer the covered roasting pan to the preheated oven.
Roast the pork belly for approximately 2 ½ to 3 hours, or until the meat is incredibly tender and easily pierced with a fork. Cooking time will vary depending on the size and thickness of your pork belly; use a meat thermometer to ensure it reaches an internal temperature of 190-195°F (88-91°C). The internal temperature is the most reliable indicator of doneness.
Once the pork belly is cooked through, carefully remove it from the oven and let it rest for at least 15 minutes before proceeding to the crisping stage. Allowing it to rest is vital; it allows the juices to redistribute, resulting in a more tender and flavorful final product.
Now that your pork belly is tender and juicy, you’re ready to move on to the next step: achieving that perfect crispy skin! This will be detailed in the subsequent section.
Recommendations for Crispy Pork Belly
Serving Suggestions
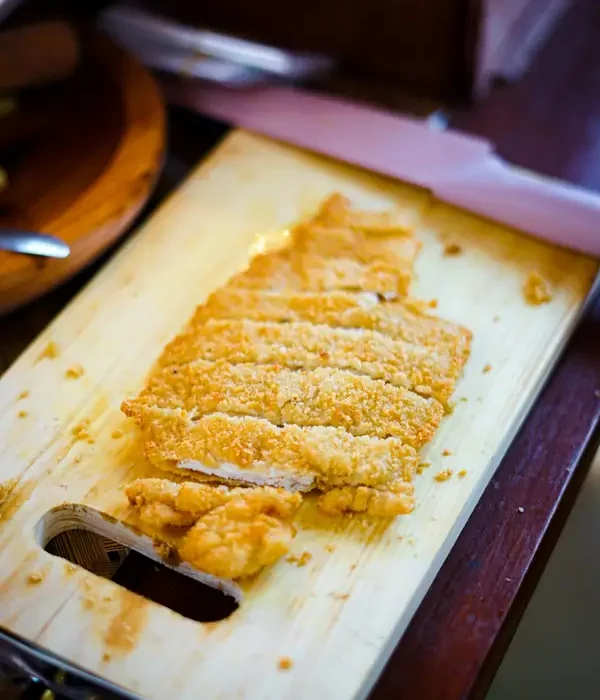
Crispy pork belly is incredibly versatile and lends itself to a variety of serving styles. For a truly indulgent experience, serve it simply sliced, allowing the crackling to shine. A sprinkle of flaky sea salt enhances the natural flavors. Alternatively, you can elevate your presentation by arranging the slices on a bed of creamy mashed potatoes or a vibrant slaw. A drizzle of a flavorful reduction, such as a balsamic glaze or a rich pan sauce, adds another layer of complexity.
Consider serving your crispy pork belly as part of a larger meal. It pairs beautifully with Asian-inspired dishes, such as steamed rice, stir-fried greens, and noodle dishes. For a more Western-style presentation, serve it with roasted root vegetables, a hearty salad, or alongside crusty bread for dipping into the rendered fat. The possibilities are endless!
For a truly special occasion, consider serving individual portions of crispy pork belly as an appetizer or main course. Garnish with fresh herbs like cilantro or chives for an added touch of freshness and visual appeal.
Storage and Leftovers
Proper storage is crucial to maintaining the quality of your crispy pork belly. Allow the cooked pork belly to cool completely before storing. Once cooled, wrap tightly in plastic wrap, then place in an airtight container or resealable bag. Store in the refrigerator for up to 3-4 days. To reheat, you can gently warm it in a low oven (around 300°F/150°C) or in a skillet over medium-low heat. Avoid reheating at high temperatures, as this can make the crackling soggy.
Freezing is also an option for longer storage. Wrap the cooled pork belly tightly in plastic wrap, then foil, before placing it in a freezer-safe bag. Frozen pork belly can last for up to 2-3 months. When thawing, transfer it to the refrigerator overnight for the safest and most consistent results.
Complementary Dishes
The richness of crispy pork belly pairs well with dishes that offer contrasting flavors and textures. Consider serving it with a bright and acidic salad, such as a green papaya salad or a simple vinaigrette-dressed salad with citrus fruits. The acidity cuts through the richness of the pork, creating a balanced flavor profile.
Dishes with a spicy kick also complement the pork beautifully. Kimchi, gochujang (Korean chili paste), or a simple chili-garlic sauce can add a delightful contrast to the richness of the pork. The heat helps to cleanse the palate and keeps the meal exciting.
Don’t underestimate the power of simple accompaniments. A side of steamed rice, boiled potatoes, or even a simple green vegetable like asparagus can enhance the overall dining experience.
Nutritional Information (Approximate per 100g serving – values will vary based on preparation)
Calories: 450-550 kcal
Fat: 40-50g
Protein: 20-25g
Carbohydrates: 5-10g
Note: This is an estimate and can vary depending on the cut of pork belly, cooking method, and added ingredients.
Disclaimer: Nutritional information is approximate and should be considered a guideline only. Always consult a nutritionist or dietitian for personalized dietary advice.