Prepare yourself for a culinary journey into the world of Caramel Flan, a dessert so beloved it transcends geographical boundaries and cultural differences. Originating in Spain, this creamy custard confection, known as flan in Spanish, boasts a history as rich and complex as its caramel topping. While pinpointing its exact origins is difficult, evidence suggests variations of this dessert existed in ancient Rome, with eggs and milk-based sweets gaining popularity throughout the Middle Ages. The specific caramel-topped version we know and love today likely emerged in Spain sometime during the 16th or 17th centuries, evolving alongside advancements in sugar refining which made the rich caramel sauce more accessible.
The introduction of sugar cane to Europe had a profound impact on dessert culture, and flan became a testament to this. Sugar, once a luxury, became increasingly available, allowing for the creation of richer, more decadent desserts. The Spanish, known for their mastery of confectionery, embraced this new ingredient, refining techniques for creating the perfectly smooth and glossy caramel topping that is now synonymous with flan. From Spain, this beloved dessert spread throughout the Spanish colonies in the Americas, adapting and evolving within different regional cuisines. In Latin America, particularly, flan holds a prominent position in celebrations and family gatherings, often appearing as a cherished staple at holidays and special occasions.
The cultural significance of flan is undeniable. It’s far more than just a dessert; it’s a symbol of tradition, family, and joy. Across Latin America, countless variations exist, from the creamy flan napolitano of Mexico to the richer, denser versions found in countries like Argentina and Cuba. While precise global consumption statistics for flan are difficult to obtain, its widespread popularity is evident in its presence in countless restaurants, bakeries, and home kitchens worldwide. Millions of people around the globe enjoy flan every year, making it a truly global culinary phenomenon. The simple elegance of its smooth custard and intensely flavorful caramel sauce continues to captivate palates and inspire generations of home cooks and professional pastry chefs alike.
This recipe will guide you through the process of creating your own perfect Caramel Flan, allowing you to experience the magic of this timeless dessert. From achieving the perfect caramel to ensuring a silky-smooth custard, we will navigate each step, equipping you with the knowledge and confidence to recreate this culinary masterpiece. Get ready to embark on a flavor journey that combines the rich history and cultural significance of flan with the satisfaction of creating something truly delicious.
Ingredients and Measurements
Creating the perfect caramel flan requires precise measurements and high-quality ingredients. The success of your flan hinges on the balance of sweetness, richness, and the delicate texture of the custard. Below, you’ll find a detailed list of ingredients and their respective measurements, along with some professional recommendations to ensure your flan is a culinary masterpiece.
For the Caramel:
- 1 cup (200g) granulated sugar: Use a fine granulated sugar for even caramelisation. Avoid using coarse sugar, as it may burn unevenly.
- 1/4 cup (60ml) water: This small amount of water initiates the caramelisation process. Do not increase the amount, as it can result in a thinner, less flavorful caramel.
For the Custard:
- 1 (14 ounce) can (397g) sweetened condensed milk: Sweetened condensed milk provides the perfect balance of sweetness and creaminess. Do not substitute with evaporated milk or regular milk, as the consistency and sweetness will be significantly different.
- 2 large eggs: Use large, fresh eggs for the best results. Room temperature eggs will emulsify more easily with the other ingredients, resulting in a smoother custard.
- 1 (12 ounce) can (355ml) evaporated milk: Evaporated milk adds richness and body to the custard. Make sure the can is well shaken before adding it to the mixture.
- 1 teaspoon pure vanilla extract: Use a high-quality vanilla extract for the best flavor. Avoid using imitation vanilla, as it can impart an artificial taste.
- 1/2 teaspoon ground cinnamon (optional): A pinch of cinnamon adds a warm, subtle spice note. This is entirely optional, based on your preference.
Important Considerations:
Accuracy is key: Using a kitchen scale for measuring the sugar and condensed milk will ensure the most consistent results. While measuring cups are acceptable for liquids, strive for accuracy. Inaccurate measurements can lead to a flan that is either too sweet, too thin, or too dense.
Egg temperature matters: Bringing the eggs to room temperature before incorporating them into the custard mixture will prevent curdling. Cold eggs can cause the mixture to separate.
Fresh ingredients are best: Using fresh, high-quality ingredients will enhance the overall flavor of your flan. Stale or low-quality ingredients will negatively impact the final product.
Gentle mixing: When combining the custard ingredients, mix gently and thoroughly to avoid over-incorporating air. Over-mixing can lead to a less smooth texture.
By following these instructions and using the specified measurements, you will be well on your way to creating a delicious and perfectly textured caramel flan. Enjoy!
Equipment List
Creating a perfect caramel flan requires the right tools to ensure even cooking and easy unmolding. This equipment list details everything you’ll need, from measuring implements to the essential baking dish. Investing in quality equipment will significantly improve your results.
Measuring Cups and Spoons: Accurate measurements are crucial in baking. Use a set of nested measuring cups (1 cup, ½ cup, ⅓ cup, ¼ cup) and a set of measuring spoons (1 tablespoon, 1 teaspoon, ½ teaspoon, ¼ teaspoon). Avoid using oversized spoons or cups as this will affect the final texture and sweetness of your flan. Using a kitchen scale for weighing ingredients, especially the sugar for the caramel, is highly recommended for even more precise results.
Saucepan: You’ll need a medium-sized saucepan (approximately 2-quart capacity) with a heavy bottom for making the caramel. A heavy bottom prevents scorching and ensures even heat distribution. Avoid using non-stick pans for making caramel as the sugar can react with the coating and create an uneven caramel.
Whisk: A sturdy whisk is essential for smoothly incorporating the ingredients in the custard. A balloon whisk is ideal due to its large surface area, which incorporates air and prevents lumps. Ensure your whisk is clean and dry before using it to prevent unwanted clumps or curdling in your custard mixture.
Blender or Immersion Blender: While not strictly necessary, a blender or immersion blender can help create a smoother custard. If using a blender, be cautious when blending hot liquids; vent the lid to prevent pressure build-up. An immersion blender is safer and more convenient for this purpose. If using an immersion blender, blend slowly and carefully to avoid splashing.
8-inch or 9-inch ramekins or a single large baking dish: This is where your flan will bake and set. Choose ramekins for individual servings or a larger baking dish (approximately 8-inch or 9-inch diameter) for a single larger flan. Ensure your ramekins or baking dish are oven-safe and preferably made of tempered glass or ceramic for even heating. Metal ramekins can also be used, but be mindful that they may heat up quickly.
Large Bowl: A large bowl is needed for whisking together the custard ingredients. Choose a bowl that’s large enough to comfortably accommodate all the ingredients without overflowing. A stainless steel bowl is recommended as it won’t react with the ingredients.
Rubber Spatula or Scraper: A rubber spatula or scraper is helpful for scraping down the sides of the bowl to ensure all the ingredients are incorporated. A silicone spatula is ideal as it’s heat-resistant and won’t scratch your bowls.
Baking Sheet or Roasting Pan: You’ll need a baking sheet or roasting pan large enough to hold your ramekins or baking dish. This will create a water bath for even baking and prevent cracking. The water bath is crucial for a smooth, creamy texture.
Oven: An oven is necessary to bake the flan. Make sure your oven is clean and preheated to the correct temperature before baking.
Cooling Rack: Once the flan is baked, allow it to cool completely in a cooling rack before refrigerating. This prevents condensation and ensures even cooling.
Caramel Preparation
The caramel is the foundation of a truly exceptional caramel flan, providing that irresistible sweet and slightly bitter counterpoint to the creamy custard. Getting it right is crucial, so pay close attention to the following steps. Patience and careful observation are key to achieving the perfect caramel color and consistency.
Begin by measuring out 1 cup (200g) of granulated sugar. Using a granulated sugar with smaller crystals will help prevent burning and ensure a smoother caramel. Pour the sugar into a heavy-bottomed saucepan, ideally one with a light or neutral color to easily monitor the color of the caramel. Avoid using a non-stick pan, as the caramel can react with the coating.
Place the saucepan over medium heat. Do not stir the sugar at this stage. Allow the sugar to melt slowly and evenly. You’ll notice the sugar at the edges melting first, and it will gradually melt towards the center as the heat distributes. This process takes time and patience. Resist the urge to increase the heat, as this will lead to uneven cooking and burning.
As the sugar melts, it will begin to turn a light amber color. This is a slow transition. Once it has fully melted into a clear, amber liquid, continue heating, watching the color very closely. The caramel will deepen in color from light amber to a rich, dark amber. Keep a close eye on the color, as it can change rapidly. A deeper color will result in a more intense caramel flavor, but be careful not to burn it.
The ideal color is a deep amber, almost bordering on a mahogany brown. If it becomes too dark, it will taste bitter. Once you reach the desired color, immediately remove the pan from the heat. This is crucial to prevent further browning and burning. The caramel will continue to cook from the residual heat.
Carefully add 1/2 cup (120ml) of hot water to the caramel. This is where caution is paramount. The caramel will bubble and splatter vigorously. Pour the water slowly and steadily, while keeping a safe distance. It’s best to pour the water down the side of the pan, rather than directly into the center. Use a heat-resistant spatula to gently stir the mixture until the caramel is fully dissolved and smooth.
Once the caramel is smooth and fully incorporated with the water, pour it into your prepared flan molds. Tilt the molds gently to coat the bottom and sides evenly. Allow the caramel to cool completely before adding the custard mixture. This prevents the caramel from cracking or separating when the flan is baked.
Your perfectly crafted caramel is now ready for the next stage of the flan making process. Remember, practice makes perfect! Don’t be discouraged if your first attempt isn’t flawless. With a little patience and attention to detail, you’ll soon be creating stunning caramel flans.
Custard Preparation
The custard is the heart of your caramel flan, and its smooth, creamy texture is paramount. This section details the precise method for creating a perfect custard base that will complement your rich caramel beautifully. We’ll be using whole milk for its richness, but you can substitute with 2% milk or even half-and-half if you prefer a slightly richer flavor. However, avoid using skim milk as it won’t provide the same creamy texture.
Begin by whisking together the custard ingredients in a large bowl. This ensures that no lumps form and that the sugar and cornstarch are fully incorporated. For a standard flan recipe (yielding approximately 6 servings), you will need: 1 cup granulated sugar, 1/4 cup cornstarch, 1/4 teaspoon salt, 4 large eggs, and 2 cups whole milk. Ensure your eggs are at room temperature; this will help them emulsify better with the other ingredients and prevent the custard from curdling.
In a separate saucepan, gently heat the milk over medium heat. Do not boil the milk. You want it to be warm enough to dissolve the sugar and cornstarch mixture, but not so hot that it scorches or creates lumps. The ideal temperature is around 160-180°F (71-82°C). You can use a candy thermometer to monitor this accurately.
While the milk is heating, whisk the sugar, cornstarch, and salt together in a large bowl. This step is crucial for preventing lumps in your custard. Slowly add the room temperature eggs one at a time, whisking vigorously after each addition. Make sure each egg is fully incorporated before adding the next. The mixture will appear slightly thickened and pale yellow.
Once the milk is warm, gradually temper the milk into the egg mixture. This means adding the warm milk to the egg mixture slowly, while continuously whisking. This prevents the eggs from scrambling. Add about 1/4 of the milk at a time, whisking constantly to combine fully before adding more. Tempering is crucial to prevent curdling.
Once all the milk has been incorporated, pour the mixture through a fine-mesh sieve into a clean bowl. This removes any potential lumps and ensures a perfectly smooth custard. Sieving is highly recommended for achieving a flawless texture. Gently whisk the sieved custard to ensure everything is evenly distributed. This will result in a smoother and more uniform custard.
At this point, your custard is ready to be poured into your prepared caramel-lined ramekins or baking dish. Avoid overfilling the ramekins, leaving approximately half an inch of space at the top to allow for expansion during baking. The custard is now ready for the water bath and baking process. Remember, patience and attention to detail during this custard preparation are key to a successful and delicious caramel flan.
Baking/Steaming the Flan
This section details the crucial baking or steaming process that transforms your custard mixture into a luscious, jiggly flan. Both methods yield excellent results, but each offers unique advantages. We’ll cover both, allowing you to choose the method best suited to your kitchen and preferences.
Baking Method: This method offers even cooking and a beautifully caramelized top. Preheat your oven to 350°F (175°C). Place your ramekins containing the flan mixture into a larger baking dish. Carefully pour enough boiling water into the larger dish to come about halfway up the sides of the ramekins. This creates a water bath, preventing the flan from cracking and ensuring gentle, even cooking. This water bath is crucial; do not skip it.
Baking Time and Temperature: Bake for approximately 50-60 minutes, or until the flan is just set around the edges and the center still has a slight jiggle. The exact baking time will depend on the size of your ramekins and your oven. A gentle jiggle in the center is desirable; overbaking will result in a dry, rubbery flan. To test for doneness, gently insert a knife or toothpick near the center; it should come out with a few moist crumbs clinging to it, not completely clean.
Steaming Method: Steaming produces a supremely smooth and tender flan, often preferred for its delicate texture. Fill a large pot or steamer with about 2 inches of water and bring to a rolling boil. Place your ramekins in the steamer basket, ensuring they are not overcrowded. Cover the pot tightly to maintain steam. Steam for approximately 45-55 minutes, or until the flan is set around the edges and the center has a slight jiggle, just as with the baking method.
Steaming Time and Monitoring: Steaming times can vary slightly depending on your steamer and the size of your ramekins. It’s important to monitor the water level during steaming and add more boiling water as needed to prevent the pot from running dry. This can be done carefully and safely by opening the lid slightly and carefully pouring in boiling water from a kettle.
Cooling and Chilling: Regardless of whether you bake or steam your flan, once cooked, carefully remove the ramekins from the water bath or steamer. Let them cool completely at room temperature before refrigerating for at least 4 hours, or preferably overnight. This chilling period allows the flan to set completely and develop its rich flavor. The slow cooling also helps to prevent cracking.
Unmolding: To unmold, run a thin knife or offset spatula around the edges of the flan to loosen it from the ramekin. Place a serving plate upside down on top of the ramekin and quickly invert. The flan should slide out smoothly. If it sticks, gently run the knife around the edges again. If the flan cracks slightly during unmolding, don’t worry; it’s still delicious!
Remember to always use oven mitts or heat-resistant gloves when handling hot ramekins and water. Enjoy your perfectly baked or steamed caramel flan!
Cooling and Chilling: Achieving the Perfect Caramel Flan Texture
The cooling and chilling process is crucial for achieving the signature smooth, creamy texture of a perfect caramel flan. Rushing this stage can lead to a grainy or unstable dessert. Patience and the right techniques are key.
Once your caramel flan has finished baking in a bain-marie (water bath), the first step is to carefully remove it from the oven. Avoid any sudden movements that could cause the flan to crack or jiggle excessively. Let the flan cool slightly within the bain-marie for about 15-20 minutes. This allows the custard to gradually adjust to room temperature, minimizing the risk of thermal shock.
After the initial cooling period, gently remove the flan from the water bath. To do this, carefully lift the baking dish from the water bath using oven mitts or a kitchen towel. Be mindful of the hot water and steam. You can use tongs or a spatula to carefully remove the flan if it’s proving difficult to lift directly.
Transfer the flan to a wire rack. This allows for even air circulation around the baking dish, promoting consistent cooling and preventing condensation from forming on the bottom of the flan. Avoid placing the hot baking dish directly onto a cold surface, as this could cause the flan to crack.
Let the flan cool completely at room temperature. This typically takes 2-3 hours, depending on the size of your flan and the ambient temperature. During this time, the custard will continue to set and the caramel will solidify further. Do not rush this process; it’s essential for achieving a stable and delicious flan.
Once the flan is completely cool at room temperature, refrigerate it for at least 4 hours, or preferably overnight. This extended chilling period allows the flan to fully set and develop its characteristic creamy texture. The longer it chills, the firmer and more stable it will become. After 4-6 hours in the fridge, the flan will be ready to serve.
Important Note: Avoid placing the flan directly on a cold surface (like a marble slab) once it’s out of the oven as this can cause thermal shock and cracking. Always allow for a gradual cooling process.
Professional Tip: For an even smoother flan, cover the baking dish with plastic wrap before refrigerating. This prevents the surface of the flan from drying out and forming a skin. However, ensure the plastic wrap doesn’t touch the surface of the custard.
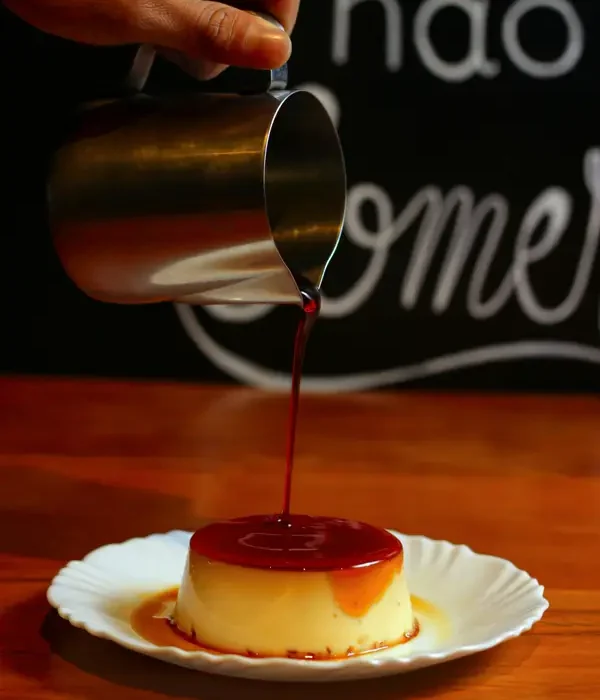
Serving suggestion: Once chilled, run a thin knife or offset spatula around the edge of the flan to loosen it from the baking dish. Invert the flan onto a serving plate, allowing the luscious caramel to cascade down the sides. Serve immediately and enjoy the rich, creamy perfection of your homemade caramel flan.
Recommendations for the Perfect Caramel Flan
To achieve the most exquisite Caramel Flan, meticulous attention to detail is crucial throughout the entire process. Ensure your eggs are at room temperature before incorporating them into the custard base, as this prevents curdling. Similarly, gradually whisk in the hot sugar mixture into the egg yolks to temper them and avoid scrambling. This slow addition is key to a smooth, silky texture.
The baking process is also critical. A water bath (bain-marie) is essential for gentle, even cooking, preventing cracks and ensuring a perfectly set flan. Use a deep baking dish and ensure the water level reaches at least halfway up the sides of your ramekins to maintain a consistent temperature. Overbaking will lead to a rubbery texture, while underbaking will result in a wobbly, uncooked center. Check for doneness using a toothpick or knife inserted into the center; it should come out clean. Allow the flan to cool completely before refrigerating to prevent cracking.
Proper chilling is paramount. Refrigerate the flan for at least 4 hours, preferably overnight, to allow the custard to fully set and the flavors to meld. Avoid rapid temperature changes, as this can cause the flan to crack. Gently run a thin knife or offset spatula around the edges of the ramekin before inverting to ensure a clean release. If you encounter difficulty, briefly submerge the ramekin in warm water for a few seconds to loosen the flan.
Serving suggestions abound! A classic presentation involves dusting the top with powdered sugar or a light sprinkle of cocoa powder. A drizzle of additional caramel sauce adds an extra touch of sweetness and richness. Fresh berries, such as raspberries or strawberries, provide a delightful contrasting tartness. A dollop of whipped cream adds a luxurious touch, complementing the velvety texture of the flan.
Storage is important to maintain quality. Store leftover flan, tightly covered, in the refrigerator for up to 3 days. The caramel may thicken slightly over time, but the flan itself will retain its delicious flavor and texture. Avoid freezing flan, as this can affect its consistency and result in an icy texture upon thawing.
Complementary dishes can elevate your dining experience. Caramel flan pairs beautifully with strong coffee, a rich espresso, or a robust dessert wine. It can also be served alongside light and fruity desserts, such as a sorbet or a light fruit salad, to balance the richness of the flan. As a more substantial pairing, consider serving it alongside a light savory dish, such as a simple green salad or a delicate seafood appetizer.
Nutritional Information (per serving, approximate): The nutritional content will vary depending on the specific ingredients and portion size. However, a typical serving of caramel flan contains approximately 300-400 calories, with a significant portion coming from sugar and fat. It is a source of protein from the eggs and calcium from the milk, but it is relatively high in sugar and fat and should be enjoyed in moderation. Precise nutritional values should be calculated based on your specific recipe and ingredient quantities.