Chicken Parmesan, a culinary masterpiece seemingly born from the marriage of Italian-American ingenuity and readily available ingredients, is a dish whose precise origins remain shrouded in a delicious mystery. While pinpointing a single inventor is impossible, its rise to popularity is strongly linked to the large Italian-American communities in the United States, particularly in the early to mid-20th century. It’s widely believed to be a variation on the classic Italian dish, cotoletta alla Milanese – a breaded and fried cutlet – adapted to incorporate the rich, flavorful tomato sauce prevalent in Italian-American cuisine. This adaptation cleverly combined familiar flavors and techniques, creating a dish that quickly resonated with both Italian-Americans seeking a taste of home and a broader American audience eager to explore new culinary horizons.
The exact timeline of Chicken Parmesan’s emergence is debated, but its widespread adoption throughout the latter half of the 20th century is undeniable. By the 1970s and 80s, it had firmly established itself as a staple on Italian-American restaurant menus across the country, often appearing as a featured item alongside more traditional Italian fare. Its popularity continues today, with countless variations found in restaurants from casual eateries to upscale establishments. Online searches for Chicken Parmesan recipe average millions per year, showcasing its enduring appeal and its status as a beloved comfort food. This consistent popularity demonstrates not just its deliciousness but also its adaptability; it’s easily customizable to individual tastes and dietary needs.
Beyond its simple deliciousness, Chicken Parmesan holds cultural significance as a prime example of culinary fusion. It represents the creative spirit of immigrant communities, demonstrating how adapting traditional recipes to new ingredients and palates can result in iconic dishes that transcend their origins. The dish reflects the cultural exchange between Italian and American culinary traditions, showcasing the evolution of food as a living, breathing entity that evolves based on availability, preference, and cultural influence. Further, its presence on menus across the country serves as a testament to the impact of Italian-American culture on broader American food culture. It’s a delicious reminder that some of the most beloved dishes are born not from grand culinary designs, but from simple, innovative adaptations of beloved classics.
Ingredients and Measurements
This recipe yields approximately 4 servings of delicious Chicken Parmesan. Accurate measurements are crucial for achieving the perfect balance of flavors and textures. Use a kitchen scale for the most precise results, especially when measuring flour and breadcrumbs.
For the Chicken:
- 4 boneless, skinless chicken breasts (approximately 6-8 ounces each). Choose thick, uniform breasts for even cooking. Thinner breasts will cook faster and may dry out, while thicker ones require longer cooking time.
- 1/2 teaspoon salt
- 1/4 teaspoon black pepper
- 1/2 cup all-purpose flour
- 2 large eggs, lightly beaten. Ensure your eggs are at room temperature for better blending with other ingredients.
- 1 1/2 cups Italian-style breadcrumbs. Panko breadcrumbs are recommended for a crispier crust. You can also add grated Parmesan cheese to the breadcrumbs for extra flavor (approximately 1/2 cup).
- 1/2 cup vegetable oil (or other high-heat oil like canola). Use enough oil to ensure the chicken is fully submerged for even browning.
For the Marinara Sauce:
- 28 ounces (794g) canned crushed tomatoes. Choose high-quality canned tomatoes for the best flavor. San Marzano tomatoes are ideal.
- 1 (15 ounce) can tomato sauce
- 2 cloves garlic, minced
- 1 teaspoon dried oregano
- 1/2 teaspoon dried basil
- 1/4 teaspoon red pepper flakes (optional, for a touch of heat)
- 1 tablespoon olive oil
- Salt and pepper to taste
For the Cheese and Assembly:
- 8 ounces fresh mozzarella cheese, sliced into 1/4-inch thick slices. Low-moisture mozzarella is best for melting and preventing a watery sauce.
- 1/2 cup grated Parmesan cheese
- Fresh basil leaves (for garnish, optional)
Important Note: These measurements are guidelines. You can adjust the quantities based on your preferences and the number of servings you want to prepare. For example, if you’re making a larger batch, simply multiply the ingredients proportionally. Remember to always taste and adjust seasoning as needed throughout the cooking process. Proper seasoning is key to a truly delicious Chicken Parmesan.
Professional Tip: For an even crispier crust, you can let the breaded chicken rest for about 15-20 minutes in the refrigerator before frying. This allows the breading to set and prevents it from falling off during cooking.
Equipment and Utensils
Creating a delicious Chicken Parmesan requires the right tools to ensure even cooking and efficient preparation. While you might have many of these items already in your kitchen, having the correct equipment will elevate your cooking experience and the final result. Let’s break down the essential equipment and utensils you’ll need.
For the Chicken: You’ll need at least three shallow dishes, approximately 9-11 inches in diameter. One will be for dredging the chicken in flour, another for the egg wash, and the third for the breadcrumbs. These should be wide enough to comfortably accommodate your chicken breasts without overcrowding. Choose dishes that are easy to clean and won’t stain easily from the ingredients. Avoid using extremely deep dishes as this can lead to excess coating on your chicken.
For Breadcrumbing: A whisk is essential for lightly whisking the eggs with a splash of milk or water for the egg wash. A sturdy fork will also be helpful for ensuring the chicken is evenly coated in the flour, egg wash, and breadcrumbs. Consider using a fine-mesh sieve to remove any lumps from your breadcrumbs before use, ensuring a smoother, more even coating on your chicken.
For Cooking: A large skillet or frying pan, at least 12 inches in diameter, is crucial for frying the chicken. Choose a pan with a heavy bottom to ensure even heat distribution and prevent hot spots that could burn the chicken. A cast iron skillet is ideal, but a good quality non-stick pan will also suffice. You’ll need enough oil to submerge about half the chicken breast’s thickness. Approximately 1/2 inch to 3/4 inch of oil is recommended. Use a thermometer to monitor the oil temperature; it should be around 350°F (175°C) for optimal frying.
For Baking: A large baking sheet, approximately 18×13 inches, will be needed to bake the assembled Chicken Parmesan. Line this with parchment paper for easy cleanup and to prevent the chicken from sticking. If you don’t have parchment paper, use a baking sheet with non-stick coating. Having another smaller baking sheet handy is also useful to catch any drips or spills during baking.
Other Utensils: You’ll need measuring cups and spoons for accurate ingredient measurements. A pair of tongs will be invaluable for safely handling the hot chicken during frying and transferring it to the baking sheet. A spatula or wooden spoon will be needed for stirring the marinara sauce, and a cheese grater for shredding the mozzarella cheese. Finally, a meat mallet is highly recommended for pounding the chicken breasts to an even thickness, ensuring they cook evenly and at the same rate.
Cleaning Up: Having a few clean bowls and plates on hand to place the breaded chicken, and a small bowl for discarding excess breading will help streamline the cooking process and prevent mess. Remember to always use oven mitts or pot holders when handling hot pans and dishes.
Chicken Preparation (Breading and Frying)
This section details the crucial breading and frying process for your Chicken Parmesan. Properly breaded and fried chicken ensures a crispy exterior and juicy interior, vital for a delicious final dish. We’ll be using a classic three-step breading method for optimal results.
Step 1: Preparing the Chicken Breasts. Begin by ensuring your chicken breasts are uniformly sized. Aim for about 1/2-inch thickness. This ensures even cooking. Using a meat mallet, gently pound each breast to an even thickness. This not only helps with even cooking but also tenderizes the meat. Avoid pounding too hard, as this can lead to tough chicken. Season both sides generously with salt and freshly ground black pepper. About 1/2 teaspoon of salt and 1/4 teaspoon of pepper per breast is a good starting point, but adjust to your taste.
Step 2: The Three-Step Breading Process. This process creates a wonderfully crispy and flavorful crust. You’ll need three shallow dishes: one for flour, one for beaten eggs, and one for breadcrumbs. In the first dish, place 1 cup of all-purpose flour. Season the flour with 1/2 teaspoon of salt, 1/4 teaspoon of black pepper, and 1/4 teaspoon of paprika for extra flavor. In the second dish, whisk together 2 large eggs with 2 tablespoons of milk or water. This helps the breading adhere better. In the third dish, place 2 cups of Italian-seasoned breadcrumbs. You can easily make this by mixing plain breadcrumbs with 1 teaspoon of dried Italian herbs (such as oregano, basil, and thyme).
Now, dredge each chicken breast through the seasoned flour, ensuring it’s fully coated. Then, dip it into the egg mixture, allowing any excess to drip off. Finally, press the chicken firmly into the breadcrumbs, making sure all sides are completely covered. Gentle pressure is key; pressing too hard will compact the breading and result in a less crispy crust. Repeat this process for all chicken breasts.
Step 3: Frying the Chicken. Heat about 1 inch of vegetable oil in a large skillet over medium-high heat. The oil is ready when a pinch of breadcrumb sizzles immediately upon contact. Carefully place the breaded chicken breasts in the hot oil, ensuring not to overcrowd the pan. Overcrowding will lower the oil temperature and result in greasy, not crispy, chicken. Fry for about 4-5 minutes per side, or until golden brown and cooked through. Use a meat thermometer to ensure the internal temperature reaches 165°F (74°C). Once cooked, remove the chicken from the skillet and place it on a wire rack set over a baking sheet to drain excess oil. This helps maintain the crispiness.
Professional Tip: For extra crispy chicken, you can double-bread the chicken breasts by repeating steps 2 and 3. This adds an extra layer of crunch. Also, let the breaded chicken rest for at least 10-15 minutes before frying; this allows the breading to set and prevents it from falling off during frying.
Once the chicken is cooked and drained, it’s ready to be layered with marinara sauce and mozzarella cheese, completing your delicious Chicken Parmesan.
Marinara Sauce Preparation (if homemade)
While jarred marinara sauces offer convenience, a homemade sauce elevates the Chicken Parmesan experience significantly. This recipe yields approximately 4 cups of marinara, enough for several meals or a large batch of Chicken Parmesan.
Ingredients:
- 2 tablespoons extra virgin olive oil
- 3 cloves garlic, minced
- 1 (28 ounce) can crushed tomatoes
- 1 (15 ounce) can tomato sauce
- 1 teaspoon dried oregano
- 1 teaspoon dried basil
- 1/2 teaspoon dried thyme
- 1/4 teaspoon red pepper flakes (optional, for a touch of heat)
- 1/2 teaspoon salt
- 1/4 teaspoon black pepper
- 1 tablespoon sugar (optional, to balance acidity)
- 2 bay leaves
Instructions:
1. Sauté the Garlic: Heat the olive oil in a large saucepan over medium heat. Add the minced garlic and cook, stirring frequently, until fragrant (about 30 seconds). Be careful not to burn the garlic, as this will impart a bitter taste.
2. Add the Tomatoes and Spices: Add the crushed tomatoes, tomato sauce, oregano, basil, thyme, red pepper flakes (if using), salt, pepper, sugar (if using), and bay leaves to the saucepan. Stir well to combine.
3. Simmer the Sauce: Bring the sauce to a gentle simmer, then reduce the heat to low. Cover the saucepan and let the sauce simmer for at least 1 hour, or up to 3 hours for a richer, deeper flavor. The longer it simmers, the more the flavors will meld and deepen. Stir occasionally to prevent sticking.
4. Remove Bay Leaves and Blend (Optional): After simmering, remove the bay leaves. For a smoother sauce, use an immersion blender to partially or fully blend the sauce. Leaving some texture is perfectly acceptable, depending on your preference.
5. Taste and Adjust Seasoning: Taste the sauce and adjust the seasoning as needed. You may want to add more salt, pepper, sugar, or herbs to achieve your desired flavor profile. Remember, you can always add more seasoning, but you can’t take it away.
6. Cool and Store: Once the sauce has cooled slightly, you can store it in an airtight container in the refrigerator for up to 5 days or freeze it for longer storage. Allow the sauce to cool completely before refrigerating or freezing to prevent condensation and bacterial growth.
Professional Recommendations:
- Use high-quality canned tomatoes for the best flavor. San Marzano tomatoes are a popular choice.
- Don’t be afraid to experiment with different herbs and spices to create your own signature marinara sauce.
- If you have fresh herbs on hand, consider using a combination of fresh and dried for a more complex flavor.
- For a smoother sauce, strain the sauce through a fine-mesh sieve after simmering.
Baking/Cooking the Chicken Parmesan
This section details the baking process for achieving perfectly cooked and golden-brown Chicken Parmesan. While frying is a traditional method, baking offers a healthier alternative without sacrificing flavor. We’ll guide you through achieving crispy, juicy chicken breasts every time.
Preparation is key. Before you begin baking, ensure your chicken breasts are completely dry. Pat them thoroughly with paper towels to remove excess moisture. This is crucial for achieving a crispy breading. Any remaining moisture will steam the breading, resulting in a soggy, rather than crunchy, exterior.
Preheat your oven to 400°F (200°C). This temperature ensures even cooking and browning. Line a baking sheet with parchment paper for easy cleanup and to prevent the chicken from sticking. Lightly grease the parchment paper with olive oil or cooking spray to further aid in preventing sticking.
Breading the Chicken: Arrange three shallow dishes. In the first, place 1 cup of all-purpose flour seasoned with 1 teaspoon of salt and ½ teaspoon of black pepper. In the second, whisk 2 large eggs with 2 tablespoons of milk or water. In the third, combine 2 cups of breadcrumbs (panko breadcrumbs are recommended for extra crispiness) with ½ cup of grated Parmesan cheese and ½ teaspoon of garlic powder.
Dredge each chicken breast in the flour mixture, ensuring it’s fully coated. Then, dip it into the egg mixture, allowing any excess to drip off. Finally, coat the chicken thoroughly in the breadcrumb mixture, pressing gently to adhere the breadcrumbs. Avoid over-handling the breaded chicken, as this can cause the breading to fall off during baking.
Baking the Chicken: Arrange the breaded chicken breasts on the prepared baking sheet, leaving some space between each piece for even air circulation. Do not overcrowd the baking sheet; this will reduce the crispiness and may result in uneven cooking. Bake for 20-25 minutes, or until the chicken is cooked through and the breading is golden brown and crispy. To check for doneness, insert a meat thermometer into the thickest part of the chicken; it should register an internal temperature of 165°F (74°C).
Adding Marinara and Cheese: During the last 5-7 minutes of baking, spoon your prepared marinara sauce generously over the chicken breasts. Then, top with 1-1.5 cups of shredded mozzarella cheese. Return to the oven to allow the cheese to melt and become bubbly and slightly browned. Be careful not to overbake, as this can dry out the chicken and burn the cheese.
Once the chicken is cooked through, the cheese is melted and bubbly, and the breading is golden brown and crispy, remove the baking sheet from the oven. Let the chicken rest for a few minutes before serving. This allows the juices to redistribute, resulting in a more tender and flavorful chicken parmesan. Serve immediately and enjoy!
Assembly of the Dish
With your perfectly breaded chicken cutlets and simmering marinara sauce ready, we can now move on to the assembly of the Chicken Parmesan. This stage is crucial for achieving a juicy, flavorful, and aesthetically pleasing final product. Accuracy and a gentle touch are key here.
Begin by preheating your oven to 375°F (190°C). This ensures the cheese melts beautifully and the chicken cooks through evenly. Lightly grease a large baking dish (approximately 9×13 inches) with olive oil or cooking spray. This prevents sticking and makes for easier cleanup.
Carefully arrange half of your prepared marinara sauce (approximately 1 ½ cups) in the bottom of the prepared baking dish. Spread it evenly to create a base layer. This will prevent the chicken from drying out and add extra flavor.
Next, gently place your breaded chicken cutlets on top of the marinara sauce. Ensure they are not overlapping significantly, allowing for even cooking and browning. If necessary, use a second baking dish to accommodate all the cutlets.
Once the chicken cutlets are arranged, generously ladle the remaining marinara sauce over the top of the chicken. Make sure each cutlet is completely coated, ensuring a rich, flavorful sauce permeates the entire dish. About 1 ½ cups of sauce should be sufficient here.
Now comes the star of the show: the mozzarella cheese. Using approximately 2 cups of shredded mozzarella cheese, evenly distribute it over the top of the sauced chicken. Avoid piling the cheese in one area, aiming for a uniform layer. You can also use a blend of mozzarella and Parmesan cheese for added depth of flavor.
Optional additions at this stage can elevate your Chicken Parmesan. Consider sprinkling a small amount of grated Parmesan cheese (about ¼ cup) over the mozzarella for a salty, sharp contrast. Fresh basil leaves scattered on top add a beautiful visual touch and a burst of fresh flavor once the dish is baked.
Carefully transfer the baking dish to the preheated oven. Bake for 25-30 minutes, or until the chicken is cooked through and the cheese is melted, bubbly, and golden brown. Use a meat thermometer to ensure the internal temperature of the chicken reaches 165°F (74°C) for food safety. If the cheese browns too quickly, you can loosely tent the dish with aluminum foil during the last few minutes of baking.
Once baked, let the Chicken Parmesan rest for about 5-10 minutes before serving. This allows the sauce to thicken slightly and makes it easier to serve without the filling spilling out. Serve immediately and enjoy your delicious homemade Chicken Parmesan!
Chicken Parmesan: Recommendations
To elevate your Chicken Parmesan experience, consider these recommendations. For optimal flavor, allow the chicken to fully marinate in the egg mixture for at least 30 minutes before breading. This ensures the breading adheres properly and the chicken stays moist during cooking. Don’t overcrowd the pan when frying; work in batches to maintain a consistent temperature and achieve a beautiful golden-brown crust. Overcrowding will lower the oil temperature, resulting in greasy chicken.
Regarding the marinara sauce, using a high-quality, flavorful sauce is key. Homemade marinara is ideal, but a good quality store-bought option will also work well. Consider simmering your marinara sauce for a longer period to allow the flavors to meld and deepen. Adding a touch of fresh basil or oregano just before serving can further enhance the taste.
Cheese selection significantly impacts the overall dish. While mozzarella is traditional, experimenting with a blend of mozzarella and provolone, or even adding some Parmesan cheese, can create a more complex flavor profile. Make sure to use good quality cheese that melts well. Adding the cheese towards the end of the baking process ensures it is melted and bubbly but not burnt.
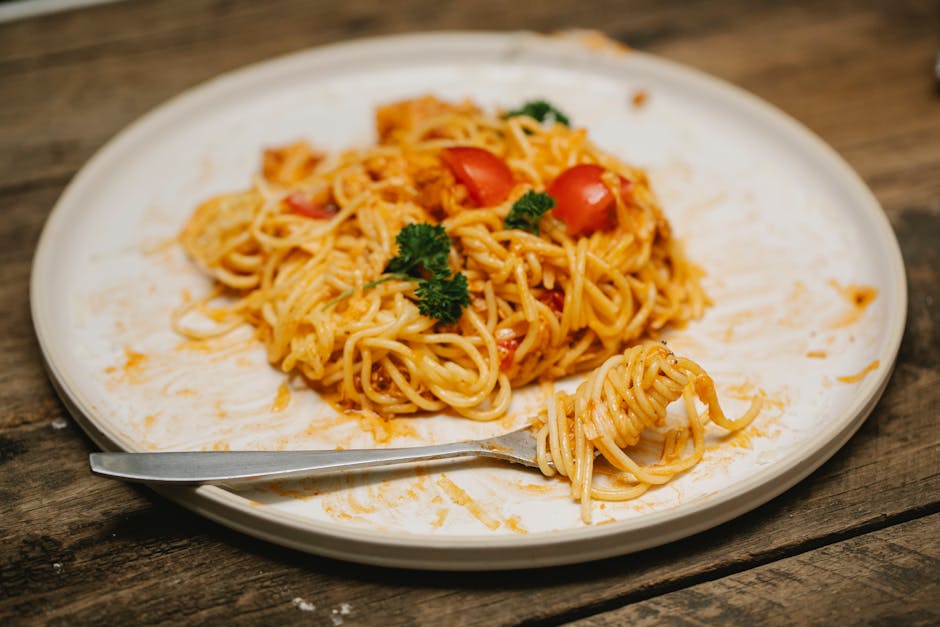
Serving suggestions are plentiful. Classic pairings include a simple side salad with a light vinaigrette, a side of spaghetti or linguine tossed with a little extra marinara sauce, or roasted vegetables like asparagus or broccoli. Garlic bread is another popular accompaniment that perfectly complements the rich flavors of the dish.
For storage, allow the Chicken Parmesan to cool completely before storing it in an airtight container in the refrigerator. It will keep for up to 3 days. To reheat, you can bake it in the oven until heated through, or microwave it in short bursts, adding a little bit of water or sauce to prevent dryness. Freezing is also an option; wrap the cooled Chicken Parmesan tightly in plastic wrap, then in aluminum foil, and store it in a freezer-safe bag for up to 3 months. Thaw overnight in the refrigerator before reheating.
Nutritional information (per serving, approximate values will vary based on ingredients and portion size): Calories: 500-700, Fat: 25-40g, Saturated Fat: 10-15g, Cholesterol: 150-200mg, Sodium: 800-1200mg, Carbohydrates: 40-60g, Protein: 30-40g. This is just an estimate; the actual nutritional content will depend on the specific ingredients you use and the portion size. For a healthier version, consider using lean chicken breast, reducing the amount of cheese, and opting for whole-wheat pasta.
Complementary dishes to enhance your meal: A crisp, refreshing salad with a lemon vinaigrette cuts through the richness of the chicken parmesan. Caprese salad, with its fresh mozzarella, tomatoes, and basil, offers a light and flavorful contrast. A side of creamy polenta or risotto provides a comforting and satisfying addition to the meal.