Few desserts evoke the sunny warmth of a summer kitchen quite like the classic lemon meringue pie. This iconic confection, a staple of American cookbooks and dinner tables, boasts a surprisingly rich and complex history. While pinpointing its exact origin is difficult, evidence suggests its popularity exploded in the United States during the early 20th century, coinciding with the widespread availability of readily accessible ingredients like condensed milk and readily available lemons. Before this, meringue itself had a long and storied past, appearing in various forms in European cuisine for centuries, with early versions dating back to as far as the 17th century. The combination of a tangy lemon filling and a fluffy, sweet meringue topping, however, became a uniquely American contribution to the world of desserts.
The rise of the lemon meringue pie’s popularity can be partly attributed to the burgeoning American food industry. The introduction of efficient ovens and readily available ingredients made baking more accessible to the average household. Recipes began to proliferate in magazines and cookbooks, solidifying the pie’s place in the American culinary landscape. Interestingly, while lemon meringue pie is undeniably associated with American culture, its basic components – lemon curd and meringue – have roots in various culinary traditions across Europe. This fusion of different influences exemplifies the dynamic nature of food history, showcasing how seemingly simple dishes can carry layers of cultural exchange and innovation.
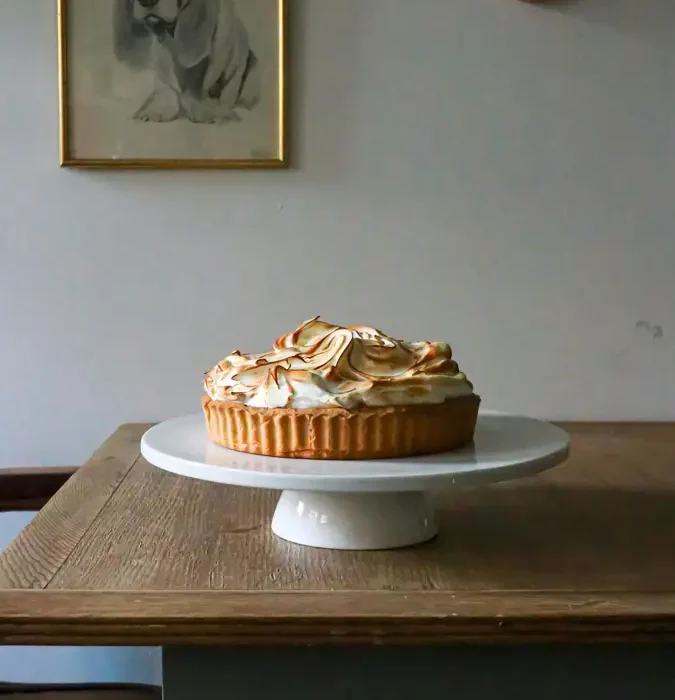
Today, the lemon meringue pie remains a beloved dessert, holding a special place in countless hearts. Surveys consistently rank it among the most popular pies in the United States, often competing with apple and pecan pies for top spots. Its enduring appeal stems from the perfect balance of tartness and sweetness, the satisfying contrast in textures between the creamy filling and the airy meringue, and its visually stunning presentation. The vibrant yellow filling, topped with the snow-white peaks of the meringue, makes it a showstopper at any gathering. Beyond its taste and aesthetics, the lemon meringue pie also holds sentimental value for many, often associated with family gatherings, holidays, and cherished memories. This dessert transcends its simple ingredients, becoming a symbol of comfort, tradition, and the enduring power of classic baking.
Ingredients and Measurements
Creating a perfect Classic Lemon Meringue Pie relies heavily on precise measurements and high-quality ingredients. Don’t be tempted to substitute – each component plays a vital role in achieving the desired texture and flavor profile.
For the Pie Crust:
- 1 ¼ cups (150g) all-purpose flour: Use a good quality flour for a tender crust. Cake flour can also be used for an even more delicate result.
- ½ teaspoon salt: Salt enhances the flavors of the other ingredients. Don’t omit this!
- ½ cup (113g) cold unsalted butter, cut into cubes: Using cold butter is crucial for a flaky crust. Work quickly to prevent the butter from melting.
- ¼ cup (60ml) ice water: Add this gradually, a tablespoon at a time. The dough should be just moist enough to come together. Overworking the dough will result in a tough crust.
For the Lemon Filling:
- 1 ½ cups (300g) granulated sugar: This provides both sweetness and structure to the filling. Adjust to your preference, but keep in mind that less sugar might result in a less stable filling.
- 1/3 cup (80ml) cornstarch: This is the thickening agent for your lemon curd. Ensure you use cornstarch, not flour or arrowroot powder, for the best results.
- 1/4 teaspoon salt: Balances the sweetness and enhances the lemon flavor.
- 1 1/2 cups (355ml) water: Use cold water to prevent lumps when whisking in the cornstarch.
- 1 cup (240ml) freshly squeezed lemon juice: Use freshly squeezed lemon juice for the best flavor. Bottled juice often lacks the vibrancy and acidity of freshly squeezed juice. About 4-5 large lemons should suffice.
- 4 large egg yolks: The egg yolks add richness and creaminess to the filling. Use room temperature egg yolks for better emulsification.
- 4 tablespoons (60g) unsalted butter, cut into cubes: Adds richness and shine to the filling. Add the butter after removing the filling from the heat. Stir until completely melted and incorporated.
- 2 tablespoons lemon zest: This adds a beautiful aromatic layer to the filling. Use a microplane or fine grater to obtain the finest zest.
For the Meringue:
- 4 large egg whites: Ensure your egg whites are at room temperature and completely free of any yolk. Even a tiny bit of yolk can prevent the meringue from whipping properly.
- ½ teaspoon cream of tartar: This helps stabilize the meringue and prevents it from collapsing. Do not substitute this ingredient.
- ¾ cup (150g) granulated sugar: Gradually add this to the egg whites while whipping. This sugar is crucial for the meringue’s structure and sweetness.
Important Note: All measurements are approximate. Adjust according to your preference and the size of your pie dish. Using a kitchen scale for measuring ingredients, especially the flour and sugar, will ensure the most consistent results.
Crust Preparation
Making a perfect pie crust is the foundation of a truly exceptional lemon meringue pie. This section details the process of creating a buttery, flaky crust from scratch. While store-bought crusts are convenient, a homemade crust adds a level of depth and flavor that significantly elevates the entire dessert. We will be making a classic 9-inch double-crust pie.
Ingredients:
- 2 1/2 cups (300g) all-purpose flour
- 1 tsp salt
- 1 cup (2 sticks, 227g) unsalted butter, very cold and cut into small cubes
- 1/2 cup (120ml) ice water
Instructions:
Step 1: Whisk Dry Ingredients: In a large bowl, whisk together the flour and salt. This ensures even distribution of salt throughout the dough, preventing pockets of intense saltiness. Thoroughly whisking is crucial for a consistent crust texture.
Step 2: Cut in the Butter: Add the very cold, cubed butter to the flour mixture. Using a pastry blender or your fingertips (keeping them as cold as possible), cut the butter into the flour until the mixture resembles coarse crumbs. Avoid overmixing at this stage. The goal is to have pea-sized pieces of butter remaining; these will create the flaky layers in your crust.
Step 3: Add Ice Water Gradually: Slowly add the ice water, a tablespoon at a time, mixing gently with a fork. Do not add all the water at once. The dough should come together, but it should still be slightly crumbly. Add just enough water to bind the ingredients. Overworking the dough will result in a tough crust.
Step 4: Form the Dough: Gently gather the dough into a ball. It’s important not to knead the dough; simply bring it together. Kneading will develop the gluten in the flour, resulting in a tough crust. Divide the dough in half, flatten each half into a disc, wrap in plastic wrap, and refrigerate for at least 30 minutes. This chilling period allows the gluten to relax and the butter to firm up, preventing shrinkage during baking.
Step 5: Roll Out the Dough: On a lightly floured surface, roll out one disc of dough into a 12-inch circle. Use gentle, even pressure to prevent tearing. Carefully transfer the dough to a 9-inch pie plate. Trim and crimp the edges as desired. Repeat with the second disc of dough for the top crust, or use it to create decorative cutouts.
Professional Tip: For an extra-flaky crust, consider using a combination of all-purpose flour and pastry flour. Pastry flour has a lower protein content, resulting in a more tender crust.
Professional Tip: Blind baking the crust (baking it partially before adding the filling) helps prevent a soggy bottom. To blind bake, line the crust with parchment paper and fill with pie weights or dried beans. Bake at 375°F (190°C) for 15-20 minutes, then remove the weights and parchment and bake for another 5-7 minutes.
Lemon Filling Preparation
Creating the perfect lemon filling is crucial for a truly exceptional lemon meringue pie. This section details the process, emphasizing techniques for achieving a smooth, tangy, and not-too-sweet filling that perfectly balances the sweetness of the meringue.
Ingredients:
- 1 1/2 cups granulated sugar
- 1/4 cup cornstarch
- 1/4 teaspoon salt
- 1 1/2 cups water
- 1/2 cup freshly squeezed lemon juice (approximately 3-4 large lemons)
- 4 large egg yolks
- 4 tablespoons (1/2 stick) unsalted butter, cut into small pieces
- 1 tablespoon lemon zest (optional, but highly recommended for enhanced lemon flavor)
Instructions:
Begin by whisking together the sugar, cornstarch, and salt in a medium-sized saucepan. This ensures that the cornstarch is evenly distributed and prevents lumps from forming in the final filling. Thoroughly whisking the dry ingredients is a key step to avoid a gritty texture.
Gradually whisk in the water until a smooth paste forms. This step prevents lumps from forming when you add the hot liquid later. Avoid creating clumps by adding the water slowly and continuously whisking.
Place the saucepan over medium heat, and bring the mixture to a simmer, stirring constantly with a whisk. This prevents the mixture from scorching or sticking to the bottom of the pan. Continuous stirring is essential during this stage. The mixture will thicken as it simmers. Continue to cook and stir for 1-2 minutes, or until the mixture has thickened enough to coat the back of a spoon.
In a separate bowl, lightly whisk the egg yolks. Do not over-whisk the egg yolks, as this can incorporate too much air and lead to a curdled filling. Slowly temper the hot cornstarch mixture into the egg yolks by adding a small amount of the hot mixture to the yolks, whisking constantly to prevent the eggs from scrambling. Gradually add the remaining hot mixture, whisking continuously until fully incorporated.
Return the mixture to the saucepan and cook for another minute, stirring constantly, to ensure the eggs are fully cooked. This step helps to prevent a runny filling. Cook until the mixture registers 170°F (77°C) on a candy thermometer. This ensures the eggs are fully cooked and the filling is safe to eat.
Remove the saucepan from the heat and stir in the lemon juice, lemon zest (if using), and butter. Stir until the butter is completely melted and the filling is smooth and glossy. The butter adds richness and a lovely sheen to the filling.
Pour the lemon filling through a fine-mesh sieve into a bowl to remove any lumps or bits of zest. This ensures a perfectly smooth and luxurious texture. Strain the filling for a truly elegant finish. Allow the filling to cool completely before pouring it into the pre-baked pie crust. Cover the surface of the filling with plastic wrap to prevent a skin from forming while it cools.
Meringue Preparation
Creating a perfect meringue is crucial for a classic lemon meringue pie. A glossy, stiff, and stable meringue not only adds visual appeal but also contributes significantly to the pie’s overall texture and flavor. This section will guide you through the process, ensuring your meringue is a stunning success.
Begin with impeccably clean equipment. Even a trace of fat or yolk in your bowl can prevent the egg whites from whipping properly. Wipe your mixing bowl and whisk with a clean, damp cloth and ensure they’re completely dry before starting. This is paramount for achieving maximum volume.
Separate 4 large egg whites into a large, clean, and dry mixing bowl. Make sure no yolk contaminates the whites; even a tiny speck can inhibit whipping. If you accidentally get yolk in, use a clean spoon to carefully remove it. It’s easier to start again with fresh eggs than try to salvage a compromised meringue.
Once the egg whites are separated, let them sit at room temperature for about 30 minutes. Room temperature egg whites whip up to a greater volume and create a more stable meringue. Cold egg whites will struggle to reach their full potential.
Begin whipping the egg whites with an electric mixer on medium speed. Gradually increase the speed to high as the whites begin to foam. You’ll notice the whites go through several stages: soft peaks, stiff peaks, and then glossy, stiff peaks. The goal is to achieve stiff, glossy peaks that hold their shape when you lift the whisk.
Once the egg whites are in stiff peaks, gradually add 6 tablespoons of granulated sugar, one tablespoon at a time, while the mixer is running on medium-high speed. This slow addition ensures the sugar dissolves completely, creating a smooth, glossy meringue. Don’t add the sugar too quickly; this could result in a grainy texture.
Continue beating until the meringue is very glossy, smooth, and holds stiff peaks. The meringue should be stiff enough to hold its shape and not droop when you lift the whisk. This usually takes another 2-3 minutes after adding all the sugar.
For added stability and a subtle sweetness, you can add 1 teaspoon of cornstarch to the meringue along with the sugar. The cornstarch helps prevent weeping and creates a slightly more resistant meringue. Mix it in with the sugar.
Once the meringue is ready, it’s important to use it immediately. Over-whipping can lead to a dry, crumbly meringue. Use a spatula to gently fold the meringue onto the lemon filling, ensuring not to deflate the mixture. Bake according to your pie recipe instructions.
Proper meringue preparation is key to a successful lemon meringue pie. Follow these steps carefully, and you’ll be rewarded with a delightful, visually stunning, and delicious meringue topping.
Baking the Pie
With your perfectly prepped pie crust and vibrant lemon filling nestled inside, it’s time for the baking magic to begin! This stage requires careful attention to detail to ensure a beautifully set filling and a delicately browned meringue. Preheat your oven to 375°F (190°C). This is crucial for achieving the right texture in both the filling and the meringue.
Carefully place your filled pie crust onto a baking sheet. This protects your oven from spills and makes it easier to handle the hot pie later. A rimmed baking sheet is ideal. Avoid placing the pie directly on the oven rack as this can lead to uneven baking.
Bake the pie for 15 minutes. After 15 minutes, reduce the oven temperature to 350°F (175°C). This lower temperature prevents the crust from burning while ensuring the filling sets properly. Continue baking for another 20-25 minutes, or until the filling is set around the edges and the center is just slightly jiggly. The center will firm up further as it cools.
Testing for doneness is crucial. Gently shake the pie; if the filling is still very wobbly, it needs more time. If the crust is browning too quickly, loosely tent it with aluminum foil to prevent over-browning. Overbaking can lead to a dry crust and a rubbery filling, so it’s better to slightly underbake than overbake.
Once the pie is baked to your satisfaction, carefully remove it from the oven and let it cool completely on a wire rack. Cooling the pie completely is essential before adding the meringue. A hot pie will cause the meringue to weep and become runny. Allow at least 2-3 hours for complete cooling. If you’re short on time, you can speed up the cooling process slightly by placing the pie in the refrigerator after about an hour of cooling at room temperature.
While the pie is cooling, prepare your meringue (recipe instructions should be provided separately). Once the pie is completely cool, carefully spread the meringue evenly over the top of the filling, sealing the edges to prevent shrinkage. You can use a piping bag for a decorative finish, or simply spread it smoothly with a spatula.
For a beautifully browned meringue, use a kitchen torch. Carefully pass the torch over the meringue, ensuring even browning. Alternatively, you can broil the pie for 1-2 minutes, keeping a close eye to avoid burning. Watch carefully during broiling as meringues can burn quickly. Remove from the oven immediately once the desired browning is achieved.
Finally, let the pie cool completely again before serving. Refrigerate for at least 30 minutes to allow the flavors to meld and the meringue to fully set. This step enhances the overall taste and texture of the pie. Serve chilled and enjoy your homemade lemon meringue pie!
Cooling and Setting
The cooling and setting process is crucial for a perfect Lemon Meringue Pie. Rushing this stage can lead to a collapsed meringue or a runny filling. Patience is key!
Once your assembled pie has finished baking (approximately 15-20 minutes, or until the meringue is lightly golden brown and the filling is set around the edges), carefully remove it from the oven. Do not open the oven door for at least the first 10 minutes of baking to prevent the meringue from deflating. The residual heat will continue to cook the filling and set the meringue.
Let the pie cool completely on a wire rack. This is essential for two reasons: firstly, it allows the filling to fully set and thicken. The lemon curd will continue to firm up as it cools, becoming less liquid and more stable. Secondly, cooling the pie on a wire rack prevents the bottom crust from becoming soggy by allowing air circulation underneath.
Allow the pie to cool completely at room temperature for at least 2 hours, preferably 3-4 hours. This slow cooling prevents drastic temperature changes that can cause cracking in the meringue. Resist the temptation to speed up the process by placing the pie in the refrigerator prematurely; this can lead to condensation forming on the meringue, making it soggy and less appealing.
After the pie has cooled completely at room temperature, you can gently transfer it to the refrigerator. Refrigerate the pie for at least 4 hours, or ideally overnight, to allow the filling to set completely and the flavors to meld. This extended chilling period enhances the overall taste and texture.
Avoid placing the pie directly on a cold surface, such as a cold marble countertop or a refrigerator shelf, as this can cause thermal shock and lead to cracking. Using a wire rack placed inside the refrigerator can help maintain even cooling and prevent temperature fluctuations.
Once the pie has chilled thoroughly, you’ll notice that the filling has significantly thickened and the meringue has a firm, glossy texture. If the meringue appears slightly cracked, this is perfectly normal and usually doesn’t affect the taste or the structural integrity of the pie. However, avoid excessive cracking, which might indicate the meringue was over-baked or cooled too quickly.
Before serving, carefully remove the pie from the refrigerator and allow it to sit at room temperature for about 15-20 minutes to soften slightly. This will make it easier to slice and serve, and it will enhance the flavor profile of the lemon curd.
Following these cooling and setting guidelines will guarantee a beautifully set, delicious Lemon Meringue Pie that’s both visually appealing and incredibly tasty. Enjoy!
Recommendations for Your Classic Lemon Meringue Pie
To achieve the perfect Classic Lemon Meringue Pie, several key recommendations should be followed. Ensure your eggs are at room temperature for optimal meringue volume and stability. This allows for better whipping and a smoother, glossier finish. Don’t rush the meringue-making process; slowly adding sugar while whipping ensures a stiff, glossy peak that holds its shape beautifully.
Proper baking is crucial. Start with a pre-baked crust to prevent a soggy bottom. Bake the pie at a moderate temperature to ensure even cooking and prevent the meringue from browning too quickly. Keep a close eye on it during the last few minutes to avoid over-baking, which can lead to a cracked meringue or a dry filling. A slight golden brown on the meringue is ideal.
For the filling, use fresh lemon juice for the brightest, most vibrant flavor. If using bottled juice, ensure it’s high quality. The balance of lemon juice, sugar, and cornstarch is critical; adjust to your preference, but be mindful that too much cornstarch will result in a thick, gluey filling, while too little will leave it runny. Taste the filling before adding it to the crust to ensure the sweetness and tartness are balanced to your liking.
Serving Suggestions: This pie is best served chilled. Allow it to cool completely at room temperature before refrigerating for at least 4 hours, or preferably overnight. This allows the flavors to meld and the filling to set properly. Serve slices on chilled plates, garnished with a dusting of powdered sugar or a sprig of fresh mint for an elegant touch. Consider serving individual portions in small dessert dishes for a more sophisticated presentation.
Storage: Store leftover pie, tightly covered, in the refrigerator for up to 3 days. The meringue may become slightly softer over time, but the filling should remain delicious. Avoid freezing this pie as the texture of both the meringue and filling will likely be compromised upon thawing.
Complementary Dishes: A classic lemon meringue pie pairs beautifully with dishes that offer a contrast in flavor and texture. Consider serving it alongside a scoop of vanilla ice cream, a dollop of whipped cream, or a light and refreshing fruit salad. It also complements dishes with a slightly savory note, such as grilled chicken or salmon. A simple green salad with a light vinaigrette would also make a delightful accompaniment.
Nutritional Information (Approximate per slice, based on a 8-slice pie): Calories: 350-400, Fat: 18-22g, Saturated Fat: 10-12g, Cholesterol: 80-100mg, Sodium: 150-200mg, Carbohydrates: 45-55g, Sugar: 30-40g, Protein: 4-6g. Note: Nutritional information varies depending on the specific ingredients used and portion size. These values are estimates and should be considered approximate.
Enjoy your homemade Classic Lemon Meringue Pie! Remember that slight variations in taste and texture are part of the charm of homemade baking. Don’t be afraid to experiment and make this recipe your own.