Raspberries, with their vibrant ruby hue and intensely sweet-tart flavor, have captivated palates for centuries. Their journey from wild hedgerows to sophisticated desserts is a testament to their enduring appeal. While pinpointing the exact origin of raspberry sorbet is difficult, its lineage is undeniably tied to the ancient art of creating frozen desserts. The earliest forms of sorbet likely originated in the Middle East, possibly Persia, as early as the 13th century, with mixtures of snow or ice combined with fruit and sweeteners. These early iterations, while not precisely sorbet as we know it, laid the groundwork for the frozen delights that would later sweep across Europe.
The evolution of sorbet into the refined treat we enjoy today saw significant advancements in Europe during the Renaissance. Catherine de’ Medici, the Italian queen consort of France, is credited with introducing many Italian culinary traditions to the French court in the 16th century, and frozen desserts were undoubtedly among them. The refinement of ice-making techniques and the wider availability of sugar further propelled the popularity of sorbet, transforming it from a simple frozen treat to a sophisticated dessert enjoyed by the aristocracy. By the 17th and 18th centuries, sorbet had become a staple in French cuisine, its elegant presentation and refreshing taste making it a centerpiece at grand feasts and celebrations.
Today, raspberry sorbet holds a special place in global cuisine. Its popularity is undeniable, evidenced by the staggering amount of raspberry production worldwide – exceeding millions of tons annually, a substantial portion of which is used in the production of various desserts, including sorbet. The simplicity of its ingredients – essentially raspberries, sugar, and water – belies its complex and refreshing flavor profile. Its versatility is also notable; it can be served as a palate cleanser between courses, a delightful dessert on its own, or even incorporated into cocktails and other culinary creations. Beyond its culinary significance, raspberry sorbet embodies a connection to the seasonality of fruits, highlighting the delicate balance between nature’s bounty and human ingenuity. This recipe will guide you through the process of crafting your own batch of this refreshing and classic dessert.
Ingredients and Measurements
Creating a truly exceptional raspberry sorbet hinges on the quality and precise measurement of your ingredients. Don’t skimp on the raspberries – the flavor is paramount! We’ll be using fresh raspberries for the best possible taste and vibrant color, but high-quality frozen raspberries can be substituted in a pinch. Just ensure they’re completely thawed and drained before proceeding.
For this recipe, we’ll be making approximately 1 quart (about 1 liter) of sorbet. Adjust the quantities proportionally if you need a larger or smaller batch. Accurate measurements are crucial for achieving the right consistency and sweetness. Use a kitchen scale for the most precise results, especially when measuring sugar and water.
Here’s a detailed breakdown of the ingredients and their quantities:
- Raspberries: 2 cups (250g) fresh raspberries. Choose raspberries that are ripe but firm. Overripe raspberries can result in a watery sorbet. If using frozen raspberries, thaw them completely and drain off any excess liquid before using. This is vital to prevent a thin, icy texture.
- Sugar: ¾ cup (150g) granulated sugar. The amount of sugar can be adjusted to your preference. If you prefer a less sweet sorbet, start with ½ cup (100g) and add more to taste after the sorbet is partially frozen. Using caster sugar can result in a smoother texture, as it dissolves more readily.
- Water: ½ cup (120ml) water. This water is essential for creating a syrup that dissolves the sugar and helps to create a smoother texture. Using filtered or spring water will result in a cleaner flavor. Tap water might impart undesirable tastes depending on your water source.
- Lemon Juice: 2 tablespoons (30ml) fresh lemon juice. The lemon juice adds a touch of acidity, balancing the sweetness of the raspberries and preventing the sorbet from becoming too cloying. It also enhances the overall flavor profile and helps prevent ice crystal formation.
- Optional: 1 tablespoon (15ml) Raspberry Liqueur (e.g., Chambord). This is entirely optional, but a tablespoon of raspberry liqueur can add depth and complexity to the flavor. If using alcohol, ensure it’s high-quality and complements the raspberry flavor. Remember that the alcohol content will slightly affect the freezing point.
Pro Tip: For the best results, use a high-quality kitchen scale to ensure accurate measurements of the sugar and water. This is especially important for achieving the perfect balance of sweetness and texture in your sorbet. Also, remember that variations in the sweetness and tartness of your raspberries might require minor adjustments to the sugar and lemon juice quantities. Taste as you go and adjust accordingly!
Equipment List
Making raspberry sorbet, while seemingly simple, requires the right tools to achieve a smooth, icy texture and avoid frustrating setbacks. This equipment list details the necessities, along with recommendations for optimal results and alternatives where applicable.
1. Food Processor or High-Powered Blender: This is arguably the most crucial piece of equipment. You’ll need a powerful motor to thoroughly puree the raspberries, ensuring a completely smooth base for your sorbet. A food processor, with its larger capacity and ability to handle more solid ingredients, is generally preferred for larger batches. However, a high-powered blender (at least 1000 watts) will suffice for smaller quantities. Avoid using a standard blender as it may struggle with the fibrous nature of raspberries and might not produce the desired smooth consistency.
2. Fine-Mesh Sieve or Strainer: While not strictly mandatory, using a fine-mesh sieve is highly recommended. This step helps remove seeds and any remaining small pieces of raspberry pulp, resulting in a significantly smoother and more luxurious sorbet. A fine-mesh sieve is preferable to a standard strainer for its ability to capture even the smallest particles. If omitting this step, be prepared for a slightly more textured sorbet.
3. Medium-Sized Saucepan (2-quart capacity): This is necessary for gently heating the sugar syrup. A saucepan with a heavy base is best to prevent scorching and ensure even heat distribution. Avoid using a non-stick saucepan for this purpose, as the high heat and sugar can potentially damage the non-stick coating over time.
4. Measuring Cups and Spoons: Accurate measurements are crucial for achieving the desired sweetness and consistency. Invest in a good set of measuring cups and spoons, preferably those made of stainless steel for durability and easy cleaning. Use dry measuring cups for dry ingredients (sugar) and liquid measuring cups for liquid ingredients (water).
5. Rubber Spatula or Whisk: A rubber spatula is useful for scraping down the sides of the food processor or blender to ensure all ingredients are blended thoroughly. A whisk is helpful for stirring the sugar syrup while it’s heating to prevent sticking and burning. Both are invaluable tools in the kitchen, and their combined use ensures a smooth and even process.
6. Airtight Freezer-Safe Container: Once your sorbet is made, you need a suitable container for freezing. Choose an airtight container to prevent freezer burn and maintain the quality of your sorbet. The container should be freezer-safe to withstand the low temperatures. Consider using a shallow, wide container for faster freezing and easier scooping later on.
7. Ice Cream Scoop or Fork: For serving, an ice cream scoop is ideal for scooping out perfectly sized portions of your frozen sorbet. If you don’t have an ice cream scoop, a sturdy fork will work, though it may require a little more effort and may not produce as neat a serving.
Optional, but Recommended: A candy thermometer for precise sugar syrup temperature control. While not strictly necessary, a thermometer ensures you achieve the correct sugar syrup consistency, leading to a superior sorbet texture.
Preparation of Raspberries (Washing, Hulling)
Before you begin making your raspberry sorbet, meticulous preparation of the raspberries is crucial for achieving the best possible flavor and texture. This involves careful washing and hulling to remove any debris and unwanted stems.
Start with 1 pound (450g) of fresh, ripe raspberries. The quality of your raspberries directly impacts the final taste of your sorbet, so choose berries that are plump, firm, and deeply colored. Avoid using raspberries that are bruised, moldy, or overripe, as these can impart an unpleasant flavor.
Gently rinse the raspberries under cool, running water. Avoid using hot water, as this can damage the delicate berries and cause them to release excess juice prematurely. A gentle stream of water is sufficient to remove any surface dirt or pesticide residue. You can use a colander to support the raspberries during this process, making it easier to manage and prevent them from being crushed.
Once rinsed, carefully inspect each raspberry. Remove any berries that show signs of damage or spoilage. Discard these immediately to maintain the high quality of your sorbet. Don’t be tempted to keep questionable berries – even a small amount of spoiled fruit can ruin the entire batch.
Now comes the hulling process. Raspberries are notoriously difficult to hull, but taking your time and using the right technique will save you frustration. There are several methods you can use, depending on your preference and the tools you have available:
Method 1: Manual Hulling: This is the most common and often the most effective method. Gently grasp each raspberry between your thumb and forefinger, and carefully pull off the green cap (the hull). This may take some time, especially with a large quantity of raspberries, but it ensures that you don’t crush the berries. Be patient and work methodically.
Method 2: Fork Hulling: For a slightly faster approach, you can use a fork. Insert the tines of the fork into the hull and gently twist. This method can be a bit more aggressive, so be careful not to damage the berry itself. Use a light touch to prevent crushing.
Method 3: Hulling Tool: For larger quantities or if you make sorbet frequently, consider investing in a dedicated raspberry hulling tool. These tools are designed to quickly and efficiently remove the hulls with minimal damage to the berries. They can significantly speed up the process.
Once all the raspberries are hulled, inspect them one last time to ensure that no hulls remain. Any remaining hulls can add a bitter taste to your finished sorbet. After hulling, you’re ready to proceed with the next step in your raspberry sorbet recipe.
Remember, the key to successful raspberry sorbet preparation lies in taking your time and handling the raspberries with care. Thorough washing and meticulous hulling are essential for a superior final product. By following these steps, you’ll ensure that your homemade raspberry sorbet is both delicious and visually appealing.
Making the Raspberry Syrup (Simmering, Straining)
This section details the crucial step of creating the raspberry syrup, the foundation of your delicious raspberry sorbet. Accurate measurements and gentle handling are key to achieving a vibrant and flavorful syrup.
Begin by gathering your ingredients: 2 cups of fresh raspberries (about 250g), 1 cup (200g) of granulated sugar, and ½ cup (120ml) of water. The quality of your raspberries significantly impacts the final taste of your sorbet, so opt for ripe, but not overripe, berries. Overripe raspberries can lead to a slightly fermented taste in the finished product.
Combine the sugar and water in a medium-sized saucepan over medium heat. Stir gently until the sugar is completely dissolved. Do not rush this process; ensure the sugar is fully dissolved before proceeding to avoid a grainy texture in your syrup. You’ll know it’s dissolved when the mixture is clear and there are no visible sugar crystals.
Once the sugar is dissolved, add the raspberries to the saucepan. Gently stir to combine the berries with the sugar syrup. Bring the mixture to a simmer, stirring occasionally to prevent sticking. Avoid a rolling boil; a gentle simmer is sufficient to extract the maximum flavor and color from the raspberries. A rolling boil can scorch the berries and lead to a bitter taste.
Simmer the mixture for approximately 10-15 minutes, or until the raspberries have softened and released their juices. You’ll notice a significant change in the consistency and color of the mixture as the raspberries break down. The syrup will thicken slightly and take on a deep, rich raspberry hue.
Now comes the straining process, essential for achieving a smooth and elegant sorbet. Remove the saucepan from the heat and let the mixture cool slightly. Line a fine-mesh sieve or cheesecloth over a bowl. Use a rubber spatula or spoon to gently press the raspberry mixture through the sieve, separating the seeds and pulp from the syrup. This step is important to avoid a gritty texture in your sorbet. Discard the remaining seeds and pulp.
Once strained, you’ll have a beautiful, vibrant raspberry syrup. Allow the syrup to cool completely before proceeding to the next stage of sorbet preparation. This ensures that the syrup is properly incorporated into the sorbet base and prevents the formation of ice crystals. Cover the cooled syrup and refrigerate until you are ready to use it to make your raspberry sorbet.
Professional Tip: For an even richer raspberry flavor, you can add a teaspoon of raspberry liqueur to your syrup after straining. This is optional, but it adds a lovely depth of flavor.
Freezing Process (Churning, Texture Considerations)
The freezing process for raspberry sorbet is crucial for achieving the desired smooth, icy texture. Unlike ice cream, which relies on fat for creaminess, sorbet relies entirely on the careful control of ice crystal formation during freezing. This is where the churning process comes in.
Churning is essential to prevent the formation of large ice crystals, which would result in a coarse, icy texture. The process involves constantly agitating the raspberry mixture as it freezes, breaking up the forming ice crystals into smaller, less noticeable ones. This creates a smoother, more refined final product.
For optimal results, use an ice cream maker designed for sorbet. These machines typically have a built-in cooling system and a paddle that constantly stirs the mixture. If you don’t have an ice cream maker, you can achieve a reasonable result using a freezer-safe container and a lot of manual labor. However, the texture won’t be as smooth.
Before churning, ensure your raspberry mixture is completely chilled. This is important because a cold mixture will freeze more evenly and prevent large ice crystals from forming. Chill the mixture in the refrigerator for at least 2 hours, or even overnight for best results. The colder it is, the better.
Pour the chilled raspberry mixture into your ice cream maker following the manufacturer’s instructions. The exact churning time will vary depending on your machine, but it typically ranges from 20 to 40 minutes. As the sorbet freezes, you’ll notice it gradually thicken. Pay close attention to the consistency; you want it to be thick enough to hold its shape but still scoopable.
Texture considerations are paramount. Over-churning can lead to a grainy texture, while under-churning results in large ice crystals. The ideal sorbet should have a smooth, almost silky texture with a refreshing icy bite. If your machine allows it, adjust the churning speed if needed to fine-tune the texture during the process. Experimentation is key!
Once the sorbet is churned, it will still be quite soft. For a firmer texture, transfer the sorbet to a freezer-safe container and freeze it for at least another 2-3 hours, or even overnight. This allows the sorbet to fully harden without further crystal formation. Avoid over-freezing, as this can make the sorbet too hard to scoop.
To prevent ice crystals from forming on the surface, you can cover the sorbet with a layer of plastic wrap pressed directly onto the surface before placing the lid on the container. This minimizes air contact and reduces the risk of freezer burn. Proper storage is crucial for maintaining the quality and texture of your raspberry sorbet.
Remember, the perfect texture is a matter of personal preference. Some people prefer a slightly icier sorbet, while others prefer a creamier consistency. Don’t be afraid to experiment and adjust the freezing time and churning process to achieve your ideal sorbet texture. Enjoy the process and the incredibly delicious results!
Storage Recommendations
Proper storage is crucial for maintaining the quality and deliciousness of your homemade raspberry sorbet. Improper storage can lead to ice crystal formation, flavor degradation, and even bacterial growth. Following these recommendations will ensure your sorbet remains at its best for as long as possible.
Immediate Storage Post-Making: Once your raspberry sorbet is churned and has reached a soft-serve consistency, it’s vital to transfer it to an airtight container. We recommend using a high-quality freezer-safe container with a tight-fitting lid. This prevents freezer burn, which can drastically affect the texture and flavor of your sorbet. A 2-quart container is ideal for a typical batch recipe.
Freezing Process: Before placing the container in the freezer, press a sheet of plastic wrap directly onto the surface of the sorbet. This creates a barrier against air and ice crystals. Then, secure the lid tightly. This double-layer protection is key to maintaining a smooth, creamy texture. Avoid filling the container completely to the brim; leave about half an inch of headspace to account for expansion during freezing.
Freezing Temperature and Duration: The optimal freezing temperature for sorbet is 0°F (-18°C). Ensure your freezer is set to this temperature for consistent results. Your raspberry sorbet should be frozen for at least 4-6 hours to allow for complete solidification. However, for optimal texture, it’s best to freeze it for at least 8 hours, or even overnight. This longer freezing time allows the ice crystals to form slowly, resulting in a smoother, less icy texture.
Thawing and Serving: When ready to serve, remove the sorbet from the freezer 15-20 minutes before scooping. This allows it to soften slightly, making scooping easier and more enjoyable. If you find it too hard to scoop even after 20 minutes, you can briefly microwave the container in 10-second intervals, stirring gently after each interval, until it reaches your desired consistency. Avoid over-thawing, as this can lead to a watery texture.
Long-Term Storage: Properly stored, your raspberry sorbet can last for up to 2-3 months in the freezer. However, the quality may start to decline after two months. Always check for any signs of freezer burn (dry, discolored patches) before consuming. If you notice any freezer burn, it’s best to discard that portion. Remember to always label the container with the date of freezing for easy reference.
Important Note: While freezing preserves the sorbet, it doesn’t sterilize it. If you have any concerns about food safety, especially if the sorbet has been partially thawed and refrozen, it is best to err on the side of caution and discard it.
Recommendations for Your Raspberry Sorbet
To achieve the best possible raspberry sorbet, consider these recommendations. Start with high-quality raspberries. The flavor of your sorbet is entirely dependent on the fruit, so invest in fresh, ripe, and flavorful raspberries. If using frozen raspberries, ensure they are of good quality and haven’t been subjected to excessive freezing and thawing cycles. This will significantly impact the texture and overall taste of your final product.
Adjust sweetness to your preference. The recipe provides a guideline for sugar, but individual tastes vary. If you prefer a less sweet sorbet, reduce the sugar quantity slightly. Conversely, if you have particularly tart raspberries, you might need to add a little more sugar to balance the acidity. Taste the mixture before freezing to ensure the sweetness level is to your liking. You can also experiment with different types of sweeteners, such as agave nectar or honey, for a unique flavor profile.
For a smoother sorbet, use a high-quality ice cream maker. While you can make sorbet without a machine, an ice cream maker will guarantee a smoother, creamier texture with fewer ice crystals. If you don’t have a machine, be sure to churn the mixture frequently during the freezing process to break up ice crystals and prevent a grainy texture. Remember to follow the manufacturer’s instructions for your specific machine.
Consider adding other ingredients for enhanced flavor. A splash of lemon juice can brighten the raspberry flavor and add a touch of tartness. A small amount of liqueur, such as raspberry liqueur or Grand Marnier, can add complexity and depth. You could also experiment with adding a touch of fresh mint or basil for a refreshing twist. Remember to adjust the sweetness accordingly if adding other ingredients.
Serving Suggestions: This delightful sorbet is perfect as a palate cleanser between courses or as a refreshing dessert. Serve it in small bowls or elegant glasses. Garnish with fresh raspberries, a sprig of mint, or a drizzle of white chocolate for an extra touch of elegance. It also makes a fantastic topping for cakes, pies, or even pancakes.
Storage: Store your raspberry sorbet in an airtight container in the freezer for up to two months. Ensure the container is well sealed to prevent freezer burn and maintain the quality of the sorbet. Allow the sorbet to sit at room temperature for a few minutes before serving to soften slightly and make scooping easier.
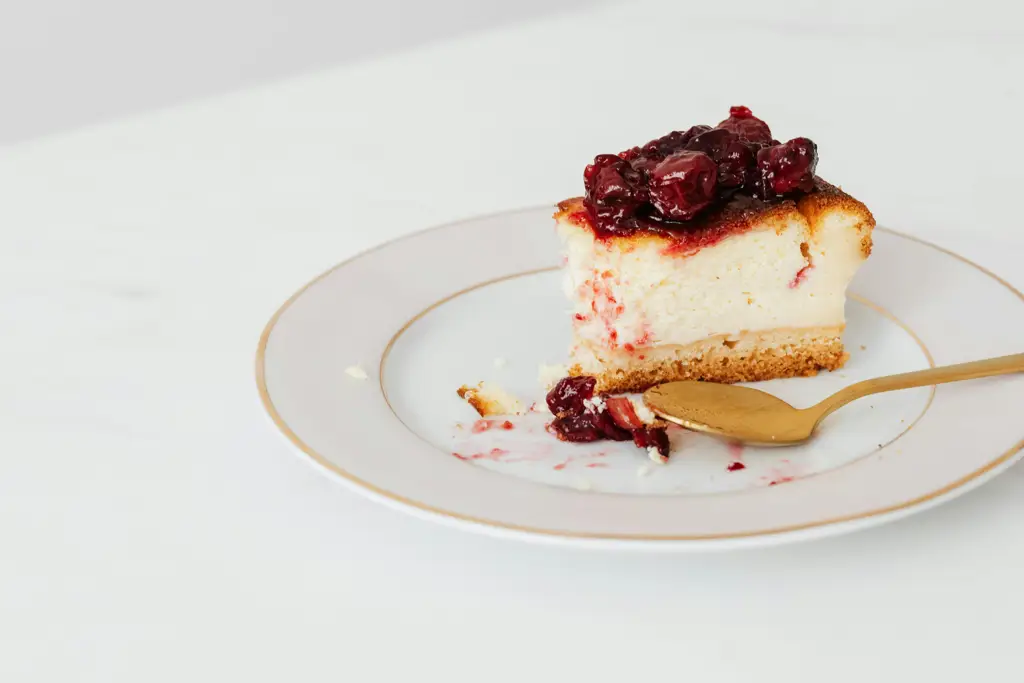
Complementary Dishes: Raspberry sorbet pairs exceptionally well with dishes that have a rich or slightly savory component. It’s a wonderful accompaniment to chocolate cakes, cheesecakes, and other decadent desserts. It also creates a delightful contrast with rich, savory dishes like grilled meats or duck confit. The tartness of the sorbet cleanses the palate and provides a refreshing counterpoint to heavier flavors.
Nutritional Information (per serving, approximate): The exact nutritional content will vary depending on the specific ingredients and quantities used. However, a typical serving of raspberry sorbet will contain approximately 150-200 calories, with a significant portion coming from sugar. It’s a good source of Vitamin C and antioxidants from the raspberries. Please note that this is an estimate and should not be considered a precise nutritional analysis.