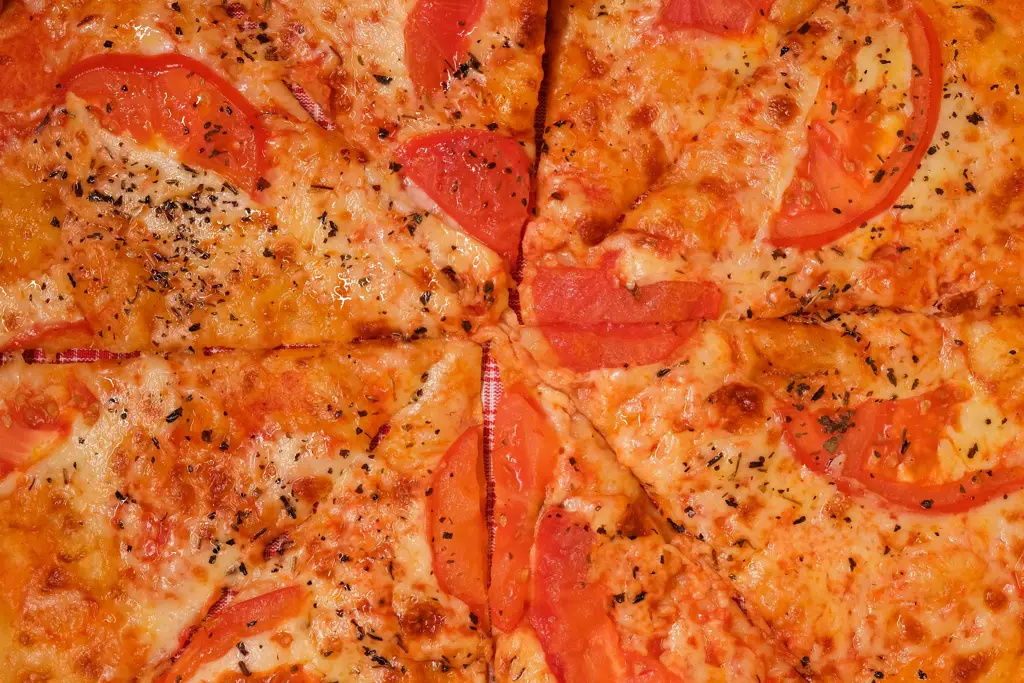
The Margherita pizza, a seemingly simple yet profoundly delicious dish, holds a significant place in culinary history and global culture. Far from being a recent invention, its story stretches back to late 19th-century Naples, Italy. Legend attributes its creation to Raffaele Esposito, a pizza maker in Naples, who in 1889 baked a pizza for Queen Margherita of Savoy. This pizza, designed to showcase the colors of the Italian flag – red tomatoes, white mozzarella, and green basil – became instantly iconic and was named in her honor. This is, however, a contested origin story, as pizza variations existed long before the Queen’s visit. Nevertheless, the Margherita pizza’s association with the Queen solidified its status as a national symbol.
The cultural significance of the Margherita pizza extends far beyond its royal connection. It represents a quintessential expression of Italian culinary heritage, embodying the simplicity and freshness of Mediterranean ingredients. Its popularity transcends national borders; it’s a globally recognized dish, readily available in countless variations across the world. In fact, pizza, in its many forms, is estimated to be a $150 billion global industry, with the Margherita pizza serving as a foundational and highly sought-after variant. This widespread appeal speaks volumes about its enduring charm and deliciousness.
Beyond its commercial success, the Margherita pizza holds a special place in the hearts of millions. It’s a dish that evokes a sense of comfort and familiarity, often associated with family gatherings and casual meals. Its minimalist approach, focusing on high-quality ingredients, emphasizes the importance of fresh, seasonal produce. This simplicity allows the natural flavors of the tomatoes, mozzarella, and basil to shine, creating a harmonious balance of sweetness, saltiness, and herbaceousness. This focus on quality ingredients and a celebration of simple flavors is a key element of its lasting appeal, differentiating it from more elaborate pizza variations.
The recipe for a truly authentic Margherita pizza remains surprisingly straightforward, yet achieving perfection requires a keen understanding of the ingredients and techniques. From selecting ripe, flavorful tomatoes to using high-quality mozzarella di bufala (ideally), every element contributes to the final result. The simplicity of the Margherita pizza is precisely what makes it challenging to master; it leaves no room to hide behind complex flavors or elaborate toppings. This guide will walk you through the process of creating a truly authentic and delicious Margherita pizza, helping you appreciate the art and skill behind this iconic dish.
Ingredients and Measurements
Creating the perfect Margherita pizza hinges on using high-quality ingredients and precise measurements. Don’t be tempted to skimp on quality; it will significantly impact the final taste and texture. This recipe yields two 12-inch pizzas.
For the Pizza Dough:
We’ll start with the dough, the foundation of any great pizza. This recipe uses a simple, yet effective, method that produces a wonderfully chewy crust. You can, of course, use store-bought dough if you’re short on time, but making your own is highly rewarding.
- 1 cup (240ml) warm water (105-115°F): The temperature is crucial. Too cold, and the yeast won’t activate; too hot, and you’ll kill it. Use a thermometer for accuracy.
- 1 teaspoon (4g) sugar: This feeds the yeast, encouraging rapid and even fermentation.
- 2 teaspoons (7g) active dry yeast: Make sure your yeast is fresh. Check the expiration date. If it’s old, it might not work effectively.
- 2 1/2 cups (300g) all-purpose flour, plus more for dusting: Start with the 2 1/2 cups, but be prepared to add a little more, depending on the humidity and your flour. The dough should be slightly tacky but not sticky.
- 1 teaspoon (5g) salt: This balances the sweetness and enhances the flavor of the dough.
- 2 tablespoons (30ml) olive oil: Adds richness and helps create a tender crust.
For the Pizza Sauce:
A simple, fresh tomato sauce is all you need for a classic Margherita. Avoid overly processed sauces; homemade is best, but high-quality store-bought options can be used in a pinch.
- 1 (28 ounce) can crushed tomatoes: Choose high-quality canned tomatoes for the best flavor. Look for brands with minimal added ingredients.
- 1 clove garlic, minced: Fresh garlic adds a wonderful depth of flavor. If you don’t have fresh, you can use about 1/2 teaspoon of garlic powder.
- 1/2 teaspoon dried oregano: A classic pizza herb. Fresh oregano is even better if you have it.
- 1/4 teaspoon salt: Adjust to your taste.
- 1/4 teaspoon black pepper: Freshly ground is always preferred.
- 1 tablespoon olive oil: For sautéing the garlic.
For the Toppings:
Simplicity is key for a Margherita. High-quality ingredients shine through.
- 8 ounces fresh mozzarella cheese, sliced: Fresh mozzarella is essential. Avoid using pre-shredded mozzarella as it contains cellulose which can affect the texture.
- Fresh basil leaves: For garnish. Use about 10-12 large leaves, or more to your liking.
- Extra virgin olive oil: For drizzling after baking.
Important Note: These measurements are guidelines. You might need to adjust them slightly depending on your specific ingredients and preferences. Always taste and adjust seasoning as you go.
Dough Preparation
Making pizza dough from scratch is a rewarding experience, resulting in a superior crust compared to store-bought options. This recipe yields enough dough for two 12-inch pizzas. Begin by activating the yeast, a crucial step for a successful rise.
In a large bowl, combine 1 cup (240ml) of lukewarm water (around 105-115°F; too hot will kill the yeast, too cold will prevent activation) with 1 teaspoon of granulated sugar and 2 teaspoons (7 grams) of active dry yeast. Gently stir to dissolve the sugar and yeast. Let the mixture stand for 5-10 minutes until foamy. If the mixture doesn’t foam, your yeast may be dead, and you’ll need to start again with fresh yeast.
Once the yeast is activated, add 2 1/2 cups (300g) of all-purpose flour to the yeast mixture. Start with the lower amount of flour; you can always add more later. Add 1 teaspoon of salt and 2 tablespoons (30ml) of olive oil. Using a wooden spoon or your hands, begin to mix the ingredients together. The dough will be sticky at this stage.
Now comes the kneading process. Turn the dough out onto a lightly floured surface. Knead for 8-10 minutes, adding more flour (1/4 cup at a time) as needed to prevent sticking. The dough should be smooth and elastic, but still slightly tacky. Don’t over-knead, or the pizza will be tough. The kneading develops the gluten, giving the pizza its characteristic chewy texture.
Once kneaded, place the dough in a lightly oiled bowl, turning to coat. Cover the bowl with plastic wrap and let it rise in a warm place for 1-1.5 hours, or until doubled in size. A warm oven (turned off) is an ideal rising environment. The rising time may vary depending on the ambient temperature; a warmer room will result in a faster rise.
After the first rise, gently punch down the dough to release the air. Divide the dough in half. Shape each half into a ball. You can either use these balls immediately or let them rest, covered, for another 30 minutes before shaping and baking. This second rest allows the gluten to relax, making it easier to stretch the dough without tearing.
Important Note: The success of your pizza hinges on the quality of the dough. Use fresh ingredients and pay close attention to the yeast activation and kneading process. Don’t be afraid to experiment with different flours (like 00 flour for a more authentic Neapolitan pizza) to find your preferred texture.
Sauce Preparation
The success of a Margherita pizza hinges significantly on the quality of its sauce. A simple yet flavorful tomato sauce elevates the entire dish, allowing the fresh mozzarella and basil to shine. This section details how to create a perfect pizza sauce from scratch, ensuring a delicious and authentic Margherita experience.
We’ll begin with 28 ounces (794g) of high-quality canned San Marzano tomatoes. San Marzano tomatoes are renowned for their low acidity and sweet, meaty flavor, making them ideal for pizza sauce. If you can’t find San Marzano, look for another variety with similar characteristics. Avoid using acidic tomatoes, as they can overpower the other ingredients.
Carefully drain the tomatoes, reserving about 1/4 cup of the juice. This juice can be added later if the sauce becomes too thick. Roughly chop the tomatoes into smaller pieces, aiming for a consistency that’s not completely pureed but avoids large chunks. This allows for a textured sauce that’s pleasing to the palate.
In a medium saucepan, heat 2 tablespoons of extra virgin olive oil over medium heat. Once heated, add 3 cloves of minced garlic. Cook for about 30 seconds, or until fragrant, being careful not to burn the garlic, as this will impart a bitter taste. Do not brown the garlic; the goal is to simply release its aroma.
Now, add the chopped tomatoes to the saucepan. Season with 1 teaspoon of dried oregano, 1/2 teaspoon of dried basil, 1/4 teaspoon of red pepper flakes (optional, for a touch of heat), and 1 teaspoon of salt. Adjust the salt to your preference, tasting as you go. Fresh herbs are preferable if available, but dried herbs work well too.
Bring the sauce to a gentle simmer, then reduce the heat to low. Cover the saucepan and let the sauce simmer for at least 30 minutes, or up to an hour. The longer it simmers, the richer and more flavorful the sauce will become. Stir occasionally to prevent sticking. During simmering, the sauce will reduce and thicken. If it becomes too thick, add a tablespoon or two of the reserved tomato juice to adjust the consistency.
Once the sauce has reached your desired consistency and flavor, remove it from the heat. Allow to cool slightly before using. Taste and adjust seasoning as needed. Some prefer a slightly sweeter sauce, while others prefer a more tangy flavor. Adjust the amount of sugar or balsamic vinegar accordingly, if desired.
Important Note: For a smoother sauce, you can blend it using an immersion blender once it has cooled slightly. However, a slightly chunky sauce adds texture and authenticity to a traditional Margherita.
Your homemade pizza sauce is now ready to be used on your delicious Margherita pizza! Enjoy the fruits of your labor.
Topping Preparation
The success of a Margherita pizza hinges not only on the dough and sauce but also on the quality and preparation of its toppings. While seemingly simple, achieving perfectly balanced flavors and textures requires attention to detail.
Let’s start with the tomatoes. For a truly authentic Margherita, use ripe, high-quality San Marzano tomatoes. These tomatoes have a low acidity and a sweet, meaty flavor that complements the mozzarella beautifully. If San Marzanos are unavailable, choose another variety with similar characteristics. Avoid using overly acidic tomatoes, as they can overwhelm the other flavors. For this recipe, we’ll use approximately 100g of San Marzano tomatoes, preferably peeled and roughly chopped. If you’re using canned San Marzanos, drain them well to remove excess liquid before chopping.
Next, we turn to the mozzarella. The type of mozzarella is crucial. Fresh mozzarella di bufala is the traditional choice, offering a creamy texture and a delicate, milky flavor. However, good quality fresh cow’s milk mozzarella is a perfectly acceptable alternative. Aim for a total of 125g of mozzarella. If using a whole ball of mozzarella, gently drain it before tearing it into small pieces. Avoid using pre-shredded mozzarella, as it often contains additives that can affect the texture and melt. The goal is to have uneven, rustic pieces of mozzarella that melt beautifully without becoming stringy.
The final crucial element is the basil. Fresh basil is essential. Avoid using dried basil, as it lacks the vibrant aroma and flavor of the fresh herb. We’ll use approximately 10-12 large basil leaves. Wash the leaves thoroughly and pat them dry. Avoid chopping the basil too finely; larger leaves add visual appeal and their flavor is best appreciated in larger pieces. Adding the basil after baking helps retain its bright green color and fresh taste. Some prefer to tear the leaves rather than chop them.
Preparation Tips for Optimal Results:
- Prepare your toppings in advance: Chop the tomatoes and tear the mozzarella while the dough is proofing to save time during the pizza-making process.
- Control moisture: Excess moisture can lead to a soggy crust. Always drain canned tomatoes well and pat the basil leaves dry. If using fresh mozzarella that’s been in brine, allow it to sit on a paper towel for a few minutes to absorb excess moisture.
- Temperature matters: Cold toppings can lower the oven temperature and hinder proper baking. Allow the toppings to come to room temperature before placing them on the pizza.
- Less is more: Overloading the pizza with toppings will prevent the crust from cooking evenly and will make it soggy. Use the specified quantities, and don’t be afraid to leave some areas of the crust visible.
By following these guidelines, you’ll ensure that your Margherita pizza’s toppings are as delicious and visually appealing as possible. Enjoy!
Pizza Assembly
With your perfectly prepared dough and vibrant sauce ready, it’s time for the most satisfying part: assembling your Margherita pizza. This stage requires precision and a light touch to ensure a delicious and visually appealing final product. Let’s get started!
Begin with the dough: Gently dust your clean work surface with a light coating of flour – about 2 tablespoons should suffice. This prevents sticking and ensures easy handling. Carefully transfer your pizza dough to the floured surface. Using your fingertips, gently stretch and shape the dough into a 12-inch circle. Avoid using a rolling pin, as this can make the crust tough. The goal is a thin, yet slightly puffy crust. If the dough springs back, let it rest for 5-10 minutes before continuing. This allows the gluten to relax.
Prepare your work area: Have your prepared tomato sauce, fresh mozzarella, and fresh basil leaves readily accessible. This will streamline the assembly process and prevent your ingredients from getting cold.
Adding the sauce: Using a spoon, carefully spread a thin and even layer of your tomato sauce across the pizza dough, leaving about a half-inch border. Don’t overload the crust with sauce; this can lead to a soggy bottom. Aim for a consistent, thin layer that covers the entire surface, excluding the edge.
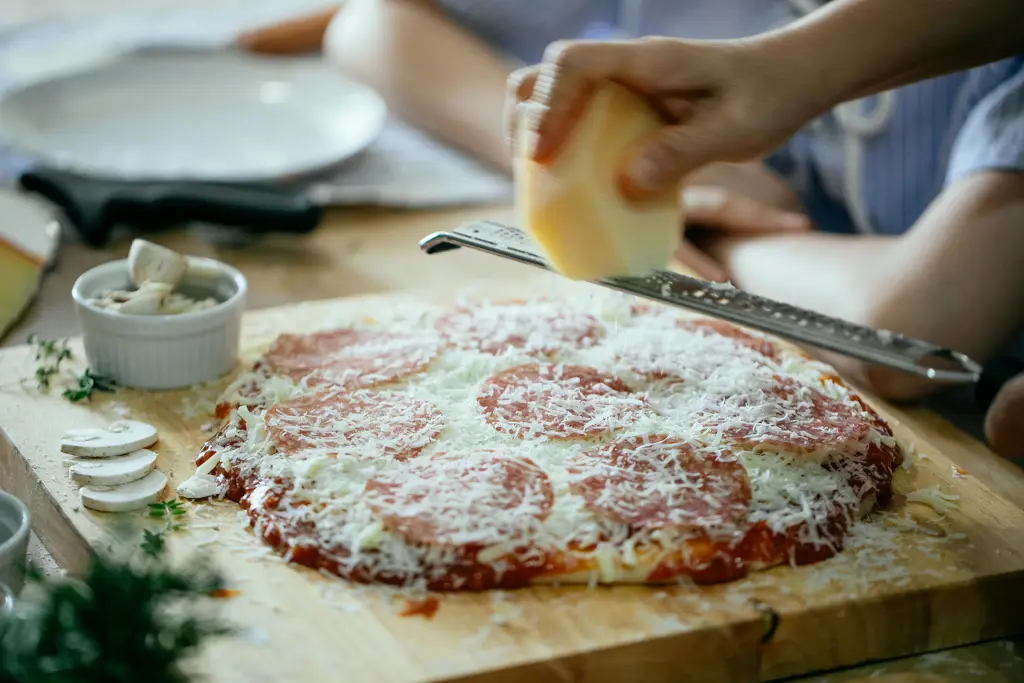
Distributing the mozzarella: Tear the fresh mozzarella into small, bite-sized pieces. Evenly distribute these pieces across the sauced pizza base. Avoid overcrowding the cheese; allow some space between the pieces for even melting and browning. Approximately 8 ounces of fresh mozzarella should be sufficient for a 12-inch pizza.
Seasoning is key: Lightly sprinkle your pizza with sea salt and freshly ground black pepper. A pinch of each is all you need to enhance the flavors. Don’t be heavy-handed; the simplicity of the Margherita pizza relies on the quality of the ingredients, not excessive seasoning.
Adding the basil: Once the cheese is in place, carefully arrange fresh basil leaves over the mozzarella. Use about 10-12 large basil leaves, depending on their size. Their vibrant green color will add a stunning visual contrast and a burst of fresh flavor.
Transferring to the baking sheet: Carefully slide a large, wide spatula or pizza peel underneath the assembled pizza. Gently transfer the pizza from your work surface onto a preheated pizza stone or baking sheet. Ensure the transfer is smooth to prevent tearing the crust. If using a peel, lightly dust it with flour before transferring to avoid sticking.
Final preparations: Now you’re ready to bake your masterpiece! Make sure your oven is preheated to the correct temperature (usually around 450-500°F or 232-260°C). Baking time will vary depending on your oven, but typically ranges from 12-15 minutes. Keep a close eye on your pizza to prevent burning.
Baking the Pizza
Baking your Margherita pizza perfectly requires attention to detail and the right equipment. Preheating your oven is crucial for achieving a crisp crust and evenly cooked toppings. Preheat your oven to its maximum temperature, ideally around 500°F (260°C), for at least 30 minutes. A pizza stone, if you have one, should be placed in the oven while it preheats. This helps to retain heat and create a superior crust.
Once the oven is thoroughly preheated, carefully remove the pizza stone (or baking sheet) using oven mitts. Avoid touching the hot stone directly! Gently slide your prepared pizza onto the preheated pizza stone or baking sheet. If the pizza is too delicate to slide easily, you can use a pizza peel (a long, thin, wooden paddle) to transfer it. Dusting the peel lightly with cornmeal will prevent sticking.
Baking time will vary depending on your oven and the thickness of your crust, typically ranging from 8 to 12 minutes. Start checking for doneness at the 8-minute mark. The crust should be golden brown and crispy, and the cheese should be melted and bubbly. You can use a pizza cutter or a sharp knife to carefully lift a small edge of the pizza to check the bottom. If it’s still pale, give it another couple of minutes. Overbaking will result in a dry crust and burnt toppings.
For optimal browning, you might consider using a baking steel instead of a pizza stone. Baking steels retain heat even better, leading to a crispier crust with beautiful char marks. Remember to always use oven mitts when handling hot baking surfaces. If you’re using a conventional oven without a pizza stone or steel, a baking sheet will work, although the crust might not be as crispy. In this case, you may want to pre-bake the crust for a few minutes before adding toppings to prevent a soggy bottom.
Keep a close eye on your pizza during the last few minutes of baking. The cheese should be beautifully browned in places, and the edges of the crust should be puffed and slightly charred. Once the pizza is cooked to your liking, carefully remove it from the oven using your pizza peel or oven mitts. Let it rest for a few minutes before slicing and serving. This allows the cheese to set slightly, making it easier to slice and preventing a molten cheese explosion.
Professional Tip: For an even crispier crust, consider using a combination of high heat and a quick bake time. This method helps to create a nice char on the crust without overcooking the toppings. Experiment with different baking times and temperatures to find what works best in your oven.
Professional Tip: If your oven doesn’t reach high enough temperatures, consider using a broiler for the last minute or two of baking to achieve a crispier crust and more browned cheese. However, watch it closely to prevent burning. This step is optional but can significantly enhance the final product.
Recommendations for the Perfect Margherita Pizza
To achieve the best results with your Margherita pizza, consider these recommendations. Proper dough preparation is key. Allow the dough sufficient time to rise – at least 2 hours, or even overnight in the refrigerator for a more developed flavour. Don’t rush this process; patience yields a lighter, airier crust.
Sauce quality significantly impacts the overall taste. Use high-quality San Marzano tomatoes for the freshest, most authentic flavour. If using canned tomatoes, choose whole peeled ones and blend them yourself for a smoother, less acidic sauce. Season generously with salt, fresh basil, and a touch of garlic. Avoid over-seasoning, as you want the fresh tomato flavour to shine through.
The cheese is paramount. Use fresh mozzarella di bufala for the most traditional experience. If unavailable, opt for fresh mozzarella fior di latte. Avoid pre-shredded mozzarella, as it often contains cellulose which can affect the texture and melt. Properly distribute the cheese across the pizza to ensure even coverage and melting. A slight overlap of the mozzarella slices is recommended for a richer, more cohesive result.
Baking temperature is crucial. A very hot oven (around 475-500°F or 240-260°C) is essential for a crispy crust and properly melted cheese. Use a pizza stone or steel for best results, preheating it thoroughly in the oven before adding the pizza. Bake for approximately 8-12 minutes, or until the crust is golden brown and the cheese is bubbly and slightly browned.
Serving suggestions are plentiful! Enjoy your Margherita pizza straight from the oven for the ultimate experience. A drizzle of extra virgin olive oil and a sprinkle of fresh basil leaves add a touch of elegance. Consider serving it with a simple side salad of arugula or mixed greens with a light vinaigrette for a refreshing counterpoint.
Storage: Leftover pizza should be stored in an airtight container in the refrigerator for up to 3 days. Reheat slices in a skillet with a little olive oil for a crispy crust or in the oven for even heating. Avoid microwaving, as it can make the crust soggy.
Complementary dishes to pair with your Margherita pizza include a Caprese salad (tomatoes, mozzarella, basil), a light pasta salad, or a simple minestrone soup. A crisp Italian white wine, such as Pinot Grigio or Vermentino, would complement the pizza beautifully.
Nutritional Information (per serving, approximate): Calorie count will vary based on size and ingredients used. A typical 12-inch Margherita pizza sliced into 8 pieces may contain approximately 250-350 calories per slice. This includes carbohydrates from the crust, fats from the cheese and oil, and some protein from the cheese. The pizza is a good source of calcium and some vitamins, depending on the ingredients used. Note: This is an estimate, and nutritional content can vary significantly.
Remember to adjust ingredients and cooking times based on your oven and personal preferences. Experiment with different types of tomatoes, cheeses, and herbs to discover your perfect Margherita pizza recipe. Enjoy!