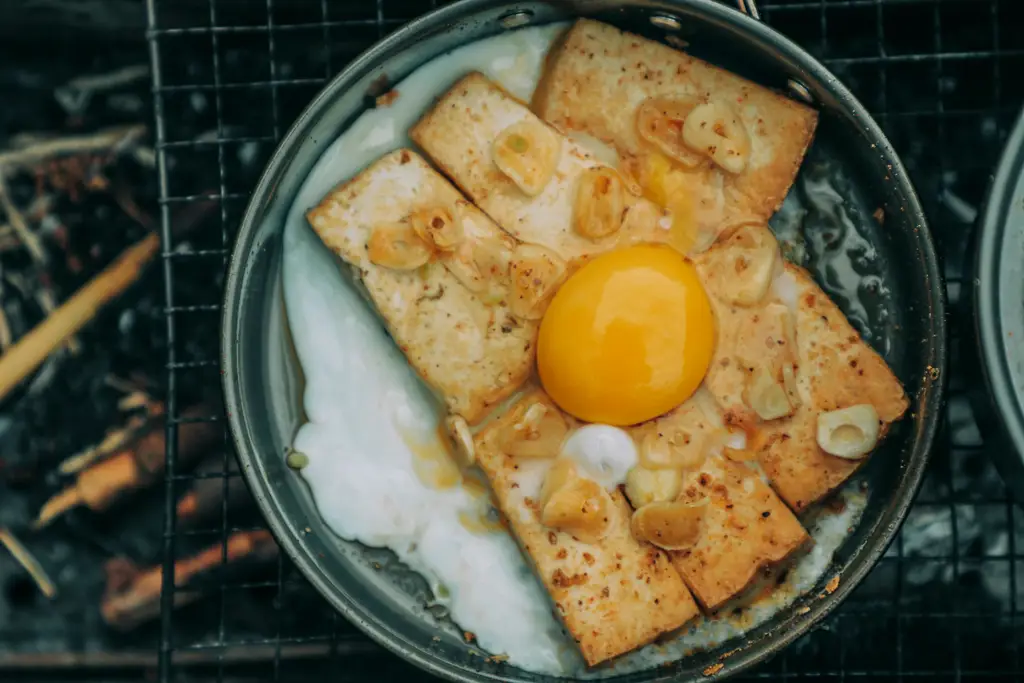
Crispy garlic fries: the irresistible aroma, the satisfying crunch, the addictive flavor—they’ve conquered snack menus worldwide. While pinpointing the exact origin is difficult, the concept builds upon the long and storied history of both french fries and garlic. French fries themselves boast a surprisingly complex history, with claims ranging from Belgium to France, and even further afield. Regardless of their precise birthplace, their global popularity is undeniable. Annual global potato consumption is staggering, with billions of pounds consumed annually, a significant portion of which undoubtedly ends up transformed into fries in countless variations. The addition of garlic, a staple in cuisines across the globe for millennia, elevates the humble fry to a new level.
Garlic’s role in culinary history is extensive, its use documented in ancient civilizations from Egypt to Greece. Its potent flavor profile and purported health benefits have ensured its continued prominence in countless dishes. In many cultures, garlic holds symbolic meaning; it’s associated with warding off evil spirits in some traditions, while in others, it’s simply a beloved ingredient integral to countless regional specialties. The combination of the crispy, salty fry and the pungent, savory garlic creates a flavor synergy that transcends cultural boundaries. It’s a testament to the power of simple ingredients, expertly combined.
The modern iteration of crispy garlic fries, with its characteristically crisp exterior and fluffy interior, likely emerged from the fusion of various culinary traditions. Fast-food chains played a significant role in popularizing garlic fries, further cementing their place in popular culture. Their prevalence on social media, with countless photos and videos showcasing their golden-brown perfection, adds another layer to their modern appeal. The accessibility of ingredients and the relative simplicity of the recipe contribute to their widespread appeal, making them a favorite among home cooks and professional chefs alike. Statistics show a steady rise in searches for “garlic fries recipes” online, highlighting the continued and growing interest in this delicious snack.
This recipe aims to provide a simple yet effective method for achieving perfectly crispy garlic fries at home. We’ll explore techniques to maximize crispiness, ensure even garlic distribution, and achieve the ideal balance of flavors. Whether you’re a seasoned chef or a kitchen novice, this guide will empower you to create a batch of garlic fries that rival those found in your favorite restaurant—a testament to the enduring appeal of this globally loved snack.
Ingredients and Measurements
Creating perfectly crispy garlic fries hinges on the quality and precise measurement of your ingredients. Don’t skimp on the good stuff – the flavor payoff is well worth it! We’ll be using russet potatoes, known for their high starch content which contributes to that desirable crispiness. Other potato varieties might work, but russets are our top recommendation for this recipe.
For this recipe, we’ll be using 2 pounds (approximately 900 grams) of russet potatoes. This quantity serves about 4 people generously. You can easily adjust this upward or downward depending on your needs. When selecting your potatoes, choose firm, unblemished specimens. Avoid any potatoes that are soft, bruised, or sprouting – these won’t fry up as nicely.
Next, we need the garlic! We’ll be using a generous amount to infuse those delicious garlicky notes into our fries. I recommend using 6-8 large cloves of garlic, minced finely. Using a garlic press or mincing the garlic with a sharp knife ensures even cooking and prevents large chunks of garlic from burning. For a milder garlic flavor, use less; for a stronger punch, add a couple more cloves.
For the perfect crispy coating, we’ll employ a combination of cornstarch and flour. 2 tablespoons of cornstarch adds a light, airy crispness, while 1 tablespoon of all-purpose flour provides a bit more structure and helps the garlic adhere nicely. These seemingly small amounts make a big difference in the overall texture.
Oil is crucial for achieving that golden-brown, crispy exterior. We recommend using 2 cups (475ml) of vegetable oil, canola oil, or a blend of both. These oils have high smoke points, meaning they can withstand high temperatures without breaking down and imparting undesirable flavors. Ensure your oil is fresh and hasn’t been previously used for frying multiple times. Avoid using olive oil as its lower smoke point can lead to burning and an unpleasant taste.
Finally, we’ll need seasonings to enhance the flavor profile. We’re using 1 teaspoon of salt and 1/2 teaspoon of black pepper. These are basic but essential. Feel free to experiment with other seasonings such as paprika, garlic powder, onion powder, or even a pinch of cayenne pepper for a little heat. Remember to adjust the seasoning based on your personal preferences.
Important Note: Always ensure your potatoes are thoroughly dried before frying. Excess moisture can cause the oil to splatter and result in unevenly cooked fries. Patting them dry with paper towels is recommended after washing and cutting.
Equipment Needed
Making perfectly crispy garlic fries requires the right tools. While you might be able to improvise with some items, having the correct equipment will significantly improve your results and make the process easier and more efficient. Let’s break down the essential tools, categorized for clarity.
Potato Preparation: You’ll need a few key tools for prepping the potatoes. First, a large, sharp chef’s knife (approximately 8-10 inches) is crucial for safely and efficiently cutting the potatoes into uniform fries. A dull knife will lead to uneven cuts, resulting in uneven cooking and some fries burning before others are cooked through. Consider investing in a good quality knife and keeping it sharp. Secondly, a large bowl (at least 4 quarts) is needed for soaking the potatoes. This helps remove excess starch and contributes to crispier fries. Finally, a colander is essential for draining the potatoes after soaking and rinsing.
Frying Equipment: This is where the real magic happens. For achieving truly crispy garlic fries, a large, heavy-bottomed pot or Dutch oven (at least 6 quarts) is highly recommended. The heavy bottom ensures even heat distribution, preventing hot spots that can burn the fries. Never overcrowd the pot; this will lower the oil temperature and lead to soggy fries. You will need a deep-fry thermometer to accurately monitor the oil temperature. Maintaining the correct temperature (around 325-350°F or 160-175°C) is absolutely critical for achieving that perfect crispiness. Don’t skip this step! A pair of tongs will be invaluable for safely handling the hot fries during frying and transferring them to a draining rack.
Garlic and Seasoning: While not strictly equipment, having the right tools for mincing garlic will make a difference. A garlic press is efficient for quick mincing, or you can use a sharp knife for finer control. A small bowl is needed for mixing the garlic with your chosen seasonings. Consider using a measuring spoon set for accurate seasoning. For even seasoning, a large shallow bowl or baking sheet might be helpful for tossing the fries after frying.
Serving and Storage: Finally, you’ll need something to serve your delicious garlic fries in. A large serving platter or basket is ideal. Lastly, if you have leftovers, proper storage is key. Let the fries cool completely before storing them in an airtight container in the refrigerator. Reheating can be done in the oven or air fryer to restore some crispiness.
Optional, but Recommended: A paper towel-lined wire rack is highly recommended for draining the fries after frying. This allows excess oil to drip away, promoting extra crispiness. An air fryer can be used as an alternative to deep frying, offering a healthier option, although achieving the same level of crispiness might require some experimentation.
Potato Preparation
The key to achieving truly crispy garlic fries lies in meticulous potato preparation. We’ll be using russet potatoes, known for their high starch content which contributes to excellent crispiness when fried. Start by selecting 2 pounds of russet potatoes, ensuring they are firm and free of blemishes. Avoid potatoes that are sprouting or soft to the touch, as these won’t fry as well.
Thoroughly wash the potatoes under cold running water, scrubbing away any dirt or debris. Do not peel the potatoes; the skin adds flavor and texture. However, you can gently scrub with a vegetable brush to remove any stubborn dirt clinging to the skin. Once clean, cut the potatoes into fries. For optimal crispiness, aim for a consistent size and thickness. We recommend cutting them into roughly ½ inch thick fries. Consistency in size ensures even cooking, preventing some fries from burning while others remain undercooked.
After cutting, it’s crucial to remove excess starch. Starch absorbs oil during frying, leading to soggy fries. To do this, place the cut potatoes in a large bowl and cover them completely with cold water. Let them soak for at least 30 minutes, or up to 2 hours. This soaking process helps draw out the excess starch, resulting in crispier fries. After soaking, drain the potatoes thoroughly in a colander. Gently pat them dry using clean kitchen towels or paper towels. Removing as much surface moisture as possible is critical for achieving a crisp exterior.
Now, we’ll pre-fry the potatoes, a technique called blanching. This step helps cook the potatoes partially, ensuring a fluffy interior while promoting a crisp exterior during the final frying stage. Heat about 2 cups of vegetable oil (or your preferred high-heat oil with a high smoke point, such as canola or peanut oil) in a large, heavy-bottomed pot or deep fryer to 325°F (163°C). Use a thermometer to monitor the oil temperature accurately. Working in batches to avoid overcrowding the pot, carefully add the potatoes to the hot oil. Fry for about 5-7 minutes, or until the edges are slightly softened but not browned. Remove the fries with a slotted spoon and transfer them to a wire rack to cool completely. This cooling step allows the fries to firm up before the final fry.
Once the potatoes have cooled completely, you’re ready for the final frying step, which will be done at a higher temperature to achieve maximum crispiness. Don’t skip the cooling stage; it’s essential for achieving the desired texture. If you proceed to the final fry while the potatoes are still warm, the fries will likely become soggy. After cooling, the potatoes are ready for the flavorful garlic coating and the final fry for ultimate crispiness!
Garlic Preparation
Proper garlic preparation is crucial for achieving perfectly crispy garlic fries. Overcooked garlic will be bitter and burnt, while undercooked garlic will be raw and unpleasant. The following steps outline the best method for preparing the garlic for your fries.
Begin with 1 whole bulb of garlic. The size of the bulb will influence the final quantity of garlic fries, so adjust accordingly if you desire more or fewer fries. We recommend using a large bulb (about 4-5 inches in diameter) for a generous serving.
The first step is separating the cloves. Carefully break apart the bulb, separating each clove from the papery skin. You may find it easier to gently squeeze the bulb to loosen the cloves before attempting to pull them apart. Discard the root end and any overly damaged cloves.
Next, peel the cloves. The easiest way to peel garlic is to place the cloves on a cutting board and place the flat side of a chef’s knife on top of them. Then, firmly press down on the knife to crush the cloves slightly. This will loosen the skins significantly. You can then easily peel off the skins with your fingers. Avoid using your fingernails as this can introduce dirt and bacteria.
Once all the cloves are peeled, it’s time to slice them. Consistency is key for even cooking. Aim for uniformly thin slices, approximately 1/8 inch thick. A mandoline slicer is ideal for this task, ensuring perfectly even slices every time. However, if you don’t own one, a sharp knife will suffice. Just be careful to maintain consistent thickness. Unevenly sliced garlic will cook at different rates, leading to some pieces being burnt while others remain raw.
After slicing, it’s important to rinse the garlic. This step removes any excess starch and helps prevent browning. Gently rinse the garlic slices under cold running water, then drain them thoroughly in a colander. Thoroughly drying the garlic is essential before frying to prevent splattering and ensure even crispiness. Pat them dry with paper towels or a clean kitchen towel.
Finally, before frying, consider a quick soak. Soaking the sliced garlic in cold water for about 10-15 minutes can help further reduce bitterness and improve texture. After soaking, make sure to thoroughly dry the garlic again. This step is optional but highly recommended for a superior result.
With your garlic properly prepared, you’re ready to move on to the frying process and create those delicious crispy garlic fries!
Frying Technique
Achieving perfectly crispy garlic fries hinges on a well-executed frying technique. We’ll be using a double-fry method for optimal results. This involves a preliminary fry to cook the potatoes through, followed by a final fry to crisp them up beautifully. Don’t skip the double-fry; it’s the key to achieving that coveted crispy exterior.
First, prepare your potatoes. We’re assuming you’ve already peeled and cut your potatoes into roughly 1/2-inch thick fries (adjust thickness according to your preference, but remember thinner fries cook faster and crispier, while thicker fries may require longer frying times). Ensure your fries are evenly cut for even cooking. Soak the cut potatoes in cold water for at least 30 minutes, or even up to an hour. This helps remove excess starch, which contributes to soggy fries. After soaking, thoroughly pat the fries dry with paper towels. Thorough drying is crucial; excess moisture will prevent crisping.
For the first fry, heat approximately 3 cups of vegetable oil (or your preferred high-smoke-point oil like canola or peanut oil) in a large, heavy-bottomed pot or deep fryer to 325°F (160°C). Use a thermometer to monitor the oil temperature accurately. This is important for even cooking and preventing burning. Carefully add the fries to the hot oil in batches, ensuring not to overcrowd the pot. Overcrowding will lower the oil temperature and result in soggy fries. Fry for approximately 5-7 minutes, until the fries are partially cooked but not yet browned. Remove the fries with a slotted spoon and place them on a wire rack to drain excess oil.
Once the first fry is complete, let the fries cool completely. This allows the potatoes to firm up, which is essential for achieving maximum crispiness in the second fry. Allow at least 30 minutes for cooling.
For the second fry, increase the oil temperature to 375°F (190°C). Again, carefully add the fries in batches, avoiding overcrowding. Fry for 3-5 minutes, or until golden brown and deliciously crispy. Keep a close eye on the fries during this stage to prevent burning. Remove the fries and immediately transfer them to a wire rack lined with paper towels to drain excess oil.
Immediately after the second fry, while the fries are still hot, toss them with your garlic mixture (prepared according to your recipe). Seasoning while the fries are hot helps the flavors adhere better. Serve immediately to enjoy the ultimate crispy garlic fries experience. If you need to keep them warm for a short period, place them in a warm oven (around 200°F) but be aware that they may lose some crispiness.
Professional Tip: For extra crispy fries, consider using a starch-reducing agent like potato starch before frying. This further reduces the starch content and enhances crispiness. Remember to always practice safe frying techniques, and never leave hot oil unattended.
Seasoning and Flavoring
The magic of truly exceptional garlic fries lies not just in the crispiness, but in the depth and complexity of flavor. While simple salt can work, elevating your seasoning game will transform these from a good snack to an unforgettable experience. This section will guide you through various options, from classic to adventurous, ensuring you find the perfect flavor profile for your taste.
Salt: This is the foundational seasoning. Use about 1 teaspoon of coarse sea salt per pound of fries. Coarse salt provides a better textural contrast against the crisp fry and adheres more effectively than fine salt. Don’t be afraid to experiment; some prefer a more generous sprinkling. Kosher salt is also excellent.
Garlic Powder: Since we’re making *garlic* fries, this is essential. Start with 1 teaspoon per pound of fries. Garlic powder provides a consistent garlicky flavor throughout. However, don’t rely solely on powder; fresh garlic offers a superior flavor complexity.
Fresh Garlic: Mince approximately 2-3 cloves of fresh garlic per pound of fries. Add this after frying, while the fries are still hot. The heat helps to release the garlic’s aroma and flavor. Adding it before frying can lead to burning and a bitter taste. Remember to avoid overcrowding the pan when adding the garlic to prevent steaming.
Black Pepper: Freshly ground black pepper adds a subtle spicy kick that complements the garlic beautifully. Use about ½ teaspoon per pound of fries. Freshly ground pepper always tastes better; pre-ground loses its potency and flavor over time.
Herbs: Experiment with dried or fresh herbs to add another layer of complexity. Rosemary, thyme, and oregano all pair well with garlic and potatoes. Use about 1 teaspoon of dried herbs or 2 tablespoons of chopped fresh herbs per pound of fries. Dried herbs should be added before frying, while fresh herbs are best added after frying, along with the fresh garlic. Consider a sprinkle of parsley for a pop of color and freshness.
Cheese Powder: For a truly indulgent treat, consider adding a cheese powder blend. Parmesan, Romano, or a blend of Italian cheeses work particularly well. Start with 1 tablespoon per pound of fries and adjust to taste. Add cheese powder after frying to prevent burning and ensure it melts evenly.
Spice Blends: Don’t be afraid to get creative! A sprinkle of paprika, cayenne pepper (for a touch of heat), or a pre-made seasoning blend like Italian seasoning or garlic herb can add exciting variations. Always start with a small amount and adjust to your preferred level of spice.
Important Note: Seasoning is best done in stages. A light initial seasoning before frying helps to ensure flavor penetration, while the final seasoning after frying adds that extra burst of flavor and aroma. Remember to taste and adjust as needed to achieve your desired flavor profile. This is your culinary creation; personalize it!
Recommendations for the Perfect Crispy Garlic Fries
To achieve truly exceptional crispy garlic fries, several key steps should be followed diligently. Firstly, the choice of potato is crucial. Russet potatoes, with their high starch content, are ideal for creating that perfectly fluffy interior and crisp exterior. Avoid waxy potatoes, as they tend to become gummy when fried. Cutting the potatoes into consistent, even-sized fries is also paramount. Uniformity ensures even cooking and prevents some fries from burning while others remain undercooked. Aim for approximately ½-inch thick fries for optimal crispiness.
Double frying is highly recommended for achieving maximum crispness. The first fry is a lower-temperature par-fry, which cooks the interior of the fries. This step helps to prevent sogginess. The second fry is a high-temperature blast, which crisps the exterior beautifully. Ensure that the oil is at the correct temperature for each stage; using a thermometer is advised. Overcrowding the fryer should be avoided, as it lowers the oil temperature and results in soggy fries. Work in batches to maintain the ideal frying temperature.
The garlic butter is the star of the show. Use fresh, high-quality garlic for the best flavor. Don’t be shy with the garlic; a generous amount will infuse the fries with a delicious garlicky aroma and taste. Consider adding other herbs and spices to your garlic butter, such as parsley, thyme, or paprika, to enhance the flavor profile. Once the fries are fried, toss them immediately in the warm garlic butter to ensure the butter melts and adheres to the fries, creating a flavorful, glossy coating.
Serving suggestions are key to elevating your garlic fries experience. Consider serving them immediately after frying, while they are still hot and crispy. They are delicious on their own, but they also pair beautifully with various dipping sauces. Aioli, chipotle mayo, or even a simple ketchup are all excellent choices. For a more sophisticated touch, try a creamy horseradish sauce or a spicy sriracha mayo.
Storage and reheating are important considerations. Leftover garlic fries are best stored in an airtight container at room temperature for up to 2 days. For longer storage, freeze them in a freezer-safe bag. To reheat, simply bake them in a preheated oven at 375°F (190°C) for about 10-15 minutes, or until crispy. Microwaving is not recommended, as it will make the fries soggy.
Complementary dishes enhance the overall dining experience. Garlic fries pair wonderfully with burgers, sandwiches, and salads. They also make an excellent side dish for grilled meats or fish. Consider serving them with a vibrant green salad to balance the richness of the fries. A creamy coleslaw or a refreshing tomato salsa can also complement the garlic fries beautifully.
Nutritional Information (per serving, approximate): Calories: 300-400 (depending on portion size and oil used), Fat: 15-25g, Carbohydrates: 40-50g, Protein: 5-7g. Note: This is an estimate and can vary depending on the specific ingredients and preparation methods used. Nutritional information is best calculated using a nutrition tracking app with the exact ingredients and quantities used in your recipe.