Chicken Parmesan, a culinary masterpiece beloved worldwide, boasts a surprisingly rich and fascinating history, far beyond its simple, delicious presentation. While pinpointing its exact origin is difficult, most food historians agree that it emerged in the United States, likely in the early to mid-20th century, a delightful evolution from its Italian-American counterpart, Eggplant Parmesan. The dish cleverly adapted the classic Italian method of breading and frying vegetables, substituting chicken for eggplant, perfectly reflecting the ingenuity of Italian-American cuisine in creating new dishes using readily available ingredients. It’s a testament to the power of adaptation and innovation within a culinary tradition.
The rise of Chicken Parmesan’s popularity coincided with the post-war boom in the United States, a period of increased prosperity and a growing appetite for convenience foods. The dish’s relative simplicity and satisfying flavors quickly made it a staple in Italian-American restaurants and homes across the country. Unlike many complex, labor-intensive dishes, Chicken Parmesan was relatively quick to prepare, making it an appealing option for busy families. This practicality likely contributed significantly to its rapid ascent to culinary stardom. Interestingly, while precise statistics are hard to come by, countless anecdotal accounts and the ubiquitous presence of Chicken Parmesan on restaurant menus across America suggest it’s one of the nation’s most popular Italian-American dishes.
Beyond its popularity in the US, Chicken Parmesan’s influence has extended globally. Its adaptability has allowed it to be embraced and reinterpreted in various cultures, incorporating local ingredients and variations on the classic breading and sauce. From adding different cheeses to experimenting with spice levels, the dish’s versatility makes it a truly global phenomenon. While it might not hold the same historical significance as some ancient Italian recipes, its journey from a simple adaptation to a globally recognized comfort food is a remarkable achievement. The enduring appeal of Chicken Parmesan lies not just in its deliciousness but also in its representation of cultural exchange and culinary innovation. It’s a dish that speaks to our shared human love of comfort food and the satisfying experience of a perfectly crispy, juicy piece of chicken bathed in rich tomato sauce and melted cheese.
Ingredients and Measurements
Creating the perfect Chicken Parmesan hinges on using high-quality ingredients and precise measurements. This recipe yields approximately 4 servings.
For the Chicken:
- 4 boneless, skinless chicken breasts (about 1.5 lbs total). Choose breasts that are relatively uniform in size for even cooking. Thick breasts may require a slightly longer cooking time.
- 1/2 cup all-purpose flour. Using a good quality flour ensures a better texture for the breading.
- 2 large eggs, lightly beaten. Add a tablespoon of milk or water to the beaten eggs for a smoother, more cohesive breading.
- 1 1/2 cups Italian seasoned breadcrumbs. For extra flavor, consider making your own breadcrumbs from crusty bread. You can also add grated Parmesan cheese to the breadcrumbs for an intensified cheesy flavor.
- 1 teaspoon salt.
- 1/2 teaspoon black pepper.
- 1/4 teaspoon garlic powder.
- 1/4 teaspoon paprika (optional, for a touch of color and flavor).
- Vegetable oil, for frying (approximately 2 cups). Use enough oil to submerge the chicken breasts about halfway. This ensures even cooking and a beautiful golden-brown crust.
- 28 ounces crushed tomatoes (one 28-ounce can). Using high-quality canned tomatoes makes a significant difference in the overall taste. Look for brands with minimal added ingredients.
- 1 (15 ounce) can tomato sauce.
- 2 cloves garlic, minced. Fresh garlic is always best, but jarred minced garlic can be used in a pinch.
- 1 teaspoon dried oregano.
- 1/2 teaspoon dried basil.
- 1/4 teaspoon red pepper flakes (optional, for a hint of spice).
- 1 tablespoon olive oil.
- Salt and pepper to taste.
- 8 ounces fresh mozzarella cheese, sliced. Use fresh mozzarella for the best flavor and melt. Low-moisture mozzarella is also a good option.
- 1/2 cup grated Parmesan cheese. This adds extra cheesy goodness and helps to create a slightly browned crust on top.
- Fresh basil leaves, for garnish (optional). A sprinkle of fresh basil adds a beautiful finishing touch and a burst of fresh flavor.
- 2 tablespoons extra virgin olive oil
- 3 cloves garlic, minced (or 1 tablespoon minced garlic from a jar)
- 2 (28-ounce) cans crushed tomatoes
- 1 (15-ounce) can tomato sauce
- 1 teaspoon dried oregano
- 1 teaspoon dried basil
- 1/2 teaspoon salt
- 1/4 teaspoon black pepper
- 1/4 teaspoon sugar (optional, to balance acidity)
- 1/4 cup chopped fresh basil (optional, for garnish)
For the Sauce:
For the Topping:
Important Note: These measurements are guidelines. You can adjust the seasoning to your preference. For example, if you love garlic, feel free to add more! Remember to always taste and adjust the seasoning as you go.
Equipment and Utensils
Making a truly outstanding Chicken Parmesan requires the right tools. While you might be able to adapt with substitutes, having the proper equipment will streamline the process and significantly enhance the final result. This section details the essential equipment and utensils, along with some helpful tips for optimal performance.
For breading the chicken: You’ll need three shallow dishes, approximately 9-10 inches in diameter. These will hold your breading station: one for the flour, one for the beaten eggs, and one for the breadcrumbs. Using shallow dishes allows for even coating and prevents excess breading from accumulating on the chicken. Avoid using deep bowls as this will lead to soggy chicken.
Measuring tools are crucial for consistency. Invest in a good set of measuring cups and spoons. Accurate measurements are particularly important for the flour and breadcrumbs, as too much or too little will affect the texture of the final product. A kitchen scale can also be beneficial for more precise measurements, especially when working with larger batches.
For cooking the chicken: A large, heavy-bottomed skillet (at least 12 inches in diameter) is ideal for evenly cooking the chicken cutlets. The heavy bottom prevents hot spots and ensures consistent browning. A cast iron skillet is an excellent choice, but a good quality stainless steel or nonstick skillet will also work well. Ensure you have enough cooking oil – about 1/4 inch depth in the pan is sufficient for frying.
For baking the Parmesan: A large baking dish (approximately 9×13 inches) is needed for baking the assembled Chicken Parmesan. A glass baking dish is preferred as it allows for even heat distribution and browning. However, a ceramic or metal baking dish can also be used. Make sure the dish is oven-safe and can withstand high temperatures.
Utensils: Beyond the dishes and pans, you’ll need several essential utensils. A whisk is necessary for thoroughly beating the eggs. A pair of tongs or a spatula will be needed for carefully turning the chicken cutlets during frying and for transferring them to the baking dish. A meat mallet or rolling pin is crucial for pounding the chicken breasts to an even thickness, ensuring consistent cooking. Pounding the chicken to about 1/4 inch thickness is essential for achieving tender and juicy chicken cutlets.
Optional but recommended: A pastry brush can be helpful for brushing the melted mozzarella cheese over the chicken before baking. A thermometer (either a meat thermometer or an oven thermometer) will help ensure the chicken is cooked to a safe internal temperature of 165°F (74°C). Clean kitchen towels are essential for keeping your work surface tidy and for patting the chicken dry before breading.
Cleaning up: Remember to have a good supply of paper towels for cleaning up spills and excess oil. Soaking your dishes and utensils promptly after use will make cleanup much easier.
Chicken Preparation (Breading and Pan-frying/Baking)
This section details the preparation of the chicken cutlets, focusing on achieving a perfectly crispy and flavorful breading. We’ll cover both pan-frying and baking methods, allowing you to choose the approach that best suits your preferences and equipment.
Start with the right chicken: Begin with approximately 1.5 lbs of boneless, skinless chicken breasts. Pound them to an even 1/4-inch thickness. This ensures even cooking and prevents some parts from being dry while others remain raw. Use a meat mallet or the flat side of a heavy pan to gently pound the chicken, covering it with plastic wrap to avoid splattering.
Prepare the breading station: Set up three shallow dishes. In the first, whisk together 1/2 cup all-purpose flour with 1 teaspoon salt and 1/2 teaspoon black pepper. The second dish will hold 2 large eggs, lightly beaten with 2 tablespoons of milk or water (this helps the breading adhere). The third dish contains 1 1/2 cups of Italian-seasoned breadcrumbs. You can use store-bought breadcrumbs or make your own from crusty bread for a deeper flavor.
Bread the chicken: Dredge each chicken cutlet in the flour mixture, ensuring it’s fully coated. Shake off any excess flour. Next, dip the floured chicken into the egg mixture, allowing any excess to drip off. Finally, coat the chicken thoroughly in the breadcrumbs, pressing gently to help the breading adhere. Ensure complete coverage for optimal crispiness.
Pan-frying the chicken: Heat about 1/4 inch of vegetable oil in a large skillet over medium-high heat. The oil is ready when a pinch of breadcrumb sizzles immediately. Carefully place the breaded chicken cutlets in the hot oil, working in batches to avoid overcrowding the pan. Overcrowding will lower the oil temperature and result in soggy chicken. Cook for about 3-4 minutes per side, or until golden brown and cooked through. Use a meat thermometer to ensure the internal temperature reaches 165°F (74°C).
Baking the chicken: Preheat your oven to 400°F (200°C). Arrange the breaded chicken cutlets on a baking sheet lined with parchment paper. Lightly spray the chicken with cooking spray to prevent sticking and add a little extra crispiness. Bake for 20-25 minutes, or until golden brown and cooked through. Again, use a meat thermometer to ensure the internal temperature reaches 165°F (74°C).
Important Considerations: Regardless of your chosen cooking method, avoid overcrowding the pan or baking sheet. This ensures even cooking and prevents steaming, which can lead to soggy chicken. Let the cooked chicken rest for a few minutes before adding it to your Chicken Parmesan. This allows the juices to redistribute, resulting in a more tender and flavorful final product.
Seasoning Tip: For extra flavor, consider adding a pinch of garlic powder or onion powder to your flour mixture or breadcrumbs. You can also use panko breadcrumbs for an extra-crispy texture.
Sauce Preparation (Marinara)
A truly great Chicken Parmesan hinges on a flavorful, vibrant marinara sauce. Don’t skimp on this crucial component! This recipe focuses on a classic, simple marinara, but feel free to adapt it to your taste with additions like fresh herbs or a pinch of red pepper flakes.
Yields: Approximately 4 cups
Prep time: 15 minutes
Cook time: 45-60 minutes
Ingredients:
Instructions:
1. Sauté the Garlic: Heat the olive oil in a large, heavy-bottomed saucepan over medium heat. Add the minced garlic and cook, stirring frequently, until fragrant and lightly golden, about 1 minute. Be careful not to burn the garlic, as this will impart a bitter taste.
2. Add the Tomatoes and Seasonings: Pour in the crushed tomatoes and tomato sauce. Stir in the dried oregano, dried basil, salt, pepper, and sugar (if using). Using a good quality canned tomato is crucial for a flavorful sauce. Look for brands with minimal added ingredients.
3. Simmer the Sauce: Bring the sauce to a gentle simmer, then reduce the heat to low. Cover the saucepan and let the sauce simmer for at least 45 minutes, or up to 1 hour. The longer it simmers, the richer and more flavorful it will become. Stir occasionally to prevent sticking and burning.
4. Adjust Seasoning: After simmering, taste the sauce and adjust the seasoning as needed. You may want to add more salt, pepper, or sugar to achieve your desired balance of flavors. Consider adding a pinch of red pepper flakes for a touch of heat.
5. Finish and Serve: Once the sauce has reached your desired consistency and flavor, remove it from the heat. If using, stir in the fresh basil. Allow the sauce to cool slightly before using it in your Chicken Parmesan. This will prevent the cheese from melting too quickly.
Professional Tip: For a smoother sauce, you can use an immersion blender to partially blend the sauce after simmering. This will break down some of the tomato solids without making it completely smooth. Alternatively, you can carefully transfer the sauce to a blender (in batches) and blend until smooth, but be cautious of hot liquids and venting steam.
Storage: Leftover marinara sauce can be stored in an airtight container in the refrigerator for up to 5 days or frozen for up to 3 months.
Pasta Cooking
Perfectly cooked pasta is the foundation of a great Chicken Parmesan. Undercooked pasta will be crunchy and unpleasant, while overcooked pasta will become mushy and stick together. Achieving that ideal *al dente* texture requires attention to detail and a little practice.
We’ll be using 1 pound (450g) of long pasta such as spaghetti or linguine for this recipe. Avoid using short pasta shapes like penne or rotini, as they don’t hold the sauce as well.
Begin by bringing a large pot of salted water to a rolling boil. The pot should be large enough to comfortably hold the pasta without overcrowding. Use at least 6 quarts (5.7 liters) of water for 1 pound of pasta. This ensures even cooking and prevents the pasta from sticking together.
Once the water is boiling vigorously, add 2 tablespoons of salt. Don’t be shy with the salt! It seasons the pasta from the inside out, enhancing the flavor significantly. This is crucial, as the pasta will absorb a considerable amount of salt during cooking. Taste the water – it should taste like the sea.
Carefully add the pasta to the boiling water, stirring gently to prevent it from sticking to the bottom of the pot. Avoid breaking the pasta unless absolutely necessary. Use a long pasta fork or tongs to submerge the noodles completely.
Cook the pasta according to the package directions, usually 8-12 minutes for long pasta. Start checking for doneness about a minute before the minimum cooking time. This allows for variations in stovetop heat and pasta brand.
The pasta is cooked *al dente* when it’s firm to the bite but not hard or crunchy. To check, use tongs to remove a strand of pasta and bite into it. If it’s still too firm, continue cooking for another minute or two, checking frequently. Overcooked pasta is a common mistake, so err on the side of slightly undercooked.
Once the pasta is cooked, immediately drain it in a colander. Don’t rinse the pasta unless you are making a cold pasta salad. The starchy water clinging to the pasta helps the sauce cling better, resulting in a more flavorful and satisfying dish.
While the pasta is still hot, add a tablespoon or two of the reserved pasta water (from the pot before draining) to the pot. This adds moisture and helps create a creamy texture when the sauce is added. This step is crucial for a perfectly coated pasta.
Now, you’re ready to toss the pasta with your delicious Chicken Parmesan sauce and serve! Remember, proper pasta cooking is key to a successful and enjoyable Chicken Parmesan experience.
Assembly
With your perfectly breaded chicken cutlets and your vibrant marinara sauce ready, it’s time to assemble your classic Chicken Parmesan. This stage requires precision and attention to detail to ensure a beautifully layered and flavorful dish. We’ll be assembling individual portions, but you can easily scale this up for a larger baking dish.
Preheat your oven to 375°F (190°C). This ensures the cheese melts beautifully and the chicken cooks through evenly. Lightly grease a baking sheet with olive oil or cooking spray to prevent sticking. This is crucial; otherwise, your delicious Chicken Parmesan might get stuck to the pan.
Prepare your baking dish: Choose an oven-safe dish suitable for individual portions or a larger baking dish depending on your needs. If using individual dishes, grease them lightly as well. This step prevents sticking and ensures easy serving.
Layering is key: Begin by placing a breaded chicken cutlet in the prepared baking dish. Aim for cutlets that are roughly the same size for even cooking. Use about 3-4 ounces of chicken breast per serving. A thinner cutlet will cook faster and more evenly than a thick one. If you have thicker cutlets, consider pounding them gently to an even thickness of about ½ inch.
Generous sauce application: Spoon a generous amount of your homemade marinara sauce over each chicken cutlet. Aim for approximately ¼ to ⅓ cup of sauce per serving, ensuring the entire cutlet is coated. Don’t be shy with the sauce; it adds moisture and flavor.
Cheese it up: Now comes the delicious part! Sprinkle a generous amount of shredded mozzarella cheese over the sauce-coated chicken. About ½ to ¾ cup of mozzarella per serving is ideal. You can also add a sprinkle of Parmesan cheese for an extra layer of flavor and a richer texture. The cheese should generously cover the sauce.
Optional additions: For an extra touch of flavor, consider adding a few fresh basil leaves on top of the cheese before baking. This adds a fresh, herbaceous note to the dish. You could also include thin slices of fresh tomato for added acidity and juiciness. However, remember to adjust baking time if adding extra ingredients.
Baking time: Bake for 20-25 minutes, or until the chicken is cooked through and the cheese is melted, bubbly, and golden brown. Use a meat thermometer to ensure the chicken reaches an internal temperature of 165°F (74°C). This guarantees the chicken is fully cooked and safe to eat. Keep a close eye on it during the last few minutes to prevent burning.
Resting is important: Once baked, let the Chicken Parmesan rest for 5-10 minutes before serving. This allows the juices to redistribute, resulting in a more tender and flavorful dish. Serve immediately with your favorite pasta and a side salad for a complete and satisfying meal. Enjoy!
Recommendations for Classic Chicken Parmesan
To achieve the most delicious Chicken Parmesan, consider these recommendations for preparation and serving:
Breading Technique: For extra crispy chicken, ensure your chicken breasts are completely dry before breading. Use a three-stage breading process: flour, egg wash (beaten egg with a splash of milk or water), and breadcrumbs. Press the breadcrumbs firmly onto the chicken to ensure good adhesion. Don’t overcrowd the pan when frying; work in batches to maintain a consistent oil temperature and achieve even browning. A higher-quality breadcrumb, such as panko, will create a lighter, crispier crust.
Marinara Sauce: Using a high-quality, flavorful marinara sauce is crucial. Consider making your own for the best results, allowing the sauce to simmer gently for at least 30 minutes to develop its flavors. Alternatively, opt for a high-quality store-bought marinara with minimal added sugar. Adding a touch of fresh basil or oregano at the end enhances the flavor profile.
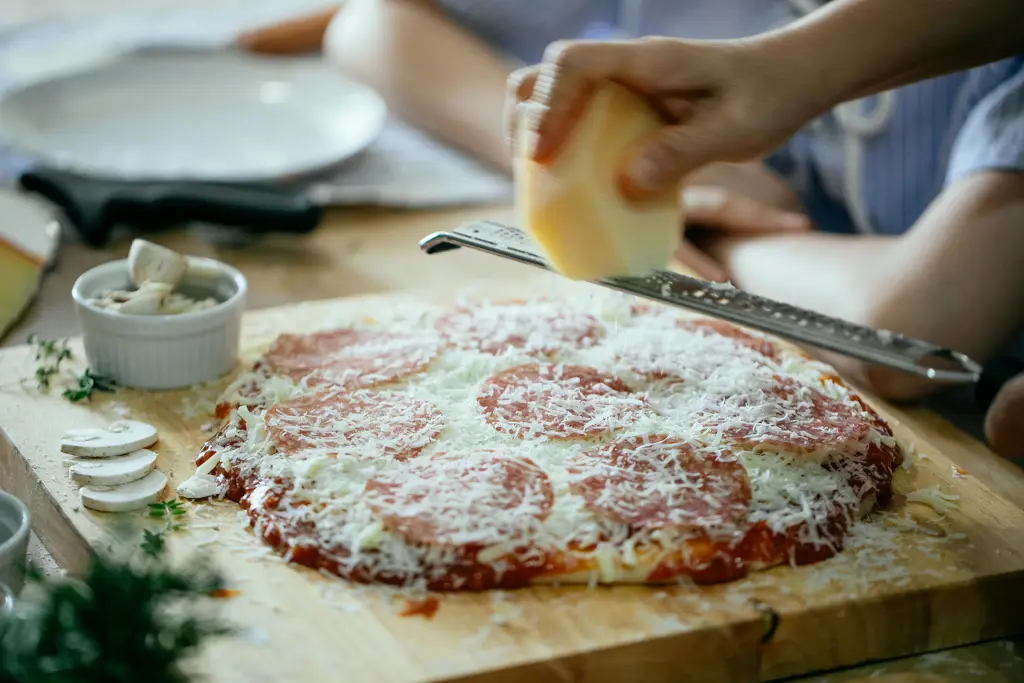
Cheese Selection: While mozzarella is traditional, feel free to experiment with other cheeses like provolone or a blend of Italian cheeses. Shred your cheese rather than using pre-shredded cheese, as the added cellulose in pre-shredded cheese can prevent proper melting. Ensure the cheese is evenly distributed over the chicken for optimal coverage and melting.
Baking vs. Broiling: Baking the Chicken Parmesan provides a more even cooking process and prevents the cheese from burning. For a crispier top, broil for the last few minutes of cooking, but watch closely to avoid burning. Use an oven-safe dish that is appropriately sized to avoid overcrowding.
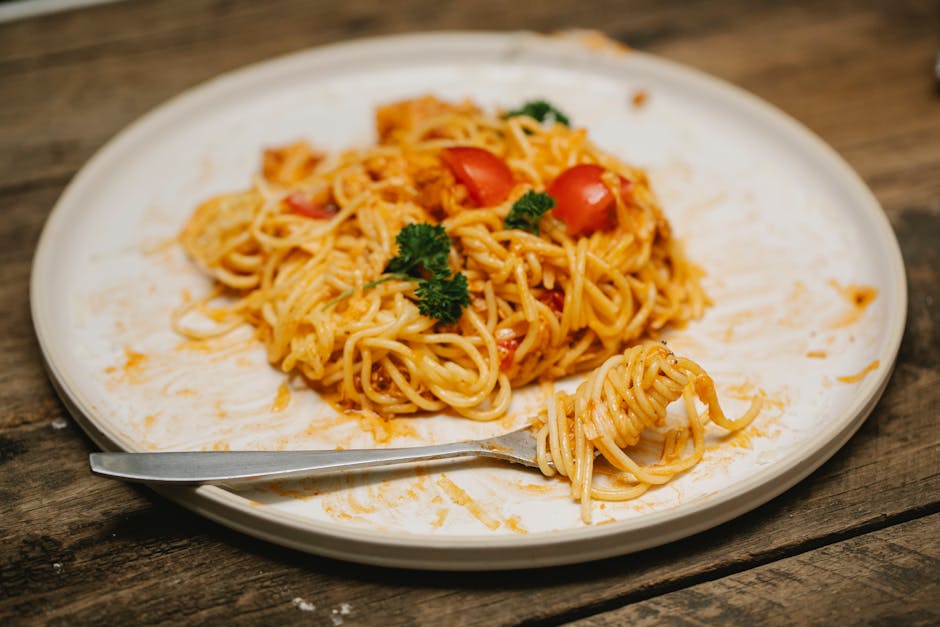
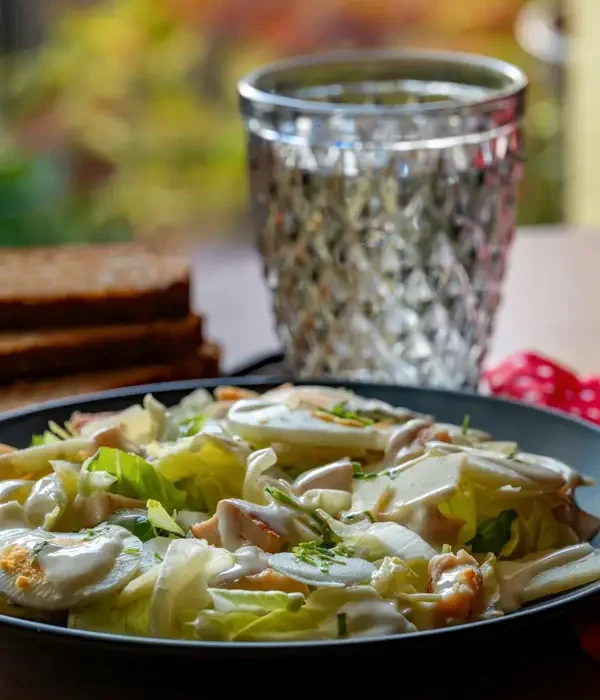
Serving Suggestions: Classic Chicken Parmesan is best served immediately after cooking, while the cheese is melted and bubbly and the chicken is still juicy. Serve it with a side of spaghetti or linguine tossed in a simple tomato sauce or butter. A fresh green salad with a light vinaigrette adds a refreshing contrast to the richness of the chicken parmesan.
Storage: Leftovers can be stored in an airtight container in the refrigerator for up to 3 days. Reheat gently in the oven or microwave until heated through. The texture may slightly change upon reheating, so it’s best enjoyed fresh.
Complementary Dishes: Garlic bread, a simple caprese salad, or roasted vegetables like asparagus or broccoli make excellent accompaniments to Chicken Parmesan. A glass of chilled white wine, such as Pinot Grigio or Sauvignon Blanc, complements the dish perfectly.
Nutritional Information (Approximate per serving, based on a 6-ounce chicken breast): This is an estimate and will vary depending on the specific ingredients used and portion size. Calories: 500-600, Fat: 25-35g, Saturated Fat: 8-12g, Cholesterol: 150-200mg, Sodium: 800-1000mg, Carbohydrates: 40-50g, Fiber: 5-7g, Sugar: 5-10g, Protein: 35-45g. These values are estimates and can vary significantly based on ingredients and preparation methods. For accurate nutritional information, use a nutrition calculator with your specific recipe details.
Enjoy your delicious homemade Chicken Parmesan!