The humble chicken Caesar wrap, a seemingly simple handheld meal, boasts a surprisingly rich history interwoven with the legacies of two culinary giants: the Caesar salad and the tortilla wrap. While the exact origin of the chicken Caesar wrap remains elusive, lacking a singular inventor or definitive date, its creation is undeniably a testament to culinary innovation and the ever-evolving nature of food. Its roots lie firmly in the iconic Caesar salad, invented in 1924 by Italian-American chef Cesare Cardini at his Tijuana restaurant. Cardini’s original recipe, a surprisingly simple concoction of romaine lettuce, croutons, Parmesan cheese, and a creamy dressing, became an instant sensation, quickly transcending its humble beginnings to achieve global fame.
The rise of the tortilla wrap, particularly in the latter half of the 20th century, provided the perfect vessel for this culinary masterpiece to be transformed into a portable and convenient meal. Tortillas, with their ancient origins in Mesoamerica, offer a versatile and adaptable base for countless fillings, easily incorporating the components of the Caesar salad. The popularity of Mexican cuisine in the United States, and its subsequent global spread, undoubtedly played a crucial role in the adoption of wraps as a popular food format. The marriage of the Caesar salad’s sophisticated flavors with the convenience of the wrap created a culinary hybrid perfectly suited to the fast-paced modern lifestyle.
Today, the chicken Caesar wrap is a ubiquitous presence on menus worldwide, a testament to its enduring appeal. While precise statistics on consumption are difficult to obtain, its prevalence in fast-casual restaurants, cafes, and even grocery store deli sections suggests a significant market share. It’s a dish that transcends geographical boundaries and cultural differences, appealing to a broad spectrum of palates. Its popularity is partially attributed to its adaptability; variations abound, incorporating different types of chicken (grilled, fried, shredded), additional vegetables, and variations on the Caesar dressing. This adaptability allows for customization, catering to individual preferences and dietary restrictions, further contributing to its widespread acceptance.
The chicken Caesar wrap represents more than just a convenient meal; it’s a cultural artifact, reflecting the fusion of culinary traditions and the ongoing evolution of food in a globalized world. It’s a delicious example of how seemingly disparate elements, from ancient Mesoamerican cooking techniques to a 20th-century American salad creation, can be seamlessly combined to create a dish that resonates with millions across the globe. This recipe will guide you through the process of making your own delicious and satisfying chicken Caesar wrap, allowing you to experience this culinary fusion firsthand.
Ingredients and Measurements
Creating the perfect Chicken Caesar Wrap hinges on using fresh, high-quality ingredients and precise measurements. Below, we detail the components, offering substitutions and tips to elevate your culinary experience.
Chicken Breast (6 oz): We recommend using boneless, skinless chicken breasts for ease of preparation and optimal texture within the wrap. Approximately 6 ounces (170g) of chicken will yield enough for one generous wrap. You can adjust this amount based on your appetite. Tip: Marinating the chicken for at least 30 minutes before cooking enhances its flavor and tenderness. A simple marinade of olive oil, lemon juice, garlic powder, and salt & pepper works wonders.
Romaine Lettuce (2 cups, loosely packed): Crisp romaine lettuce provides the perfect base for this wrap. Two cups of loosely packed romaine, roughly chopped, offers a sufficient volume. Important Note: Thoroughly wash and dry the lettuce to remove any dirt or debris. Wilted lettuce compromises the overall quality of the wrap. Consider using a salad spinner for efficient drying.
Caesar Dressing (1/4 cup): The Caesar dressing is the heart of this recipe. We recommend using a high-quality store-bought dressing or making your own from scratch (recipe suggestions are available in a separate section). Recommendation: A creamy, yet not overly thick, dressing is ideal for optimal wrap assembly and flavor distribution. 1/4 cup (60ml) provides sufficient dressing, but feel free to adjust to your preference.
Croutons (1/4 cup): Homemade or store-bought croutons add a delightful crunch. Aim for about 1/4 cup (30g) of croutons, ensuring they are not overly soft or soggy. Professional Tip: Toasting your croutons in a pan with a touch of olive oil before adding them to the wrap enhances their flavor and crispness.
Parmesan Cheese (1/4 cup, grated): Freshly grated Parmesan cheese provides a sharp and salty flavor that complements the other ingredients. Approximately 1/4 cup (30g) of grated Parmesan is sufficient. Substitution: If you don’t have Parmesan cheese, you can use another hard cheese like Pecorino Romano, but note that the flavor profile will differ slightly.
Tortillas (1 large flour or whole wheat): Choose large flour or whole wheat tortillas – approximately 10 inches in diameter. These provide a sturdy base that can hold all the ingredients without tearing. Tip: Gently warming the tortilla before adding the filling makes it more pliable and easier to wrap.
Optional additions: Consider adding other ingredients to personalize your wrap. Some popular options include cherry tomatoes (1/2 cup, halved), black olives (1/4 cup, sliced), or grilled chicken (instead of pan-fried).
Remember to adjust the quantities according to your needs and preferences. Enjoy your delicious Chicken Caesar Wrap!
Equipment and Utensils
Making a delicious Chicken Caesar Wrap requires the right tools to ensure efficiency and a professional finish. While you might already have most of these items in your kitchen, having them readily available will streamline the process. Let’s break down the essential equipment and utensils needed, categorized for clarity.
Cutting and Preparation Tools: First and foremost, you’ll need a sharp chef’s knife (approximately 8 inches) for precise cutting of the chicken and vegetables. A dull knife will make the process more difficult and potentially lead to uneven slices. A smaller paring knife will be handy for more delicate tasks, such as trimming lettuce or removing any tough chicken sinews. A cutting board, preferably one made of durable material like wood or plastic, is essential to protect your countertops and provide a stable surface for chopping. Two separate cutting boards are recommended – one for raw chicken and one for vegetables to prevent cross-contamination.
Cooking Equipment: The method for cooking your chicken will dictate the necessary equipment. For pan-frying or searing, you’ll require a large non-stick skillet (at least 10 inches in diameter) to ensure even cooking and easy cleanup. If opting for baking or grilling, you’ll need a baking sheet or grill pan. You’ll also need appropriate cooking utensils: tongs for safely handling the hot chicken, and a spatula for flipping if pan-frying. A meat thermometer is highly recommended to ensure the chicken reaches a safe internal temperature of 165°F (74°C) to prevent foodborne illnesses. This is crucial for food safety.
Mixing and Serving Utensils: A medium-sized mixing bowl (approximately 3-quart capacity) is needed for preparing the Caesar dressing. A whisk is ideal for effectively emulsifying the dressing ingredients, creating a smooth and creamy texture. A large spoon or spatula will be useful for folding in the ingredients. Measuring cups and spoons are crucial for accurate ingredient measurements, ensuring the perfect balance of flavors in your dressing. For serving, you’ll need a large flat surface, ideally a clean countertop, to assemble the wraps. Having paper towels handy is also a good idea to clean up any spills or excess dressing.
Wrap Assembly and Presentation: Finally, you’ll need large flour tortillas (approximately 10-12 inches in diameter) to create the wraps. The size is crucial for comfortably holding all the ingredients without overflowing. You might also consider having a clean, damp kitchen towel nearby; this can help keep your tortillas pliable and prevent them from cracking while you assemble the wraps. For an elegant presentation, consider using a serving platter or individual plates. Optional: You might want to use a serrated knife to cut the finished wraps into smaller, more manageable portions for easier eating.
Cleaning Up: Remember to gather all your utensils and equipment and clean them thoroughly after use. Proper hygiene is essential in food preparation. Using warm, soapy water and a sponge or brush will help to eliminate any food residue and prevent bacterial growth.
Chicken Preparation (including cooking method)
The success of your Chicken Caesar Wrap hinges on perfectly cooked chicken. We’ll be using boneless, skinless chicken breasts for ease of use and quick cooking time. You can adjust the quantity based on your desired serving size; this recipe is for two wraps.
Ingredients:
- 2 boneless, skinless chicken breasts (approximately 6 ounces each)
- 1 tablespoon olive oil
- 1 teaspoon garlic powder
- 1/2 teaspoon paprika
- 1/4 teaspoon salt
- 1/4 teaspoon black pepper
Preparation:
Begin by preparing your chicken breasts. Pat them dry with paper towels. This step is crucial for achieving a nice sear and preventing excess moisture during cooking. Then, slice each chicken breast in half lengthwise to create thinner, more evenly cooking pieces. This will significantly reduce cooking time and ensure the chicken cooks through completely without becoming dry.
In a small bowl, combine the olive oil, garlic powder, paprika, salt, and pepper. Mix well to create a flavorful marinade. Place the chicken pieces in a shallow dish and pour the marinade over them, ensuring each piece is evenly coated. Let the chicken marinate for at least 15 minutes, or up to an hour in the refrigerator for maximum flavor penetration. Note: Marinating for longer periods is fine, but don’t let it exceed 4 hours.
Cooking Method (Pan-Seared): For a quick and easy cooking method, we recommend pan-searing. Heat a large skillet or frying pan over medium-high heat. Add the marinated chicken pieces to the hot skillet, ensuring not to overcrowd the pan. Avoid overcrowding, as this will lower the temperature and result in steaming instead of searing. Cook for 3-4 minutes per side, or until the chicken is cooked through and reaches an internal temperature of 165°F (74°C). Use a meat thermometer for accuracy.
Cooking Method (Baking): Alternatively, you can bake the chicken. Preheat your oven to 400°F (200°C). Place the marinated chicken pieces on a baking sheet lined with parchment paper. Bake for 15-20 minutes, or until the chicken is cooked through and reaches an internal temperature of 165°F (74°C). Ensure even cooking by flipping the chicken halfway through.
Once the chicken is cooked, remove it from the skillet or oven and let it rest for 5 minutes before slicing or shredding. This allows the juices to redistribute, resulting in more tender and flavorful chicken. Shred the chicken using two forks for easy incorporation into your Caesar wraps. Properly cooked chicken is essential for food safety. Always ensure the internal temperature reaches 165°F (74°C) to eliminate any risk of bacterial contamination.
Caesar Dressing Preparation
Creating a truly delicious Caesar dressing is key to a fantastic chicken Caesar wrap. This recipe focuses on a classic, creamy version, but feel free to adjust it to your taste preferences. We’ll be making a dressing from scratch, which, while slightly more time-consuming than using a bottled variety, delivers a superior flavor and texture.
Ingredients:
- 1/2 cup mayonnaise (preferably a high-quality brand)
- 1/4 cup grated Parmesan cheese (freshly grated is best)
- 2 tablespoons extra virgin olive oil
- 2 tablespoons lemon juice (freshly squeezed is crucial)
- 1 clove garlic, minced (or 1/2 teaspoon garlic powder)
- 1 teaspoon Dijon mustard
- 1/2 teaspoon Worcestershire sauce
- 1/4 teaspoon black pepper
- Pinch of salt (start with a small amount and adjust to taste)
- Optional: 1-2 anchovy fillets, finely minced (for a more traditional, savory flavor)
Instructions:
1. Combine Ingredients: In a medium-sized bowl, whisk together the mayonnaise, Parmesan cheese, olive oil, and lemon juice until well combined. Ensure the emulsion is smooth; you may need to whisk vigorously. A smooth emulsion prevents the dressing from separating.
2. Add Flavor: Next, add the minced garlic (or garlic powder), Dijon mustard, Worcestershire sauce, black pepper, and salt. If using anchovy fillets, incorporate them now. Taste and adjust seasonings as needed. Remember, you can always add more, but it’s harder to take away.
3. Emulsify Thoroughly: Continue whisking until the dressing is completely emulsified and creamy. A well-emulsified dressing will have a smooth, consistent texture and won’t separate. If it starts to separate, add a teaspoon or two of cold water while whisking to help bring it back together.
4. Chill (Optional): For optimal flavor, cover the bowl and refrigerate the dressing for at least 30 minutes before using. This allows the flavors to meld and develop. Chilling also enhances the creamy texture.
Professional Recommendations:
- Use fresh ingredients whenever possible: Freshly squeezed lemon juice, freshly grated Parmesan, and even fresh garlic make a significant difference in the taste of the dressing.
- Don’t over-season: Start with small amounts of salt and pepper, and taste as you go. You can always add more, but it’s difficult to remove excess seasoning.
- Adjust to your taste: Feel free to experiment with different amounts of ingredients to create your perfect Caesar dressing. Some people prefer a tangier dressing with more lemon juice, while others prefer a richer dressing with more mayonnaise.
- Make it ahead: The dressing can be made up to 2 days in advance, allowing the flavors to develop further.
Following these steps will ensure you create a delicious Caesar dressing that complements your chicken Caesar wrap perfectly.
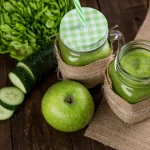
Lettuce and Vegetable Prep
The crispness and freshness of your lettuce are crucial to a great Caesar wrap. We’ll be using romaine lettuce, known for its sturdy leaves perfect for holding the filling without wilting. For this recipe, we’ll need approximately 4 large romaine lettuce leaves, or enough to comfortably wrap the chicken and Caesar dressing.
Begin by thoroughly washing the romaine lettuce. Don’t underestimate this step! Residue from pesticides or soil can significantly impact the taste and safety of your wrap. Rinse the lettuce under cold, running water, gently separating the leaves to ensure all surfaces are clean. You can submerge the lettuce in a large bowl of water if necessary, gently swirling to remove any dirt. Then, lift the lettuce out and allow it to drain completely. Avoid soaking the lettuce for too long, as this can make it soggy.
Once rinsed, carefully remove the outer, tougher leaves. These are often less appealing both in texture and appearance. Then, using a sharp knife, carefully separate the remaining leaves. Avoid tearing the leaves, as this will diminish their structural integrity for wrapping. Aim for leaves that are large enough to comfortably enclose the filling without overflowing or breaking.
Beyond the romaine, consider adding other crisp vegetables to enhance the flavor profile and add texture. For this Caesar wrap, we’ll add some crunchy elements. Dice one medium-sized tomato into approximately ½ inch cubes. This size allows for a good balance of flavor and prevents the tomatoes from being too overpowering. Wash and finely chop ½ a cup of cherry tomatoes, halving them if they are particularly large. The smaller size adds bursts of concentrated tomato flavor.
Next, we’ll incorporate some cucumber for a refreshing contrast. Wash and thinly slice ½ a medium cucumber. Removing the seeds beforehand can help reduce excess moisture and prevent the wrap from becoming soggy. You can use a vegetable peeler to create thin ribbons, or slice them into thin half-moons. Avoid overly thick slices, as they can make the wrap difficult to handle.
Finally, consider adding a small amount of finely shredded carrots for extra color and a subtle sweetness. Shred approximately ¼ cup of carrots using a box grater or food processor. Ensure they are finely shredded to prevent them from overpowering the other ingredients. Remember to wash the carrots thoroughly before shredding.
Once all the vegetables are prepped, store them separately in airtight containers, refrigerated until ready to assemble your wraps. Proper storage helps maintain freshness and prevent wilting, ensuring a superior final product.
Professional Tip: For an extra touch of elegance, use a paper towel to gently pat dry the lettuce leaves before assembling the wraps. This will help prevent excess moisture and ensure a crispier, more satisfying wrap.
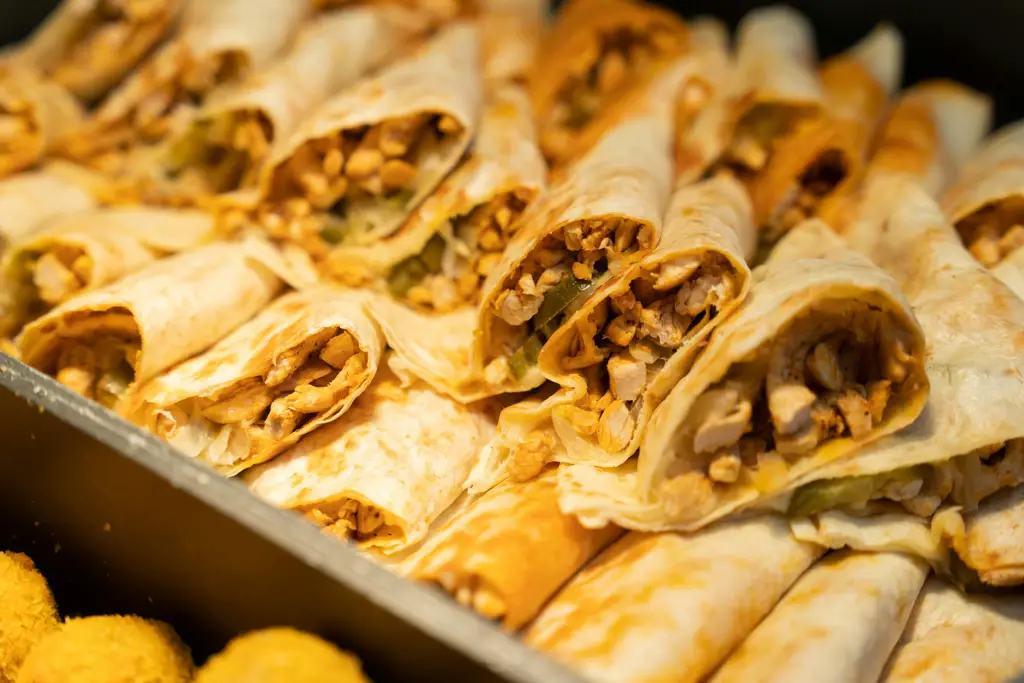
Wrap Assembly
With your delicious chicken Caesar salad prepared, it’s time to assemble the wraps! This stage requires a delicate touch to ensure a beautifully presented and easily manageable wrap. We’ll be using large flour tortillas, approximately 10-12 inches in diameter. You can adjust the size based on your preference and the size of your filling.
Laying the Foundation: Begin by laying a single tortilla flat on a clean, dry work surface. Ensure the tortilla is completely unfolded to prevent tearing during the filling process. A slightly warm tortilla is easier to work with and less prone to cracking; you can gently warm them in a microwave for 10-15 seconds or briefly in a dry skillet over low heat.
Strategic Filling: The key to a successful wrap is balanced distribution of the filling. Avoid overloading the tortilla, as this can lead to messy spills and difficulty wrapping. Start by placing approximately 1/2 cup of the prepared chicken Caesar salad in the center of the tortilla. Don’t pile it too high. Aim for a neat mound that’s roughly 4-5 inches in diameter.
Folding Technique: Once the filling is in place, begin the folding process. This is where a little finesse comes in handy. First, fold the bottom edge of the tortilla over the filling, covering about one-third of the salad. Then, fold in the sides, tucking them in snugly. Imagine you are creating an envelope shape. This will help keep the filling contained and prevent it from spilling out.
Securing the Wrap: Finally, fold the top edge of the tortilla down over the filling, completing the wrap. At this point, you have a neat, sealed package. To prevent the wrap from unraveling, you can gently press down on the seams to secure them. You can also use toothpicks or small skewers to hold the wrap together temporarily, especially if you plan to transport or store them.
Professional Tip: For a more visually appealing wrap, consider using a slightly smaller amount of dressing in the salad itself. This prevents the tortilla from becoming soggy. You can always serve additional dressing on the side for those who prefer a more drenched wrap.
Serving Suggestions: Once assembled, your Chicken Caesar Wraps are ready to serve! They can be enjoyed immediately or chilled for later. If chilling, store them in an airtight container in the refrigerator for up to 24 hours. Consider serving them with a side of extra Caesar dressing, croutons, or a fresh green salad for a complete meal.
Troubleshooting: If your tortilla tears, don’t panic! Simply use another tortilla. If your wrap feels too full, reduce the amount of filling. Practice makes perfect! With a few attempts, you’ll master the art of assembling delicious and perfectly portioned Chicken Caesar Wraps.
Recommendations for Your Chicken Caesar Wrap
To elevate your Chicken Caesar Wrap experience, consider these recommendations for preparation, serving, and storage. Proper preparation is key to a delicious and satisfying wrap. Ensure your chicken is fully cooked and cooled before assembling the wrap to prevent sogginess. Thoroughly wash and dry all your produce before use. Don’t overload the wrap; too much filling will make it difficult to manage and eat. Aim for a balanced distribution of ingredients for optimal flavor and texture in each bite.
For the ultimate Caesar flavor, consider making your own Caesar dressing. Homemade dressing allows you to control the ingredients and tailor the taste to your preferences. Experiment with different types of romaine lettuce for variations in texture and flavor. Some people prefer a crisper romaine, while others enjoy a slightly softer texture. You can also add other vegetables to the wrap, such as chopped bell peppers or shredded carrots, to enhance the nutritional value and add a crunch.
Serving Suggestions: These wraps are excellent for lunch or a light dinner. They are perfect for picnics, potlucks, or a quick and easy meal on the go. Cut the wraps in half diagonally for easier handling. Serve with a side of fresh fruit, such as grapes or sliced apples, for a balanced meal. A small side salad with a light vinaigrette dressing complements the richness of the wrap without being overly heavy.
Storage: For best results, consume your Chicken Caesar Wrap immediately after preparation. However, if you need to store leftovers, wrap them tightly in plastic wrap or place them in an airtight container. Store in the refrigerator for up to 24 hours. The quality of the wrap may deteriorate after this time, as the lettuce may wilt and the chicken may become dry. Do not freeze the assembled wrap, as this will significantly affect the texture and overall taste.
Complementary Dishes: To create a complete meal, consider pairing your Chicken Caesar Wrap with other dishes. A simple side of roasted vegetables, such as broccoli or asparagus, adds extra nutrients and a contrasting flavor profile. A light soup, such as tomato soup or minestrone, makes for a comforting and satisfying meal, especially during cooler months. For a more indulgent option, serve the wraps with a side of crispy potato wedges or sweet potato fries.
Nutritional Information (Approximate per serving, based on a standard recipe): Calorie count will vary depending on ingredients and portion sizes. A typical Chicken Caesar Wrap might contain approximately 450-600 calories, with varying amounts of protein, carbohydrates, and fat. It is recommended to consult a nutrition calculator for a precise breakdown based on your specific recipe and ingredients. The nutritional content is highly influenced by factors such as the type of chicken used (e.g., breast vs. thigh), the amount of dressing used, and the presence of additional ingredients. This wrap provides a good source of protein from the chicken and fiber from the lettuce and croutons.
Important Note: The nutritional information provided is an estimate and may vary. Always check the nutritional labels of your specific ingredients for the most accurate information. This recipe is a guideline; feel free to adjust it to your liking and dietary needs. Enjoy your delicious and customizable Chicken Caesar Wrap!