Chicken tenders, those beloved strips of white meat, have firmly cemented their place as a fast-food and comfort-food staple. While pinpointing their exact origin is difficult, their rise to popularity is intrinsically linked to the fast-food industry’s boom in the mid-20th century. The convenient, bite-sized nature of chicken tenders, coupled with their perceived healthiness compared to fried options like burgers, made them a quick success. Unlike some dishes with centuries-old histories, chicken tenders’ story is relatively recent, evolving alongside changing consumer preferences and food processing technologies. Their widespread availability reflects a broader shift towards convenient, pre-portioned meals, a trend amplified by busy lifestyles and increased demand for readily available protein sources.
The cultural significance of chicken tenders is undeniable. They’ve transcended mere food and become a symbol of casual dining, particularly within American culture. Their presence on countless menus, from fast-food chains to upscale restaurants offering gourmet variations, showcases their adaptability. Interestingly, statistics show that chicken tenders are incredibly popular among children and young adults, contributing significantly to the overall consumption of chicken in the United States. In fact, according to the National Chicken Council, chicken consumption has steadily increased over the past few decades, with chicken tenders playing a significant role in this growth. This popularity isn’t limited to the U.S., however; variations of breaded and fried chicken strips appear in many cuisines worldwide, reflecting a universal appreciation for crispy, flavorful protein.
Today, the preparation of chicken tenders has evolved beyond simple breading and frying. Homemade versions, often featuring unique marinades and dipping sauces, have gained considerable traction, allowing for greater control over ingredients and flavor profiles. This recipe focuses on crafting delicious chicken tenders from scratch, emphasizing the quality of ingredients and the satisfaction of creating a meal from beginning to end. We’ll delve into a simple yet effective breading technique and, most importantly, explore the creation of a homemade dipping sauce, allowing you to tailor the flavor to your personal preferences. The versatility of the homemade approach empowers you to experiment with different spices, herbs, and sauces, transforming a classic dish into a culinary adventure.
Ingredients and Measurements
This recipe yields approximately 20 chicken tenders and a generous amount of dipping sauce. Adjust quantities as needed depending on your serving size.
For the Chicken Tenders:
Chicken Breast: 1.5 lbs (approximately 2 large chicken breasts). Choose boneless, skinless chicken breasts for ease of preparation and optimal tenderness. Ensure the breasts are relatively uniform in size for even cooking. If one breast is significantly larger, consider slicing it in half lengthwise to create more even-sized tenders.
All-Purpose Flour: 1 ½ cups. Using all-purpose flour provides a classic, slightly crisp coating. You can experiment with other flours like rice flour or almond flour for gluten-free options, but note that the texture might vary.
Eggs: 2 large. Use large eggs at room temperature for optimal binding and a smoother batter. Room temperature eggs whisk more easily and create a more consistent coating on the chicken.
Breadcrumbs: 2 cups. Panko breadcrumbs are highly recommended for their extra-crispy texture. If using regular breadcrumbs, you might need to add a little more for a thicker coating. You can also add grated parmesan cheese to the breadcrumbs for extra flavor.
Seasoning Blend: This is where you can get creative! A basic blend might include: 1 teaspoon paprika, ½ teaspoon garlic powder, ½ teaspoon onion powder, ½ teaspoon salt, and ¼ teaspoon black pepper. Feel free to experiment with other spices like cayenne pepper for a kick, or dried herbs like oregano or thyme for a more complex flavor profile. Adjust seasonings to your preference. Remember to taste test your seasoning blend before using it on all the chicken.
Vegetable Oil: Approximately 2 cups. Use a high-smoke-point oil like canola, vegetable, or peanut oil for frying. This prevents the oil from breaking down and burning during cooking. Ensure you have enough oil to fully submerge the chicken tenders without overcrowding the pan.
For the Homemade Dipping Sauce:
Mayonnaise: ½ cup. Use a high-quality mayonnaise for the best flavor. Real mayonnaise, not a light version, will provide a richer and creamier sauce.
Sweet Relish: ¼ cup. Sweet relish adds a tangy sweetness that balances the richness of the mayonnaise. You can substitute with finely chopped pickles if preferred.
Honey: 2 tablespoons. Honey adds a touch of sweetness and depth to the sauce. You can adjust the amount depending on your preferred level of sweetness. Agave nectar or maple syrup can be used as substitutes.
Lemon Juice: 1 tablespoon. Freshly squeezed lemon juice provides a bright, acidic counterpoint to the sweetness and richness of the other ingredients. Avoid using bottled lemon juice as it often lacks the vibrant flavor of freshly squeezed juice.
Garlic Powder: ½ teaspoon. Garlic powder adds a subtle savory note to the sauce. For a stronger garlic flavor, consider using 1-2 cloves of minced fresh garlic instead.
Paprika: ¼ teaspoon. Paprika adds a subtle smokiness and a pop of color to the sauce. Smoked paprika would be particularly delicious here.
Salt and Black Pepper: To taste. Season the sauce to your preference. Start with a small amount and add more as needed.
Equipment List
Creating delicious chicken tenders and a homemade dipping sauce requires the right tools. This equipment list details everything you’ll need, from prepping the chicken to serving your finished masterpiece. Careful selection of your equipment will significantly impact the quality and efficiency of your cooking process.
For prepping the chicken, you’ll need a selection of cutting boards and knives. I recommend using two separate cutting boards: one dedicated solely to raw chicken and the other for preparing the sauce ingredients. This prevents cross-contamination and ensures food safety. A large, sharp chef’s knife (approximately 8-10 inches) is essential for cutting the chicken breasts into even tenders. A smaller paring knife can be helpful for trimming any excess fat or sinew. Ensure your knives are very sharp; dull knives are more likely to tear the chicken, resulting in uneven cooking and less appealing tenders.
Next, you’ll need several shallow dishes or trays for breading the chicken. Three shallow dishes are ideal: one for the flour dredge, one for the egg wash, and one for the bread crumbs. The size of the dishes should be proportionate to the amount of chicken you’re preparing. Using larger dishes allows for easier handling and prevents overcrowding, which can lead to uneven breading. Avoid using deep dishes as this can lead to excess batter and soggy tenders.
For cooking, a large skillet or frying pan (cast iron is ideal for even heat distribution) with a diameter of at least 12 inches is recommended. Choose a pan that is deep enough to fully submerge the chicken tenders in the cooking oil. A deep fryer can also be used for a crispier result, but a well-seasoned skillet works perfectly well. You’ll also need a thermometer to accurately monitor the oil temperature; maintaining the oil temperature between 350-375°F (175-190°C) is crucial for achieving perfectly cooked, golden-brown chicken tenders.
For the sauce, you will need basic kitchen tools such as measuring cups and spoons for precise ingredient measurements. A whisk is essential for thoroughly combining the sauce ingredients, ensuring a smooth and consistent texture. A small saucepan is ideal for gently heating the sauce, allowing the flavors to meld together. Don’t forget a sturdy spatula for flipping the chicken tenders during cooking and also for stirring the sauce. Finally, tongs will make it easier to transfer the cooked chicken from the pan to a wire rack for draining excess oil.
Finally, for serving, you’ll need serving plates and utensils. Consider using a wire rack placed over a baking sheet to allow the cooked chicken tenders to drain excess oil before serving. Paper towels are also useful for blotting away any extra oil from the cooked chicken. This attention to detail ensures your chicken tenders are not only delicious but also presented beautifully.
Chicken Preparation (Tenderizing, Marinating)
The key to incredibly juicy and flavorful chicken tenders lies in proper preparation. This involves both tenderizing the meat to ensure even cooking and marinating to infuse it with delicious flavors. We’ll cover both processes in detail, ensuring your chicken tenders are restaurant-quality.
Tenderizing: While boneless, skinless chicken breasts are already relatively tender, a little extra help goes a long way. We recommend using a meat mallet to achieve even thickness and a more delicate texture. Avoid pounding the chicken too hard, as this can result in tearing the meat. Instead, aim for a consistent thickness of about ½ inch. To begin, place each chicken breast between two sheets of plastic wrap or inside a zip-top bag. This prevents the meat from splattering and keeps your work surface clean. Using the flat side of the meat mallet, gently pound the chicken until it reaches the desired thickness. Check for even thickness across the entire breast; you may need to adjust your pounding accordingly.
Once tenderized, you’ll need to cut the chicken breasts into strips, roughly 1-inch wide and 3-4 inches long, to create your chicken tenders. Ensure each tender is roughly the same size for even cooking. If some pieces are significantly larger or smaller than others, they may cook unevenly, resulting in some being undercooked or overcooked.
Marinating: Marinating not only adds flavor but also helps to keep the chicken moist during cooking. For this recipe, we recommend a simple yet effective marinade. Combine ½ cup buttermilk, 1 tablespoon lemon juice, 1 teaspoon garlic powder, 1 teaspoon onion powder, ½ teaspoon paprika, ½ teaspoon salt, and ¼ teaspoon black pepper in a medium-sized bowl. Whisk the ingredients together thoroughly to ensure that the spices are evenly distributed. Add the chicken tenders to the marinade, ensuring they are fully submerged. Cover the bowl with plastic wrap and refrigerate for at least 30 minutes, or preferably for 2-4 hours. The longer the chicken marinates, the more flavorful it will become, but 30 minutes is sufficient for a quick weeknight meal.
Important Note: When removing the chicken from the marinade, allow any excess to drip off. This prevents excess liquid from creating steam during the cooking process, which can result in soggy tenders. Patting them gently with paper towels can further help to remove excess moisture.
Professional Recommendation: For an even more flavorful marinade, consider adding a tablespoon of your favorite hot sauce or a splash of Worcestershire sauce. You can also experiment with different herbs and spices to create your signature marinade. Remember to always taste and adjust seasonings to your personal preference.
Following these steps will ensure that your chicken tenders are both tender and flavorful, setting the stage for a truly delicious meal. Now you are ready to proceed to the next step of breading and cooking your perfectly prepared chicken tenders!
Sauce Preparation (Mise en Place)
Before you even begin cooking your chicken tenders, meticulously preparing your sauce – the mise en place – is crucial for a smooth and efficient cooking process. This section details the preparation of a delicious honey-mustard dipping sauce, but the principles apply to any sauce you choose.
Ingredients: For a perfectly balanced honey-mustard sauce, you’ll need the following ingredients, measured precisely for optimal flavor:
- 1/2 cup high-quality mayonnaise (Use a mayonnaise with a good flavor profile, as it forms the base of your sauce).
- 1/4 cup honey (Choose a honey with a distinct flavor, such as wildflower or clover, to enhance the sauce’s complexity).
- 2 tablespoons Dijon mustard (Dijon adds a sharp, tangy note; adjust the amount to your preference for spiciness).
- 1 tablespoon yellow mustard (This provides a milder, sweeter counterpoint to the Dijon).
- 1 tablespoon apple cider vinegar (Adds brightness and acidity to balance the sweetness).
- 1 teaspoon Worcestershire sauce (Adds umami and depth of flavor; use a high-quality Worcestershire for best results).
- 1/2 teaspoon garlic powder (Enhances the savory notes).
- 1/4 teaspoon black pepper (Freshly ground black pepper is always preferred for its superior aroma and flavor).
- Pinch of cayenne pepper (optional) (Adds a touch of heat; adjust to your spice tolerance).
Preparation Steps: Follow these steps carefully to ensure a perfectly emulsified and flavorful sauce:
- Measure all ingredients accurately: Using measuring cups and spoons ensures consistency and prevents imbalances in flavor. Inaccurate measurements can significantly impact the final taste.
- Combine mayonnaise and honey: In a medium-sized bowl, thoroughly whisk together the mayonnaise and honey until completely combined and smooth. This is the base of your emulsion, and thorough mixing is essential.
- Incorporate mustards and vinegar: Gradually whisk in the Dijon mustard, yellow mustard, and apple cider vinegar. Whisk continuously to prevent clumping and ensure a smooth consistency.
- Add remaining ingredients: Add the Worcestershire sauce, garlic powder, black pepper, and cayenne pepper (if using). Whisk until everything is fully incorporated and the sauce is homogenous.
- Taste and adjust: Taste the sauce and adjust the seasoning as needed. You might want to add more honey for sweetness, more mustard for tang, or more vinegar for acidity. Tasting and adjusting is crucial for perfecting the flavor profile to your liking.
- Chill (optional): For optimal flavor development, cover the bowl and refrigerate the sauce for at least 30 minutes before serving. This allows the flavors to meld and deepen.
Professional Recommendations: For a truly exceptional sauce, consider using freshly squeezed lemon juice instead of apple cider vinegar for a brighter, more vibrant flavor. Experiment with different types of honey and mustards to create your signature sauce. Always taste and adjust as you go – this is the chef’s secret to creating consistently delicious sauces.
Cooking the Chicken Tenders (Frying, Baking, etc.)
Now that your chicken tenders are prepped and ready, it’s time to cook them to perfection! We’ll explore three popular methods: frying, baking, and air frying. Choose the method that best suits your preferences and equipment.
Method 1: Deep Frying (for the crispiest results)
Deep frying yields the crispiest, most flavorful chicken tenders. For this method, you’ll need about 2-3 cups of vegetable oil (or your preferred frying oil with a high smoke point) in a deep, heavy-bottomed pot or deep fryer. Heat the oil to 350°F (175°C). Use a candy thermometer to monitor the temperature carefully; maintaining consistent heat is crucial for even cooking and preventing burning. Never overcrowd the pot; work in batches, adding about 4-6 chicken tenders at a time to avoid lowering the oil temperature significantly. Fry for approximately 5-7 minutes per batch, or until the chicken is golden brown and cooked through (internal temperature reaches 165°F (74°C)). Remove the tenders with a slotted spoon and place them on a wire rack lined with paper towels to drain excess oil.
Method 2: Baking (a healthier option)
Baking offers a healthier alternative to frying. Preheat your oven to 400°F (200°C). Line a baking sheet with parchment paper for easy cleanup. Arrange the breaded chicken tenders in a single layer on the baking sheet, ensuring they aren’t overcrowded. Baking time will vary depending on the thickness of your tenders, but generally, it takes around 20-25 minutes, flipping halfway through, to ensure even cooking. To check for doneness, insert a meat thermometer into the thickest part of a tender; it should register 165°F (74°C). For extra crispiness, you can broil the tenders for the last 2-3 minutes, keeping a close eye to prevent burning.
Method 3: Air Frying (a convenient and crispy alternative)
Air frying offers a convenient and relatively healthy way to achieve crispy chicken tenders. Preheat your air fryer to 400°F (200°C). Arrange the breaded chicken tenders in a single layer in the air fryer basket, avoiding overcrowding. Do not overcrowd the basket, as this will result in uneven cooking. Air fry for 12-15 minutes, shaking the basket halfway through, until the chicken is golden brown and cooked through (internal temperature reaches 165°F (74°C)). Cooking times may vary depending on your air fryer model, so consult your owner’s manual for specific recommendations.
Important Note: Regardless of the cooking method you choose, always ensure the internal temperature of the chicken reaches 165°F (74°C) to guarantee it’s fully cooked and safe to eat. Use a food thermometer to check the temperature in multiple locations to ensure consistent doneness. Let the cooked chicken tenders rest for a few minutes before serving to allow the juices to redistribute, resulting in more tender and flavorful meat.
Sauce Finishing (Adjusting Consistency, Flavor)
Once your sauce base is cooked, the real magic happens in the finishing stage. This is where you fine-tune the consistency and flavor profile to perfectly complement your crispy chicken tenders. Remember, taste as you go – your palate is your best tool!
Adjusting Consistency: The ideal consistency depends on your preference – a light drizzle, a thick dipping sauce, or something in between. Here’s how to achieve your desired texture:
For a thicker sauce: If your sauce is too thin, you can thicken it in several ways. A classic method is to make a roux. In a separate saucepan, melt 1 tablespoon of butter over medium heat. Whisk in 1 tablespoon of all-purpose flour and cook for 1-2 minutes, stirring constantly, until the mixture is smooth and bubbly (this cooks out the raw flour taste). Gradually whisk in 1/4 cup of your sauce, whisking vigorously to prevent lumps. Return this mixture to your main sauce pot and simmer for 5 minutes, stirring frequently, until the sauce has thickened to your liking. Alternatively, you can use a cornstarch slurry. Mix 1 tablespoon of cornstarch with 2 tablespoons of cold water until smooth. Whisk this slurry into your simmering sauce and cook until thickened, about 1-2 minutes. Don’t boil vigorously, or you may end up with a clumpy sauce.
For a thinner sauce: If your sauce is too thick, simply whisk in a little liquid – water, chicken broth, or even a splash of milk or cream, depending on the flavor profile of your sauce. Add a tablespoon at a time until you reach the desired consistency. Remember to taste frequently to avoid over-thinning.
Adjusting Flavor: This is where you can truly personalize your sauce. Start by tasting and identifying what needs adjusting. Is it too sweet? Too salty? Not enough acidity? Here are some tips:
Acidity: A squeeze of fresh lemon juice or a splash of white wine vinegar can brighten up a dull sauce. Start with 1/2 teaspoon and add more to taste. Be cautious, as too much acidity can overpower the other flavors.
Sweetness: A pinch of sugar, a teaspoon of honey, or a touch of maple syrup can add sweetness. Again, start small and add more gradually. Consider the type of sweetness you want – honey provides a more complex flavor than granulated sugar.
Saltiness: Use kosher salt or sea salt to adjust saltiness. Add a pinch at a time and taste frequently. Salt enhances other flavors, so don’t be afraid to experiment.
Savory Depth: To add complexity, consider adding a pinch of freshly ground black pepper, a dash of Worcestershire sauce, or a teaspoon of Dijon mustard. Experiment with different herbs and spices to find your perfect blend. A small amount of grated garlic or onion powder can also add depth.
Finishing Touches: Once you’ve achieved the desired consistency and flavor, give your sauce one last taste. Consider adding a finishing touch, such as a tablespoon of chopped fresh herbs (parsley, chives, or dill), a sprinkle of red pepper flakes for a hint of heat, or a drizzle of high-quality olive oil for richness. Let the sauce cool slightly before serving with your delicious chicken tenders.
Recommendations
To elevate your Chicken Tenders with Homemade Sauce experience, consider these recommendations for preparation, serving, and storage:
For optimal tenderness and flavor: Marinate the chicken tenders for at least 30 minutes, or up to 4 hours in the refrigerator. This allows the chicken to absorb the marinade’s flavors fully, resulting in more succulent and flavorful tenders. Experiment with different marinades – a simple buttermilk brine, a lemon-herb mixture, or even a spicy chili marinade can all add unique dimensions to your dish. Ensure the chicken is completely dry before breading to promote crispier results. Don’t overcrowd the pan when frying – work in batches to maintain a consistent temperature and ensure even browning.
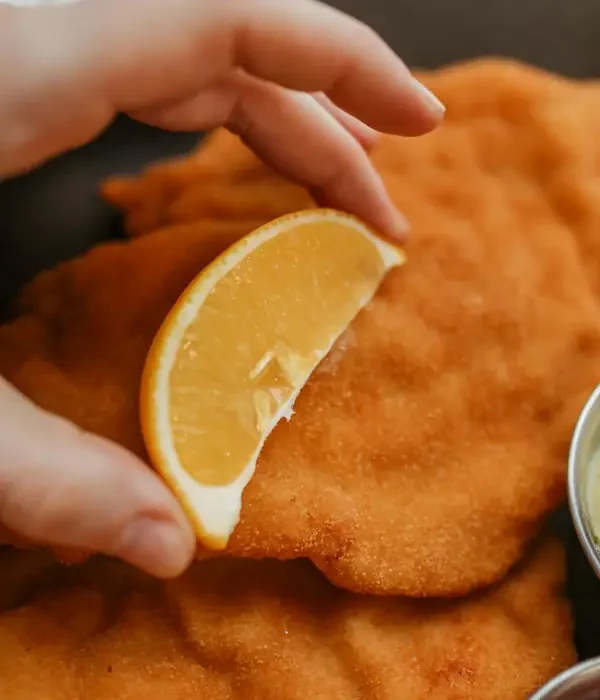
Serving Suggestions: These chicken tenders are incredibly versatile. Serve them hot, straight from the fryer, with your homemade sauce for dipping. Consider offering a variety of sauces to cater to different tastes, such as a spicy sriracha mayo, a honey mustard, or a BBQ sauce. For a complete meal, serve the tenders with classic sides like french fries, potato wedges, or coleslaw. A fresh salad with a light vinaigrette provides a refreshing contrast to the richness of the fried chicken. For a more sophisticated presentation, serve the tenders on a bed of creamy mashed potatoes or alongside a vibrant vegetable medley.
Storage and Reheating: Store leftover chicken tenders and sauce separately in airtight containers in the refrigerator for up to 3 days. To reheat, you can either bake the tenders in a preheated oven at 350°F (175°C) for about 10-15 minutes, or air fry them for a crispier finish. Avoid reheating the tenders in the microwave, as this can result in dry, rubbery chicken. The homemade sauce can be reheated gently on the stovetop or in the microwave.
Complementary Dishes: These chicken tenders pair beautifully with a variety of complementary dishes. Consider serving them with creamy macaroni and cheese, a side of rice pilaf, or a comforting bowl of creamy tomato soup. For a more casual meal, serve them with slider buns and all the fixings for a delicious chicken tender sandwich. A side of sweet potato fries or roasted vegetables adds a touch of sweetness and healthy balance to the meal. Don’t underestimate the power of a simple green salad to complete the meal and add freshness.
Nutritional Information (Approximate per serving, based on a 4-ounce serving of chicken tenders and 2 tablespoons of sauce – values will vary based on ingredients used): Calories: 350-450; Protein: 30-40g; Fat: 20-25g; Carbohydrates: 20-30g. Note: This is an estimate and the actual nutritional content will vary depending on the specific ingredients and quantities used in the recipe. For accurate nutritional information, use a nutrition calculator with your specific ingredients and measurements.
Important Note: Always ensure that the chicken is cooked to an internal temperature of 165°F (74°C) to ensure food safety. Adjust cooking times based on the thickness of your chicken tenders and your preferred level of crispiness.