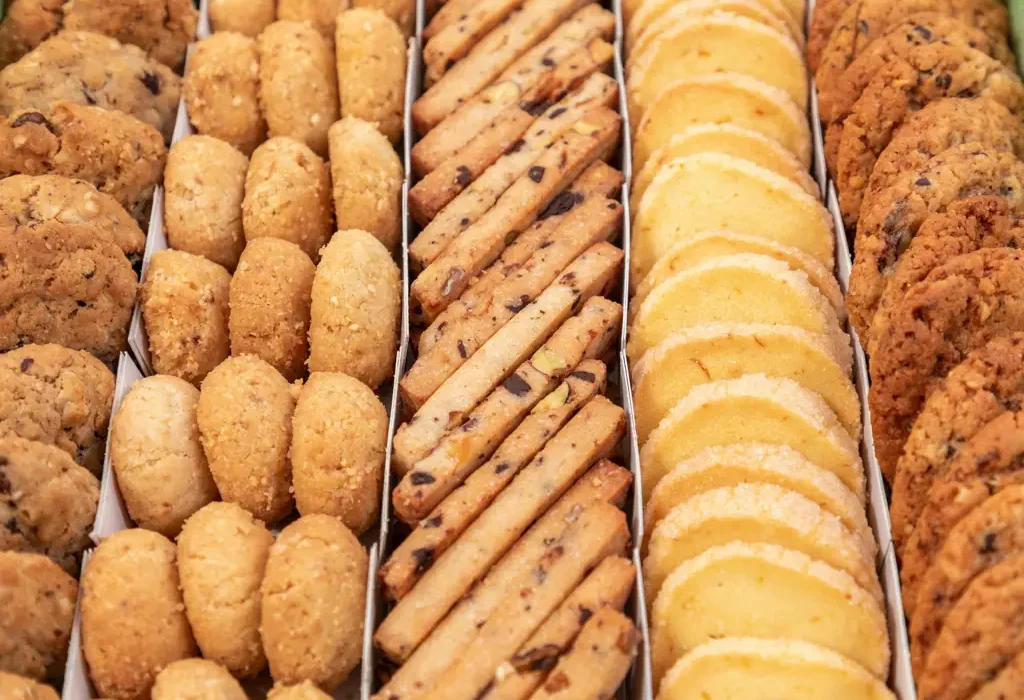
The delicate crumb, the melt-in-your-mouth texture, the subtle sweetness – these are the hallmarks of the homemade butter cookie, a treat whose simple elegance belies a rich and fascinating history. While pinning down the precise origin is difficult, given the countless variations across cultures, butter cookies, in their fundamental form of a simple flour, butter, and sugar mixture, likely emerged alongside the development of reliable butter production and widespread sugar availability. This places their origins somewhere in the late Middle Ages or early Renaissance, a period that saw significant advancements in food processing and trade.
The earliest forms likely differed greatly from the cookies we know today. Recipes evolved slowly, influenced by local ingredients and cultural preferences. In some parts of Europe, spices like cinnamon and nutmeg became prominent additions, reflecting the burgeoning spice trade. Others incorporated nuts, citrus zest, or even dried fruits, showcasing the regional variations in both ingredients and baking techniques. The development of specialized cookie cutters in the 18th and 19th centuries further diversified the forms and aesthetics of these treats, leading to the vast array of shapes and designs we see today.
Butter cookies hold significant cultural importance in many parts of the world. They are frequently associated with holidays and celebrations, particularly Christmas and Hanukkah, often appearing as festive treats exchanged amongst family and friends. In some cultures, specific shapes or flavors carry symbolic meaning; for instance, certain designs might represent good luck or prosperity. The act of making butter cookies itself can become a cherished family tradition, passed down through generations, strengthening bonds and preserving culinary heritage. In fact, according to a recent survey by the National Association of Bakers, approximately 75% of respondents reported baking butter cookies during the holiday season, highlighting their enduring popularity.
Today, the humble butter cookie continues to thrive. While mass-produced versions are readily available, the appeal of a homemade version remains strong. The satisfaction of creating these delicate treats from scratch, the ability to customize flavors and shapes to personal preferences, and the joy of sharing them with loved ones make homemade butter cookies a timeless and cherished culinary experience. This guide will take you through the process of making your own batch, allowing you to experience the delight of creating these classic cookies from start to finish. Prepare for a journey into buttery bliss!
Ingredients and Measurements
Making delicious homemade butter cookies hinges on using high-quality ingredients and precise measurements. Even small variations can significantly impact the final texture and taste. This recipe yields approximately 3 dozen cookies, depending on your cookie cutter size.
Butter: We’ll be using 1 cup (2 sticks) of unsalted butter, softened to room temperature. This is crucial. If your butter is too cold, it won’t cream properly with the sugar, resulting in a tough cookie. If it’s too warm, it will be difficult to handle and may lead to overly spread-out cookies. Let your butter sit out at room temperature for at least an hour before you begin. Using unsalted butter allows you to control the salt level in your cookies, for a more refined flavor profile.
Granulated Sugar: You’ll need 1 cup of granulated white sugar. This provides sweetness and helps create a tender crumb. Avoid using powdered sugar, as it will result in a different texture. Ensure your sugar is fluffy and free of clumps for optimal creaming with the butter.
Large Eggs: Two large eggs are required. Make sure your eggs are at room temperature as well. Cold eggs can cause the butter mixture to seize, making it difficult to incorporate the dry ingredients. Room temperature eggs contribute to a smoother, more evenly mixed batter.
Vanilla Extract: Add 1 teaspoon of pure vanilla extract for a rich, aromatic flavor. Avoid using imitation vanilla, as it lacks the complex flavor profile of pure vanilla extract. This small addition makes a significant difference in the overall taste of the cookies.
All-Purpose Flour: The recipe calls for 3 cups of all-purpose flour. Spoon the flour into your measuring cup, rather than scooping it directly from the bag. Scooping compresses the flour, leading to inaccurate measurements and potentially dry cookies. Level off the flour with a straight edge for precise results.
Baking Powder: 1 teaspoon of baking powder is essential for leavening the cookies, giving them a light and airy texture. Ensure your baking powder is fresh. Old baking powder loses its effectiveness, resulting in flat cookies.
Salt: A pinch of salt (about 1/4 teaspoon) enhances the flavors of the other ingredients. Don’t skip this seemingly small detail! Salt balances the sweetness and brings out the best in the butter and vanilla.
Optional additions: Feel free to experiment! You can add 1/2 cup of chopped nuts (walnuts, pecans, or almonds), dried cranberries, or chocolate chips to customize your butter cookies. Remember to adjust baking time slightly if adding ingredients that contain moisture.
Precise measurements are paramount for baking success. Using a kitchen scale for weighing ingredients is highly recommended for the most consistent results. However, if you are using measuring cups and spoons, always follow the instructions above carefully to ensure accuracy.
Equipment List
Making delicious homemade butter cookies requires the right tools to ensure a smooth and efficient baking process. This equipment list details everything you’ll need, from essential mixing bowls to specialized cookie cutters, allowing you to achieve perfectly shaped and textured cookies.
Mixing Bowls: You’ll need at least two mixing bowls of different sizes. A large bowl (approximately 5-quart capacity) is essential for creaming together the butter and sugar, while a smaller bowl (approximately 3-quart capacity) is ideal for whisking together the dry ingredients. Stainless steel bowls are recommended for their durability and easy cleaning. Glass bowls are also a good option, but avoid using plastic bowls as they can sometimes retain odors.
Measuring Cups and Spoons: Accurate measurements are crucial in baking. Invest in a set of both dry and liquid measuring cups and measuring spoons. Use dry measuring cups for dry ingredients like flour and sugar, and liquid measuring cups for wet ingredients like milk and eggs. Ensure that you level off the dry ingredients with a straight edge to avoid adding too much, which can affect the final texture of your cookies.
Electric Mixer: A stand mixer or a hand-held electric mixer with a paddle attachment is highly recommended. Creaming butter and sugar together by hand is time-consuming and can result in less evenly incorporated ingredients. A stand mixer provides superior power and consistency, making the process much easier, especially for larger batches. If using a hand-held mixer, ensure it’s powerful enough to handle the task without stalling.
Rubber Spatula or Wooden Spoon: Even with an electric mixer, you’ll need a rubber spatula or wooden spoon to scrape down the sides of the bowl and ensure all ingredients are thoroughly combined. A rubber spatula is particularly effective at incorporating any leftover batter from the sides and bottom of the bowl, preventing dry patches in your cookies.
Baking Sheets: Two or more standard-sized baking sheets (approximately 12×18 inches) are essential for baking the cookies. Non-stick baking sheets are preferred to prevent sticking and make cleanup easier. Alternatively, you can line your baking sheets with parchment paper for easy removal and to prevent burning.
Cookie Cutters: Choose your favorite cookie cutters! The size and shape are completely up to your preference. Consider using a variety of shapes and sizes for a visually appealing batch of cookies. You will need at least 2-3 different cutters for a delightful assortment.
Parchment Paper: Using parchment paper on your baking sheets is highly recommended to prevent sticking and for easy cleanup. Cut parchment paper to fit your baking sheets to avoid any overhang which can catch fire.
Wire Rack: Once the cookies are baked, transfer them to a wire rack to cool completely. This prevents them from becoming soggy and allows for even cooling. A wire rack ensures air circulation around the cookies, promoting a crisp texture.
Optional Equipment: A pastry bag and piping tips (for decorating), a rolling pin (for even thickness), and a kitchen scale (for precise measurements) can enhance your cookie-making experience. While not strictly necessary, these can add a professional touch to your homemade butter cookies.
Instructions (Mixing)
Making delicious homemade butter cookies begins with the meticulous mixing of ingredients. This process is crucial for achieving the perfect texture and flavor. We’ll be using the creaming method, which involves beating together the butter and sugar until light and fluffy. This incorporates air, leading to tender and crumbly cookies.
Step 1: Softening the Butter. Begin by taking your 1 cup (2 sticks) of unsalted butter out of the refrigerator at least 30 minutes before you start baking. You want the butter to be soft and pliable, but not melted. If it’s too cold, the mixture will be difficult to cream, and if it’s too warm, the cookies will spread excessively during baking. Using a stand mixer or a hand mixer will significantly ease this process. Avoid using the microwave to soften butter, as it can lead to uneven softening and potentially melted butter.
Step 2: Creaming Butter and Sugar. Once your butter is softened, add 1 ½ cups of granulated sugar and ½ cup of powdered sugar to the mixing bowl. Begin creaming these ingredients together using your mixer on medium speed. Creaming means beating the mixture until it’s light, fluffy, and pale yellow in color. This usually takes about 3-5 minutes. The longer you cream, the more air you incorporate, leading to a lighter, airier cookie.
Step 3: Adding Eggs and Vanilla. Next, add 2 large eggs one at a time, beating well after each addition. Scrape down the sides of the bowl to ensure all ingredients are incorporated. Then, add 1 teaspoon of pure vanilla extract. Mix until everything is thoroughly combined. Don’t overmix at this stage; just mix until the ingredients are evenly distributed. Overmixing can develop the gluten in the flour, resulting in tough cookies.
Step 4: Dry Ingredients. In a separate bowl, whisk together 4 cups of all-purpose flour, 1 teaspoon of baking powder, and ½ teaspoon of salt. This ensures the leavening agent is evenly distributed. Sifting the flour is optional but recommended as it aerates the flour and helps prevent lumps. Gradually add the dry ingredients to the wet ingredients, mixing on low speed until just combined. Do not overmix. Overmixing will result in tough cookies. Mix only until the dry ingredients are just incorporated into the wet ingredients. The dough should be slightly soft but not sticky.
Step 5: Chill the Dough (Optional but Recommended). For best results, cover the dough and chill it in the refrigerator for at least 30 minutes, or even up to overnight. Chilling the dough helps prevent the cookies from spreading too much during baking and allows the flavors to meld. Chilling also makes the dough easier to handle when you’re ready to shape the cookies.
Important Note: The consistency of your dough should be soft and pliable, but not sticky. If it seems too sticky, add a tablespoon of flour at a time until it reaches the desired consistency. If it’s too dry, add a teaspoon of milk or cream at a time until it is workable. Observe your dough throughout the mixing process and adjust as needed. Remember, practice makes perfect!
Instructions (Baking)
Preheat your oven to 375°F (190°C). This is crucial for achieving the perfect golden-brown color and ensuring the cookies bake through evenly. Using an oven thermometer is highly recommended to verify your oven’s accuracy, as ovens can often vary in temperature.
Line your baking sheets with parchment paper. This prevents the cookies from sticking and makes cleanup a breeze. Don’t skip this step! It’s a small detail that significantly impacts the baking process and the final product’s appearance.
In a large bowl, cream together 1 cup (2 sticks) of unsalted butter and ¾ cup of granulated sugar until the mixture is light and fluffy. Use an electric mixer for best results; this ensures the butter and sugar are thoroughly incorporated, resulting in a smoother, more tender cookie. Creaming the butter and sugar properly is key to achieving a light and airy texture.
Beat in 2 large eggs one at a time, ensuring each egg is fully incorporated before adding the next. Don’t overmix at this stage; you just want to combine the ingredients. Overmixing can develop the gluten in the flour, leading to tough cookies.
In a separate bowl, whisk together 2 ½ cups of all-purpose flour, 1 teaspoon of baking powder, and ½ teaspoon of salt. Sift the dry ingredients for a lighter texture. This helps to aerate the flour and prevent lumps.
Gradually add the dry ingredients to the wet ingredients, mixing on low speed until just combined. Be careful not to overmix. Overmixing will lead to tough cookies. The dough should be slightly soft but not sticky.
Once the dough is mixed, chill it in the refrigerator for at least 30 minutes. Chilling the dough is essential. It firms up the butter, preventing the cookies from spreading too much during baking and resulting in a more defined shape. You can even chill it for up to 2 hours for an even better result.
Once chilled, roll out the dough on a lightly floured surface to about ¼ inch thickness. Use cookie cutters to cut out your desired shapes. If the dough becomes too soft, chill it again for 15-20 minutes before continuing. Place the cut cookies onto the prepared baking sheets, leaving about 1 inch between each cookie to allow for spreading.
Bake for 8-10 minutes, or until the edges are lightly golden brown. Keep a close eye on the cookies as oven temperatures can vary. Start checking for doneness at the 8-minute mark. Baking time may need to be adjusted depending on your oven and the size of your cookies.
Remove the cookies from the oven and let them cool on the baking sheets for a few minutes before transferring them to a wire rack to cool completely. Allowing the cookies to cool slightly on the baking sheet prevents breakage. Once completely cooled, you can store them in an airtight container at room temperature for up to a week.
Enjoy your delicious homemade butter cookies! Experiment with different flavors by adding extracts like vanilla, almond, or lemon, or by incorporating sprinkles or other decorations before baking.
Cooling and Storage
Once your butter cookies have emerged golden brown and perfectly baked from the oven, the cooling and storage process is crucial to maintaining their delicate texture and delightful flavor. Improper handling can lead to soggy cookies or a loss of crispness, so careful attention to detail is key.
Allow the cookies to cool completely on the baking sheet for at least 10-15 minutes before transferring them to a wire rack. This initial cooling period allows the cookies to firm up slightly, preventing breakage and ensuring even cooling. Resist the urge to move them prematurely; the heat from the baking sheet will continue to cook them, potentially leading to over-baked edges or a softer center.
Transfer the cookies to a wire rack to cool completely. This is a critical step. Leaving them on the baking sheet traps heat and moisture, leading to a softer, chewier cookie than desired. A wire rack provides excellent air circulation, allowing for even and rapid cooling. This process typically takes an additional 15-20 minutes, depending on the thickness of your cookies and the ambient temperature.
Once completely cooled, store the cookies in an airtight container. This prevents them from absorbing moisture from the air, which can make them stale and less crisp. An airtight container, such as a tin or a container with a tight-fitting lid, is ideal. Avoid using plastic bags, as they don’t provide sufficient protection against moisture and can trap condensation.
For optimal storage, consider layering parchment paper or wax paper between layers of cookies. This prevents them from sticking together and helps maintain their individual shape and crispness. If you’re using a stackable container, consider placing a layer of parchment paper between each layer of cookies to prevent them from sticking together.
Room temperature storage is best for maintaining the ideal texture of butter cookies for up to 5-7 days. Beyond this point, the cookies may begin to lose their crispness and develop a slightly stale taste. Keep the container in a cool, dry place, away from direct sunlight or heat sources, which can accelerate staleness.
For longer storage, consider freezing your cookies. Freeze them in a single layer on a baking sheet lined with parchment paper until solid, then transfer them to a freezer-safe bag or container. Frozen cookies can last for 2-3 months. To thaw, simply remove the desired number of cookies from the freezer and allow them to come to room temperature before serving. Note: The texture might be slightly softer after freezing, but the flavor will remain largely unaffected.
Proper cooling and storage are essential for preserving the quality and deliciousness of your homemade butter cookies. By following these guidelines, you can enjoy perfectly crisp, flavorful cookies for days, or even months, to come. Remember, patience is key to achieving that perfect, melt-in-your-mouth texture!
Icing (Optional)
While these butter cookies are delightful on their own, a simple icing can elevate them to a truly special treat. This section outlines several icing options, from a classic royal icing to a simpler glaze. Remember to let your cookies cool completely before icing to prevent melting.
Option 1: Classic Royal Icing
Royal icing provides a crisp, firm finish perfect for decorating. It’s a little more involved but offers superior results for intricate designs.
Ingredients:
- 3 large egg whites, at room temperature
- 4 cups (450g) powdered sugar, sifted
- 1/2 teaspoon cream of tartar
- 1/2 teaspoon vanilla extract (optional)
- Gel food coloring (optional, for desired color)
Instructions:
- In a large bowl, beat egg whites with an electric mixer until soft peaks form.
- Gradually add the sifted powdered sugar and cream of tartar, beating on low speed until combined.
- Increase speed to medium-high and beat for 7-10 minutes, until the icing is glossy and stiff peaks form. This is crucial for a stable icing.
- Add vanilla extract (if using) and food coloring (if using), beating until evenly incorporated. Start with a small amount of coloring and add more as needed to achieve your desired shade.
- Transfer the icing to a piping bag fitted with your desired tip. Use different tips to create various decorative effects.
- Pipe icing onto the cooled cookies and allow to set completely before serving or storing (at least 2-3 hours).
Option 2: Simple Glaze
This glaze is quicker and easier to make, providing a smooth, glossy coating. It’s perfect for a less elaborate finish.
Ingredients:
- 1 cup (120g) powdered sugar
- 2-4 tablespoons milk (or water, for a thinner consistency)
- 1/2 teaspoon vanilla extract (optional)
- Gel food coloring (optional, for desired color)
Instructions:
- In a small bowl, whisk together the powdered sugar and vanilla extract (if using).
- Gradually add the milk (or water), whisking constantly until a smooth, pourable glaze forms. Add milk one tablespoon at a time, adjusting the consistency to your preference. Too thick? Add more milk. Too thin? Add more powdered sugar.
- Add food coloring (if using) and whisk until evenly distributed.
- Dip each cooled cookie into the glaze, allowing excess to drip off. Alternatively, you can drizzle the glaze over the cookies using a spoon or fork.
- Place the glazed cookies on a wire rack to allow the glaze to set before serving or storing.
Important Considerations:
Storage: Iced cookies are best stored in an airtight container at room temperature for up to 3 days. For longer storage, consider freezing them.
Experimentation: Feel free to experiment with different flavors and colors. Add extracts like almond or lemon, or use cocoa powder for a chocolate glaze. The possibilities are endless!
Clean-up: Royal icing can be difficult to clean, so work quickly and efficiently. Warm water usually helps loosen the icing from your equipment.
Recommendations for Homemade Butter Cookies
These delicate butter cookies are best enjoyed fresh, but proper storage will ensure they remain delicious for several days. Store your cookies in an airtight container at room temperature for up to 5 days. For longer storage, consider freezing them. Place the cooled cookies in a freezer-safe container or bag, and they should last for up to 3 months. Remember to thaw them completely at room temperature before serving.
Serving these cookies is half the fun! Their buttery, melt-in-your-mouth texture makes them perfect for a variety of occasions. Serve them alongside a cup of hot tea or coffee for an afternoon treat, or use them to complement a dessert spread at a party. They’re equally delightful with a glass of cold milk or a scoop of your favorite ice cream. The subtle sweetness pairs beautifully with strong, dark beverages, enhancing both the cookie and the drink.
To elevate your butter cookie experience, consider pairing them with complementary dishes. Their delicate flavor profile allows them to complement a range of desserts and savory options. For a sophisticated pairing, serve them alongside a fruit tart or a light citrus salad. The contrast of textures and flavors creates a delightful culinary experience. Alternatively, they make a wonderful addition to a cheese board, adding a sweet element to the salty cheeses. Their subtle sweetness also works well with strong cheeses like cheddar or aged gouda.
Consider experimenting with different flavor variations to expand your culinary horizons. Add a teaspoon of vanilla extract, almond extract, or orange zest to the dough for a unique twist. You can also incorporate chopped nuts, dried fruits, or chocolate chips for added texture and flavor. Remember to adjust the baking time accordingly when adding ingredients that retain moisture.
Nutritional Information (per cookie, approximate values may vary based on ingredients and portion size):
Calories: Approximately 100-120 kcal
Fat: 6-8g
Saturated Fat: 4-6g
Cholesterol: 15-25mg
Sodium: 20-40mg
Carbohydrates: 12-15g
Sugar: 6-8g
Protein: 1-2g
Note: These are approximate values and can vary depending on the specific ingredients used and the size of the cookies. For precise nutritional information, use a nutrition calculator with your exact recipe details.
Enjoy your delicious homemade butter cookies! Remember to adjust the recipe to your preferences and experiment with different flavors and toppings to create your signature cookies. Happy Baking!