Strawberry shortcake, a seemingly simple dessert, boasts a surprisingly rich and complex history, far exceeding its delicate appearance. While the exact origins are debated, its roots can be traced back to 18th-century England, where biscuits or shortcakes served as a vehicle for whipped cream and fruit. These early versions lacked the standardized structure we associate with modern strawberry shortcake, often featuring a more rustic, crumbly base. The transition from a simple biscuit-based dessert to the iconic layered treat we know today occurred largely in the United States, evolving alongside the nation’s own culinary landscape.
The rise of commercial baking powder in the late 19th and early 20th centuries played a crucial role in the evolution of strawberry shortcake. This readily available leavening agent allowed for a lighter, airier biscuit, better suited to supporting the weight of whipped cream and juicy strawberries. Recipes began appearing in American cookbooks, solidifying the dessert’s place in the nation’s culinary consciousness. Interestingly, there’s no single definitive original recipe; regional variations abound, reflecting the diverse agricultural landscape and culinary traditions across the country. Some variations use a richer, buttery biscuit, while others opt for a more cake-like base.
Strawberry shortcake’s cultural significance is undeniable. It’s deeply intertwined with the imagery of summer and springtime, often associated with picnics, barbecues, and celebrations. The vibrant red strawberries, paired with the fluffy biscuit and creamy topping, create a visually appealing and delicious combination that resonates with people across generations. Its popularity is widespread, with countless variations found in restaurants and home kitchens alike. While precise sales figures for strawberry shortcake are difficult to obtain, its consistent presence on restaurant menus and in home baking suggests a significant and enduring market share within the dessert industry. It’s a dessert that transcends cultural boundaries, finding its place in celebrations and everyday life.
Beyond its culinary appeal, strawberry shortcake has permeated popular culture. It has featured in literature, films, and television shows, further cementing its iconic status. This enduring popularity speaks to its simple yet satisfying nature, a perfect balance of sweetness, tartness, and texture. From humble beginnings as a simple biscuit and fruit combination, strawberry shortcake has evolved into a beloved classic, a testament to the power of culinary innovation and the enduring appeal of a truly delicious dessert.
Ingredients and Measurements
This recipe yields approximately 6 servings of delightful Strawberry Shortcake. The quantities provided can be easily adjusted to suit your needs, simply remember to maintain the ratios for optimal results. Accurate measurements are crucial for baking success, so using a kitchen scale is highly recommended, especially for the flour and sugar.
For the Biscuits:
- 2 cups (250g) all-purpose flour – Use a good quality flour for the best texture. Spoon the flour into your measuring cup and level it off with a straight edge, rather than scooping directly from the bag, to avoid packing the flour and resulting in denser biscuits.
- 1/4 cup (50g) granulated sugar – Superfine sugar will dissolve better but granulated will work just fine.
- 4 teaspoons baking powder – Ensure your baking powder is fresh; old baking powder will not provide sufficient leavening and will result in flat biscuits. Check the expiration date.
- 1/2 teaspoon baking soda – Baking soda helps to neutralize the acidity in the buttermilk and contributes to a lighter texture.
- 1/4 teaspoon salt – Salt enhances the flavors of the other ingredients.
- 1/2 cup (113g) cold unsalted butter, cut into small cubes – Using cold butter is critical for creating flaky biscuits. Cut the butter into small pieces to ensure even distribution throughout the dough.
- 3/4 cup (177ml) cold buttermilk – Buttermilk adds tang and moisture to the biscuits. If you don’t have buttermilk, you can make a substitute by adding 1 tablespoon of white vinegar or lemon juice to 3/4 cup of milk and letting it sit for 5 minutes.
For the Macerated Strawberries:
- 2 pounds (907g) fresh strawberries, hulled and sliced – Choose ripe, but firm strawberries for the best flavor and texture. Avoid using overripe strawberries as they will be too soft and mushy.
- 1/2 cup (100g) granulated sugar – Adjust the sugar to your preference depending on the sweetness of your strawberries.
- 2 tablespoons lemon juice – The lemon juice helps to brighten the flavor of the strawberries and prevents them from browning.
For the Whipped Cream (Optional):
- 1 cup (240ml) heavy cream – Use heavy cream with a minimum fat content of 36% for best whipping results. Cold cream whips up better.
- 2 tablespoons powdered sugar – Adjust to your preferred sweetness.
- 1 teaspoon vanilla extract – Enhances the flavor of the whipped cream.
Important Note: These measurements are precise. While minor adjustments are permissible based on personal preference (e.g., more or less sugar), significant deviations might affect the final outcome. Always weigh your ingredients for the most consistent results.
Strawberry Preparation
Preparing the strawberries is arguably the most crucial step in making a delicious strawberry shortcake. The quality of your strawberries directly impacts the overall flavor profile of the dessert. Start with the freshest, ripest strawberries you can find. Look for berries that are plump, bright red, and fragrant. Avoid any that are bruised, moldy, or overly soft.
Begin by washing your strawberries thoroughly. Gently rinse them under cool running water, taking care not to bruise them. A colander is ideal for this process. Avoid soaking the strawberries, as this can make them watery and less flavorful. A quick rinse is all that’s necessary.
Next, hull the strawberries. This means removing the green leafy tops. You can use a small paring knife or a dedicated strawberry huller for this task. A sharp knife provides the cleanest cut and minimizes waste. If you’re short on time, you can leave a small portion of the green cap on, but be sure to remove any damaged or brown parts.
Now, it’s time to slice or macerate the strawberries. For a classic shortcake, slicing is sufficient. Cut the strawberries into roughly 1/2-inch thick slices. Consistency in size helps ensure even cooking and prevents some pieces from becoming mushy before others. For a more intense strawberry flavor and a slightly softer texture, consider macerating them.
Macerating involves gently breaking down the strawberries’ cell walls, releasing their juices and enhancing their flavor. To macerate 1 pound (approximately 2 cups) of sliced strawberries, combine them in a medium bowl with 1/4 cup granulated sugar and 1 tablespoon of lemon juice. The sugar draws out the juices and the lemon juice brightens the flavor and helps prevent browning. Gently toss the strawberries to coat them evenly with the sugar and lemon juice. Let them sit at room temperature for at least 30 minutes, or up to 2 hours, stirring occasionally. The longer they macerate, the more intense the flavor will become.
Important Note: If you are adding the macerated strawberries to your shortcake immediately, you may not need to add as much sugar. Taste the macerated berries and adjust the sweetness according to your preference. You can always add more sugar, but it is difficult to remove excess sweetness.
Once your strawberries are prepared (sliced or macerated), gently drain off any excess juice before adding them to your shortcake. This will prevent your shortcake from becoming soggy. Reserve the strawberry juice for another use, such as a glaze or a simple syrup for another dessert. Your perfectly prepared strawberries are now ready to be layered onto your delicious shortcakes!
Biscuit Dough Preparation
Making perfect biscuits for your strawberry shortcake is crucial; they should be light, fluffy, and slightly sweet, providing a delightful contrast to the juicy strawberries and whipped cream. This section details the process of creating these essential components.
Begin by ensuring your ingredients are cold. This is absolutely essential for achieving tender biscuits. Cold butter is key to creating flaky layers within the dough. Use a chilled bowl and cold milk or buttermilk – even chilling your flour slightly in the refrigerator for 30 minutes beforehand can make a difference.
For this recipe, we’ll use the following ingredients: 2 cups (250g) all-purpose flour, 4 teaspoons (20g) baking powder, 1/2 teaspoon (3g) salt, 1/4 cup (50g) cold unsalted butter, cut into small pieces, and 3/4 cup (180ml) cold buttermilk (or milk with 1 tablespoon of lemon juice or white vinegar added and allowed to sit for 5 minutes).
In a large bowl, whisk together the flour, baking powder, and salt. This ensures even distribution of the leavening agents, preventing pockets of uneven rise in your biscuits. Thorough whisking is important here.
Cut in the cold butter using a pastry blender or your fingers. Work quickly to prevent the butter from melting. The goal is to incorporate the butter into the flour mixture until it resembles coarse crumbs, with some pea-sized pieces of butter remaining. Avoid overmixing at this stage, as this will develop the gluten in the flour, resulting in tough biscuits.
Gradually add the cold buttermilk, mixing gently with a fork until the dough just comes together. Do not overmix. A slightly shaggy dough is perfectly fine. Overmixing leads to tough biscuits; aim for just enough mixing to hydrate the flour.
Turn the dough out onto a lightly floured surface. Gently pat the dough into a 1-inch thick circle. Avoid kneading; simply pat it down. Use a 2-inch biscuit cutter or a sharp knife to cut out biscuits. Reroll the scraps once to maximize yield, but avoid rerolling more than once, as this will further develop the gluten.
Place the biscuits onto an ungreased baking sheet. Brush the tops lightly with milk or cream for a golden brown finish. Bake in a preheated oven at 450°F (232°C) for 12-15 minutes, or until golden brown and cooked through. Check for doneness by inserting a toothpick; it should come out clean.
Allow the biscuits to cool slightly on a wire rack before serving with your strawberry shortcake. Enjoy the delightful combination of fluffy biscuits, sweet strawberries, and creamy whipped cream!
Baking the Biscuits
Baking perfect biscuits for your strawberry shortcake is crucial; they should be light, fluffy, and slightly sweet, providing a delightful contrast to the juicy strawberries and whipped cream. This section will guide you through the process, ensuring you achieve biscuit perfection.
Preheat your oven to 450°F (232°C). This high temperature is essential for creating a quick rise and a tender crumb. A lower temperature will result in dense, tough biscuits. Make sure your oven rack is in the center position for even baking.
Prepare your baking sheet. Line a baking sheet with parchment paper. This prevents sticking and makes cleanup a breeze. Alternatively, you can lightly grease the baking sheet with butter or cooking spray. Avoid overcrowding the baking sheet; leave at least an inch of space between each biscuit to allow for proper expansion.
Shape the biscuits. Once your dough is ready (following your chosen recipe), gently roll it out to about ½ inch thickness. Use a 2-inch biscuit cutter or a sharp knife to cut out individual biscuits. Avoid twisting the cutter as you cut; this can create tough edges. If you don’t have a biscuit cutter, you can use a glass or a similar round object.
Place the biscuits onto the prepared baking sheet. Arrange them evenly, leaving space between each one. For a rustic look, you can also drop rounded spoonfuls of dough onto the baking sheet and gently pat them down to about ½ inch thickness. This will create slightly irregular biscuits.
Bake for 12-15 minutes, or until golden brown. Keep a close eye on your biscuits during the last few minutes of baking. Overbaking will result in dry, hard biscuits. The baking time might vary slightly depending on your oven, so start checking for doneness around the 12-minute mark.
Cool slightly before serving. Once baked, remove the biscuits from the oven and let them cool on the baking sheet for a few minutes. This allows them to firm up slightly before handling. Do not cool them completely; warm biscuits are ideal for serving with the strawberries and cream. The warmth helps to melt the butter or cream, enhancing the overall flavor and texture of your shortcake.
Professional Tip: For extra fluffy biscuits, try using cold ingredients and avoid overmixing the dough. Overmixing develops the gluten, resulting in tough biscuits. Gently fold the ingredients together until just combined.
Professional Tip: If you want to add a touch of sweetness, brush the tops of the biscuits with a little melted butter before baking. This will add a beautiful golden color and a subtle buttery flavor.
Following these steps will ensure that your strawberry shortcake biscuits are light, fluffy, and perfectly complement the sweet strawberries and creamy topping. Enjoy!
Whipped Cream Preparation
Achieving perfectly whipped cream is crucial for a truly delightful strawberry shortcake. This section details the process, ensuring your whipped cream is light, airy, and perfectly complements the sweet strawberries and buttery shortcakes.
Ingredients:
- 1 cup (240ml) heavy cream – Use heavy cream with a minimum of 36% milkfat for best results. Lighter creams will not whip properly.
- 2-3 tablespoons powdered sugar – Adjust to your desired sweetness. Granulated sugar can be used, but powdered sugar incorporates more smoothly and easily.
- 1 teaspoon vanilla extract – Pure vanilla extract is recommended for the best flavor.
- Pinch of salt – This enhances the sweetness and balances the flavors.
Equipment:
- Metal mixing bowl – Metal bowls chill faster, aiding in the whipping process. Ensure it’s thoroughly chilled before starting.
- Electric mixer – A stand mixer or hand mixer is ideal for achieving stiff peaks quickly and efficiently. A whisk can be used, but it requires significantly more effort and time.
- Rubber spatula or spoon – Useful for scraping down the sides of the bowl to ensure even whipping.
Preparation:
1. Chill the Bowl and Cream: Place your metal mixing bowl and the heavy cream in the refrigerator for at least 30 minutes before starting. This is crucial for achieving maximum volume and stability. Cold cream whips better.
2. Combine Ingredients: Add the chilled heavy cream to the chilled bowl. Add the powdered sugar, vanilla extract, and salt. Do not add any liquid ingredients at this point, such as milk or lemon juice. These can hinder the whipping process.
3. Whip the Cream: Using your electric mixer on medium speed, begin whipping the cream. Initially, the cream will be thin and slightly frothy. Gradually increase the speed to medium-high as the cream thickens. Avoid whipping on high speed initially, as this can lead to butter formation.
4. Monitor the Consistency: As you whip, the cream will gradually thicken. You’ll notice soft peaks forming, then medium peaks, and finally stiff peaks. Stiff peaks are achieved when the cream holds its shape and stands up in stiff peaks when the beaters are lifted. Over-whipping can result in a grainy texture. Stop whipping just before the stiff peaks stage to prevent this.
5. Transfer and Serve: Carefully transfer the whipped cream to a serving bowl or piping bag. Do not over-mix after achieving the desired consistency. Serve immediately or cover and refrigerate for later use. Note that whipped cream will soften slightly when refrigerated.
Troubleshooting: If your cream doesn’t whip properly, it’s likely due to the cream not being cold enough or using cream with insufficient fat content. Try again with fresh, cold heavy cream and a thoroughly chilled bowl.
Assembly
Assembling your Strawberry Shortcake is the final, and arguably most enjoyable, step! With all your components prepared – the fluffy biscuits, the luscious macerated strawberries, and the creamy whipped cream – you’re ready to create a delightful dessert. Accuracy and a gentle touch are key to achieving the perfect balance of textures and flavors.
Begin by selecting your biscuits. If using homemade biscuits, allow them to cool slightly before handling to prevent them from crumbling. Store-bought biscuits should be at room temperature for optimal handling. Avoid overly warm biscuits, as they will be more prone to breakage.
Gently split each biscuit in half horizontally using a serrated knife. A gentle sawing motion will yield cleaner, more even halves. Avoid pressing down too hard, as this can cause the biscuit to compress and lose its airy texture. If the biscuits are particularly delicate, consider using a fork to gently separate them.
Now for the strawberries! Using a spoon, carefully distribute the macerated strawberries evenly between the biscuit halves. Aim for approximately 1/4 cup to 1/3 cup of macerated strawberries per shortcake, depending on the size of your biscuits. Avoid overcrowding, as this can lead to a soggy bottom biscuit.
Next comes the whipped cream. This is where you can get creative! Using a piping bag with a large star tip creates a beautiful, professional look. Alternatively, a spoon will work perfectly fine. Aim for a generous dollop of whipped cream on the bottom biscuit half, ensuring it covers the strawberries adequately.
Carefully top with the other biscuit half, gently pressing down to create a secure but not overly compressed sandwich. Avoid excessive pressure to prevent the biscuit from crumbling or the filling from squishing out. A light, even pressure is all that’s needed.
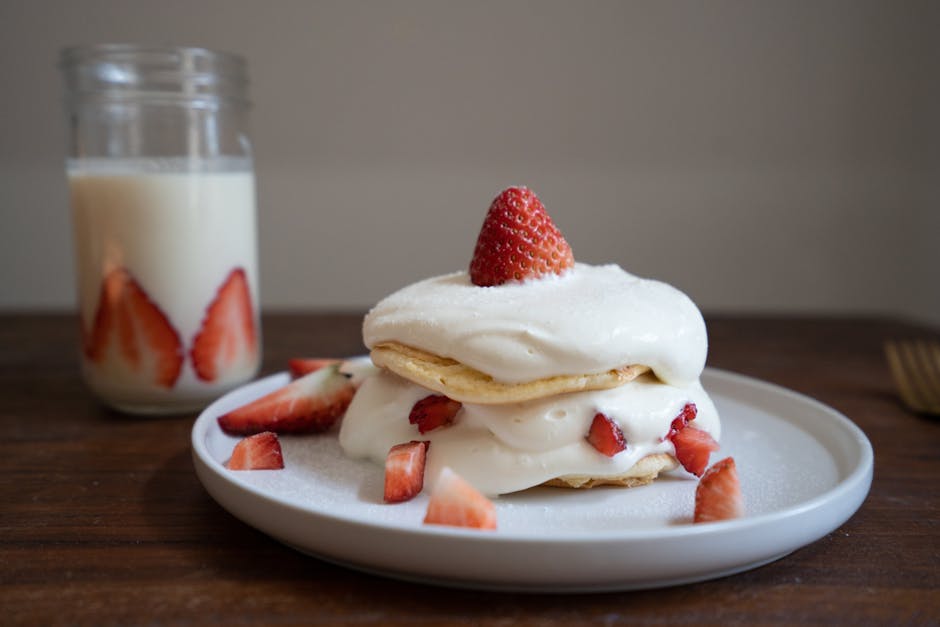
For an extra touch of elegance, consider dusting the assembled shortcakes with a light dusting of powdered sugar. This adds a touch of sweetness and visual appeal. You can also garnish with a fresh strawberry slice or a sprig of mint for an added flourish. Garnishing should be done lightly to avoid overwhelming the other flavors.
Once assembled, serve your Strawberry Shortcakes immediately for optimal enjoyment. The biscuits are best served fresh, as they tend to become less airy over time. If making ahead, assemble the shortcakes just before serving to prevent the biscuits from becoming soggy.
With a little care and attention, your homemade Strawberry Shortcakes will be a beautiful and delicious treat. Enjoy the fruits of your labor (literally!), and remember that slight variations in assembly are perfectly acceptable. The most important ingredient is love, which will undoubtedly shine through in every bite!
Strawberry Shortcake Recommendations
Strawberry Shortcake is a delightful dessert best enjoyed when fresh and bursting with flavor. To maximize your enjoyment, we recommend the following:
Serving Suggestions: For the ultimate experience, serve your Strawberry Shortcake immediately after preparation. The delicate balance of textures and flavors is best appreciated when the biscuits are still warm and the strawberries are juicy. Consider serving individual portions in small dessert bowls or on pretty plates. A dollop of whipped cream, a sprinkle of powdered sugar, or a fresh mint sprig adds a touch of elegance and visual appeal. You can also try layering the components – biscuit, strawberries, cream – in a parfait glass for a fun twist.
Storage Conditions: For optimal freshness, store the components of your Strawberry Shortcake separately. Biscuits are best stored in an airtight container at room temperature for up to 2 days, or in the refrigerator for up to 3 days. Macerate strawberries separately in a covered container in the refrigerator for up to 24 hours before serving. Whipped cream should be stored in an airtight container in the refrigerator and used within 24 hours. Do not refreeze any thawed components. Avoid combining all components until ready to serve to prevent the biscuits from becoming soggy.
Complementary Dishes: Strawberry Shortcake pairs beautifully with light and refreshing dishes. Consider serving it alongside a scoop of vanilla ice cream or a side of fresh berries. A light salad with balsamic vinaigrette or a fruit salad complements the sweetness of the dessert without being overly heavy. For a more substantial meal, a simple grilled chicken salad or a light pasta dish would be suitable pairings. Avoid pairing it with overly rich or heavy desserts as this may be overwhelming.
Nutritional Information (Approximate per serving, may vary based on recipe): This information is an estimate and can vary significantly depending on the specific recipe used, including the size of the biscuits and the amount of added sugar and fat. Always check your specific recipe for the most accurate information.
Calories: Approximately 300-400 calories per serving.
Fat: Approximately 15-20 grams per serving.
Saturated Fat: Approximately 5-10 grams per serving.
Cholesterol: Approximately 20-30 milligrams per serving.
Sodium: Approximately 100-200 milligrams per serving.
Carbohydrates: Approximately 40-50 grams per serving.
Sugar: Approximately 25-35 grams per serving.
Protein: Approximately 4-6 grams per serving.
Note: This nutritional information is a general guideline. The actual nutritional content may vary depending on the specific ingredients used and the portion size. For precise nutritional information, use a nutrition calculator with your specific recipe details.