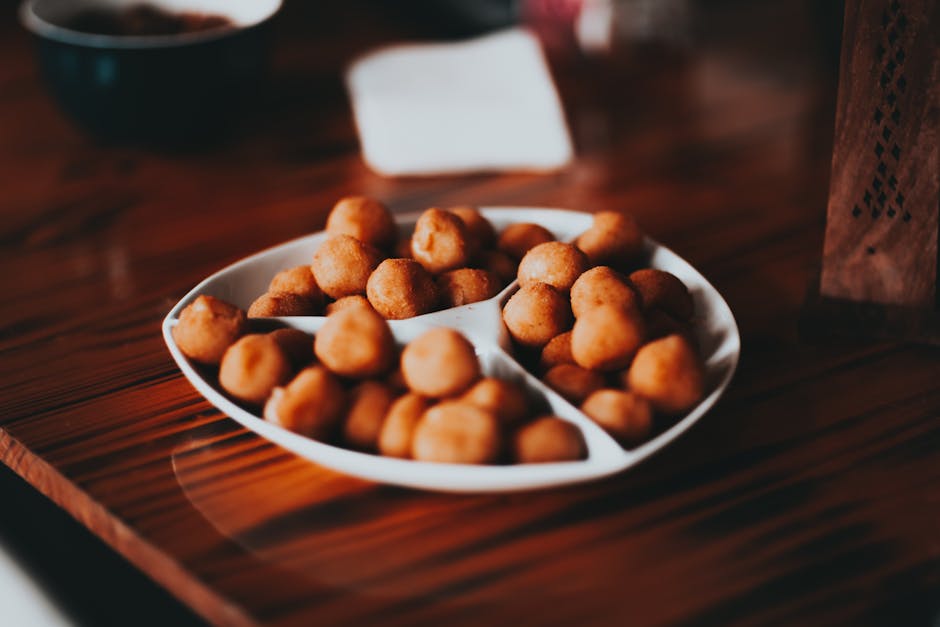
Prepare your taste buds for a culinary journey to Brazil! We’re diving into the delightful world of Pão de Queijo, a beloved cheese bread that’s more than just a snack; it’s a cultural icon. Originating in the Minas Gerais region of Brazil, this humble yet extraordinary treat boasts a history as rich and flavorful as its taste. Its story is intertwined with the state’s agricultural heritage, particularly the abundance of cassava, the starchy root vegetable that forms the very foundation of this iconic bread.
The exact origins of Pão de Queijo are shrouded in some mystery, with various legends and stories contributing to its folklore. However, its emergence is strongly linked to the 18th century, coinciding with the increasing popularity of cassava cultivation in Minas Gerais. Early recipes likely involved simpler methods and ingredients, evolving over time into the perfected version we enjoy today. The unique texture—simultaneously soft, chewy, and slightly airy—is a result of the cassava flour’s interaction with the cheese and other ingredients. Its popularity quickly spread beyond Minas Gerais, becoming a national treasure and a staple in Brazilian households and bakeries.
Today, Pão de Queijo is practically synonymous with Brazilian cuisine. It transcends socioeconomic boundaries, enjoyed by everyone from street vendors to high-end restaurants. You’ll find it served warm as a breakfast treat, a midday snack, or even as an accompaniment to more substantial meals. Its versatility is remarkable: it can be plain, infused with herbs, or stuffed with various fillings. Statistics show that millions of Pão de Queijo are consumed daily across Brazil, a testament to its enduring appeal. Furthermore, the bread has become a significant part of Brazilian culture, often featured in celebrations, festivals, and as a symbol of national identity.
Beyond its domestic popularity, Pão de Queijo has gained international recognition, captivating palates worldwide. Its unique flavor profile and relatively simple preparation have made it a popular item in Brazilian restaurants and bakeries overseas. The recipe’s adaptability also allows for creative variations, catering to different tastes and culinary traditions. From its humble beginnings in the fields of Minas Gerais to its current status as a globally recognized culinary delight, the story of Pão de Queijo is a testament to the power of simple ingredients, combined with cultural heritage and a dash of irresistible flavor.
Ingredients and Measurements
Creating authentic Brazilian Pão de Queijo hinges on the precision of your ingredients and their measurements. The tapioca starch, in particular, is crucial for achieving the characteristic texture. We’ll be using both cup and gram measurements to ensure accuracy, catering to different kitchen setups. Remember that slight variations in ingredient density might necessitate minor adjustments. Don’t hesitate to taste and adjust the seasoning to your preference.
Tapioca Starch (Polvilho Doce): 1 ½ cups (200g). This is the star ingredient! Using the right type of tapioca starch is paramount. Polvilho Doce, also known as sweet tapioca starch, is essential for the soft, airy crumb inside. Don’t substitute with regular tapioca starch (polvilho azedo) or cornstarch, as they will drastically alter the final product’s texture and flavor. Ensure your tapioca starch is fresh; older starch can become clumpy and affect the dough’s consistency.
Tapioca Flour (Polvilho Azedo): ½ cup (50g). While polvilho doce provides the soft interior, polvilho azedo adds a subtle tang and helps create a slightly chewier exterior. It’s a crucial component for the authentic pão de queijo experience. If you can’t find polvilho azedo, you can experiment with a small amount of sour cream or lemon juice added to the dough, but the result may not be exactly the same.
Milk: 1 cup (240ml). Use whole milk for the richest flavor and optimal texture. The fat content in whole milk contributes to the moistness and tenderness of the pão de queijo. Skim milk can lead to a drier, less flavorful result. Ensure the milk is at room temperature for even mixing and to prevent the cheese from clumping.
Vegetable Oil: 2 tablespoons (30ml). This adds moisture and helps create a tender crumb. You can use any neutral-flavored oil like canola, sunflower, or vegetable oil. Avoid using strongly flavored oils as they may overpower the delicate flavor of the cheese.
Eggs: 2 large eggs. These bind the ingredients together and contribute to the structure of the pão de queijo. Make sure your eggs are at room temperature to properly emulsify with the other wet ingredients. Room temperature eggs also ensure a smoother batter.
Parmesan Cheese: 1 cup (100g), freshly grated. Freshly grated parmesan cheese is crucial for the best flavor and texture. Pre-grated parmesan often contains cellulose which can affect the dough’s consistency. Use a high-quality parmesan for the most authentic taste.
Salt: 1 teaspoon (5g). Adjust to your taste. Start with 1 teaspoon and add more if needed. Salt enhances the flavors of the cheese and other ingredients, bringing the entire recipe together.
Optional: For extra flavor, consider adding ½ teaspoon of freshly ground black pepper or a pinch of your favorite herbs. Experimentation is key to finding your perfect pão de queijo recipe!
Important Note: Accurate measurements are critical for achieving the right texture and consistency. Use a kitchen scale for the most precise measurements, particularly for the tapioca starches. If using cups, ensure you use a standardized measuring cup and level the ingredients off with a straight edge.
Equipment List
Making authentic Brazilian Pão de Queijo requires the right tools to ensure a smooth and successful process. While some items might seem optional, using the recommended equipment will significantly improve the texture and overall quality of your cheese breads. This list details the essential and recommended equipment, along with explanations to guide your choices.
Essential Equipment:
1. Mixing Bowls (at least two): You’ll need one large bowl (approximately 4-quart capacity) for mixing the dough and a smaller bowl (approximately 2-quart capacity) for separately whisking the eggs and incorporating the tapioca flour. Stainless steel bowls are preferred as they are durable, easy to clean, and won’t react with acidic ingredients. Glass bowls are also a good alternative.
2. Whisk: A sturdy whisk is crucial for effectively incorporating the eggs and creating a smooth batter. A balloon whisk with its many thin wires is ideal for incorporating air and preventing lumps. Avoid using a fork or spoon, as these tools are less effective at achieving the desired consistency.
3. Measuring Cups and Spoons: Accurate measurements are essential for consistent results. Invest in a set of measuring cups and spoons that allow for precise measurements of both dry and liquid ingredients. Use a kitchen scale for even more accurate measurements of the tapioca flour, as this is the most critical ingredient in achieving the right texture.
4. Spatula or Wooden Spoon: You’ll need a spatula or sturdy wooden spoon for gentle folding of the tapioca flour into the wet ingredients. Avoid overmixing, as this can lead to tough pão de queijo.
5. Baking Sheet: A standard baking sheet, ideally non-stick, is required for baking the pão de queijo. Line the baking sheet with parchment paper for easy cleanup and to prevent the pão de queijo from sticking. You can also use silicone baking mats.
6. Oven: A conventional oven is essential for baking. Ensure your oven is preheated to the correct temperature before placing the pão de queijo in the oven, as this is key to achieving a perfectly baked interior and a golden-brown exterior.
7. Cookie Scoop or Tablespoon: Using a cookie scoop or tablespoon ensures consistent size and shape for your pão de queijo. This makes them cook evenly and look more appealing.
Recommended Equipment:
1. Food Processor (optional): While not strictly necessary, a food processor can be used to quickly grate the cheese, saving you time and effort.
2. Pastry Bag with a Round Tip (optional): For a more professional look, you can use a pastry bag fitted with a large round tip to pipe the dough onto the baking sheet. This will create uniformly sized and shaped pão de queijo.
3. Oven Thermometer (recommended): An oven thermometer ensures the accuracy of your oven’s temperature reading. Oven temperatures can often vary, so an oven thermometer ensures consistent baking results.
By using the recommended equipment and following the recipe carefully, you will be well on your way to creating delicious and authentic Brazilian Pão de Queijo.
Preparation Phase: Making the Dough
Creating the perfect pão de queijo dough is the cornerstone of this beloved Brazilian treat. The process requires precision and attention to detail, but the results are well worth the effort. This section will guide you through each step, ensuring you achieve a delightfully chewy and airy interior with a perfectly crisp exterior.
Begin by preheating your oven to 400°F (200°C). This is crucial for achieving the optimal rise and browning of your pão de queijo. While the oven preheats, we’ll focus on preparing the dough. Accurate measurements are vital for the desired texture, so use a kitchen scale for the most precise results.
We’ll start with 1 cup (120g) of tapioca starch (also known as tapioca flour). Ensure your tapioca starch is fresh and dry; this significantly affects the dough’s consistency. If your tapioca starch is lumpy, sift it to eliminate any clumps. This ensures a smooth and even dough.
Next, add 1 cup (240ml) of whole milk to a medium-sized saucepan. Use whole milk for the richest flavor and texture; lower fat percentages will result in a drier pão de queijo. Heat the milk over medium heat until it’s just simmering – avoid boiling, as this can affect the final texture.
In a separate bowl, whisk together 2 large eggs, 1/2 cup (100g) of grated parmesan cheese, and 2 teaspoons of salt. Using fresh, high-quality parmesan cheese will enhance the flavor considerably. You can substitute with other hard cheeses, but the parmesan provides the most authentic taste.
Slowly pour the warm milk into the egg mixture, whisking constantly to prevent the eggs from scrambling. This gradual addition helps to temper the eggs and create a smooth, homogenous batter. Once the milk is fully incorporated, add the sifted tapioca starch. Mix vigorously until a smooth, thick dough forms. There should be no visible lumps of tapioca starch.
Finally, add 1/2 cup (120g) of melted butter to the dough. Use unsalted butter to control the salt content in your recipe. Stir gently until the butter is fully incorporated into the dough. The dough should be slightly sticky but manageable.
At this stage, let the dough rest for at least 15 minutes at room temperature. This allows the tapioca starch to fully hydrate, resulting in a more cohesive and flavorful pão de queijo. Allowing the dough to rest is a crucial step; skipping it will result in a less desirable texture. After resting, your dough is ready to be shaped and baked!
Cooking Techniques: Baking the Pão de Queijo
Baking the perfect pão de queijo requires attention to detail and a few key techniques. While the recipe itself is relatively simple, mastering the baking process ensures a delightfully airy interior and a beautifully crisp exterior. This section will guide you through achieving that perfect pão de queijo texture.
Preheat your oven to a high temperature: This is crucial. Preheating your oven to 450°F (232°C) ensures that the pão de queijo will rise quickly and develop a golden-brown crust. Give your oven at least 20 minutes to reach this temperature; using an oven thermometer is recommended for accuracy.
Prepare your baking sheet: Don’t use a non-stick baking sheet. The pão de queijo needs some grip to prevent sticking and maintain its shape during baking. Lightly grease a baking sheet with butter or oil, or line it with parchment paper. Avoid overcrowding the baking sheet; leave at least an inch of space between each pão de queijo to allow for even baking and expansion.
Shape the dough correctly: The size and shape of your pão de queijo will affect the baking time and final texture. Aim for balls of roughly 1.5 to 2 inches in diameter. Roll the dough gently between your palms to create smooth, even balls. Don’t overwork the dough, as this can result in tough pão de queijo. Gently pressing a fork onto the surface of each ball creates a slightly rustic look and helps with even cooking.
Baking time and monitoring: The baking time will depend on the size of your pão de queijo and your oven. However, expect a baking time of approximately 20-25 minutes. Keep a close eye on them during the last 5-10 minutes, as they can brown quickly. If they start browning too rapidly, reduce the oven temperature slightly.
Checking for doneness: The pão de queijo are done when they are golden brown and have a firm texture. Gently tap the bottom of one; if it sounds hollow, it’s ready. Remove them from the oven immediately to prevent over-baking and dryness. Let them cool slightly on the baking sheet before transferring them to a wire rack to cool completely.
Troubleshooting: If your pão de queijo are dense and gummy, your oven temperature may have been too low, or you may have over-mixed the dough. If they are too brown on the outside but undercooked inside, reduce your oven temperature or increase the baking time slightly while carefully monitoring.
Professional Recommendation: For the most consistent results, use a good quality tapioca starch (also known as tapioca flour). Different brands can vary in their starch content, which can affect the final texture of your pão de queijo. Experiment with different brands to find your favorite.
By following these techniques, you’ll be well on your way to baking delicious, golden-brown, and perfectly textured pão de queijo every time! Enjoy!
Cooling and Serving Your Delicious Pão de Queijo
Cooling your pão de queijo correctly is crucial to achieving the perfect texture and preventing them from becoming gummy or soggy. Avoid cooling them directly on a metal surface, as this can lead to rapid temperature loss and uneven cooling, potentially impacting the fluffy interior. Instead, opt for a wire rack or a baking sheet lined with parchment paper.
Once removed from the oven, allow the pão de queijo to cool in their baking pan for approximately 5-10 minutes. This initial cooling period helps to set the exterior and prevents them from breaking apart when transferred. Gentle handling is key during this stage. Use a spatula or your fingers (if you’re comfortable with the heat) to carefully lift them from the pan and place them onto your chosen cooling surface.
After transferring them to the wire rack or parchment-lined baking sheet, allow the pão de queijo to cool completely at room temperature. This process usually takes about 30-45 minutes, depending on the size and the ambient temperature. Resist the urge to rush the cooling process; patience is rewarded with a superior texture.
Proper cooling prevents excessive moisture buildup within the pão de queijo, which can lead to a less desirable, doughy interior. Overly warm pão de queijo will also be more prone to crumbling when handled, making them difficult to serve attractively.
Once cooled, your pão de queijo can be stored for later enjoyment. For optimal freshness, store them in an airtight container at room temperature for up to 2 days. Avoid refrigeration, as this can cause them to become dry and stale. If storing for longer than 2 days, consider freezing them. To freeze, place the cooled pão de queijo in a freezer-safe bag or container and freeze for up to 3 months.
When serving, you can enhance the experience by offering a variety of accompaniments. A classic pairing is a strong cup of Brazilian coffee, but they also pair well with a variety of cheeses, such as Minas cheese (a semi-hard cheese with a slightly salty, nutty taste), or even a creamy goat cheese. Consider serving them warm, reheated gently in a low oven (about 150°C/300°F) for 5-7 minutes, or briefly in a microwave for a softer texture. However, reheating for too long can make them dry.
For a more elegant presentation, arrange the pão de queijo on a serving platter or in a basket. You can garnish them with fresh herbs, such as finely chopped chives or parsley, for an added touch of visual appeal. Remember, the presentation should complement the delicious taste and aroma of these delightful Brazilian treats. Experiment with different serving styles and accompaniments to find your favorite combinations.
Serving Suggestion: For a truly authentic Brazilian experience, serve your pão de queijo warm alongside a selection of cheeses, Brazilian coffee, and perhaps even a refreshing guava juice.
Tips and Tricks for Perfect Pão de Queijo
Achieving perfectly fluffy, cheesy, and melt-in-your-mouth Pão de Queijo takes practice, but these tips and tricks will significantly improve your results. Follow these guidelines for consistently delicious results, every time.
Using the Right Tapioca Flour: The quality of your tapioca flour (also known as tapioca starch) is paramount. Look for a finely ground, pure tapioca starch, free from additives. Avoid using pre-mixed pão de queijo mixes unless you’re specifically looking for a shortcut; the quality control can vary. Using a good quality tapioca starch is the foundation of perfect pão de queijo.
Proper Hydration: The correct amount of water is crucial. Too much, and your pão de queijo will be gummy and dense. Too little, and they’ll be dry and crumbly. Our recipe calls for 1 cup of warm water (around 105-115°F or 40-46°C). Ensure the water is warm but not hot, as boiling water can cook the tapioca starch prematurely, affecting the final texture.
Cheese Selection: While traditionally made with queijo minas curado, you can experiment with other cheeses. However, choose cheeses with a relatively low moisture content. Too much moisture can lead to gummy pão de queijo. Experiment with combinations of cheeses like Parmesan, Asiago, or even a blend of your favorites. About 1 ½ cups of grated cheese is ideal for our recipe.
Mixing Technique: Avoid overmixing the dough. Once the ingredients are combined, stop mixing. Overmixing develops the gluten in the tapioca starch, resulting in tough pão de queijo. A gentle, folding motion is all you need to incorporate everything. The dough should be slightly sticky but not overly wet.
Resting the Dough: Allowing the dough to rest for at least 30 minutes (and up to an hour) is essential. This allows the tapioca starch to fully hydrate and absorb the liquid, leading to a more tender texture. Cover the dough lightly with plastic wrap to prevent it from drying out.
Baking Temperature and Time: Baking at the correct temperature is vital. Our recipe suggests preheating your oven to 400°F (200°C). Baking for too short a time will result in undercooked pão de queijo, while overbaking will lead to dryness. Start checking for doneness around 20-25 minutes, using a toothpick to test for a clean insertion. The outside should be golden brown.
Avoiding Cracks: If your pão de queijo are cracking, it could be due to overbaking or a dough that’s too dry. Try slightly reducing the baking temperature or adding a tablespoon or two of extra water to the dough (if it appears overly dry before baking).
Freezing for Later: Unbaked pão de queijo can be frozen before baking. Portion the dough onto a baking sheet lined with parchment paper, freeze until solid, then transfer to a freezer bag for longer storage. Bake from frozen, adding about 5-7 minutes to the baking time.
Experimentation is Key: Don’t be afraid to experiment with different cheeses, herbs, and spices to create your own unique variations of pão de queijo. Have fun with it, and enjoy the delicious results!
Recommendations for Delicious Brazilian Pão de Queijo
Our Delicious Brazilian Pão de Queijo are best enjoyed fresh from the oven, boasting a delightfully chewy exterior and a soft, airy interior. For optimal taste and texture, we recommend consuming them within 2 days of baking. However, their deliciousness can be extended with proper storage.
Serving Suggestions: These delightful cheese breads are incredibly versatile and can be enjoyed in a variety of ways. They are perfect as a standalone snack, a delightful accompaniment to coffee or tea, or as part of a larger meal. Consider serving them warm, straight from the oven, for the best experience. You can also lightly toast them for a crispier exterior. They pair wonderfully with savory dips like guacamole or a vibrant chimichurri sauce. For a truly authentic experience, serve them alongside a strong Brazilian coffee.
Storage: To maintain freshness, store leftover Pão de Queijo in an airtight container at room temperature for up to 2 days. For longer storage (up to 5 days), refrigerate them in an airtight container. To reheat, simply place them in a preheated oven at 350°F (175°C) for 5-7 minutes, or until heated through. You can also microwave them for 30-60 seconds, but be mindful that this method may result in a slightly less crispy texture.
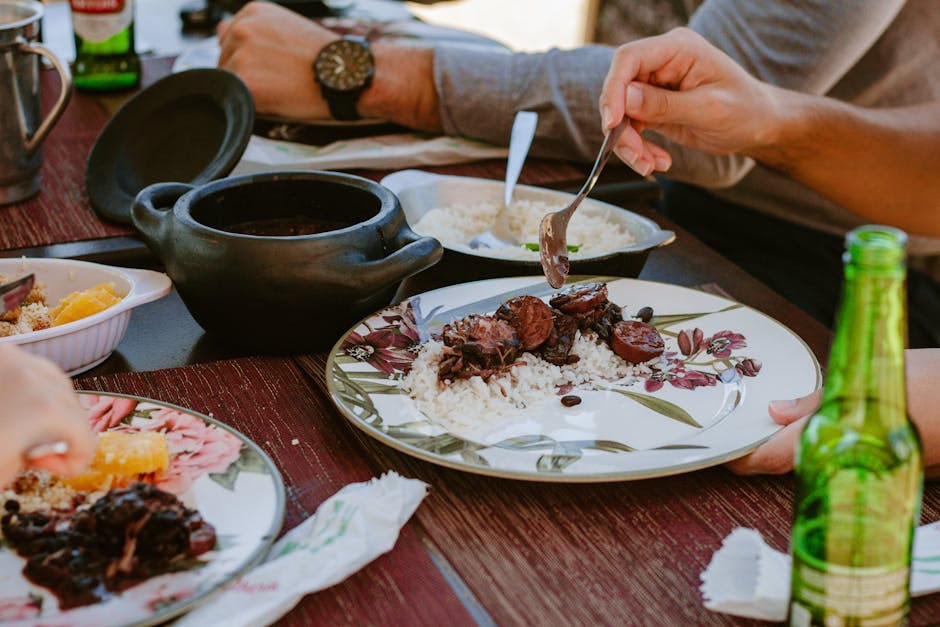
Complementary Dishes: The versatility of Pão de Queijo makes them a fantastic addition to various meals. They complement hearty Brazilian stews like feijoada exceptionally well, absorbing the rich flavors of the beans and meats. They also make an excellent addition to a Brazilian breakfast or brunch alongside fresh fruit, yogurt, and strong coffee. Consider serving them alongside a light salad for a balanced meal. Their slightly salty and cheesy flavor also pairs beautifully with creamy soups and chili.
Nutritional Information (per Pão de Queijo, approximate values): The nutritional content of our Pão de Queijo will vary slightly depending on the specific recipe and ingredients used. However, a typical serving will contain approximately 150-200 calories. This includes a moderate amount of carbohydrates from the tapioca flour, protein from the cheese, and some healthy fats. Please note that this is an estimate, and the exact nutritional profile may differ. For a precise breakdown, please consult the specific nutritional label if provided.
Important Note: Our Pão de Queijo contain gluten-free tapioca flour, making them a suitable option for individuals with gluten sensitivities. However, please always check the ingredient list to ensure it aligns with your dietary needs and be aware of potential cross-contamination during preparation and handling. If you have any specific dietary restrictions or allergies, please contact us before ordering.