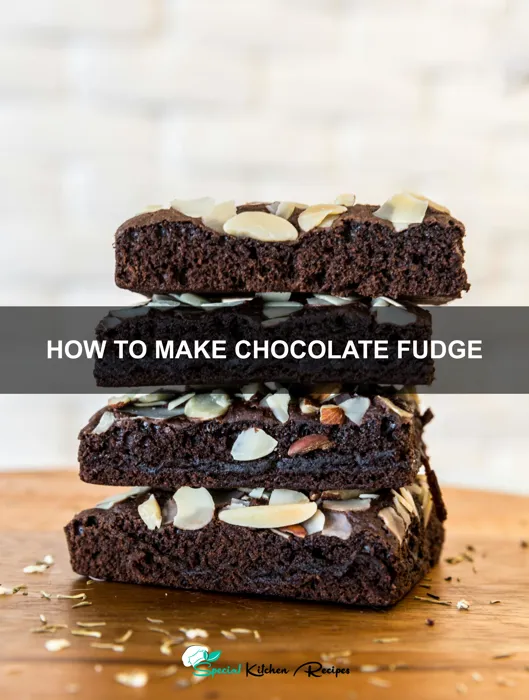
Indulge in the rich, satisfying world of dark chocolate bark, a confection whose simple elegance belies a surprisingly complex history. While pinpointing the precise origin is difficult, the concept of breaking down chocolate into easily-sharable pieces dates back centuries. Ancient civilizations, including the Mayans and Aztecs, revered cacao beans, not just for their flavor, but also for their perceived medicinal and ritualistic properties. They ground the beans into a paste, often incorporating spices and chili peppers, creating a far cry from the smooth, refined dark chocolate we know today. However, the fundamental idea of enjoying chocolate in a broken, easily-portionable form—a precursor to the modern bark—is inherent in these ancient preparations.
The evolution of dark chocolate bark, as we understand it, is closely tied to the development of chocolate-making technology. The industrial revolution brought about significant advancements in processing cacao beans, leading to the creation of smoother, more refined chocolate. This, coupled with increased accessibility to sugar and other ingredients, paved the way for experimentation and innovation in chocolate confectionery. While a precise date for the invention of chocolate bark is elusive, its rise in popularity aligns with the surge in home baking and the increasing availability of high-quality chocolate in the 20th century. The simplicity of its preparation—melting chocolate and spreading it on a baking sheet—made it an accessible treat for both amateur and experienced cooks.
Today, dark chocolate bark enjoys widespread popularity, transcending cultural boundaries. Its versatility is key to its enduring appeal. The base of dark chocolate can be effortlessly customized with an array of toppings, reflecting diverse culinary preferences. From nuts and dried fruits to sea salt and spices, the possibilities are endless, allowing for personalized creations that cater to individual tastes. Furthermore, the growing awareness of dark chocolate’s health benefits, particularly its high concentration of antioxidants, has further fueled its popularity. Statistics show a consistent rise in dark chocolate consumption globally, with many consumers appreciating its intense flavor and potential health advantages. This simple yet sophisticated treat is more than just a dessert; it’s a testament to human ingenuity and our enduring love affair with chocolate.
Ingredients and Measurements
This recipe for Dark Chocolate Bark yields approximately one large baking sheet’s worth (around 12-15 pieces, depending on how you break it). The quantities listed below can be easily halved or doubled to suit your needs. Accuracy in measuring is key to achieving the desired consistency and flavor profile. Use a kitchen scale for the most precise measurements, especially for the chocolate.
Dark Chocolate: 12 ounces (340g) high-quality dark chocolate, 70% cacao or higher. The percentage of cacao directly impacts the bitterness and intensity of the final product. Choose a chocolate with a flavor profile you enjoy; some have notes of fruit, others of spice. Avoid using chocolate chips, as they often contain stabilizers that can affect the melting and setting process. We recommend using a good quality dark chocolate bar, broken into smaller pieces for easier melting.
Nuts: 1/2 cup (60g) roughly chopped nuts. Variety is encouraged! Consider using a mix of almonds, pecans, walnuts, hazelnuts, or macadamia nuts. Toasting the nuts beforehand will enhance their flavor and provide a lovely crunch. To toast, spread them on a baking sheet and bake at 350°F (175°C) for 5-7 minutes, or until fragrant and lightly browned. Be careful not to burn them. Allow them to cool completely before incorporating them into the chocolate.
Dried Fruit: 1/4 cup (30g) dried fruit, chopped. This adds a delightful sweetness and textural contrast. Choose dried fruits that complement the dark chocolate. Cranberries, cherries, blueberries, apricots, and figs all work well. Ensure the dried fruit is finely chopped to prevent large, uneven pieces from dominating the bark. If using larger pieces of fruit, chop them into smaller, more manageable pieces before adding them to the chocolate.
Sea Salt: 1/4 teaspoon (1g) flaky sea salt. A pinch of sea salt is crucial for balancing the sweetness and bitterness of the dark chocolate, enhancing the overall flavor profile. Flaky sea salt adds a pleasant textural element that complements the smoothness of the chocolate. Avoid using iodized table salt, as it can impart a slightly metallic taste.
Optional additions: Feel free to experiment with other ingredients! Consider adding 1-2 tablespoons of cocoa nibs for extra chocolatey flavor and texture, or a sprinkle of chili flakes for a spicy kick. Dried flowers, such as lavender or rose petals (ensure they are edible and food-grade), can add a beautiful visual appeal and subtle floral notes. Remember to adjust the quantities based on your preference and the overall balance of flavors.
Important Note: All ingredients should be at room temperature before combining them. This ensures proper melting and mixing of the chocolate and prevents seizing (the chocolate becoming grainy). Prepare your working space and tools beforehand to maintain a smooth and efficient process.
Equipment List
Creating delicious dark chocolate bark requires the right tools to ensure a smooth and efficient process. While you might already possess many of these items, selecting the appropriate equipment will significantly impact the final product’s quality and appearance. This detailed list outlines the necessary equipment, along with recommendations for optimal results.
Baking Sheet: You’ll need at least one large baking sheet (approximately 18 x 13 inches or similar size) to spread the melted chocolate. Consider using a rimmed baking sheet to prevent spills and ensure easier handling. Non-stick baking sheets are beneficial but not strictly necessary; parchment paper will address any sticking concerns.
Parchment Paper: This is crucial for preventing the chocolate from sticking to the baking sheet. Use a generous amount of parchment paper, ensuring it extends beyond the edges of the baking sheet to create easy lifting handles. High-quality parchment paper is recommended as it’s less likely to tear or wrinkle.
Double Boiler or Heat-Safe Bowl and Saucepan: Melting chocolate correctly is paramount. A double boiler provides the most even and controlled heat, preventing scorching. If you don’t have a double boiler, a heat-safe bowl (glass or stainless steel) placed over a saucepan of simmering water works equally well. Ensure the bottom of the bowl doesn’t touch the water and that the water maintains a gentle simmer, not a rolling boil.
Spatula or Rubber Scraper: A sturdy spatula or rubber scraper is vital for spreading the melted chocolate evenly across the baking sheet. A flexible spatula allows for smoother spreading and reaching corners effectively. A high-quality silicone spatula is particularly recommended for its heat resistance and ease of cleaning.
Measuring Cups and Spoons: Accurate measurements are essential for achieving the desired consistency and flavor profile. Use measuring cups and spoons appropriate for both wet and dry ingredients. For precise measurements, a kitchen scale is highly recommended, especially for measuring chocolate chips.
Cutting Board and Sharp Knife: Once the chocolate bark has set, you’ll need a cutting board and a sharp knife to cut it into pieces. A large cutting board provides ample space to work with. A sharp knife, preferably a chef’s knife, ensures clean cuts and prevents the chocolate from crumbling. For even cuts, consider using a pastry wheel or pizza cutter.
Optional Equipment: While not essential, certain tools can enhance the experience and presentation. These include a piping bag for creating decorative patterns, various toppings (nuts, dried fruit, etc.) in specific quantities for even distribution, and a cooling rack for accelerated cooling. A small offset spatula can aid in smoothing the chocolate surface before adding toppings.
Cleaning Supplies: Finally, remember to have cleaning supplies on hand. Warm soapy water and a non-abrasive sponge are ideal for cleaning your equipment after use. Avoid harsh chemicals that could damage your baking sheets or spatulas.
Preparation of Ingredients
Before you begin assembling your decadent dark chocolate bark, meticulous ingredient preparation is key to achieving a beautifully textured and evenly distributed final product. This section details the precise techniques for preparing your chocolate and other additions, ensuring a flawless result.
Chopping the Chocolate: We’ll be using 12 ounces (340g) of high-quality dark chocolate, ideally with a minimum of 70% cacao for a rich, intense flavor. Begin by breaking the chocolate bar into smaller pieces. Avoid using a microwave to melt the chocolate at this stage; this can lead to seizing. Instead, aim for roughly 1-inch pieces. This allows for even melting later. Using a sharp chef’s knife, finely chop the chocolate. A rocking motion, rather than a forceful downward chop, will yield more consistent-sized pieces. Aim for a mixture of small and slightly larger pieces for a varied texture in your final bark. Consistency in size is important for even melting, but some variation adds visual appeal.
Preparing the Nuts: We’ll use a combination of nuts for added texture and flavor. This recipe calls for ½ cup (60g) of roughly chopped almonds and ¼ cup (30g) of coarsely chopped pecans. Begin by preheating your oven to 300°F (150°C). Spread the nuts on a baking sheet lined with parchment paper. Roasting the nuts for 5-7 minutes will enhance their flavor and create a delightful crunch. Keep a close eye on them, as they can burn quickly. Once roasted, let them cool completely before chopping. Use a sharp knife or a nut chopper to achieve a consistent, yet slightly rustic, chop. Avoid over-chopping, as you want to retain some texture in the finished bark.
Dealing with Dried Fruit (Optional): If you are adding dried fruit, such as cranberries or cherries (½ cup, approximately 60g), remember to prepare them carefully. Chop the dried fruit into small, roughly uniform pieces. This prevents large clumps in the finished bark and ensures an even distribution of flavor. If using larger pieces of fruit, such as cherries, halve or quarter them to achieve a manageable size. Avoid using overly sticky dried fruits, as they can make the chocolate difficult to work with and may cause uneven spreading.
Sea Salt Preparation: A pinch of sea salt (about 1/8 teaspoon) is crucial for balancing the richness of the dark chocolate. Coarse sea salt is preferred, as it provides a delightful textural contrast and a more intense salty flavor. Simply set it aside in a small bowl for easy access during the assembly process. Do not add the salt until the very end, just before spreading the chocolate onto the baking sheet.
Important Note: Before you begin, ensure all your ingredients are at room temperature. This is particularly crucial for the chocolate, as cold chocolate can be more difficult to melt evenly and may seize. Having your ingredients prepared and measured beforehand will streamline the chocolate bark-making process and prevent any unexpected delays.
Melting the Chocolate (Temperature Control, Double Boiler Method)
Melting chocolate correctly is crucial for achieving a smooth, glossy, and beautifully tempered dark chocolate bark. Using the double boiler method provides excellent temperature control, preventing scorching and seizing, which can ruin your bark. For this recipe, we’ll be melting 12 ounces (340g) of high-quality dark chocolate, ideally with a minimum of 70% cacao for a rich, intense flavor. You can adjust the quantity based on your desired bark size.
First, prepare your double boiler. If you don’t have a dedicated double boiler, you can easily improvise one. Fill a medium saucepan with about an inch of water and bring it to a gentle simmer over medium-low heat. Never let the water boil vigorously; a gentle simmer is essential to prevent the chocolate from overheating.
Place a heatproof bowl, preferably glass or stainless steel, on top of the saucepan. Ensure the bottom of the bowl doesn’t touch the water. The steam from the simmering water will gently melt the chocolate. Avoid using plastic or non-heatproof bowls as they can warp or melt.
Chop your 12 ounces (340g) of dark chocolate into small, roughly equal-sized pieces. This will help them melt evenly and quickly. Smaller pieces melt faster and more uniformly than larger chunks. Add the chopped chocolate to the heatproof bowl.
Now, begin melting the chocolate. Stir gently and consistently with a spatula or a heat-resistant rubber scraper. Avoid vigorous stirring, which can incorporate air bubbles and create a grainy texture. Work the chocolate from the edges towards the center, ensuring all pieces are in contact with the heat.
As the chocolate melts, continue stirring gently until it’s completely smooth and glossy. This process usually takes about 5-10 minutes, depending on the size of your chocolate pieces and the heat of your double boiler. Monitor the temperature closely. An ideal melting temperature for dark chocolate is between 90-95°F (32-35°C). You can use a candy thermometer to ensure accuracy. If you don’t have a thermometer, rely on the visual cues: the chocolate should be completely melted and flowing smoothly.
Once the chocolate is completely melted and smooth, immediately remove the bowl from the double boiler. Leaving it in the residual heat can cause it to overheat and seize. If you notice any lumps, continue stirring gently until they disappear. Your perfectly melted chocolate is now ready for the next step in creating your delicious dark chocolate bark.
Important Note: If your chocolate seizes (becomes thick and grainy), don’t panic! You can often rescue it by adding a teaspoon of vegetable oil or shortening at a time, stirring constantly until smooth. However, preventing seizing in the first place by using the double boiler method and careful temperature control is always the best approach.
Spreading the Chocolate (Even Distribution, Thickness)
Achieving an even distribution and consistent thickness of your chocolate is crucial for a beautiful and delicious dark chocolate bark. A patchy or unevenly coated bark can affect both the visual appeal and the enjoyment of the final product. This section will guide you through the process, ensuring a perfect result every time.
Prepare your work surface: Before you begin spreading the chocolate, ensure you have a clean, flat, and non-stick surface ready. A parchment-lined baking sheet is ideal. Avoid using silicone baking mats as they can sometimes cause the chocolate to stick or pull away unevenly. Lightly dust the parchment paper with cocoa powder (this helps prevent sticking and adds a subtle cocoa flavor) or use a non-stick baking spray specifically designed for baking.
Pouring the melted chocolate: Once your chocolate is melted and smooth (refer to the previous section for melting instructions), carefully pour it onto the prepared baking sheet. For a standard 9×13 inch baking sheet, aim for approximately 12 ounces (340g) of melted chocolate. Adjust this amount based on your desired thickness. More chocolate equals thicker bark; less chocolate equals thinner bark. A good starting point for a medium-thickness bark is 1/4 inch (6mm).
Spreading techniques: There are several effective methods for spreading the chocolate evenly. Using an offset spatula is highly recommended. Start by pouring the chocolate in the center of the baking sheet. Then, using the offset spatula, gently spread the chocolate outwards from the center, working your way to the edges. Keep the spatula as flat as possible against the surface to create a uniform layer. Avoid dragging the spatula, which can create streaks or uneven texture. Work quickly, as the chocolate will begin to set.
Addressing irregularities: As you spread, you may encounter some areas thicker than others. Use the spatula to carefully redistribute the chocolate, gently pushing it from thicker to thinner areas. Don’t overwork the chocolate, as this can introduce air bubbles. If you have small, isolated thick spots, you can use a clean finger (ensure it’s dry and clean!) to gently smooth the surface.
Achieving Consistent Thickness: For perfectly even thickness, consider using a bench scraper or a ruler to guide you. After an initial spreading, use the scraper to gently even out any inconsistencies. A thin layer of chocolate will set faster, so work efficiently. If you find the chocolate is starting to set too quickly, briefly place the baking sheet over a pan of simmering water (double boiler method) to re-melt it enough to continue spreading.
Important Note: The ambient temperature significantly impacts the setting time of the chocolate. A warmer room will result in faster setting, while a cooler room will slow it down. Adjust your working speed accordingly. Always work in a clean, cool environment, avoiding air currents or drafts that could cause the chocolate to set unevenly.
Once you’ve achieved an even layer, immediately proceed to the next step: adding your toppings. Working quickly is key to prevent the chocolate from setting before you can add your desired ingredients.
Adding Toppings (Arrangement, Even Spacing)
Once your tempered dark chocolate is smoothly spread onto your prepared baking sheet, it’s time for the fun part: adding your toppings! The key to a beautiful and professional-looking dark chocolate bark lies in the even distribution and aesthetically pleasing arrangement of your chosen ingredients. Don’t rush this step; careful placement will significantly enhance the final product.
Start with a plan: Before you begin sprinkling, consider the overall visual appeal you’re aiming for. Do you want a chaotic yet balanced mix of toppings, or a more structured pattern? Perhaps you’d like to create sections with different topping combinations? Sketching a quick layout on paper can be surprisingly helpful.
Quantity is key: Overloading your bark with toppings can lead to an uneven texture and potentially overwhelm the rich dark chocolate flavor. A good rule of thumb is to use approximately 1/4 cup to 1/2 cup of toppings for every 12 ounces of melted dark chocolate. This amount will provide a generous scattering without obscuring the chocolate base. Adjust this quantity based on the size and density of your chosen toppings. Larger items, such as dried fruit slices, will require less overall volume compared to smaller items like chopped nuts.
Even distribution techniques: For a uniform distribution, consider these methods: For smaller toppings like chopped nuts, sprinkles, or sea salt, gently sprinkle them evenly across the surface using a spoon or your fingertips. Use a light hand to avoid clumping. Work in sections, starting with one area and moving systematically across the sheet to ensure consistent coverage. For larger toppings like dried fruit or pretzels, strategically place them with tweezers or a small spatula, maintaining a balanced spacing between each item. Arrange them in rows, patterns, or clusters, depending on your chosen design.
Spacing matters: Leave enough space between individual toppings to prevent them from overlapping excessively. This allows each element to be appreciated visually and prevents the toppings from clumping together. Aim for roughly ½ inch to 1 inch of space between larger items. If you’re using a mixture of sizes, prioritize spacing the larger items first, then filling the gaps with smaller ones.
Consider color and texture contrast: To create a visually stunning bark, think about the color and texture contrast between your toppings and the dark chocolate. For example, combining dark chocolate with brightly colored dried fruits or crunchy nuts creates a beautiful contrast in both color and texture. Experiment with different combinations to find your favorite aesthetic.
Gentle pressing (optional): For certain toppings, such as nuts or seeds, you might want to gently press them into the chocolate surface to ensure they adhere well and don’t fall off during breaking. However, be cautious not to press too hard, as this could disrupt the smooth surface of the chocolate.
Refrigeration is crucial: Once your toppings are arranged to your satisfaction, immediately refrigerate the baking sheet for at least 30 minutes, or until the chocolate is completely set. This will ensure the toppings adhere firmly and prevent them from shifting or falling off during the breaking process.
Recommendations
This Dark Chocolate Bark recipe is incredibly versatile and can be adapted to suit a variety of tastes and occasions. For a truly decadent experience, we recommend using high-quality dark chocolate with a minimum of 70% cacao for a rich, intense flavor. Experiment with different types of nuts, seeds, and dried fruits to create your own signature bark. The possibilities are endless!
Serving Suggestions: This dark chocolate bark is perfect for enjoying on its own as a satisfying treat. Break off a piece and savor the complex flavors and textures. It also makes a fantastic addition to dessert platters, gift baskets, or party favors. Consider serving it alongside a scoop of vanilla ice cream or a dollop of whipped cream for an extra touch of indulgence. It also pairs beautifully with strong coffee or a glass of dry red wine.
Storage Conditions: For optimal freshness and flavor, store your dark chocolate bark in an airtight container in a cool, dark, and dry place. Avoid storing it in the refrigerator, as this can cause the chocolate to become dull and lose its snap. At room temperature, your bark should remain fresh for up to two weeks. If you notice any signs of blooming (a whitish coating on the surface), it’s still safe to eat, but the texture might be slightly affected.
Complementary Dishes: The rich, bittersweet flavor of dark chocolate bark complements a wide range of dishes. It works beautifully as a garnish for ice cream sundaes, fruit salads, or even savory dishes like seared scallops or roasted chicken. The contrasting textures and flavors can elevate a simple dessert or appetizer to a new level. Consider crumbling it over your morning yogurt or oatmeal for a delicious and healthy boost.
Nutritional Information (per 1 ounce serving – approximate values will vary based on ingredients used): This is an estimate and will vary depending on the specific ingredients and quantities used. It’s crucial to use a nutrition calculator with your exact recipe for precise values.
- Calories: Approximately 150-200
- Fat: 10-15g
- Saturated Fat: 6-9g
- Carbohydrates: 15-20g
- Sugar: 8-12g
- Protein: 2-4g
Note: This nutritional information is a general guideline. The actual nutritional content may vary depending on the specific ingredients and quantities used in your recipe. For precise nutritional information, we recommend using a nutrition calculator and entering your specific ingredients and measurements.
Important Considerations: Always ensure that all ingredients are fresh and of high quality. If using nuts or seeds, make sure they are thoroughly roasted and cooled before adding them to the chocolate. Work quickly when tempering chocolate to prevent it from seizing. Enjoy creating and sharing your delicious dark chocolate bark!