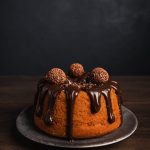
The humble chocolate chip cookie, a seemingly simple delight, boasts a surprisingly rich and fascinating history. While pinpointing its exact origin is difficult, the most widely accepted story credits Ruth Wakefield, owner of the Toll House Inn in Whitman, Massachusetts. In 1930, needing chocolate for a batch of cookies, she famously broke up a Nestlé semi-sweet chocolate bar, expecting it to melt and create a chocolatey spread. Instead, the chocolate chunks retained their shape, creating the now iconic texture that defines the treat. This accidental invention proved incredibly popular, and Wakefield’s recipe, featuring the now-ubiquitous chocolate chips, was eventually published in a 1938 edition of a women’s magazine, leading to its widespread adoption.
The success of the chocolate chip cookie wasn’t merely a culinary phenomenon; it was a reflection of changing societal trends. The post-World War II era saw a surge in home baking, fueled by readily available ingredients and a desire for comforting, nostalgic foods. The cookie’s simple recipe, requiring relatively few ingredients, made it accessible to home bakers of all skill levels. Nestle cleverly capitalized on this, establishing a mutually beneficial partnership with Wakefield, and ultimately contributing to the cookie’s global dominance. The chocolate chip cookie became a quintessential symbol of American home baking, its image inextricably linked with childhood memories, family gatherings, and a sense of warmth and comfort.
Today, the chocolate chip cookie reigns supreme in the world of baked goods. Annual sales of chocolate chip cookies in the United States alone are estimated to be in the billions of dollars, a testament to its enduring appeal. Variations abound, from chewy to crispy, thin to thick, and with additions ranging from nuts to pretzels. Its cultural significance extends far beyond the kitchen; it features prominently in popular culture, appearing in movies, television shows, and literature as a symbol of happiness, reward, and indulgence. The cookie’s widespread popularity has also led to numerous studies exploring its sensory properties, with researchers analyzing everything from the ideal ratio of chocolate chips to the perfect baking temperature.
Beyond its commercial success, the chocolate chip cookie holds a special place in the hearts of people worldwide. It transcends geographical boundaries and cultural differences, serving as a universal symbol of simple pleasure and shared experience. From homemade batches shared amongst family to mass-produced versions sold in supermarkets across the globe, the chocolate chip cookie’s humble origins have catapulted it to a position of global culinary icon, a testament to its delicious simplicity and enduring appeal. It’s more than just a cookie; it’s a cultural phenomenon.
Ingredients and Measurements
This recipe yields approximately 24 classic chocolate chip cookies. The success of your cookies relies heavily on precise measurements, so we strongly recommend using a kitchen scale for the dry ingredients, especially the flour. Volume measurements can be inconsistent, leading to variations in texture and outcome.
Butter: 1 cup (2 sticks) unsalted butter, softened. Using unsalted butter allows you to control the salt level in your cookies. Make sure the butter is softened but not melted; it should be pliable enough to easily cream with the sugar. Room temperature, around 70°F (21°C), is ideal. If your butter is too cold, your cookies may be tough. If it’s too warm, they may spread excessively.
Granulated Sugar: ¾ cup. Granulated sugar contributes to the sweetness and crisp edges of the cookies. Using a fine granulated sugar will result in a smoother batter.
Brown Sugar: ¾ cup packed light brown sugar. Packed brown sugar means you firmly press down the sugar in your measuring cup to eliminate air pockets. Brown sugar adds moisture and chewiness to the cookies. The moisture content of brown sugar can vary, so if your cookies seem too dry, you may want to slightly increase the amount of brown sugar next time.
Large Eggs: 2 large eggs. Eggs bind the ingredients together and add richness and moisture. Make sure your eggs are at room temperature for optimal emulsification with the butter and sugars. Cold eggs can result in a more dense cookie.
Vanilla Extract: 1 teaspoon pure vanilla extract. Pure vanilla extract enhances the flavor of the cookies significantly. Avoid using imitation vanilla, as it lacks the depth of flavor.
All-Purpose Flour: 2 ¼ cups all-purpose flour, spooned and leveled. Spooning and leveling your flour is crucial. Don’t scoop directly from the bag, as this compacts the flour and leads to denser cookies. Spoon the flour lightly into your measuring cup and level it off with a straight edge.
Baking Soda: 1 teaspoon baking soda. Baking soda is the leavening agent that gives the cookies their characteristic rise. Ensure your baking soda is fresh; old baking soda loses its potency.
Salt: 1 teaspoon salt. Salt enhances the sweetness of the cookies and balances the flavors. We recommend using kosher salt for its consistent size and flavor.
Semi-Sweet Chocolate Chips: 2 cups semi-sweet chocolate chips. You can adjust the amount of chocolate chips to your preference. Using high-quality chocolate chips will greatly improve the overall taste of the cookies. Consider adding other types of chocolate chips, such as milk chocolate or dark chocolate, for variety.
Optional Additions: For added texture and flavor, consider adding ½ cup chopped nuts (walnuts, pecans, or macadamia nuts) to the batter. Remember to adjust the baking time slightly if adding nuts, as they may slightly increase the baking time.
Equipment List
Baking delicious chocolate chip cookies requires the right tools. While you might be able to improvise with some items, having the correct equipment ensures consistent results and a more enjoyable baking experience. This list details the essential and recommended equipment, with specifications where appropriate.
Mixing Bowls: You’ll need at least two mixing bowls. One large bowl (approximately 5-quart capacity) is crucial for creaming together the butter and sugar. A smaller bowl (approximately 3-quart capacity) is ideal for whisking together the dry ingredients. Stainless steel bowls are recommended for their durability and ease of cleaning. Glass bowls are also a good option, but avoid using plastic bowls, especially when working with fats, as they can retain odors.
Measuring Cups and Spoons: Accurate measurements are paramount in baking. Invest in a set of both liquid and dry measuring cups. Use separate sets for dry and liquid ingredients to avoid cross-contamination. For dry ingredients, use the spoon and level method: scoop the ingredient into the measuring cup and level it off with a straight edge (e.g., a butter knife). For liquid ingredients, use a liquid measuring cup placed on a flat surface and read the measurement at eye level. A set of measuring spoons (1/4 teaspoon, 1/2 teaspoon, 1 teaspoon, 1 tablespoon) is also essential for precise addition of spices and extracts.
Electric Mixer: A stand mixer or a hand mixer is highly recommended for creaming the butter and sugar. This process incorporates air into the mixture, resulting in lighter and fluffier cookies. A stand mixer offers greater power and ease of use, especially for larger batches, but a hand mixer works well for smaller quantities. Ensure your mixer is in good working order before you start.
Rubber Spatula (or Silicone Scraper): This versatile tool is indispensable for scraping down the sides of the bowl, ensuring all ingredients are incorporated properly. A high-quality silicone spatula is recommended as it’s heat-resistant and won’t scratch your bowls. It’s also easier to clean.
Baking Sheets: Two or more standard-sized baking sheets (approximately 18 x 13 inches) are necessary. Use baking sheets with light-colored, non-stick surfaces for even baking and easy cleanup. Avoid dark-colored baking sheets, as they can cause the edges of the cookies to brown too quickly.
Parchment Paper (or Silicone Baking Mat): Lining your baking sheets with parchment paper or using a silicone baking mat prevents cookies from sticking and makes cleanup a breeze. Parchment paper is more readily available and inexpensive, but silicone mats are reusable and durable. Cut the parchment paper to fit your baking sheets.
Cooling Rack: Once the cookies are baked, transfer them immediately to a wire cooling rack to prevent them from becoming soggy. This allows for proper air circulation and helps the cookies cool evenly. A cooling rack is essential for perfectly crisp cookies.
Preparation Phase: Prepping Ingredients
Before you even think about turning on the oven, meticulous ingredient preparation is key to achieving perfectly textured, delicious chocolate chip cookies. This phase might seem tedious, but it’s the foundation for success. We’ll be focusing on ensuring all ingredients are at the right temperature and consistency for optimal mixing and baking.
Let’s start with the butter. The recipe calls for 1 cup (2 sticks) of unsalted butter, softened to room temperature. This is crucial. If your butter is too cold, it won’t properly cream with the sugar, resulting in a dense, tough cookie. If it’s too warm and melted, the cookies will spread too thin and might burn. The ideal consistency is malleable, easily pressed with a finger, but not liquid. To achieve this, take the butter out of the refrigerator about 1-2 hours before you begin baking. You can also speed up the process by cutting the butter into smaller pieces and placing it in a bowl at room temperature.
Next, we have the sugars: ¾ cup granulated sugar and ½ cup packed light brown sugar. The granulated sugar contributes to crisp edges, while the brown sugar adds moisture and chewiness. Ensure the brown sugar is firmly packed – this ensures accurate measurement and impacts the final texture. Lightly fluff the granulated sugar with a fork before measuring to prevent compaction and ensure an accurate measurement.
Now for the eggs: 2 large eggs should be at room temperature as well. Cold eggs can cause the batter to become too thick and lead to uneven baking. Allowing the eggs to sit at room temperature for at least 30 minutes before use will improve the overall texture of your cookies.
The dry ingredients require just as much attention. Measure 2 ¼ cups all-purpose flour accurately using a kitchen scale, or the spoon and level method, avoiding scooping directly from the bag. Scooping directly from the bag can lead to compacting the flour, resulting in a denser cookie. Add 1 teaspoon of baking soda and 1 teaspoon of salt. Sifting the dry ingredients together isn’t strictly necessary for chocolate chip cookies, but it helps ensure even distribution of the leavening agent, resulting in a more uniform rise and texture.
Finally, prepare your chocolate chips: 2 cups of your favorite semi-sweet chocolate chips. While you can use any type of chocolate chips, semi-sweet offers a nice balance of sweetness and chocolate flavor. If using chocolate chunks, roughly chop them to a similar size as the standard chocolate chips for even distribution throughout the cookies. Having your chocolate chips measured and ready to go will streamline the mixing process.
Pro Tip: Prepare all your ingredients and have them measured and ready in separate bowls before you begin mixing. This will make the mixing process much smoother and more efficient, minimizing the chances of mistakes and ensuring a consistent outcome. This organized approach is key to baking success.
Mixing Instructions
Making perfect chocolate chip cookies hinges on the correct mixing technique. Follow these instructions carefully for optimal results, achieving that signature chewy center and crisp edges.
Creaming the Butter and Sugar: Begin by creaming together 1 cup (2 sticks) of unsalted butter, softened to room temperature, and ¾ cup of granulated sugar, along with ½ cup packed light brown sugar. Use a stand mixer fitted with the paddle attachment, or a hand mixer. Creaming means beating the butter and sugars together until the mixture is light, fluffy, and pale yellow in color. This process incorporates air into the batter, leading to lighter and chewier cookies. Don’t rush this step! It should take approximately 3-5 minutes on medium speed. Scrape down the sides of the bowl as needed to ensure everything is properly incorporated.
Adding the Eggs and Vanilla: Once the butter and sugar are creamed, beat in 2 large eggs one at a time, mixing well after each addition. Then, stir in 1 teaspoon of pure vanilla extract. Be sure to mix only until combined; overmixing at this stage can lead to tough cookies. The batter should be smooth and creamy.
Combining the Dry Ingredients: In a separate bowl, whisk together 2 ¼ cups of all-purpose flour, 1 teaspoon of baking soda, 1 teaspoon of salt, and ½ teaspoon of baking powder. Make sure to sift the dry ingredients to prevent lumps and ensure even distribution of leavening agents. This will result in a more uniform texture in your cookies.
Gradually Adding Dry to Wet Ingredients: Gradually add the dry ingredients to the wet ingredients, mixing on low speed until just combined. Do not overmix! Overmixing develops the gluten in the flour, resulting in tough cookies. Mix until you can no longer see any streaks of flour. The batter will be thick and slightly sticky.
Folding in the Chocolate Chips: Gently fold in 2 cups of your favorite chocolate chips. Use a spatula to fold the chips into the batter, ensuring they are evenly distributed. Avoid stirring vigorously at this point, as it will break up the chocolate chips and make them less visually appealing. A few whole chips are desirable in the final product.
Chilling the Dough (Optional but Recommended): For the best results, cover the bowl and chill the dough in the refrigerator for at least 30 minutes, or preferably up to 2 hours. Chilling the dough helps prevent the cookies from spreading too thin during baking, resulting in thicker, chewier cookies. If you’re short on time, a 15-minute chill will still improve the outcome.
Ready to Bake! Once the dough is chilled (or if you choose to skip this step), proceed to baking according to your chosen recipe’s instructions.
Baking Techniques: Oven Temperature and Baking Time
Achieving perfectly baked chocolate chip cookies hinges on mastering oven temperature and baking time. While recipes often provide guidelines, your oven’s quirks and the specific ingredients used can influence the outcome. Understanding these factors is crucial for consistently delicious results.
Preheat your oven to 375°F (190°C). This is the standard temperature for most chocolate chip cookie recipes, ensuring even browning and proper expansion of the dough. It’s tempting to skip preheating, but this can lead to unevenly baked cookies, with some parts raw while others are burned. Allow your oven at least 15-20 minutes to reach the desired temperature. Using an oven thermometer is highly recommended, as oven temperatures can vary significantly from the dial setting.
Baking time typically ranges from 9 to 12 minutes for standard-sized cookies (about 2 tablespoons of dough per cookie). However, this is a guideline, not a hard and fast rule. Thicker cookies will require longer baking times, while thinner cookies will bake faster. Avoid opening the oven door frequently during baking, as this will cause a sudden drop in temperature and lead to uneven baking or flat cookies.
The best way to determine doneness is to observe the edges and the tops of the cookies. The edges should be golden brown, and the tops should be lightly browned but still slightly soft. The centers should appear mostly set but still slightly soft to the touch. Overbaked cookies will be dry and hard, while underbaked cookies will be gooey and undercooked in the center.
Consider your cookie sheet. Darker-colored cookie sheets absorb more heat, leading to faster baking. If using dark sheets, you may need to reduce the baking time slightly. Lighter-colored sheets, like aluminum, reflect heat, potentially requiring a slightly longer baking time. Also, avoid overcrowding the cookie sheet. Overcrowding restricts airflow, resulting in uneven baking and potentially soggy cookies. Leave at least 1 inch between each cookie.
Experimentation is key. The first batch might not be perfect. Pay close attention to how your cookies bake in your specific oven. Note the baking time and any adjustments needed. Keep a record of your findings – this will help you achieve consistently perfect cookies in the future. For example, if your first batch is underbaked, increase the baking time by a minute or two for the next batch. If they are overbaked, reduce the time accordingly.
Don’t rely solely on the timer. Start checking for doneness around the 9-minute mark. Use a spatula to gently lift a cookie’s edge. If it’s still very soft and unbaked underneath, continue baking for another minute or two and check again. Remember that cookies will continue to bake slightly even after you remove them from the oven due to residual heat.
Proper cooling is also crucial. Once removed from the oven, let the cookies cool on the baking sheet for a few minutes before transferring them to a wire rack to cool completely. This allows them to set properly and prevents them from becoming soggy.
By carefully monitoring the oven temperature, observing the cookies’ appearance, and adjusting baking time as needed, you’ll be well on your way to baking the perfect batch of chocolate chip cookies every time.
Cooling and Storage
Proper cooling and storage are crucial for maintaining the texture and flavor of your freshly baked chocolate chip cookies. Improper handling can lead to soggy cookies or a loss of that delightful crispness we all crave.
Cooling on the Baking Sheet: Immediately after removing your cookies from the oven, let them rest on the baking sheet for at least 5-10 minutes. This allows the cookies to firm up slightly and prevents them from breaking when you transfer them. The baking sheet retains some heat, which helps the cookies set properly. Don’t rush this step; patience is key to achieving perfectly textured cookies.
Transferring to a Cooling Rack: After the initial 5-10 minutes, carefully transfer the cookies to a wire cooling rack. This ensures air circulation around each cookie, preventing them from becoming steamy and soft. A wire rack allows the bottom of the cookie to cool evenly, preventing sogginess. Avoid overcrowding the cooling rack; leave some space between the cookies for optimal air circulation.
Complete Cooling Time: Allow the cookies to cool completely on the wire rack before storing. This process typically takes 20-30 minutes, depending on the size and thickness of your cookies. Completely cooled cookies are less prone to sticking together and will maintain their texture better during storage.
Storage Containers: Once completely cooled, store your cookies in an airtight container. This prevents them from drying out and absorbing moisture from the surrounding air. Avoid using containers that are too large, as excessive air space can lead to stale cookies. Choose a container that fits your cookies snugly.
Room Temperature Storage: At room temperature, chocolate chip cookies will generally stay fresh for 3-5 days. After this time, they may begin to lose their crispness and become slightly stale. However, the flavor will likely remain pleasant for a day or two longer.
Freezing for Extended Storage: For longer storage, freezing your cookies is an excellent option. Place the completely cooled cookies in a single layer on a baking sheet lined with parchment paper. Freeze them for about 1-2 hours to prevent them from sticking together. Once frozen solid, transfer the cookies to a freezer-safe bag or airtight container. Properly frozen cookies can last for up to 3 months, maintaining their texture and flavor remarkably well.
Thawing Frozen Cookies: To thaw frozen cookies, simply remove them from the freezer and let them sit at room temperature for about 30 minutes. You can also enjoy them straight from the freezer if you prefer a slightly firmer texture.
Professional Tip: For optimal freshness, consider using a cookie jar with a tight-fitting lid. Many cookie jars are specifically designed to maintain humidity levels, helping to keep your cookies crisp and delicious for longer.
Important Note: The storage time may vary slightly depending on factors such as the recipe, ingredients used, and storage conditions. Always check your cookies for any signs of spoilage before consuming.
Chocolate Chip Cookie Recommendations
These delectable chocolate chip cookies are best enjoyed fresh from the oven, still warm and slightly soft. However, their deliciousness persists even after they’ve cooled. For optimal texture and flavor, we recommend consuming them within 3-4 days of baking. Their soft, chewy centers and crispy edges are a delightful combination that won’t last long!
Serving Suggestions: These cookies are incredibly versatile. Enjoy them as a simple after-dinner treat with a tall glass of cold milk, or pair them with a warm cup of coffee or tea for a cozy afternoon snack. They also make a wonderful addition to ice cream sundaes, adding a delightful textural contrast and intense chocolate flavor. For a more sophisticated experience, serve them alongside a scoop of vanilla bean ice cream and a drizzle of chocolate sauce. Consider crumbling them over your favorite yogurt or milkshake for an extra chocolatey boost.
Storage Conditions: To maintain freshness and prevent them from becoming stale, store your cookies in an airtight container at room temperature. Avoid storing them in the refrigerator, as this can cause them to dry out. If properly stored, your cookies should remain fresh and delicious for up to 3-4 days. For longer storage, consider freezing them. Place the cooled cookies in a freezer-safe bag or container and freeze for up to 2 months. Thaw them at room temperature before enjoying.
Complementary Dishes: The rich chocolate flavor of these cookies pairs beautifully with a variety of desserts and beverages. They complement the tartness of berries in a crumble or crisp, or the creamy texture of a chocolate mousse. They also are a fantastic accompaniment to a rich, dark chocolate lava cake or a light and airy angel food cake. Consider serving them alongside a fruit salad for a balanced and refreshing dessert experience. For a truly indulgent treat, pair them with a glass of cold milk infused with vanilla extract.
Nutritional Information (per cookie, approximate values may vary based on recipe):
Calories: Approximately 150-200 calories
Fat: 8-10g
Saturated Fat: 4-6g
Cholesterol: 15-20mg
Sodium: 80-100mg
Carbohydrates: 20-25g
Fiber: 1-2g
Sugars: 10-15g
Protein: 2-3g
Note: These are approximate values and can vary depending on the specific ingredients and quantities used in the recipe. For precise nutritional information, use a nutrition calculator with your exact recipe details.