Prepare your taste buds for a culinary journey to Thailand with the best Thai peanut sauce, a condiment that transcends mere flavor to embody a rich history and cultural significance. While pinpointing the exact origin is difficult, the sauce’s popularity is deeply rooted in Thailand’s diverse culinary landscape, showcasing the country’s masterful blend of sweet, savory, sour, spicy, and umami. The foundation of the sauce, peanuts, were introduced to Southeast Asia via trade routes centuries ago, gradually becoming integrated into local cuisine. Specific recipes likely evolved regionally, with family variations passed down through generations, resulting in the myriad versions we enjoy today. The exact recipe varies widely, but the core components remain consistent: peanuts, lime juice, fish sauce, soy sauce, garlic, chili, and often a touch of sugar.
The cultural significance of Thai peanut sauce is undeniable. It’s not merely a dipping sauce; it’s a cornerstone of many beloved dishes. It’s estimated that over 80% of Thai restaurants worldwide offer some variation of a peanut sauce, showcasing its widespread appeal. This speaks to its versatility – it’s equally delicious drizzled over noodles, used as a marinade for meats, or served as a dipping sauce for spring rolls, satay, and vegetables. Beyond its culinary uses, the sauce represents a key aspect of Thai hospitality. Sharing a meal, especially one featuring this flavorful sauce, is a social ritual, strengthening bonds and fostering community. The vibrant colors of the sauce itself – often a beautiful, rich brown – reflect the vibrancy and energy of Thai culture.
Interestingly, the popularity of Thai peanut sauce isn’t confined to Thailand. Its global appeal has led to numerous adaptations, with variations appearing in other Southeast Asian countries and even beyond. This adaptation, however, doesn’t diminish its original Thai roots. Instead, it acts as a testament to its delicious simplicity and versatility. While some versions opt for alternative ingredients like tahini or different types of chili, the core flavor profile remains unmistakably Thai, a harmonious blend of sweet and savory, punctuated by the delightful warmth of chili and the tang of lime. The sauce’s international success also highlights the growing global interest in authentic Thai cuisine, contributing to a greater appreciation for the country’s rich culinary heritage.
So, get ready to experience the magic of authentic Thai peanut sauce. More than just a condiment, it’s a culinary journey through time, a taste of Thai culture, and a testament to the enduring power of simple, delicious ingredients. Whether you’re a seasoned Thai food enthusiast or a curious newcomer, prepare to be captivated by its irresistible flavor and rich history. The best Thai peanut sauce isn’t just a taste; it’s an experience.
Ingredients and Measurements
Crafting the perfect Thai peanut sauce hinges on the precise balance of ingredients. This recipe yields approximately 1 ½ cups of sauce, perfect for a variety of dishes from noodles to spring rolls. Accuracy in measurement is crucial for achieving the desired creamy texture and nuanced flavor profile. We recommend using a kitchen scale for the most precise results, especially for the peanut butter and sugar.
Peanut Butter: 1 cup (240g) creamy peanut butter. The choice of peanut butter significantly impacts the final product. We strongly recommend using a high-quality, all-natural peanut butter with minimal added ingredients, such as salt or sugar. Natural peanut butter often separates, so be sure to stir it thoroughly before measuring. If using a chunky peanut butter, you may want to process it briefly in a food processor for a smoother consistency. Avoid using reduced-fat peanut butter, as it can result in a thinner, less flavorful sauce.
Soy Sauce: ¼ cup (60ml) soy sauce (or tamari for gluten-free). Soy sauce provides the savory umami base for the sauce. The type of soy sauce you choose will subtly influence the final flavor; tamari offers a slightly sweeter and less salty profile. Adjust the amount to your preference, depending on your desired saltiness.
Rice Vinegar: 2 tablespoons (30ml) rice vinegar. Rice vinegar adds a touch of acidity that balances the richness of the peanut butter and complements the other flavors. Do not substitute with white vinegar, as it will significantly alter the flavor profile. Apple cider vinegar can be used in a pinch, but it will impart a slightly different taste.
Lime Juice: 2 tablespoons (30ml) freshly squeezed lime juice. Freshly squeezed lime juice is essential for its vibrant acidity and aromatic quality. Bottled lime juice lacks the freshness and complexity of freshly squeezed juice. Adjust the amount based on the tartness of your limes.
Honey or Maple Syrup: 2 tablespoons (30g) honey or maple syrup. This adds sweetness and balances the acidity. Honey provides a more complex flavor, while maple syrup offers a subtle caramel note. Adjust the amount according to your preferred level of sweetness and the sweetness of your peanut butter.
Garlic: 2 cloves garlic, minced. Freshly minced garlic adds a pungent aroma and flavor. Using pre-minced garlic from a jar can result in a slightly less intense flavor. If using pre-minced garlic, reduce the amount slightly.
Ginger: 1 tablespoon (15g) grated fresh ginger. Fresh ginger adds a warm, spicy note. Avoid using ground ginger, as it will have a different flavor and intensity. Adjust the amount according to your ginger preference.
Sesame Oil: 1 teaspoon (5ml) toasted sesame oil. Toasted sesame oil adds a nutty aroma and flavor. A small amount goes a long way; adding too much can overpower the other flavors. Use sparingly and adjust to your preference.
Water: 2-4 tablespoons (30-60ml) water. Water is used to adjust the consistency of the sauce. Start with 2 tablespoons and add more as needed to reach your desired thickness. Adding the water gradually ensures you don’t make the sauce too thin.
Optional Chili Garlic Sauce (Sriracha): 1-2 teaspoons (5-10ml), or to taste. This adds a spicy kick. Add gradually and taste as you go to adjust the level of spiciness to your preference.
Equipment List
Creating the best Thai peanut sauce requires the right tools to ensure smooth, consistent results and efficient preparation. While some items might seem optional, investing in the right equipment will significantly enhance your cooking experience and the quality of your final product.
Food Processor or Blender: This is arguably the most crucial piece of equipment. A powerful food processor, capable of handling both wet and dry ingredients with ease, is essential for achieving the desired creamy texture. A blender can work, but a food processor often provides better results for this particular recipe, as it handles larger quantities and chunkier ingredients more effectively. We recommend a food processor with at least a 10-cup capacity to avoid overcrowding and ensure thorough blending. Avoid using a standard immersion blender as it may not be powerful enough to fully process the peanuts and other ingredients to the desired consistency.
Measuring Cups and Spoons: Accuracy is paramount in achieving the perfect balance of flavors in Thai peanut sauce. Invest in a set of reliable measuring cups and spoons, preferably those made of stainless steel for durability and easy cleaning. Precise measurements of ingredients like peanut butter, lime juice, and soy sauce are crucial to replicate the recipe’s success. Having both dry and liquid measuring cups is essential for accurate ingredient portioning.
Medium-Sized Saucepan: A medium-sized saucepan (approximately 2-quart capacity) is needed for gently warming the sauce after it has been initially blended. This step helps to meld the flavors and create a smoother, more cohesive sauce. Choose a saucepan with a heavy bottom to ensure even heat distribution and prevent scorching. Non-stick surfaces are preferable for easy cleaning, particularly if dealing with sticky peanut butter.
Whisk: Although the food processor does most of the work, a whisk comes in handy for stirring the sauce in the saucepan while it gently warms. This ensures that the ingredients are evenly heated and that any lumps or inconsistencies are eliminated. A sturdy balloon whisk is ideal for this purpose, providing efficient mixing and preventing splattering.
Spatula or Rubber Scraper: A spatula or a rubber scraper is indispensable for scraping down the sides of the food processor bowl, ensuring that all the ingredients are incorporated into the sauce. This prevents wasted ingredients and guarantees a perfectly smooth, consistent texture. A flexible silicone spatula is recommended for its ability to reach every corner of the bowl without scratching the surface.
Small Bowls: Several small bowls are useful for preparing and measuring individual ingredients before adding them to the food processor. This keeps your workspace organized and prevents accidental spills or cross-contamination. Three to four small bowls should be sufficient for most recipes.
Serving Dish or Storage Container: Finally, you’ll need a serving dish or airtight storage container to hold your delicious homemade Thai peanut sauce. An airtight container is essential for proper storage to maintain the sauce’s freshness and prevent it from drying out or absorbing unwanted odors.
Preparation of Ingredients
The success of your Thai peanut sauce hinges significantly on the quality and preparation of its ingredients. Taking the time to properly prepare each component will elevate the final flavor profile, creating a sauce that’s both rich and nuanced.
Let’s start with the peanuts. We’ll be using 1 cup of unsalted roasted peanuts. While you can certainly use store-bought roasted peanuts, toasting your own peanuts is highly recommended. This step adds a depth of flavor that’s difficult to replicate otherwise. Spread your peanuts (1 cup) in a single layer on a dry skillet over medium heat. Constantly stir the peanuts to prevent burning. Toast them for about 5-7 minutes, or until they are fragrant and lightly browned. Be careful not to over-toast them, as this can result in a bitter taste. Once toasted, let them cool completely before proceeding. This prevents them from releasing excess oil while blending.
Next, we’ll prepare the garlic. We’ll need 4 cloves of garlic for this recipe. Mince the garlic as finely as possible. This ensures even distribution of garlic flavor throughout the sauce. Using a garlic press is convenient, but a sharp knife yields a more textured result. If you prefer a milder garlic flavor, you can reduce the amount to 2-3 cloves. However, 4 cloves provide a nice balance of savory flavor.
Now, let’s address the ginger. We’ll be using 1 tablespoon of freshly grated ginger. Fresh ginger is crucial; using ground ginger will result in a significantly different flavor profile. Peel the ginger using a spoon or vegetable peeler, then grate it using a fine grater. If you don’t have fresh ginger, you can substitute with 1 teaspoon of ground ginger, but keep in mind the flavor difference.
For the chilies, we recommend using 2-3 Thai chilies, finely chopped. Adjust the amount based on your spice preference. If you’re sensitive to spice, start with one chili and add more to taste. Remember that the heat level of chilies can vary depending on the variety. If using a milder chili, you may need to add more to achieve your desired level of spiciness. Alternatively, you could substitute with ½ – 1 teaspoon of chili flakes for a less intense heat.
Finally, we have the shallots. We’ll need 2 medium shallots, finely minced. Shallots provide a delicate sweetness and oniony flavor that complements the other ingredients beautifully. Make sure to mince them finely for even distribution of flavor. If you don’t have shallots, you can substitute with a small white onion, but the flavor will be slightly different.
Once all the ingredients are prepared, you’re ready to move on to the next step in making the best Thai peanut sauce!
Sauce Preparation (Mixing Wet and Dry Ingredients, Blending Techniques)
Creating the perfect Thai peanut sauce hinges on the careful combination of wet and dry ingredients and the skillful application of blending techniques. This section will guide you through the process, ensuring a smooth, flavorful, and perfectly emulsified sauce every time.
We’ll begin with the dry ingredients. For this recipe, we’ll use 1/2 cup roasted peanuts (unsalted), 2 tablespoons of brown sugar (for depth and richness), and 1 tablespoon of cornstarch (for thickening). It’s crucial to use roasted peanuts; raw peanuts lack the necessary depth of flavor. If using salted peanuts, reduce or omit the added salt later in the recipe. Grind the peanuts coarsely using a food processor; avoid over-processing, as this can result in a pasty texture. Don’t pulverize them into peanut butter; we want some texture remaining. Once ground, set the dry ingredients aside.
Next, prepare the wet ingredients. This includes 1/4 cup of soy sauce (or tamari for gluten-free), 2 tablespoons of rice vinegar (for acidity and balance), 2 tablespoons of lime juice (freshly squeezed is best!), 2 tablespoons of fish sauce (for umami depth – optional, but highly recommended), 1/4 cup of water, and 2-3 tablespoons of peanut oil (or another neutral oil). The quality of your fish sauce significantly impacts the final flavor, so choose a good quality brand. Combine all wet ingredients in a separate bowl and whisk gently to ensure everything is incorporated.
Now, it’s time to combine the wet and dry ingredients. Gradually add the dry peanut mixture to the wet ingredients, whisking continuously. This slow addition prevents clumping and ensures a smooth emulsion. Start with a low speed on your blender (if using) to avoid splattering. Gradually increase the speed as the mixture combines.
For optimal blending, we recommend using a high-powered blender. This will create a smoother, creamier sauce. However, if you don’t have a blender, a food processor or even a vigorous whisking by hand will suffice, although the texture might be slightly less smooth. If using a blender, blend in short bursts, stopping occasionally to scrape down the sides of the blender to ensure even blending. Blend until the sauce is completely smooth and emulsified, reaching your desired consistency.
Taste and adjust seasoning as needed. You might want to add more lime juice for acidity, brown sugar for sweetness, soy sauce for saltiness, or even a pinch of red pepper flakes for a spicy kick. Taste testing is crucial throughout the process; everyone’s palate is different, and you want to tailor the sauce to your preferences.
Once you’ve achieved your desired flavor and consistency, your Thai peanut sauce is ready to use! Enjoy it as a dipping sauce for spring rolls, satay, or vegetables, or use it as a dressing for noodles or salads. Store leftover sauce in an airtight container in the refrigerator for up to a week.
Adjusting Consistency and Taste
Once you’ve made your base Thai peanut sauce, the real fun begins – customizing it to your exact preferences! The beauty of this recipe lies in its adaptability. You can easily tweak the consistency and taste to create a sauce that perfectly complements your dish.
Adjusting Consistency: The ideal consistency is often described as a smooth, pourable sauce, thick enough to cling to noodles or vegetables but not so thick as to be difficult to work with. If your sauce is too thick, there are a few simple solutions.
To thin your sauce, start by adding 1-2 tablespoons of water at a time. Whisk vigorously after each addition to fully incorporate the water and prevent clumping. If you prefer a smoother, creamier consistency, use coconut milk instead of water. Begin with 1-2 tablespoons of full-fat coconut milk, adding more as needed until you achieve your desired thickness. Be mindful not to add too much liquid at once, as this can make the sauce too runny and dilute the flavor.
Conversely, if your sauce is too thin, you can easily thicken it. The most effective method is to add 1-2 tablespoons of peanut butter at a time. Remember to use the same type of peanut butter you used in the initial recipe to maintain consistency in flavor and texture. Alternatively, you can gently simmer the sauce over low heat for a few minutes. This method will reduce some of the liquid content, resulting in a slightly thicker sauce. However, be careful not to overheat the sauce, as this can cause separation or scorching.
Adjusting Taste: The flavor profile of your Thai peanut sauce should be a delicious balance of sweet, savory, spicy, and tangy. If you find your sauce needs a little something extra, don’t hesitate to experiment!
Sweetness: If your sauce is not sweet enough, add a teaspoon of honey, brown sugar, or maple syrup at a time, tasting and adjusting as you go. Start with small additions to avoid making it overly sweet.
Savory: To enhance the savory notes, add a pinch of salt or a dash of soy sauce. Soy sauce will also add a subtle umami flavor. A teaspoon of fish sauce can also add depth and complexity, but use it sparingly as it has a strong flavor.
Spice: If you prefer a spicier sauce, add a pinch of red pepper flakes or a few drops of your favorite hot sauce. Start with a small amount and gradually increase the spice level to your liking. Remember that the heat will intensify as the sauce sits.
Tanginess: A splash of lime juice or rice vinegar can add a refreshing tartness to balance the sweetness and richness of the peanut butter. Add a teaspoon at a time and taste frequently to avoid overpowering the other flavors.
Remember to taste your sauce frequently throughout the adjustment process. This allows you to fine-tune the flavors to your personal preference and ensures a perfectly balanced and delicious Thai peanut sauce every time.
Storage Suggestions
Proper storage is crucial for maintaining the vibrant flavor and texture of your homemade Thai peanut sauce. Following these guidelines will ensure you can enjoy your delicious creation for as long as possible while preventing spoilage and maintaining its quality.
Refrigeration is key. Once your Thai peanut sauce has cooled completely after preparation, transfer it to an airtight container. A glass jar with a tight-fitting lid is ideal, but a sturdy plastic container will also work well. Avoid using metal containers as they can react with the ingredients and alter the taste. Ensure the sauce is completely sealed to prevent air exposure, which can lead to oxidation and rancidity.
Quantity matters. If you’ve made a large batch (let’s say, more than 4 cups), consider portioning it into smaller containers for easier use and to minimize waste. Using smaller containers also helps with faster cooling and even temperature distribution in the refrigerator, preventing uneven texture and potential bacterial growth. Fill the containers to about ¾ full to allow for expansion during freezing (if you choose to freeze it).
Refrigeration lifespan: Properly stored in the refrigerator, your Thai peanut sauce should remain fresh and flavorful for approximately 5-7 days. After this timeframe, while it might still be safe to consume, the flavor and texture might begin to degrade. It’s always best to err on the side of caution and discard any sauce that shows signs of spoilage such as mold, off-odors, or a significant change in texture.
Freezing for longer storage: For longer-term storage, freezing your Thai peanut sauce is a great option. Pour the cooled sauce into freezer-safe containers, leaving about an inch of headspace to account for expansion. Label the containers with the date to ensure you use the oldest batches first. Frozen Thai peanut sauce can last for 2-3 months, maintaining most of its flavor and texture. When ready to use, thaw the sauce overnight in the refrigerator. Avoid thawing at room temperature to prevent bacterial growth.
Thawing and reheating: Once thawed, gently stir the sauce to ensure even consistency. You can then reheat it gently over low heat on the stovetop or in the microwave, stirring frequently to prevent scorching. Do not boil the sauce as this can alter its texture and flavor. Always ensure the sauce is thoroughly heated before consuming if you are concerned about food safety.
Important Note: Always practice proper food safety measures. If you notice any unusual changes in the appearance, smell, or texture of your Thai peanut sauce, discard it immediately. Do not risk consuming spoiled food.
Best Thai Peanut Sauce: Recommendations
Our Best Thai Peanut Sauce is a delicious and versatile condiment perfect for a variety of dishes. To fully enjoy its rich flavor and creamy texture, we recommend the following:
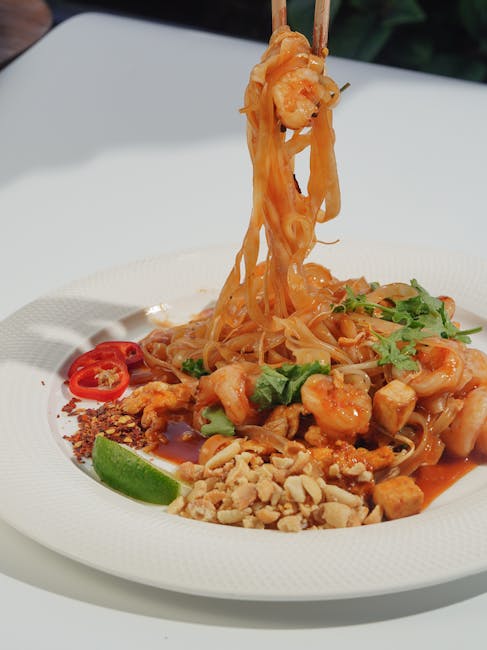
Serving Suggestions: This sauce is incredibly versatile. Its rich peanut flavor pairs beautifully with noodles, rice, vegetables, and proteins. For a classic experience, try it as a dipping sauce for spring rolls, chicken satay, or vegetable tempura. You can also drizzle it over stir-fried noodles or rice dishes, such as Pad Thai or Pad See Ew. Consider tossing it with grilled chicken or tofu for a quick and flavorful meal. For a more substantial dish, use it as a base for a peanut noodle salad, adding shredded carrots, cucumbers, and bean sprouts for extra crunch and freshness. A dollop on top of a hearty peanut butter chicken curry adds a delightful touch of richness.
Complementary Dishes: The subtly sweet and savory profile of our sauce complements a wide array of cuisines. It works particularly well with dishes featuring Southeast Asian flavors. Consider pairing it with grilled meats like chicken, pork, or shrimp. It also enhances the flavors of roasted vegetables, especially broccoli, carrots, and bell peppers. For a fusion twist, try it with Mexican-inspired dishes like tacos or burritos, adding a unique twist to your fillings. Its creamy texture also makes it a great addition to sandwiches or wraps, adding a savory punch to your lunchtime favorites.
Storage Conditions: For optimal freshness and flavor, store your Best Thai Peanut Sauce in an airtight container in the refrigerator. It should be refrigerated within 2 hours of opening. Proper refrigeration will help maintain its creamy consistency and prevent spoilage. We recommend consuming the sauce within 7-10 days of opening for the best quality. Do not freeze this sauce, as freezing may alter its texture and flavor.
Nutritional Information (per 2 tablespoons): Please note: Nutritional information is an approximation and may vary slightly depending on specific ingredients and batch variations.
Calories: Approximately 180-200 calories
Fat: 15-17 grams
Saturated Fat: 3-4 grams
Cholesterol: 0 mg
Sodium: 150-200 mg
Carbohydrates: 7-9 grams
Sugar: 5-7 grams
Protein: 4-5 grams
Important Note: This nutritional information is a guideline only. For the most accurate information, please refer to the nutritional label on your specific package of Best Thai Peanut Sauce.