Embark on a culinary journey with this recipe for homemade pita bread, a staple in Mediterranean cuisine for millennia. Its origins are shrouded in the mists of antiquity, with evidence suggesting pita-like flatbreads were consumed in the Fertile Crescent as far back as the Bronze Age. While pinpointing the exact birthplace is impossible, ancient Egypt, Mesopotamia, and the Levant all lay claim to variations of this simple yet versatile bread. Archaeological findings reveal flatbreads baked in primitive ovens, testament to the enduring appeal of this food across diverse cultures and time periods.
The word pita itself likely derives from the Greek word πίτα (pita), meaning flat cake or pastry. This highlights the bread’s fundamental simplicity: a dough of flour, water, and yeast (or leavening agent), transformed by heat into a light, airy pocket. This seemingly straightforward process has, however, yielded a surprising diversity of pita styles across the region. From the thin, crisp lavash of Armenia to the thicker, fluffier versions found in Lebanon and Syria, regional variations showcase the adaptability of this ancient food. Over 500 million pita breads are estimated to be consumed globally each day, a testament to its enduring popularity and adaptability to various cuisines.
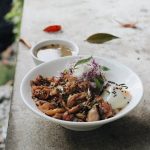
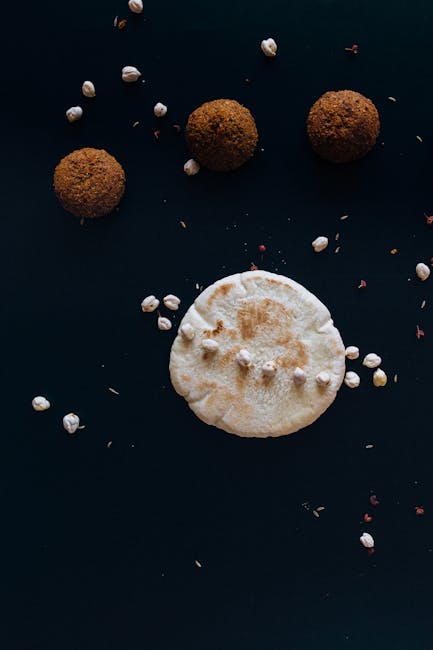
Pita bread’s cultural significance extends far beyond its nutritional value. It’s more than just a food; it’s a symbol of hospitality and community. In many cultures, sharing pita bread is an integral part of social gatherings and meals. The act of breaking and sharing the bread fosters a sense of togetherness and underscores the importance of communal dining. It’s often served as an accompaniment to numerous dishes, used to scoop up hummus, falafel, grilled meats, and various dips, functioning as both a utensil and a delicious element of the meal itself. Its versatility is unparalleled; it can be enjoyed warm, toasted, or even used as a base for pizzas or sandwiches, showcasing its adaptability to modern culinary trends.
This recipe aims to capture the essence of authentic pita bread, allowing you to experience the joy of making this historical food from scratch. While modern conveniences may simplify the process, the fundamental technique remains unchanged, connecting us to a culinary heritage spanning thousands of years. Get ready to enjoy the satisfying chewiness and airy pockets of homemade pita, a taste of history with every bite. Prepare to be amazed by how easy it is to create such a flavorful and culturally significant food in your own kitchen!
Ingredients and Measurements
Making delicious homemade pita bread hinges on using high-quality ingredients and precise measurements. The following list details everything you’ll need, with recommendations for achieving optimal results. Don’t be tempted to substitute ingredients without understanding the impact on the final product.
Flour: The cornerstone of any bread recipe, the type of flour you choose significantly impacts the texture and rise of your pita. We recommend using 3 cups (375g) of all-purpose flour. All-purpose flour provides a good balance of gluten development and tenderness. However, for a chewier pita, you could experiment with substituting up to 1 cup of bread flour. Bread flour has a higher protein content, leading to a stronger gluten network and thus, a chewier texture. Ensure your flour is fresh; stale flour can lead to a less airy final product.
Water: The amount of water needed can vary slightly depending on the humidity and the type of flour used. Start with 1 ½ cups (355ml) of lukewarm water. Lukewarm water is crucial as it activates the yeast effectively. Too hot and you’ll kill the yeast; too cold and the fermentation will be slow. Gradually add the water, a little at a time, while mixing. You may need slightly more or less depending on the absorbency of your flour. The dough should be soft and slightly sticky but not overly wet.
Yeast: Active dry yeast is the recommended choice. Use 2 ¼ teaspoons (7g) of active dry yeast. Before adding the yeast to the water, ensure your water is at lukewarm temperature (around 105-115°F or 40-46°C). Activating the yeast before adding it to the other ingredients is not strictly necessary for this recipe, but it ensures your yeast is alive and ready to work its magic. To activate it, combine the yeast with a tablespoon of sugar and a little bit of the lukewarm water; let it stand for 5-10 minutes until foamy.
Salt: Salt is essential for flavor and controlling yeast activity. Add 1 ½ teaspoons (9g) of salt. Adding salt directly to the yeast can inhibit its growth, so it’s best to add it after the yeast has been combined with the other ingredients.
Olive Oil: A tablespoon of olive oil will add flavor and help create a softer pita bread. Use 1 tablespoon (15ml) of extra virgin olive oil. This amount is sufficient; adding more will make the dough too oily.
Sugar: A small amount of sugar helps feed the yeast. Use 1 tablespoon (12g) of granulated sugar. This amount is optimal; exceeding it can lead to an overly sweet pita bread.
Important Note: Always measure your ingredients accurately using a kitchen scale for the best results. Volume measurements can be inconsistent. Using a scale ensures consistent results batch after batch. Enjoy your homemade pita bread!
Mixing the Dough
This section details the crucial process of mixing your pita bread dough. Accuracy in this step is key to achieving perfectly puffy and airy pita pockets. We’ll be using the stand mixer method for ease and efficiency, but you can certainly adapt this to a hand-mixing approach – just be prepared for a more strenuous workout!
Begin by ensuring all your ingredients are at room temperature. This is especially important for the yeast; cold yeast will struggle to activate properly, leading to a sluggish rise and ultimately, flat pita bread. Room temperature is generally considered to be between 68-72°F (20-22°C).
In the bowl of your stand mixer, combine 1 cup (240ml) of warm water (not hot!), 1 teaspoon of granulated sugar, and 2 teaspoons of active dry yeast. Give it a gentle stir to dissolve the sugar and ensure the yeast is evenly dispersed. Let this mixture stand for about 5-10 minutes, until foamy. This confirms your yeast is alive and ready to work its magic!
Once the yeast mixture is frothy, add 3 cups (375g) of all-purpose flour, 1 teaspoon of salt, and 2 tablespoons of olive oil to the bowl. If using a hand mixer, you’ll want to incorporate the dry ingredients gradually, mixing until a shaggy dough forms. With a stand mixer fitted with the dough hook attachment, start on a low speed, gradually increasing to medium-low as the ingredients combine.
The dough will initially be sticky and somewhat difficult to work with. This is normal! Continue mixing for another 5-7 minutes, or until the dough starts to pull away from the sides of the bowl and forms a smooth, slightly elastic ball. If the dough remains too sticky after 7 minutes, add flour, one tablespoon at a time, until it reaches the desired consistency. Avoid adding too much flour, however, as this can result in tough pita bread.
Once the dough is properly mixed, lightly grease a large bowl with olive oil. Transfer the dough to the bowl, turning it to coat it evenly with the oil. Cover the bowl with plastic wrap or a clean kitchen towel and let it rise in a warm place for at least 1-1.5 hours, or until doubled in size. The rising time can vary depending on the temperature of your environment; a warmer room will result in a faster rise.
After the first rise, gently punch down the dough to release the air. This is important to ensure even baking and to prevent the pita bread from becoming too airy or unevenly cooked. You’re now ready to proceed to the next stage: shaping and baking your pita bread!
Important Note: If you find your dough is too dry or too wet during mixing, adjust the amount of flour or water accordingly. Experience will help you fine-tune this process over time. Don’t be afraid to experiment!
First Rise (Bulk Fermentation)
The first rise, or bulk fermentation, is a crucial step in developing the flavor and texture of your pita bread. During this time, the yeast will produce carbon dioxide, creating those lovely air pockets that give pita its characteristic soft interior and puffy appearance. For this recipe, we’ll be aiming for a bulk fermentation time of approximately 2-3 hours, but this can vary depending on your ambient temperature and the activity of your yeast.
After combining all your ingredients (as detailed in the previous section) and kneading the dough until it’s smooth and elastic (around 8-10 minutes using a stand mixer, or 10-15 minutes by hand), gently shape the dough into a smooth ball. Place the dough in a lightly oiled large bowl, turning to coat it evenly. Cover the bowl tightly with plastic wrap or a damp kitchen towel. This prevents the dough from drying out and forming a skin.
Temperature plays a significant role in bulk fermentation. An ideal temperature range is between 75-80°F (24-27°C). If your kitchen is cooler, you might need to place the bowl in a slightly warmer spot, perhaps near a sunny window (avoid direct sunlight which can overheat the dough) or in a proofing box. Conversely, if your kitchen is very warm, you may need to refrigerate the dough to slow down the fermentation process. Over-fermentation will result in a flat, sour-tasting pita, while under-fermentation will yield a dense and chewy bread.
During the bulk fermentation, the dough will roughly double in size. You can gently poke the dough with a lightly floured finger. If the indentation slowly springs back, the fermentation is progressing well. If the indentation remains, it needs more time. If the indentation springs back rapidly, the dough might be over-fermented. Observe your dough carefully; the exact timing will depend on the surrounding temperature and the strength of your yeast.
After the dough has doubled, gently deflate it by pressing down on the surface. This releases some of the built-up gas and helps to even out the texture. You’ll notice the dough is considerably softer and more airy than when you initially kneaded it. Gentle handling is key during this stage to avoid degassing the dough too much, which could impact the final rise.
Once the bulk fermentation is complete, you are ready to proceed to the shaping and second rise (proofing) stage. Remember, the goal is not to achieve a precise timeframe, but rather to observe the dough’s behavior and ensure it’s properly fermented. Patience and observation are key to achieving perfectly puffed pita bread.
Dividing and Shaping the Dough
Once your pita dough has completed its second rise and is beautifully puffy and doubled in size, it’s time for the crucial step of dividing and shaping. Accurate portioning is key to achieving uniformly sized and cooked pitas. We’ll be aiming for approximately 6-ounce dough balls, yielding about 8-10 pitas depending on your desired size.
Begin by gently turning the dough out onto a lightly floured surface. Avoid kneading at this stage; you want to handle the dough as little as possible to prevent the development of too much gluten, which can result in tough pitas. Use a bench scraper or a sharp knife to cut the dough into roughly equal pieces. A kitchen scale is highly recommended for achieving consistent weight, ensuring even baking and similar pita sizes. Weigh each portion to ensure they are approximately 6 ounces (170 grams).
Proper portioning is essential for even baking. Inconsistent sizes will lead to some pitas being underbaked while others are overbaked. Take your time with this step; accuracy will pay off in the final product.
After dividing the dough, gently round each piece into a smooth ball. This is done by using the heel of your hand to tuck the edges of the dough underneath, rotating the ball as you go. Avoid pressing down too hard; aim for a smooth, slightly taut surface. Gently roll the dough ball between your hands to create a perfectly round shape. This process helps to create a consistent thickness throughout the pita, promoting even puffing during baking.
Once all the dough balls are formed, place them on a lightly floured baking sheet, leaving about 2 inches between each ball. This spacing is crucial to allow the pitas to expand freely during baking. Overcrowding will result in flat, dense pitas. Cover the baking sheet loosely with plastic wrap and let the dough balls rest for another 15-20 minutes. This allows the dough to relax and become even more pliable, making it easier to roll out.
Now, using a lightly floured rolling pin, gently roll each dough ball into a thin, round disc, approximately 6-7 inches in diameter. Avoid rolling too thin; a slightly thicker disc will result in a softer, more substantial pita. The goal is to achieve a consistent thickness throughout the disc to ensure even cooking. If you notice any tears or inconsistencies in the dough, gently patch them up with your fingers.
A final tip: If you find the dough is sticking to the rolling pin or the surface, lightly dust the surface and rolling pin with more flour. However, be mindful not to use excessive flour, as this can result in dry and tough pitas.
Your perfectly divided and shaped dough balls are now ready for baking! Proceed to the next section for instructions on baking your homemade pita bread.
Second Rise (Proofing)
After the initial bulk fermentation, your pita dough will have significantly increased in volume, appearing soft and bubbly. This is a good indication that the yeast is actively working and producing the gases that will give your pita bread its characteristic puff. Now it’s time for the crucial second rise, also known as proofing. This step allows the gluten to relax further and develop even more, resulting in lighter, airier pita.
The goal of the second rise is to gently let the dough rest in a warm, humid environment for approximately 1-1.5 hours. The exact time will depend on factors such as your ambient temperature and the strength of your yeast. A warmer environment will speed up the process, while a cooler one will slow it down. Aim for a temperature around 75-80°F (24-27°C). You can achieve this by placing the dough in a warm spot in your kitchen, or by using a proofing box or even your oven with the light on (but ensure it’s not too hot!).
Lightly oil a large bowl (approximately 4-quart capacity) with 1 tablespoon of olive oil. This prevents the dough from sticking and also adds a touch of flavor. Gently transfer the dough from its initial bowl into the oiled bowl. Avoid aggressively kneading or handling the dough at this stage; you want to preserve the delicate air bubbles that have already formed.
Gently shape the dough into a ball. Flip the dough over to coat it evenly with the oil. Cover the bowl tightly with plastic wrap, ensuring the plastic wrap doesn’t touch the surface of the dough. Alternatively, you can cover the bowl with a damp kitchen towel. This helps maintain moisture and prevents a skin from forming on the dough’s surface, which can inhibit rising.
Let the dough proof for 1-1.5 hours, or until doubled in size. During this time, resist the urge to peek too often, as this can disrupt the rising process. You’ll know the dough is ready when it’s noticeably puffy and springs back slowly when gently poked. If the dough is still quite firm after 1.5 hours, you can let it rise for another 15-30 minutes, checking periodically. Conversely, if the dough rises too quickly and appears overly puffy and possibly even slightly collapsed, it may indicate over-proofing, which could result in less airy pita.
Over-proofing can lead to flat pitas, so it’s important to monitor the dough carefully. If you notice the dough becoming too bubbly and starting to collapse, proceed to the shaping and baking stages immediately. Under-proofing, on the other hand, will result in denser, less flavorful pita.
Once the dough has doubled in size and passed the poke test, you’re ready to move on to shaping and baking your delicious homemade pita bread! Remember, patience and careful observation are key to achieving perfectly puffed pita.
Cooking Techniques (Grilling or Baking)
This section details two methods for cooking your homemade pita bread: grilling and baking. Both yield delicious results, but offer slightly different textures and flavors. Choose the method that best suits your equipment and preference.
Grilling Your Pita Bread
Grilling pita bread imparts a lovely smoky char and slightly crispy exterior. This method is best for achieving that characteristic puffy pocket. You’ll need a clean, hot grill, preferably with a gas grill for better temperature control. Preheat your grill to medium-high heat (approximately 400-450°F or 200-230°C). Ensure the grates are well oiled to prevent sticking.
Gently place the shaped pita dough rounds directly onto the preheated grill grates. Avoid overcrowding the grill; leave some space between each pita to ensure even cooking. Grill for approximately 1-2 minutes per side, or until lightly browned and puffy. You’ll notice the pita begin to inflate as it cooks – this is a sign it’s working! Keep a close eye on them, as they can burn quickly at high heat.
Once grilled, remove the pita bread from the grill and immediately place them in a clean kitchen towel or a large bowl covered with a towel to trap the steam. This steaming process helps to soften the interior and create that signature pita pocket. Let them rest for about 5 minutes before serving.
Baking Your Pita Bread
Baking provides a more consistent and predictable result, particularly if you’re not comfortable working with high heat grilling. Preheat your oven to 450°F (230°C). Place a baking sheet in the oven while it preheats; this helps create a hot, even cooking environment.
Lightly dust a clean work surface with flour. Gently roll out your pita dough rounds to about 6-7 inches in diameter. Ensure your dough is not too thin, or it will become overly crispy. Carefully transfer the pita rounds to the preheated baking sheet.
Bake for 8-10 minutes, or until the pitas are puffed and lightly golden brown. Rotate the baking sheet halfway through baking to ensure even cooking. Like grilling, once baked, immediately wrap the pitas in a clean kitchen towel to trap the steam and soften the inside. Let them rest for 5 minutes before serving.
Important Considerations for Both Methods:
Dough consistency is crucial. If your dough is too wet, the pitas may not puff properly. If it’s too dry, they may be tough.
Don’t open the oven or grill door too frequently while cooking, as this can cause the pitas to deflate.
Experiment with different flours. Using a blend of all-purpose and whole wheat flour can add depth of flavor and a slightly chewier texture.
Enjoy your freshly baked (or grilled!) pita bread! They’re perfect for sandwiches, dips, or simply enjoyed on their own.
Recommendations for Homemade Pita Bread
This homemade pita bread recipe yields incredibly soft and fluffy pita pockets, perfect for a variety of meals. To achieve the best results, ensure you follow the instructions carefully, paying close attention to the kneading and proofing times. Over-kneading can result in tough pita, while under-proofing will lead to flatbreads lacking the characteristic puffy pockets.
Serving Suggestions: The possibilities are endless! These pitas are fantastic filled with grilled meats like chicken or lamb, falafel, hummus, and fresh vegetables for a classic Mediterranean meal. They also make a delightful vessel for various fillings such as pulled pork, seasoned ground beef, or even delicious vegetarian options like roasted vegetables and cheese. Consider using them as a base for pizzas, topping them with your favorite sauce and ingredients. Alternatively, you can cut them into triangles and serve them warm alongside dips like baba ghanoush or tzatziki.
Storage Conditions: For optimal freshness, store your homemade pita bread in an airtight container at room temperature for up to 2 days. For longer storage, you can freeze the pitas. To freeze, allow the cooled pitas to cool completely, then wrap them individually in plastic wrap and place them in a freezer-safe bag. They can be stored frozen for up to 3 months. To reheat, simply warm the pita in a dry skillet or toaster oven until heated through and slightly crispy.
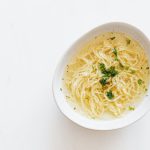
Complementary Dishes: These pitas perfectly complement a wide array of cuisines. They pair wonderfully with Middle Eastern dishes such as shawarma, kebabs, and tabbouleh. They are also a great addition to Mediterranean-style salads, adding a soft and flavorful element to the crisp vegetables. For a more casual meal, serve them alongside soups, stews, or chili. The versatility of these pitas allows you to incorporate them into countless meal combinations.
Nutritional Information (per serving, approximate): The nutritional content will vary slightly depending on the ingredients used, but a typical serving of a medium-sized pita bread contains approximately 200-250 calories. This includes roughly 40-50g of carbohydrates, 5-7g of protein, and 2-4g of fat. The pita bread is a good source of fiber, providing around 2-3g per serving. Note that these values are estimates and can change depending on the specific recipe variations and portion size.
Important Note: While this recipe aims for accuracy, individual ovens and ingredients can influence the final result. Adjust baking time as needed to achieve perfectly golden-brown and puffed-up pitas. Don’t be afraid to experiment with different flours or additions like herbs or spices to personalize your pita bread recipe. Remember to always practice safe food handling techniques.