Prepare yourself for a culinary journey to Japan with our Homemade Japanese Teriyaki Chicken! This dish, a beloved staple in Japanese cuisine, isn’t just a meal; it’s a taste of history and culture. While pinpointing the exact origin is difficult, the foundations of teriyaki lie in the ancient methods of preserving and flavoring food. Early forms of teriyaki likely involved grilling or broiling fish and meats, basting them with a simple sauce of soy sauce, mirin, and sake – ingredients readily available in Japan for centuries. The name itself, teri-yaki, combines teri (glossy) referring to the shiny glaze the sauce creates, and yaki (grilled) highlighting the cooking method. This suggests a focus on both visual appeal and flavor profile from the very beginning.
The evolution of teriyaki was significantly influenced by the arrival of Western ingredients and culinary techniques. The introduction of sugar, likely from European trade, added a crucial element to the sauce, enhancing its sweetness and creating the rich, complex flavor we associate with modern teriyaki. This development likely occurred during the Edo period (1603-1868), a time of increased international trade and culinary experimentation in Japan. While the exact timeline is debated, the popularization of teriyaki as a widely enjoyed dish undoubtedly accelerated in the 20th century, coinciding with the nation’s post-war economic boom and a growing global interest in Japanese culture.
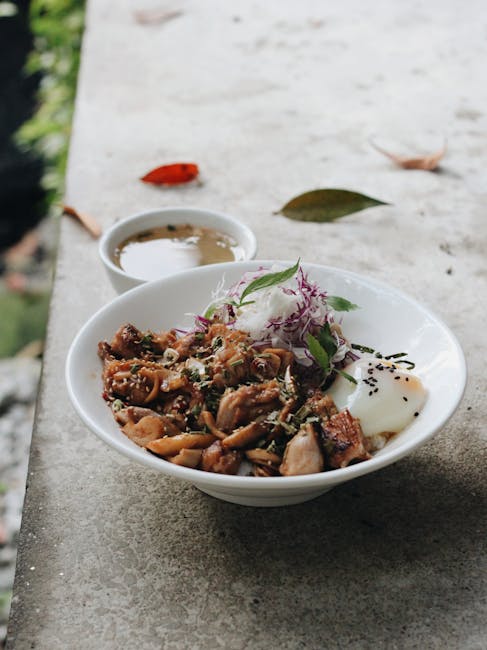
Today, teriyaki chicken is a ubiquitous dish, not just in Japan but worldwide. It’s estimated that over 70% of Japanese restaurants outside Japan include some variation of teriyaki on their menus, highlighting its global appeal and cultural impact. It’s incredibly versatile, too, often served with rice, noodles, or alongside various vegetables. The simplicity of its core ingredients belies its depth of flavor, making it accessible for home cooks while still offering a satisfyingly authentic Japanese experience. Furthermore, the glossy, dark-brown glaze of the chicken is not just visually appealing but also a testament to the precise balance of sweet, savory, and umami notes that constitute the heart of teriyaki’s enduring charm.
Beyond its taste, teriyaki chicken embodies a significant cultural aspect of Japanese cuisine: the emphasis on balance and harmony. The interplay of sweet and savory, the glossy finish reflecting the meticulous preparation, and the careful selection of ingredients all contribute to a culinary experience that embodies the Japanese aesthetic sensibility. Our recipe aims to capture this essence, providing you with an authentic and delicious homemade version of this iconic dish, allowing you to savor a piece of Japanese culinary heritage in your own kitchen.
Ingredients and Measurements
This recipe for Homemade Japanese Teriyaki Chicken yields approximately 4 servings. Accurate measurements are crucial for achieving the perfect balance of sweet, savory, and umami flavors. We’ll be using both weight and volume measurements where appropriate, to accommodate different kitchen setups.
For the Chicken:
- 1.5 lbs (approximately 680g) boneless, skinless chicken thighs, cut into 1-inch cubes. Using chicken thighs provides a more succulent and flavorful result compared to chicken breasts, which can dry out more easily during cooking. Ensure the chicken is cut into uniformly sized pieces for even cooking.
- 1 tbsp cornstarch. This helps to create a slightly crispy exterior and bind the teriyaki sauce to the chicken.
- 1 tsp salt. Adjust to your taste preference. Start with a smaller amount and add more later, as you can always add salt but you can’t take it away.
- ½ tsp black pepper, freshly ground. Freshly ground pepper offers a more vibrant flavor.
For the Teriyaki Sauce:
- ½ cup (120ml) soy sauce (low sodium preferred for healthier option, but regular works fine). Soy sauce is the foundation of the teriyaki flavor; use a high-quality brand for the best results.
- ¼ cup (60ml) mirin (sweet rice wine). Mirin adds a subtle sweetness and depth to the sauce. Do not substitute with other types of rice wine, as they may not provide the correct balance of sweetness and flavor.
- ¼ cup (60ml) sake (Japanese rice wine). Sake contributes to the overall flavor profile; dry sake is recommended. If you don’t have sake, you can substitute with an equal amount of dry sherry or white wine.
- ¼ cup (50g) granulated sugar (or brown sugar for a richer flavor). Adjust the sugar to your preferred level of sweetness. Taste and adjust accordingly.
- 2 tbsp honey (or maple syrup for a vegan option). Honey adds a touch of extra sweetness and richness to the sauce.
- 1 tbsp grated fresh ginger. Fresh ginger provides a bright, pungent flavor that complements the other ingredients in the sauce. Using fresh ginger is highly recommended over ground ginger for a superior flavor.
- 2 cloves garlic, minced. Garlic enhances the savory notes of the sauce.
- 1 tbsp cornstarch (mixed with 2 tbsp cold water to form a slurry). This creates a thicker, glossier sauce. Adding this slurry at the end helps to prevent the sauce from becoming too thin.
Optional additions: Consider adding a pinch of red pepper flakes for a hint of spice, or a teaspoon of sesame oil for added aroma and flavor. You can also garnish with sesame seeds and chopped green onions before serving.
Important Note: Always ensure that your chicken is cooked through to an internal temperature of 165°F (74°C) before serving to ensure food safety. Use a meat thermometer to check the temperature.
Marinade Preparation
The key to incredibly flavorful teriyaki chicken lies in a well-balanced marinade. This recipe provides a rich, savory, and slightly sweet marinade that will tenderize the chicken and infuse it with authentic Japanese flavors. We’ll be making a generous amount to ensure your chicken is thoroughly coated.
Ingredients:
- 1/2 cup soy sauce (preferably low sodium for better flavor control)
- 1/4 cup mirin (sweet rice wine – adds sweetness and depth)
- 1/4 cup sake (rice wine – adds complexity and helps tenderize)
- 2 tablespoons brown sugar (packed, for a caramel-like sweetness)
- 2 tablespoons grated fresh ginger (about 1 inch of ginger)
- 2 cloves garlic, minced
- 1 tablespoon cornstarch (helps thicken the sauce later)
- 1 teaspoon sesame oil (adds aroma and richness)
Instructions:
Begin by combining all the marinade ingredients in a medium-sized bowl. Ensure you use a non-reactive bowl like glass or stainless steel to prevent discoloration. Avoid using aluminum or reactive metals.
Whisk vigorously: This step is crucial to ensure all the ingredients are thoroughly combined and the sugar is completely dissolved. A smooth, homogenous mixture is essential for even flavor distribution throughout the chicken.
Taste and adjust: Once everything is well-mixed, take a small spoonful and taste the marinade. You can adjust the sweetness, saltiness, or ginger to your preference. Remember, you can always add more, but you can’t take away! Start with small adjustments and taste again before making significant changes.
Grated ginger vs. ground ginger: Freshly grated ginger provides a far superior flavor and aroma compared to ground ginger. The fresh ginger adds a vibrant, pungent note that enhances the overall taste profile of the marinade.
Marinating time: For optimal flavor and tenderness, marinate the chicken for at least 2 hours, and ideally, for 4-6 hours in the refrigerator. Marinating overnight is even better, allowing the flavors to fully penetrate the meat. However, marinating for longer than 24 hours is not recommended, as it can make the chicken mushy.
Important Note: After marinating, reserve the marinade. Do not use the marinade directly for cooking after the chicken has been in it. This is a crucial food safety precaution to prevent bacterial contamination. Instead, you can use a small amount of the marinade to deglaze the pan after cooking the chicken, adding depth and richness to your sauce.
Once your marinade is prepared and your chicken is marinating, you’re ready to move on to the next step of cooking your delicious homemade Japanese Teriyaki Chicken!
Chicken Preparation
The success of your homemade Japanese teriyaki chicken hinges significantly on the proper preparation of the chicken. We’ll be using boneless, skinless chicken thighs for this recipe, as they remain juicy and tender even with longer cooking times. You can, of course, substitute boneless, skinless chicken breasts, but be mindful of their tendency to dry out; adjust cooking times accordingly.
Begin by gathering your ingredients: 1.5 lbs boneless, skinless chicken thighs. If using larger thighs, cut them into smaller, more uniformly sized pieces – approximately 1-inch cubes. This ensures even cooking. Consistency in size is key to preventing some pieces from overcooking while others remain undercooked.
Thoroughly rinse the chicken thighs under cold running water. This helps remove any residual blood or debris. Pat the chicken completely dry with paper towels. Excess moisture will hinder the browning process and result in a less flavorful, potentially steamed, texture.
Now, we’ll prepare the chicken for marinating. The marinade not only infuses the chicken with incredible flavor but also helps keep it moist and tender. Place the dried chicken pieces in a medium-sized bowl. You’ll need a generous marinade; aim for enough to fully coat the chicken. Don’t overcrowd the bowl; if necessary, use two bowls.
Professional Tip: For a more intense flavor, consider scoring the chicken thighs with a few shallow cuts. This helps the marinade penetrate deeper into the meat, resulting in more evenly seasoned chicken. However, be careful not to cut too deeply, as this could make the chicken fall apart during cooking.
Once the chicken is in the bowl, you’re ready to add the marinade (recipe provided separately). Ensure every piece of chicken is completely coated in the marinade. Use tongs or your hands (clean hands, please!) to gently toss the chicken until it’s evenly distributed. Cover the bowl tightly with plastic wrap and refrigerate for at least 30 minutes, preferably 2-4 hours, or even overnight for maximum flavor infusion. The longer the chicken marinates, the more flavorful it will be. Do not leave the marinated chicken at room temperature for extended periods; this increases the risk of bacterial growth.
After marinating, remove the chicken from the refrigerator about 15-20 minutes before cooking to allow it to come to room temperature. This ensures more even cooking. Discard any excess marinade that hasn’t been in contact with the raw chicken. Never reuse marinade that has come into contact with raw meat.
Important Note: Always practice safe food handling techniques. Wash your hands thoroughly before and after handling raw chicken. Use separate cutting boards and utensils for raw chicken and other ingredients to prevent cross-contamination.
Cooking the Chicken
Now that your chicken is marinated, it’s time to cook it to juicy, flavorful perfection! We’ll be using a combination of pan-frying and simmering to achieve the ideal teriyaki chicken texture. For this recipe, we’ll assume you’re using about 1.5 lbs (680g) boneless, skinless chicken thighs, cut into 1-inch pieces. Adjust quantities proportionally if using a different amount of chicken.
Preparation is key. Before you begin cooking, ensure your chicken pieces are patted completely dry with paper towels. Excess moisture will prevent proper browning and result in a steamed, rather than seared, texture. This step is often overlooked but makes a significant difference.
Heat 1 tablespoon of vegetable oil in a large skillet or wok over medium-high heat. The oil should be hot enough that a drop of water sizzles immediately upon contact. Carefully add the chicken pieces to the skillet, ensuring not to overcrowd the pan. Working in batches if necessary prevents steaming and ensures even browning.
Sear the chicken for about 3-4 minutes per side, until it develops a beautiful golden-brown crust. Avoid moving the chicken too frequently during this searing process; let it develop a good sear before turning. This step contributes significantly to the overall flavor and texture of your teriyaki chicken.
Once the chicken is seared, pour the marinade (reserved from earlier steps) over the chicken. Bring the mixture to a simmer, then reduce the heat to low, cover the skillet, and let it simmer gently for 15-20 minutes, or until the chicken is cooked through and the internal temperature reaches 165°F (74°C). Use a meat thermometer to ensure the chicken is cooked safely. This simmering process allows the chicken to absorb the delicious teriyaki flavors.
During the simmering process, you might notice the sauce thickening slightly. If you prefer a thicker sauce, you can remove the chicken from the skillet and simmer the sauce uncovered for a few minutes to reduce it further. Be careful not to burn the sauce during this step; keep the heat low and stir frequently.
Once the chicken is cooked through and the sauce has reached your desired consistency, remove the skillet from the heat. Gently toss the chicken back into the sauce to coat it evenly. Serve immediately over rice, noodles, or alongside your favorite vegetables. The chicken is best enjoyed while still warm and juicy.
Professional Tip: For an extra layer of flavor, consider adding a tablespoon of mirin or sake to the simmering sauce during the last few minutes of cooking. This will add depth and complexity to the teriyaki flavor profile.
Important Note: Always ensure your chicken is cooked to a safe internal temperature to prevent foodborne illnesses. Using a meat thermometer is the most accurate way to ensure the chicken is fully cooked.
Making the Teriyaki Sauce
The heart of any great teriyaki chicken lies in its sauce. This recipe focuses on achieving a balanced, flavorful teriyaki sauce that’s both sweet and savory, with a subtle hint of umami. We’ll be making a relatively small batch, perfect for coating about 1.5 lbs of chicken, but you can easily double or triple the recipe as needed.
Ingredients:
- 1/2 cup soy sauce (low sodium preferred for better control over saltiness)
- 1/4 cup mirin (sweet rice wine – look for it in Asian grocery stores or well-stocked supermarkets)
- 1/4 cup sake (Japanese rice wine – dry sake works best, but you can substitute with dry sherry in a pinch)
- 2 tablespoons brown sugar (packed)
- 1 tablespoon cornstarch
- 1 tablespoon grated fresh ginger
- 1 clove garlic, minced
- Optional: 1 teaspoon sesame oil (for added aroma and depth of flavor)
Instructions:
Begin by combining all the ingredients (except the cornstarch) in a small saucepan. Ensure you’re using a saucepan that’s not too large, as this will help the sauce thicken more effectively. Whisk everything together thoroughly to ensure the sugar dissolves properly and the ingredients are well incorporated. This initial mixing is crucial for a smooth, lump-free sauce.
Place the saucepan over medium heat. Bring the mixture to a gentle simmer, stirring occasionally to prevent sticking. Do not boil vigorously; a gentle simmer is key to allowing the flavors to meld and the sauce to thicken properly without becoming overly reduced. The simmering process should take about 5-7 minutes, depending on your stovetop.
While the sauce simmers, in a small bowl, whisk together the cornstarch with 1 tablespoon of cold water. This creates a slurry that will help thicken the sauce. It’s important to whisk the cornstarch slurry well to avoid lumps. Once the sauce has simmered for 5-7 minutes, slowly pour the cornstarch slurry into the saucepan while whisking continuously. This prevents the sauce from becoming clumpy.
Continue to simmer the sauce, stirring constantly, for another 1-2 minutes, or until it has reached your desired thickness. The sauce should coat the back of a spoon smoothly. If it’s too thin, you can simmer it for a little longer; if it’s too thick, add a teaspoon of water at a time until you reach the desired consistency.
Once the sauce has thickened, remove it from the heat and let it cool slightly. Taste the sauce and adjust the seasoning as needed. You might want to add a little more soy sauce for saltiness, mirin for sweetness, or ginger for a sharper kick. Once you’re happy with the flavor, your delicious homemade teriyaki sauce is ready to be used!
Professional Tip: For a richer, deeper flavor, consider adding a tablespoon of toasted sesame oil at the very end, after removing the sauce from the heat. Allow the sauce to cool completely before using it to marinate or glaze your chicken. This will allow the flavors to fully penetrate the meat.
Sauce Reduction: The Heart of Teriyaki
The magic of teriyaki chicken lies not just in the marinade, but in the rich, glossy sauce that coats the finished dish. Achieving the perfect teriyaki sauce reduction requires patience and attention to detail. This section will guide you through the process, ensuring your chicken is enveloped in a delicious, deeply flavorful sauce.
To begin, we’ll use the leftover marinade from your marinated chicken (ensure it has been uncontaminated by raw chicken). If you didn’t marinate your chicken, you can make a fresh batch using the recipe below. Start with:
- 1/2 cup soy sauce (low sodium preferred)
- 1/4 cup mirin (sweet rice wine)
- 2 tablespoons sake (optional, adds depth of flavor)
- 2 tablespoons sugar (adjust to your sweetness preference)
- 1 tablespoon cornstarch (mixed with 2 tablespoons of cold water to form a slurry)
Important Note: Never use the marinade that has been in contact with raw chicken directly on the cooked chicken without boiling it first. This is crucial for food safety.
Combine all ingredients (except the cornstarch slurry) in a small saucepan over medium heat. Bring the mixture to a gentle simmer, stirring occasionally to prevent sticking. The sauce will begin to thicken slightly as the liquids reduce. This process takes around 5-7 minutes, depending on your stovetop.
Once the sauce has simmered for a few minutes, slowly whisk in the cornstarch slurry. This is the key to achieving a beautiful, glossy finish. Whisk continuously to prevent lumps from forming. Continue to simmer the sauce, stirring constantly, until it thickens to your desired consistency. This should take another 2-3 minutes. The sauce should coat the back of a spoon smoothly.
Professional Tip: To achieve a truly exceptional gloss, simmer the sauce uncovered. This allows some of the water to evaporate, resulting in a richer, more concentrated flavor and a beautiful sheen. Be vigilant, however, to prevent it from burning.
As the sauce reduces, keep a close eye on it. Avoid high heat, as this can cause the sauce to burn and become bitter. Low and slow is the key here. Taste the sauce and adjust the sweetness or saltiness as needed. You might want to add a pinch more sugar or soy sauce to fine-tune the flavor to your liking.
Once your sauce has reached the desired consistency and flavor, remove it from the heat. Immediately pour the sauce over your cooked teriyaki chicken, ensuring it is evenly coated. Serve hot, garnished with sesame seeds or chopped green onions, if desired. The glossy, flavorful sauce will elevate your teriyaki chicken to a culinary masterpiece.
Remember: Practice makes perfect! Experiment with different ratios of ingredients to develop your own signature teriyaki sauce reduction.
Homemade Japanese Teriyaki Chicken: Recommendations
Your homemade Japanese Teriyaki Chicken is sure to be a delicious and satisfying meal! To elevate your culinary experience, consider these recommendations for serving, storage, and complementary dishes. Proper handling and storage are crucial for maintaining the quality and safety of your dish.
Serving Suggestions: This versatile dish can be enjoyed in various ways. For a classic presentation, serve the teriyaki chicken over fluffy white rice. The glistening sauce clings beautifully to the rice, creating a harmonious blend of flavors and textures. Alternatively, you can serve it with steamed brown rice for a healthier option, or even quinoa for a gluten-free choice. Consider adding a sprinkle of toasted sesame seeds for extra crunch and visual appeal. For a more substantial meal, serve the chicken atop a bed of mixed greens with shredded carrots and cucumbers for a refreshing contrast.
Complementary Dishes: To enhance your teriyaki chicken experience, consider pairing it with complementary side dishes. A simple green salad with a light vinaigrette dressing cuts through the richness of the sauce. Stir-fried vegetables, such as broccoli, snap peas, and carrots, offer a vibrant and healthy addition. For a more substantial side, consider preparing Japanese-style potato salad or a comforting miso soup. If you’re feeling adventurous, try adding a side of pickled ginger or daikon radish for a tangy contrast.
Storage Conditions: Leftover teriyaki chicken should be stored properly to maintain its quality and prevent bacterial growth. Allow the chicken to cool completely before storing it in an airtight container in the refrigerator. It will keep for up to 3-4 days. To reheat, gently warm it in a microwave or skillet over medium heat. Avoid overcooking, as this can dry out the chicken. For longer storage, you can freeze the cooked chicken in an airtight container or freezer bag for up to 2-3 months. Thaw it completely in the refrigerator before reheating.
Nutritional Information (per serving, approximate): The nutritional content of your teriyaki chicken will vary depending on the ingredients and portion size. However, a typical serving (approximately 4 oz of chicken with 1/2 cup of sauce and rice) may contain approximately 350-450 calories. This includes a good source of protein from the chicken, carbohydrates from the rice, and some healthy fats. The exact macronutrient breakdown will depend on the specific ingredients used. The sauce will contribute to the sodium content, so be mindful of your sodium intake if you have concerns. For a more detailed nutritional analysis, consider using a nutrition tracking app or consulting a registered dietitian.
Important Note: These are approximate values. The actual calorie and nutritional content may vary depending on the specific ingredients used, portion sizes, and cooking methods. Always refer to the nutritional information of your specific ingredients for a more accurate calculation. Enjoy your delicious and healthy homemade Japanese Teriyaki Chicken!