Prepare yourself for a culinary journey to Brazil with a taste of coxinha, a beloved national treasure. These aren’t just ordinary chicken croquettes; coxinha holds a special place in Brazilian hearts and stomachs, representing a significant part of the country’s rich culinary heritage. Its name, meaning little thigh, playfully refers to its characteristic teardrop shape, reminiscent of a chicken leg. While the exact origins are debated, many believe coxinha emerged in the late 19th or early 20th century, possibly in São Paulo, a state renowned for its diverse food scene.
The story of coxinha’s creation is often romanticized. One popular legend attributes its invention to a princess who, yearning for a particular chicken dish, inspired a chef to create a bite-sized version. Regardless of its true origin, coxinha quickly transcended its humble beginnings, becoming a ubiquitous street food and a staple in bakeries, cafes, and even upscale restaurants across Brazil. Its popularity is undeniable; it’s estimated that millions of coxinha are consumed daily nationwide, solidifying its position as a truly iconic Brazilian snack.
More than just a delicious snack, coxinha embodies Brazilian culture and social dynamics. It’s a food that brings people together, frequently enjoyed at informal gatherings, parties, and even as a comforting treat at home. Its presence at festas juninas (June festivals), a significant part of Brazilian culture, further underscores its social importance. The versatility of coxinha is also noteworthy; while the classic recipe features shredded chicken, variations abound, incorporating ingredients like cheese, hearts of palm, or even different types of meat, reflecting the country’s diverse regional cuisines. This adaptability speaks to its enduring appeal and its ability to remain relevant across generations.
The simple yet satisfying combination of creamy mashed potatoes, flavorful chicken filling, and a crispy, golden-brown breadcrumb coating is what makes coxinha so irresistible. Its portability and ease of consumption further contribute to its widespread popularity. Whether enjoyed hot from the oven or slightly cooled, coxinha offers a unique textural experience and a taste that perfectly balances savory and subtly spicy flavors. This homemade version allows you to control the ingredients and savor the authentic taste of this beloved Brazilian classic, offering a genuine taste of Brazil in every bite.
Ingredients and Measurements
Creating authentic Brazilian Coxinhas requires precise measurements and high-quality ingredients. The success of your coxinha hinges on achieving the perfect balance of flavors and textures, so paying close attention to this section is crucial. We’ll break down the ingredients into three main categories: the chicken filling, the dough, and the breading.
Chicken Filling:
- 1 kg boneless, skinless chicken breasts: Choose high-quality chicken for the best flavor. Avoid using pre-cooked or processed chicken as it may lack the necessary texture and moisture. Ensure the chicken is thoroughly cooked before incorporating it into the filling.
- 1 large onion, finely chopped: The onion provides a base for the savory flavor profile. Finely chopping ensures it cooks evenly and doesn’t overpower the chicken.
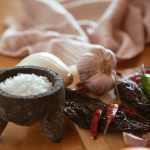
- 2 cloves garlic, minced: Garlic adds depth and richness to the filling. Mincing it releases its aromatic compounds more effectively.
- 1/2 cup (120ml) chicken broth: This helps create a moist and flavorful filling. You can use homemade broth for a richer taste or a good quality store-bought option.
- 1/4 cup (50g) chopped fresh parsley: Parsley adds freshness and brightness to the filling. Fresh parsley is highly recommended for its vibrant flavor.
- 1 teaspoon salt: Adjust to your taste preference. Start with 1 teaspoon and add more as needed.
- 1/2 teaspoon black pepper: Freshly ground black pepper is recommended for a more intense flavor.
- 2 tablespoons olive oil: Use olive oil for its flavor and healthy fats.
Dough:
- 250g (2 cups) all-purpose flour: Using all-purpose flour provides the desired texture and structure for the dough. Avoid using self-rising flour as it will alter the dough’s consistency.
- 1 teaspoon salt: Salt is essential for balancing the flavors and enhancing the dough’s texture.
- 1 tablespoon butter: Butter adds richness and a subtle flavor to the dough. Make sure the butter is softened but not melted.
- 1 cup (240ml) whole milk: Whole milk contributes to a smoother, richer dough. Avoid using skim milk as it may result in a dry dough.
- 2 large eggs: Eggs bind the ingredients together, adding richness and structure to the dough. Ensure the eggs are at room temperature for optimal incorporation.
- 1/2 cup (120ml) vegetable oil: Vegetable oil ensures the dough remains supple and prevents it from becoming too dry.
Breading:
- 2 cups all-purpose flour: The flour provides the base for the breading, creating a crispy exterior.
- 2 large eggs, lightly beaten: The eggs act as a binder between the flour and the breadcrumbs.
- 2 cups panko breadcrumbs: Panko breadcrumbs are recommended for their light and airy texture, contributing to a wonderfully crispy crust. Avoid using regular breadcrumbs, as they will result in a denser, less appealing texture.
- Vegetable oil, for frying: Use enough oil to fully submerge the coxinhas. The oil should be heated to 350°F (175°C).
Important Note: These measurements are for approximately 20-24 coxinhas. Adjust the quantities proportionally if you need to make a larger or smaller batch.
Preparation of the Chicken Filling
The success of your Coxinha hinges significantly on the quality of its filling. This section details the preparation of a flavorful and moist chicken filling perfect for your homemade Brazilian Coxinha. We’ll be using approximately 1 kg of boneless, skinless chicken breasts for this recipe, yielding enough filling for about 20-25 Coxinhas.
Begin by boiling the chicken breasts. Place the chicken in a large pot and cover with cold water. Add 1 teaspoon of salt and a bay leaf for extra flavor. Bring the water to a boil over high heat, then reduce heat to low, cover, and simmer for approximately 20-25 minutes, or until the chicken is fully cooked and easily shreds with a fork. Avoid overcooking, as this can result in dry chicken. Once cooked, remove the chicken from the pot and let it cool slightly before shredding.
While the chicken is cooling, prepare the aromatics. Finely chop 1 medium onion and 2 cloves of garlic. In a large skillet, heat 2 tablespoons of olive oil over medium heat. Add the onion and cook until softened and translucent, about 5 minutes. Add the garlic and cook for another minute, until fragrant. Do not brown the garlic, as this can impart a bitter taste.
Now, add the shredded chicken to the skillet with the sautéed onions and garlic. Stir to combine. Next, incorporate 1/2 cup of finely chopped fresh parsley and 1/4 cup of finely chopped fresh cilantro. These herbs add a vibrant freshness to the filling. You can adjust the quantity to your preference. Fresh herbs are strongly recommended for the best flavor profile.
For the seasoning, we’ll use a blend of classic Brazilian flavors. Add 1 teaspoon of salt, 1/2 teaspoon of black pepper, 1/4 teaspoon of ground paprika (sweet or smoked, depending on your preference), and a pinch of cayenne pepper for a subtle kick (optional). Taste and adjust seasoning as needed. Remember that the dough will also have a subtle flavor, so don’t over-season the filling.
Stir everything together thoroughly, ensuring the chicken is evenly coated with the seasonings and herbs. Cook for another 2-3 minutes, allowing the flavors to meld. Remove from heat and let the filling cool completely before using. Cooling the filling is crucial, as it will make it easier to handle when assembling the Coxinhas and prevent the dough from melting.
Once cooled, you can taste the filling again and make any final adjustments to the seasoning. Store the cooled chicken filling in the refrigerator until you are ready to assemble your Coxinhas. This ensures that the filling remains fresh and flavorful.
With your perfectly prepared chicken filling, you are now ready to proceed with the next step in creating delicious homemade Brazilian Coxinhas. Remember, patience and attention to detail are key to achieving the best results.
Making the Béchamel Sauce
The béchamel sauce is the heart of a truly delicious coxinha, providing a creamy, rich base that perfectly complements the shredded chicken. A well-made béchamel is smooth, flavorful, and free of lumps. This section will guide you through creating the perfect béchamel for your homemade coxinhas.
To begin, you will need the following ingredients: 50 grams (1 ¾ ounces) of unsalted butter, 50 grams (1 ¾ ounces) of all-purpose flour, and 500 milliliters (2 cups) of whole milk. Whole milk is crucial here; its fat content contributes significantly to the richness and texture of the sauce. Using skim milk will result in a thinner, less flavorful béchamel.
Start by melting the butter in a medium-sized saucepan over medium-low heat. It’s vital to melt the butter gently; avoid browning it. Once melted, whisk in the flour all at once. This step is called creating a roux. Whisk continuously and vigorously for at least 1-2 minutes to ensure there are no lumps. This prevents the sauce from becoming gritty. The mixture should become a smooth paste, slightly golden in color.
Now, gradually whisk in the milk, a little at a time. This is the most crucial step in preventing lumps. Pouring the milk too quickly will result in a lumpy sauce that is impossible to salvage. Whisk continuously as you pour, ensuring each addition of milk is fully incorporated before adding more. Continue whisking until the sauce is smooth and thickened.
Once the sauce has thickened, it’s time to season. Add a pinch of salt and freshly ground white pepper. White pepper is preferred as it doesn’t leave any specks of color in the final product. Taste the sauce and adjust the seasoning accordingly. You might want to add a touch more salt or pepper depending on your preference. Don’t be afraid to experiment! A bay leaf can also be added during the cooking process for a subtle aromatic note, removing it before the sauce is fully incorporated into the coxinha filling.
Continue cooking the béchamel over low heat for another 2-3 minutes, stirring constantly, to cook out any raw flour taste. The sauce should be thick enough to coat the back of a spoon. If it’s too thin, continue cooking for a few more minutes. If it becomes too thick, add a tablespoon of warm milk at a time until you reach the desired consistency.
Once the béchamel is ready, remove it from the heat. Let it cool completely before adding it to your shredded chicken filling. Adding it while hot will make the chicken filling too wet and difficult to work with when forming the coxinhas. The cooled béchamel will create a creamy, cohesive filling that holds its shape beautifully.
With a perfectly made béchamel, your coxinhas will be undeniably delicious. Remember, patience and attention to detail are key to achieving a smooth, flavorful sauce that will elevate your Brazilian culinary creation.
Preparing the Dough
The dough, or massa, is the foundation of a perfect coxinha. Getting the texture right is crucial for achieving that signature smooth, slightly stretchy, and yet firm consistency. This recipe uses a classic method, ensuring a delicious and reliable result every time. We’ll be starting with a simple roux, which is the base of our creamy and flavorful filling.
Begin by melting 100g of unsalted butter in a medium-sized saucepan over medium heat. Make sure the butter melts completely and is evenly distributed in the pan. Avoid browning the butter; we want to maintain its light color and delicate flavor.
Once melted, gradually whisk in 100g of all-purpose flour. This step is crucial. Add the flour slowly and continuously whisk to prevent lumps from forming. Thorough whisking is key to a smooth dough. Continue whisking vigorously for about 2-3 minutes until a smooth paste forms and pulls away from the sides of the pan. This process cooks the flour and removes any raw taste.
Now, it’s time to incorporate the liquid. Gradually add 500ml of hot whole milk to the roux, whisking constantly to prevent any lumps from forming. The milk should be hot, but not boiling. This helps to create a smooth, lump-free mixture. Continue whisking until the mixture is completely smooth and comes together as a thick paste. This may take a few minutes of consistent whisking.
Reduce the heat to low and continue to cook the mixture for another 2-3 minutes, stirring frequently. This helps to thicken the dough further and cook out any residual flour taste. The mixture should be smooth, glossy, and pull away from the sides of the pan easily. It should resemble a thick, creamy béchamel sauce.
Remove the pan from the heat and let the mixture cool slightly. This step is important to prevent the eggs from cooking prematurely. Once the mixture is only lukewarm, carefully whisk in 3 large eggs one at a time, ensuring each egg is fully incorporated before adding the next. Whisk vigorously to avoid lumps. This will incorporate air into the dough, making it lighter and fluffier.
Finally, gently stir in 1 teaspoon of salt and 1/2 teaspoon of freshly grated nutmeg (optional, but highly recommended). The nutmeg adds a subtle warmth that complements the chicken filling beautifully. The salt enhances the flavors of the dough and the overall coxinha experience.
Once all the ingredients are thoroughly combined, your coxinha dough is ready. Transfer the dough to a lightly oiled bowl, cover it with plastic wrap, and let it rest for at least 30 minutes at room temperature. This resting period allows the gluten to relax, resulting in a more manageable and easier-to-shape dough.
Important Note: The consistency of the dough might vary slightly depending on the type of flour and milk used. If the dough seems too thick, you can add a tablespoon or two of warm milk. If it’s too thin, add a tablespoon of flour at a time until you reach the desired consistency.
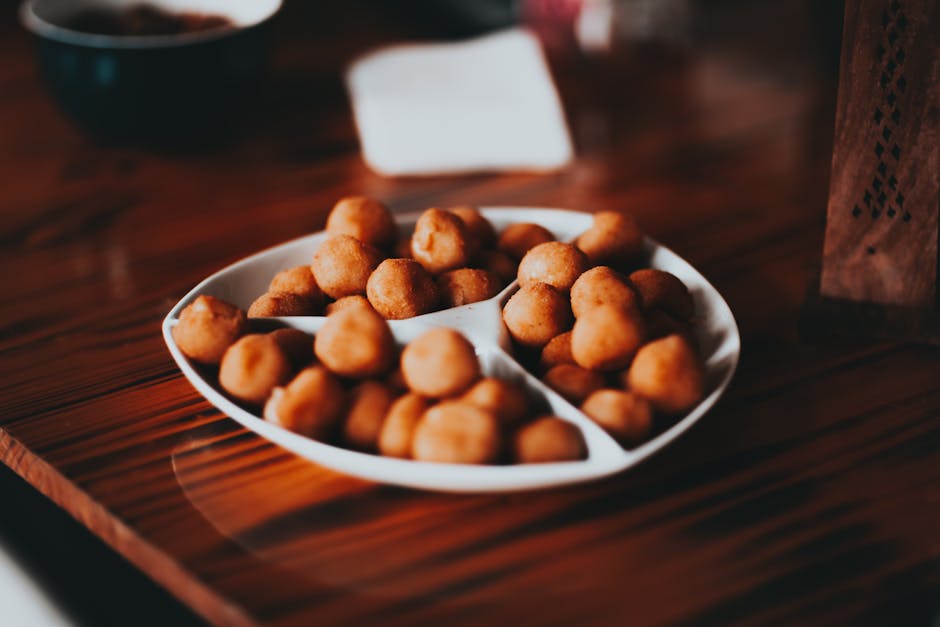
Shaping the Coxinhas
Shaping coxinha requires a delicate touch and a bit of practice, but with the right technique, you’ll be producing perfectly formed, tear-drop shaped treats in no time. This stage is crucial for achieving that iconic coxinha look and ensuring even cooking.
Begin by dividing your cooled chicken mixture into roughly 25-30 gram portions. Accurate portioning is key to consistent sizing and cooking times. A kitchen scale is highly recommended for this step to ensure uniformity. If you don’t have a scale, try to form consistent-sized balls by eye, but be aware that variations in size will lead to uneven cooking.
Lightly oil your hands to prevent the dough from sticking. This is especially important if you’re working with a stickier dough. A neutral oil like vegetable or canola oil works best. Too much oil will make the coxinha greasy, so use sparingly – a light coating is sufficient. Avoid using heavily flavored oils as they may interfere with the taste of the coxinha.
Take one portion of the chicken mixture and gently roll it into a smooth ball between your palms. Don’t press too hard; you want to maintain a relatively firm but not overly compact ball. This step creates a solid base for shaping.
Next, using your fingers, gently shape the ball into a cone or teardrop shape. Start by elongating one side of the ball, gradually tapering it to a point. Work slowly and carefully, ensuring the dough remains smooth and even. If the dough starts to crack, gently moisten your hands with a little water to help seal any breaks.
For a truly professional finish, consider using a shaping tool. Many specialized coxinha shapers are available online or in kitchen supply stores. These tools can help create uniform and perfectly shaped coxinhas, particularly useful for larger batches or if you are aiming for consistent results. However, with practice, you can achieve excellent results using just your hands.
Once shaped, place the coxinha onto a baking sheet lined with parchment paper. Ensure there is enough space between each coxinha to allow for even browning and airflow during frying or baking. Overcrowding can lead to uneven cooking and soggy coxinhas.
Repeat this process for all the portions of the chicken mixture. Consistency is key here. Aim for coxinhas that are all roughly the same size and shape for even cooking and a visually appealing presentation. Don’t worry if your first batch isn’t perfect; practice makes perfect! With a little patience and attention to detail, you’ll quickly master the art of shaping delicious Brazilian coxinha.
Before proceeding to the frying or baking stage, ensure all your coxinhas are uniformly shaped and placed on the baking sheet. A final check will save you from any last-minute issues and ensure a perfect final product. Remember, presentation matters! Beautifully shaped coxinhas are as pleasing to the eye as they are to the palate.
Frying the Coxinhas
Frying the coxinha is the final, crucial step in achieving that perfectly golden-brown, crispy exterior. Getting this right will elevate your coxinha from good to extraordinary. We’ll be focusing on achieving a consistent, even fry, avoiding burning, and ensuring a perfectly cooked interior.
Before you begin, ensure you have a large, heavy-bottomed pot or deep fryer. A pot at least 6 inches deep is recommended to allow for complete submersion of the coxinha without overcrowding. Using a heavy-bottomed pot helps maintain a consistent oil temperature.
Fill your pot with about 3-4 inches of vegetable oil or another high-heat oil with a neutral flavor, like canola or peanut oil. Avoid using olive oil, as it has a lower smoke point and will impart a strong flavor. The quantity of oil will depend on the size of your pot and the number of coxinha you are frying. You want enough oil to completely submerge the coxinha without overflowing the pot when they are added.
Heat the oil over medium-high heat. Using a thermometer is highly recommended. The ideal frying temperature is between 325°F (163°C) and 350°F (177°C). If you don’t have a thermometer, you can test the oil by dropping a small piece of dough into the oil. If it sizzles gently and rises slowly to the surface, the oil is ready. If it browns too quickly or the oil smokes heavily, it’s too hot. Lower the heat and allow it to cool slightly before proceeding.
Once the oil reaches the correct temperature, carefully add the coxinha to the pot, ensuring not to overcrowd the pot. Overcrowding will lower the oil temperature, resulting in greasy coxinha that are not crispy. Fry in batches if necessary, working in 3-4 coxinha at a time depending on the size of your pot. This prevents the temperature from dropping significantly and ensures even cooking.
Fry the coxinha for approximately 4-5 minutes, turning them occasionally with tongs or a slotted spoon to ensure even browning. They are ready when they are a deep golden brown and have a firm texture. Remove them from the oil using a slotted spoon and place them on a wire rack lined with paper towels to drain excess oil. This allows for proper drainage and prevents the coxinha from becoming soggy.
Allow the coxinha to cool slightly before serving. This not only prevents burns but also allows the filling to set properly. Serve immediately or store in an airtight container at room temperature for up to 2 days. Reheat gently in a low oven or air fryer before serving if needed.
Important note: Be cautious when working with hot oil. Always keep a fire extinguisher nearby and never leave the frying process unattended.
Following these steps will ensure you achieve perfectly fried, crispy and delicious coxinha that will impress your friends and family.
Recommendations for Homemade Brazilian Coxinha
Your homemade Brazilian Coxinhas are sure to be a hit! To ensure they are enjoyed at their best, follow these recommendations for serving, storage, and pairing with complementary dishes.
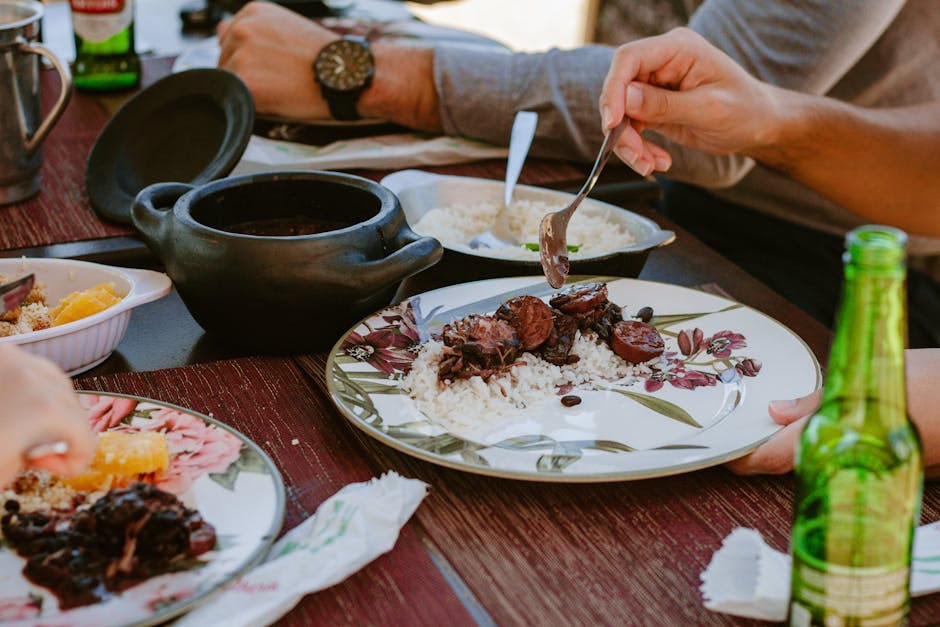
Serving Suggestions: Coxinhas are incredibly versatile and can be served in a variety of ways. They are delicious as a standalone appetizer or snack, perfect for parties, gatherings, or a casual afternoon treat. Consider offering them warm, straight from the oven or air fryer for a perfectly crispy exterior and a molten, flavorful interior. For an extra touch of elegance, serve them on a decorative platter garnished with fresh parsley or a sprinkle of paprika. You can also arrange them on a tiered serving stand for a visually appealing presentation. For a more informal setting, a simple basket or bowl works perfectly.
Storage Conditions: Proper storage is key to maintaining the quality and taste of your Coxinhas. For best results, consume your Coxinhas within 2-3 days of preparation. Store them in an airtight container at room temperature. If you anticipate not eating them within this timeframe, you can freeze them uncooked before frying. To freeze, place the shaped and breaded Coxinhas on a baking sheet lined with parchment paper and freeze until solid. Then, transfer them to a freezer-safe bag for longer storage (up to 3 months). To reheat from frozen, simply bake or air fry until golden brown and heated through.
Complementary Dishes: Brazilian Coxinhas pair beautifully with a variety of dishes. They are a fantastic accompaniment to a refreshing salad, such as a simple green salad with a light vinaigrette or a vibrant Brazilian-inspired salad with hearts of palm and tomatoes. They also complement richer dishes, providing a textural and flavorful contrast. Consider serving them alongside a hearty stew, a flavorful feijoada (Brazilian black bean stew), or even a light soup. For a complete Brazilian-inspired meal, pair your Coxinhas with a refreshing caipirinha (Brazilian cocktail).
Nutritional Information (per Coxinha – approximate values, will vary based on ingredients): These values are estimates and can change depending on the specific ingredients and portion size used. It’s recommended to use a nutrition calculator with your exact recipe for precise information.
Calories: Approximately 250-350 calories (depending on size and ingredients used).
Fat: Approximately 15-20 grams.
Carbohydrates: Approximately 20-30 grams.
Protein: Approximately 8-12 grams.
Important Note: Nutritional information provided is an estimate and may vary depending on the specific ingredients and quantities used in your recipe. For accurate nutritional analysis, it is recommended to use a nutrition calculator tailored to your specific recipe.