The humble peanut butter cup, a seemingly simple confection of chocolate and peanut butter, boasts a surprisingly rich history and cultural impact. While pinpointing the exact origin is difficult, the general consensus points to the early 20th century, with the first commercially produced version credited to the Hershey Chocolate Company in 1930s. Their creation, the Hershey’s Kisses with peanut butter filling, quickly became a popular treat, capitalizing on the burgeoning popularity of both chocolate and peanut butter in American households. This early adoption established the peanut butter cup as a quintessential American candy, a staple in lunchboxes, movie theaters, and holiday celebrations.
The vegan adaptation of this beloved classic is a more recent phenomenon, reflecting the growing interest in plant-based diets and ethical consumption. Driven by increased awareness of animal welfare and environmental concerns, the demand for vegan alternatives to traditional confectionery has exploded in recent years. Statistics show a significant rise in vegan product sales globally, with the market projected to continue its rapid expansion. This surge is fueled by a younger generation increasingly conscious of the ethical implications of their food choices and a wider consumer base seeking healthier, more sustainable alternatives.
The cultural significance of the peanut butter cup extends beyond its deliciousness. It has permeated popular culture, appearing in countless films, television shows, and songs, solidifying its place in the American cultural landscape. Its simple yet satisfying combination of sweet and salty flavors has made it a universally appealing treat, transcending age, socioeconomic status, and even dietary restrictions. The vegan version, while a relatively new entrant, is rapidly gaining traction, demonstrating the adaptability and enduring appeal of this iconic confection. Its emergence signals a broader shift towards inclusivity and accessibility in the food industry, making this beloved treat available to a wider audience while maintaining its delicious core.
The transition to vegan peanut butter cups requires careful consideration of ingredients. Traditional recipes often rely on dairy-based chocolate and potentially non-vegan additives. Vegan versions necessitate the substitution of these ingredients with plant-based alternatives, like soy milk, coconut milk, or other dairy-free options for the chocolate, ensuring a smooth, creamy texture and rich chocolate flavor comparable to the original. This careful formulation demonstrates the ingenuity and dedication of food manufacturers and home cooks alike in creating ethical and delicious alternatives to traditional favorites. The result is a treat that is both satisfyingly indulgent and aligned with contemporary values of sustainability and compassion.
Ingredients and Measurements
Creating perfect vegan peanut butter cups hinges on using high-quality ingredients and precise measurements. This recipe calls for readily available items, but choosing the right ones will significantly impact the final taste and texture. Let’s break down each ingredient and its crucial role.
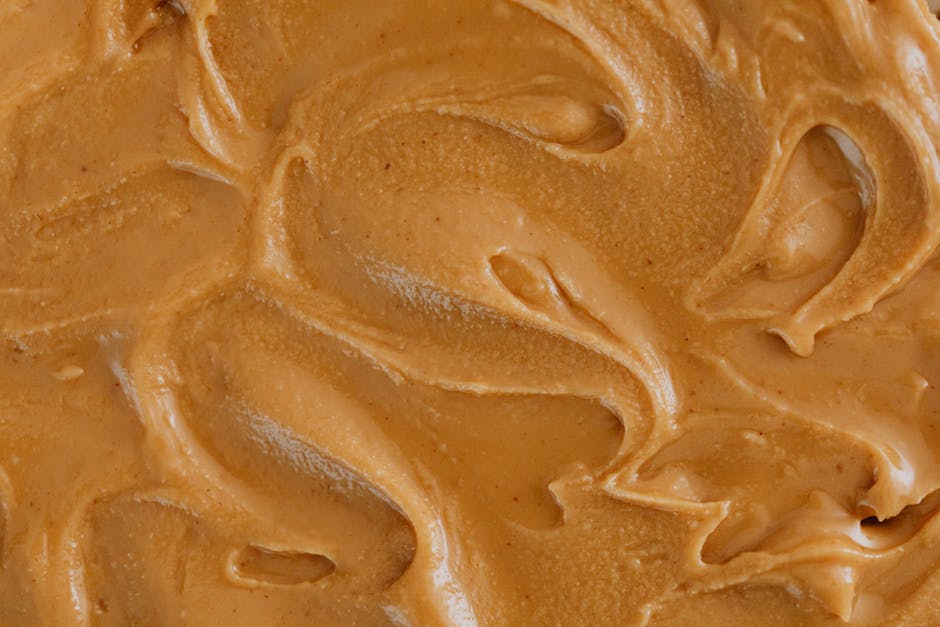
Peanut Butter: We’ll be using 1 cup (240ml) of creamy peanut butter. Avoid using natural peanut butter, as the lack of added sugar and oil can lead to a crumbly, less smooth final product. Look for a peanut butter with a smooth consistency and a good balance of sweetness and saltiness. Brands with added sugar and possibly a little salt already incorporated will work best. If you prefer a more intense peanut flavor, consider using a higher-quality, all-natural peanut butter, but be aware that you may need to adjust the sweetness accordingly.
Vegan Chocolate Chips: This recipe utilizes 2 cups (200g) of vegan dark chocolate chips. You can experiment with different percentages of cocoa for varying levels of bitterness. Dark chocolate (70% cocoa or higher) provides a rich, intense flavor that complements the peanut butter beautifully, but milk chocolate chips can also be used if you prefer a sweeter treat. Ensure your chocolate chips are specifically labeled as vegan, as many contain dairy-derived ingredients. Using a good quality chocolate will make a noticeable difference in the overall taste and experience.
Powdered Sugar: We’ll be using 1/2 cup (50g) of powdered sugar (confectioners’ sugar). This adds sweetness and helps to create a smoother, creamier peanut butter filling. Using granulated sugar is not recommended, as it will result in a grainy texture. If you have concerns about added sugar, you can reduce this amount slightly, but keep in mind it might impact the sweetness and texture of the filling.
Vegan Butter: This recipe includes 1/4 cup (57g) of vegan butter, softened to room temperature. Softened butter is crucial for proper blending and achieving a smooth, creamy peanut butter filling. Make sure your vegan butter is unsalted; otherwise, you may need to adjust the salt in the recipe. Brands like Miyoko’s Kitchen or Melt Organic are excellent choices, but any good quality vegan butter will work.
Coconut Oil: A small amount of coconut oil, 1 tablespoon (14g), is added to the peanut butter filling to improve its texture and make it easier to work with. Avoid using other oils, as they may alter the taste and consistency of the filling. Using refined coconut oil is preferred as it has a neutral flavor.
Salt: A pinch of salt (about 1/4 teaspoon) enhances the flavors of both the peanut butter and chocolate. Don’t skip the salt! It balances the sweetness and brings out the richness of the other ingredients. Adjust the amount according to your preference and the saltiness of your peanut butter.
Optional Additions: Feel free to experiment! Consider adding a teaspoon of vanilla extract to the peanut butter filling for an extra layer of flavor, or sprinkle some sea salt flakes on top of the finished cups for a sophisticated touch. Remember to adjust the sweetness if adding other flavorings.
Equipment List
Making delicious vegan peanut butter cups requires the right tools to ensure a smooth and efficient process. While you might have some of these items already in your kitchen, having the correct equipment will significantly improve your results and overall experience. Below is a detailed list of the equipment needed, including recommendations and explanations for each item.
1. Medium-Sized Mixing Bowls (2): You’ll need at least two medium-sized mixing bowls, preferably stainless steel or glass. One bowl will be for preparing the peanut butter filling, and the other for the chocolate ganache. Aim for bowls with a capacity of approximately 3-4 cups each. Using glass or stainless steel is preferable as they are non-reactive and won’t affect the flavor of your ingredients. Avoid using plastic bowls, especially for the chocolate, as they can retain odors and may slightly alter the texture of the chocolate.
2. Spatula or Rubber Scraper: A sturdy spatula or rubber scraper is essential for effectively mixing the ingredients in your bowls and ensuring that no peanut butter or chocolate is left behind. Choose a spatula with a flexible blade for scraping the sides and bottom of the bowls thoroughly. A silicone spatula is a particularly good choice as it’s heat-resistant and won’t scratch your bowls.
3. Double Boiler or Heat-Safe Bowl and Saucepan: To melt the chocolate smoothly without burning it, a double boiler is the ideal tool. Alternatively, you can use a heat-safe bowl (glass or stainless steel) set over a saucepan of simmering water. Make sure the bottom of the bowl doesn’t touch the water, preventing direct heat contact and ensuring even melting. The saucepan should be around 2 quarts in size to accommodate the bowl comfortably.
4. Whisk or Fork: A whisk is ideal for smoothly incorporating the ingredients into the chocolate ganache, ensuring a consistent texture. A fork can also be used but may result in a slightly less smooth mixture. Regardless of your choice, ensure it is clean and free of any residue that might affect the flavor.
5. Measuring Cups and Spoons: Accurate measurements are crucial for achieving the desired consistency in both the peanut butter filling and the chocolate ganache. Use a set of standard measuring cups and spoons (metric or imperial, depending on your recipe) to ensure precision. Invest in a good quality set to avoid inaccuracies.
6. Mini Muffin Tin or Similar Mold: This is where your delicious vegan peanut butter cups will take shape. A standard mini muffin tin (approximately 24 cups) works perfectly, providing individual cups for easy portioning and serving. You can also use silicone molds or even small paper baking cups if you prefer.
7. Parchment Paper (Optional but Recommended): Lining your mini muffin tin with parchment paper makes removing the finished peanut butter cups much easier. Simply cut out small circles of parchment paper to fit each cup. This prevents sticking and allows for clean removal. This is highly recommended, especially if using a non-silicone mold.
8. Refrigerator: Once your peanut butter cups are assembled, refrigeration is necessary to set the chocolate and firm up the filling. Ensure you have sufficient space in your refrigerator to accommodate your mini muffin tin.
Instructions (for the Peanut Butter Filling)
Making the perfect vegan peanut butter filling is crucial for achieving that melt-in-your-mouth texture and rich peanut butter flavor in your vegan peanut butter cups. This recipe focuses on creating a smooth, creamy filling that’s not too stiff or too runny. We’ll be using a combination of ingredients to achieve the ideal consistency and taste.
Begin by gathering your ingredients: 1 cup of creamy vegan peanut butter (ensure it’s smooth and free of added sugar for best results), 1/4 cup of maple syrup (or your preferred vegan sweetener – agave nectar works well too), 2 tablespoons of vegan butter, softened to room temperature (this is key for achieving a smooth consistency), and 1 teaspoon of vanilla extract. Having all your ingredients at room temperature will prevent clumping and ensure easy mixing.
In a medium-sized bowl, add the softened vegan butter. Using softened butter is crucial; if it’s too cold, it will be difficult to incorporate smoothly. Use a whisk or a spatula to cream the butter until it’s light and fluffy. This step helps to aerate the butter, resulting in a lighter and fluffier filling. Don’t rush this process; take your time to ensure the butter is properly creamed.
Next, add the creamy vegan peanut butter to the bowl. Make sure to use a good quality peanut butter with a smooth consistency; chunky peanut butter will result in a less desirable texture. Gradually incorporate the peanut butter into the creamed butter, mixing thoroughly until there are no lumps. A spatula will be more effective than a whisk for this step, allowing you to scrape down the sides of the bowl and ensure complete incorporation.
Now, it’s time to add the sweetener. Slowly add the 1/4 cup of maple syrup (or your chosen sweetener), mixing continuously. Don’t add all the sweetener at once; this will prevent the filling from becoming too sweet or grainy. Add a tablespoon at a time, mixing well after each addition, until the desired level of sweetness is reached. Taste as you go to adjust to your preference.
Finally, stir in the 1 teaspoon of vanilla extract. The vanilla extract enhances the overall flavor of the peanut butter filling, adding a touch of warmth and complexity. Mix thoroughly until everything is evenly combined and the filling is completely smooth and creamy. If the filling seems too thick, add a teaspoon of plant-based milk (almond or soy milk works well) at a time until you reach the desired consistency. Conversely, if the filling is too runny, add a tablespoon of powdered sugar until it thickens slightly.
Once you’ve achieved the perfect smooth and creamy consistency, transfer the peanut butter filling to a piping bag or a zip-top bag with a corner snipped off. This will make filling your chocolate cups much easier and neater. Refrigerate the filling for at least 30 minutes to allow it to firm up slightly before filling your chocolate shells. This will prevent the filling from being too soft and runny when you assemble your peanut butter cups.
Instructions (for the Chocolate Layer)
This section details the creation of the rich and decadent vegan chocolate layer for your peanut butter cups. Precise measurements and techniques are crucial for achieving the perfect consistency and snap. Remember to use high-quality vegan chocolate for the best flavor and melt.
Begin by preparing your chocolate. You’ll need 1 cup (240 grams) of vegan dark chocolate chips or chopped vegan chocolate bars with at least 70% cacao for a deep, intense flavor. If using chocolate bars, chop them finely using a sharp knife. Smaller pieces will melt more evenly and quickly. Using a coarser chop can lead to a slightly more textured chocolate, which some might prefer.
Melt the chocolate using a double boiler method. This gentle heating technique prevents scorching and ensures a smooth, consistent melt. Fill a small saucepan with about an inch of water and bring it to a simmer over medium-low heat. Place a heatproof bowl on top of the saucepan, ensuring the bottom of the bowl doesn’t touch the water. Add your chopped chocolate to the bowl. Stir occasionally with a spatula, ensuring the chocolate melts evenly. Avoid overheating the chocolate, as this can cause it to seize and become grainy.
Alternatively, you can melt the chocolate in a microwave. Place the chocolate in a microwave-safe bowl and microwave in 30-second intervals, stirring after each interval until completely melted and smooth. Again, avoid overheating; the microwave can be more prone to scorching than a double boiler. Start with short bursts and check frequently to prevent seizing.
Once the chocolate is completely melted and smooth, remove it from the heat (or microwave). Let it cool slightly – about 5-10 minutes – allowing it to thicken slightly. This will help it set properly when poured into the peanut butter cups. If the chocolate is too thin, it will be difficult to create a solid shell. If it’s too thick, it will be difficult to pour and may crack during setting.
Prepare your peanut butter cup molds. Line your muffin tin or silicone molds with paper liners or use silicone molds directly. This will make removing the finished peanut butter cups much easier. Ensure your molds are clean and completely dry. Any moisture will affect the chocolate’s setting process.
Pour the melted chocolate into the prepared molds. Fill each mold about halfway to ¾ full, depending on the desired thickness of the chocolate layer. Use a spoon or a small spatula to evenly distribute the chocolate. Gently tap the molds on the counter to remove any air bubbles.
Refrigerate the molds for at least 30 minutes, or until the chocolate is completely set. This allows the chocolate to firm up and create a solid base for the peanut butter filling. Refrigerating for longer, up to an hour, will result in a firmer chocolate shell. Once set, you can proceed to add the peanut butter filling and the final chocolate layer.
For a professional finish, consider tempering your chocolate. Tempering involves carefully heating and cooling the chocolate to create a stable crystal structure resulting in a shiny, snappable chocolate shell. While it requires more effort, the improved texture and appearance are well worth the extra steps for experienced bakers.
Assembly Instructions
Once your peanut butter filling and chocolate ganache are prepared and sufficiently cooled, you’re ready to assemble your delectable vegan peanut butter cups! This process is straightforward but requires a bit of patience and precision for the best results. We recommend chilling both the filling and ganache for at least 30 minutes before proceeding to ensure they are firm enough to handle and maintain their shape.
Prepare your molds: You’ll need either mini muffin tins or silicone candy molds. If using mini muffin tins, line them with paper cupcake liners for easy removal. Silicone molds are also excellent as they are flexible and non-stick, making release a breeze. Ensure your molds are clean and completely dry before starting.
Filling the molds: Using a small spoon or piping bag (for a more professional look), carefully fill each mold about halfway with the chilled peanut butter filling. Aim for approximately 1-1.5 tablespoons per cup, depending on the size of your molds. Gently tap the molds on a flat surface to settle the filling and remove any air bubbles. This will prevent cracking and ensure a smooth, even surface.
Chilling the filling: Place the filled molds in the refrigerator for at least 15-20 minutes. This crucial step allows the peanut butter filling to firm up completely, preventing it from mixing with the ganache and creating a messy, unappealing final product. Under-chilling the filling may lead to a poorly structured cup.
Adding the ganache: Once the filling is firm, carefully spoon or pipe the chilled chocolate ganache over the peanut butter filling, completely covering it. Aim for a layer of ganache that is roughly ¼ inch thick. Again, gently tap the molds to release any air bubbles and achieve a smooth surface. A spatula can help to even out the ganache layer, ensuring an aesthetically pleasing finish.
Final chilling and setting: Return the molds to the refrigerator for at least 2-3 hours, or preferably overnight. This allows the ganache to fully set and create a firm, delicious shell around the peanut butter filling. Sufficient chilling time is paramount for achieving the desired texture. Rushing this step will result in soft, unstable peanut butter cups.
Removing from molds: Once fully set, gently remove the peanut butter cups from the molds. If using mini muffin tins and paper liners, the cups should easily slide out. With silicone molds, simply flex the mold to release the cups. If any cups stick, gently run a knife or small offset spatula around the edges to loosen them.
Storage and Enjoyment: Store your homemade vegan peanut butter cups in an airtight container in the refrigerator for up to a week. For optimal freshness and flavor, consume within 3-4 days. Enjoy these delightful treats as a satisfying snack or a decadent dessert!
Troubleshooting: If your ganache is too thin, you can chill it for a longer period or add a small amount of vegan butter to thicken it. If your peanut butter filling is too runny, you can add a tablespoon or two of powdered sugar to help firm it up. Always remember to work quickly and efficiently, especially when working with chocolate, to prevent it from melting.
Chilling and Setting Time: Achieving Perfect Vegan Peanut Butter Cups
The chilling and setting time is crucial for achieving perfectly firm and delectable vegan peanut butter cups. This stage allows the chocolate to solidify completely, creating a satisfying snap and preventing a melty, messy treat. Proper chilling ensures a smooth, elegant finish and enhances the overall texture.
Optimal Chilling Temperature: The ideal temperature for chilling your peanut butter cups is between 35°F and 40°F (1.7°C and 4.4°C). A refrigerator is perfect for this. Avoid placing them in the freezer, as this can cause the chocolate to become grainy or develop a frosty texture. A consistently cool temperature is key to even setting.
Minimum Chilling Time: While the exact setting time can vary depending on factors like the type of chocolate used and the ambient temperature of your refrigerator, a minimum chilling time of at least 2 hours is recommended. This allows the chocolate to fully solidify and the peanut butter filling to firm up, preventing it from sticking to the wrapper or becoming too soft upon serving.
Recommended Chilling Time: For optimal results, we strongly suggest chilling your vegan peanut butter cups for at least 3-4 hours. This extended chilling period ensures a beautifully firm and crisp chocolate shell and a creamy, yet stable peanut butter center. This longer time allows for a more complete setting process, resulting in a superior product.
Monitoring the Setting Process: After the initial 2-hour minimum, gently check one or two cups to assess their firmness. Gently press the top of the cup; if the chocolate feels firm and doesn’t yield easily, they are likely ready. If not, continue chilling for another hour and check again. Remember, it’s better to err on the side of caution and chill them for a little longer than to have them under-set.
Preventing Condensation: If you notice condensation forming on the surface of your peanut butter cups after chilling, this is completely normal. It’s simply moisture from the air condensing on the cold chocolate. Allow the cups to sit at room temperature for 10-15 minutes before serving to allow the condensation to evaporate. This will ensure a pleasant, non-sticky experience for your guests.
Storage After Chilling: Once your vegan peanut butter cups are fully set, store them in an airtight container in the refrigerator for up to a week. This will help maintain their freshness and prevent them from becoming stale or absorbing unwanted odors. For longer storage (up to a month), consider freezing them in a freezer-safe container. Remember to thaw them in the refrigerator overnight before serving.
Troubleshooting: If your peanut butter cups are still too soft after 4 hours of chilling, it may be due to the type of chocolate used. Choose a higher quality dark chocolate or a chocolate with a higher percentage of cocoa butter for better setting properties. Ensure your refrigerator is maintaining the correct temperature range.
Vegan Peanut Butter Cups: Recommendations
Our decadent Vegan Peanut Butter Cups offer a rich and satisfying treat, perfect for any occasion. To ensure you enjoy them at their best, we offer the following recommendations.
Serving Suggestions: These cups are delicious straight from the freezer for a refreshing, intensely chocolatey experience. Allow them to sit at room temperature for a few minutes for a softer, meltier texture. They are equally delightful served chilled or at room temperature, depending on your preference. Consider serving them with a scoop of vegan vanilla ice cream for an extra decadent dessert. A sprinkle of sea salt on top enhances the sweetness and adds a sophisticated touch. For a festive presentation, arrange them on a decorative plate alongside fresh berries or other fruits for a beautiful contrast in color and texture.
Storage Conditions: For optimal freshness and to maintain their delicious texture, store your Vegan Peanut Butter Cups in an airtight container in the freezer. This will prevent them from becoming stale or melting. They can be stored in the freezer for up to three months without compromising quality. If storing in the refrigerator, they will remain fresh for about one week, but may become slightly softer. Avoid storing them at room temperature for extended periods, as this could lead to melting and potential spoilage.
Complementary Dishes: The rich chocolate and peanut butter flavors of our Vegan Peanut Butter Cups pair wonderfully with a variety of dishes. They’re a perfect complement to a strong cup of coffee or tea, particularly after a hearty vegan meal. They also make a fantastic addition to vegan dessert platters, alongside other treats like brownies, cookies, or fruit tarts. For a more adventurous pairing, consider serving them alongside a scoop of vegan coconut ice cream or a dollop of vegan whipped cream. Their versatility makes them an excellent addition to both casual and formal settings.
Nutritional Information (per cup, approximate values):
- Calories: 150-180
- Total Fat: 10-12g
- Saturated Fat: 4-6g
- Cholesterol: 0mg
- Sodium: 50-75mg
- Total Carbohydrate: 15-20g
- Dietary Fiber: 2-3g
- Sugars: 8-12g
- Protein: 3-4g
Note: Nutritional information is an estimate and may vary slightly depending on the specific ingredients used.
Enjoy! We hope you savor every bite of our delicious Vegan Peanut Butter Cups. If you have any questions or feedback, please don’t hesitate to contact us.