Prepare yourself for a journey into the tangy, complex world of homemade apple cider vinegar (ACV) – a drink with roots stretching back millennia. Its origins are shrouded in the mists of time, but evidence suggests that vinegar production, in various forms, dates back to at least 5000 BC in Babylon. Early methods likely involved unintentional fermentation of fruit juices, a process discovered through observation and necessity. While the exact timeline for ACV specifically is less clear, its derivation from apple cider places its emergence firmly within the era of widespread apple cultivation, likely centuries before the common era in regions with abundant apple harvests. The process, initially rudimentary, gradually evolved, becoming a significant part of various cultures’ food preservation and medicinal practices.
Throughout history, apple cider vinegar has held a prominent position in many cultures. Ancient Greek physician Hippocrates, considered the Father of Medicine, famously utilized ACV for its purported healing properties. Its use spread across the globe, becoming incorporated into traditional medicine systems in various societies. In ancient China, it was believed to promote longevity and balance within the body. Similarly, in traditional European medicine, it was often used to treat a range of ailments, from digestive issues to skin conditions. This long-standing association with health and well-being likely contributed to its enduring popularity.
Today, the interest in ACV, particularly homemade varieties, is experiencing a resurgence. Driven by a renewed focus on natural remedies and whole foods, the global market for apple cider vinegar is booming, projected to reach a value of over [insert relevant statistic, e.g., $X billion] by [insert year]. This growth reflects a consumer preference for unprocessed, naturally fermented products perceived as healthier alternatives to commercially produced beverages. Interestingly, the mother – the cloudy substance found in unfiltered ACV, composed of beneficial bacteria and yeast – is now a key selling point, highlighting the connection to traditional production methods. This signifies a shift towards appreciation of the artisanal and the authentic, a stark contrast to the homogenized food landscape of recent decades.
The process of creating homemade ACV is not only rewarding but also allows for complete control over ingredients and quality. Unlike commercially produced ACVs, homemade versions often contain higher levels of beneficial acids and enzymes, further enhancing their appeal. This drink, far from being simply a beverage, represents a link to ancient traditions, a commitment to natural health, and a personal journey into the fascinating world of fermentation. The recipe you are about to embark on is an invitation to participate in this rich history, crafting a drink with a flavor as unique as its storied past.
Ingredients and Measurements
Crafting the perfect homemade apple cider vinegar drink requires careful attention to the balance of flavors and ingredients. The following recipe provides a delicious and healthy base, but feel free to adjust quantities to suit your personal taste preferences. Remember to always use high-quality ingredients for the best results.
Apple Cider Vinegar (ACV): This is the star of the show! We’ll be using 2 tablespoons (30ml) of raw, unfiltered apple cider vinegar. Raw, unfiltered ACV is crucial because it retains the mother, a cloudy sediment containing beneficial probiotics and enzymes. Avoid using clarified or pasteurized ACV, as these lack these beneficial components. If you find the taste too strong initially, you can gradually increase the amount over time, starting with just 1 tablespoon.
Water: The foundation of our drink, water helps to dilute the potent ACV and makes it more palatable. We recommend using 8 ounces (240ml) of filtered or spring water for this recipe. Avoid using tap water, as it may contain chlorine or other chemicals that can affect the taste and potentially negate some of the health benefits of the ACV. You can adjust the amount of water to your liking; more water will create a milder drink, while less water will result in a more intense flavor.
Honey or Maple Syrup: A touch of sweetness balances the tartness of the ACV. We suggest using 1 tablespoon (21g) of raw honey or maple syrup. Raw honey and maple syrup offer additional health benefits beyond sweetness, providing antioxidants and trace minerals. If you prefer a less sweet drink, start with ½ tablespoon and add more to taste. Alternatively, you can use stevia or another natural sweetener, adjusting the amount according to your preference and the sweetener’s intensity.
Optional Ingredients: The beauty of this drink lies in its adaptability. You can enhance the flavor profile with various additions. Consider these options:
- Lemon or Lime Juice: A squeeze of fresh citrus juice (about ½ a lemon or lime) adds a zesty zing and boosts Vitamin C.
- Fresh Ginger: A small piece of grated fresh ginger (about 1 teaspoon) provides a spicy kick and potential anti-inflammatory benefits.
- Cinnamon: A dash of cinnamon (about ¼ teaspoon) adds warmth and complements the apple cider vinegar’s flavor.
- Fruit Puree: A tablespoon or two of unsweetened fruit puree (like apple or berry) can add a fruity twist and extra nutrients.
Important Note: Always start with smaller quantities of optional ingredients and adjust to taste. Too much of a good thing can easily overpower the delicate balance of flavors. Begin by making a small batch to experiment and find your perfect combination.
Storage: Once prepared, your apple cider vinegar drink is best consumed immediately to enjoy its freshness. If storing leftovers, refrigerate in an airtight container for up to 24 hours. Do not store for extended periods, as the flavor and potency may degrade.
Equipment List
Creating your own homemade apple cider vinegar drink requires a surprisingly minimal amount of equipment. However, selecting the right tools can significantly impact the quality and safety of your final product. This list details the essential and optional equipment, along with recommendations for optimal results.
Essential Equipment:
1. Large Glass or Food-Grade Plastic Container (at least 1 gallon capacity): This will be your primary fermentation vessel. Avoid using metal containers as they can react with the cider, affecting its flavor and potentially introducing harmful substances. Glass is ideal for its inertness and allows for visual monitoring of the fermentation process. A 1-gallon container is suitable for a typical batch, but you can adjust the size based on your needs. Look for a container with a wide mouth for easy access during cleaning and adding ingredients.
2. Airlock or Loose-Fitting Lid: This is crucial for allowing carbon dioxide to escape during fermentation while preventing unwanted bacteria and mold from entering. An airlock is preferred as it provides a more controlled environment. If using an airlock, ensure it’s properly sealed to prevent leaks. Alternatively, you can use a loose-fitting lid, but this will require more vigilance to prevent contamination. Regularly check for any signs of mold or off-odors.
3. Measuring Cups and Spoons: Accurate measurements are essential for successful fermentation. Having a set of measuring cups (at least 1-cup and 1/4-cup) and spoons (1 tablespoon, 1 teaspoon) will ensure consistent results. Using accurate measurements is critical for achieving the desired level of acidity and flavor.
4. Funnel: A funnel will make transferring the apple cider into the fermentation container much easier and cleaner, minimizing spills and the risk of introducing contaminants.
5. Cheesecloth or Fine-Mesh Strainer: After the fermentation process, you’ll need to strain the vinegar to remove the mother of vinegar (the cloudy substance that forms during fermentation). Cheesecloth or a fine-mesh strainer will effectively separate the liquid vinegar from the solids.
6. Bottles for Storage: Once the vinegar is strained and ready, you’ll need clean, sterilized bottles for storage. Glass bottles with airtight lids are recommended for long-term storage. Ensure bottles are thoroughly cleaned and sanitized before use to prevent spoilage.
Optional Equipment:
1. pH Meter: While not essential, a pH meter can provide more precise measurements of the acidity level during fermentation. This is helpful for ensuring your vinegar reaches the desired level of acidity (typically around 2.5-3.5 pH).
2. Hydrometer: A hydrometer can be used to measure the specific gravity of your apple cider before and during fermentation. This helps monitor the fermentation progress. However, it’s not strictly necessary for a basic recipe.
3. Sterilizing Equipment: A steamer or boiling water can be used to sterilize your equipment before use. This is a crucial step in preventing contamination and ensuring the safety of your homemade vinegar.
By gathering these tools, you’ll be well-equipped to embark on your homemade apple cider vinegar journey! Remember, cleanliness and precision are key to successful fermentation.
Preparation of Apple Cider Vinegar
Making your own apple cider vinegar (ACV) is a rewarding process, allowing you to control the quality and ingredients. This detailed guide will walk you through the steps, ensuring you produce a delicious and healthy ACV.
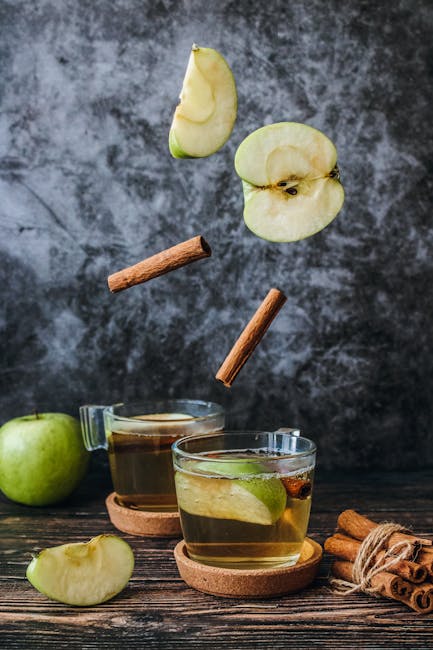
Choosing Your Apples: The success of your ACV hinges on the quality of your apples. Avoid using waxed or chemically treated apples. Organic apples are ideal, but any variety rich in sugar will work well. Aim for a mix of sweet and tart apples for a balanced flavor profile. Approximately 5 pounds of apples is a good starting quantity for a first-time batch.
Preparing the Apples: Wash your apples thoroughly. There’s no need to peel them; the skin contains beneficial pectin, which contributes to the fermentation process. Roughly chop the apples into 1-inch pieces. Smaller pieces will ferment faster, but larger pieces may yield a slightly different flavor profile. You can also use a food processor to speed up this step, but avoid pureeing them completely – some texture is beneficial.
The First Fermentation (Alcoholic Fermentation): Place the chopped apples in a large, non-reactive container, such as a food-grade plastic bucket or a glass fermenting jar. Ensure the container is at least twice the volume of the apples to allow for expansion during fermentation. Add 1 quart of filtered water for every 2 pounds of apples. This will create a mixture with enough liquid to allow the yeast to work effectively. You can optionally add a small amount of unpasteurized apple juice or a starter culture of wild yeast from a previously fermented batch to speed up the process. Stir well to combine and ensure all apple pieces are submerged.
Covering the Container: Cover the container with a breathable cloth, such as cheesecloth, secured with a rubber band. This allows for air exchange while preventing unwanted contaminants from entering. Do not use an airtight lid as this could trap gases produced during fermentation and cause the container to burst. This stage should take approximately 7-10 days at room temperature (around 70-75°F). During this time, you’ll notice bubbling and a fruity aroma indicating active fermentation. If the mixture becomes overly foamy, gently stir it to release trapped gases.
The Second Fermentation (Acetic Fermentation): Once the initial fermentation is complete (the bubbling subsides significantly), it’s time for the acetic fermentation. Strain the mixture through a fine-mesh sieve or cheesecloth, separating the liquid (apple juice) from the pulp. Transfer the liquid into a clean glass jar, leaving about an inch of headspace. The pulp can be composted. Cover the jar loosely again with a breathable cloth. This stage is where the alcohol is converted into acetic acid by acetic acid bacteria present in the air. This process takes considerably longer, typically 4-12 weeks, sometimes even longer, and may require patience. During this stage, you may notice a film or mother forming on the surface – this is a sign of healthy fermentation.
Bottling and Storage: Once the second fermentation is complete (the vinegar is sour to taste and the bubbling has ceased), carefully strain the liquid again through a fine-mesh cloth or coffee filter to remove any remaining sediment. Bottle the vinegar in clean, sterile glass bottles. Store the vinegar in a cool, dark place. Your homemade apple cider vinegar will continue to age and improve in flavor over time.
Important Note: Maintaining hygiene throughout the process is crucial to prevent unwanted bacteria or mold from spoiling your batch. Always use clean equipment and sanitize your containers before use.
Mixing the Drink
Creating the perfect apple cider vinegar drink involves more than just pouring vinegar into water. The key is finding the right balance of flavors and achieving a pleasant, refreshing beverage. This section will guide you through the process, offering variations to suit your taste preferences.
Start with the base: Begin with 1-2 tablespoons of raw, unfiltered apple cider vinegar (ACV). The amount depends on your tolerance and desired tartness. Many find 1 tablespoon a good starting point, gradually increasing to 2 tablespoons as their palate adjusts. Using raw, unfiltered ACV is crucial as it retains the beneficial mother – the cloudy sediment containing beneficial enzymes and probiotics. If you find the taste too harsh, you can always dilute it further.
Add your liquid: Next, add your chosen liquid. The most common is water, ideally filtered or spring water for a cleaner taste. Use 8-12 ounces of water per 1-2 tablespoons of ACV. Adjust the water quantity to your preference; more water will result in a milder drink. Other options include unsweetened apple juice (for a sweeter, more apple-forward drink), sparkling water (for a bubbly, refreshing sensation), or even coconut water (for an electrolyte boost). Experiment to discover your favorite liquid base.
Enhance the flavor: This is where you can personalize your drink. A squeeze of fresh lemon or lime juice (about ½ a lemon or lime) adds a citrusy zing and complements the apple cider vinegar beautifully. A small pinch of cinnamon or a few drops of pure vanilla extract can add warmth and complexity. Honey, maple syrup, or stevia can be used to sweeten the drink to your liking, but remember that excessive sweetness can mask the beneficial properties of the ACV. Start with a small amount and adjust gradually. Consider adding a few slices of fresh ginger for a spicy kick or a sprig of fresh mint for a refreshing herbal note.
Mixing techniques: For the best results, combine all ingredients in a glass or shaker. If using a shaker, close the lid tightly and shake well to ensure thorough mixing. If using a glass, stir gently with a spoon or whisk until the ingredients are fully incorporated. Avoid using metal utensils as they can react with the ACV, potentially altering the taste and nutritional content.
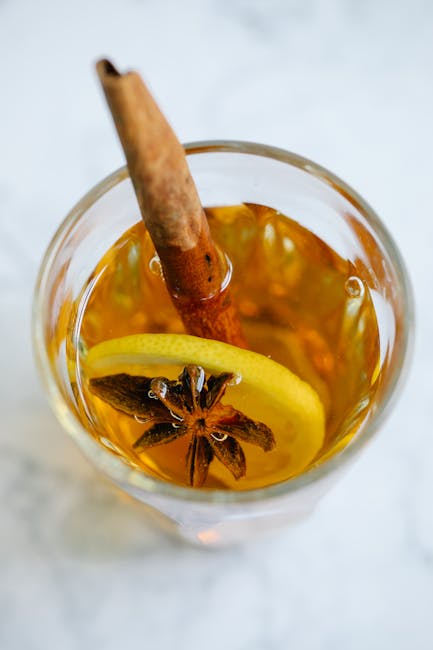
Serving suggestions: Serve your homemade apple cider vinegar drink immediately over ice for optimal refreshment. Garnish with a lemon wedge, a cinnamon stick, or a few fresh berries for an elegant touch. You can also prepare a larger batch in advance and store it in the refrigerator for up to 2-3 days. However, the flavor might slightly change over time, so consuming it fresh is always recommended.
Important note: While apple cider vinegar has numerous health benefits, it’s crucial to consume it responsibly. Start with smaller quantities and gradually increase your intake. If you experience any digestive discomfort, reduce the amount of ACV or discontinue use and consult with a healthcare professional.
Sweetener and Flavor Additive Integration
Integrating sweeteners and flavor additives into your homemade apple cider vinegar (ACV) drink is crucial for creating a palatable and enjoyable beverage. While ACV offers numerous health benefits, its tartness can be overwhelming for some. Careful consideration of sweetener and flavor choices is key to balancing the acidity and creating a drink you’ll actually enjoy consuming regularly.
Sweetener Selection: The type of sweetener you choose significantly impacts the final taste and nutritional profile of your drink. Avoid refined sugars like white sugar or high-fructose corn syrup, as they offer minimal nutritional value. Instead, opt for natural sweeteners that complement the ACV’s tanginess. Consider these options:
- Honey: A teaspoon or two of honey per 8 ounces of diluted ACV adds a subtle sweetness and complements the apple cider vinegar’s flavor profile. Its natural enzymes and antioxidants also add to the drink’s overall health benefits.
- Maple Syrup: Similar to honey, maple syrup provides a delicate sweetness and a slightly more robust flavor. Start with 1-2 teaspoons per 8 ounces and adjust to your preference. Choose pure maple syrup for optimal quality.
- Stevia: A natural, plant-based sweetener, stevia is calorie-free and intensely sweet. Use sparingly, as a small amount goes a long way. Begin with a few drops and add more until you reach your desired sweetness level. Note that stevia can have a slightly bitter aftertaste for some.
- Agave Nectar: Agave offers a mild sweetness and a slightly thicker consistency. Use it in moderation, as it is high in fructose. Start with 1-2 teaspoons per 8 ounces.
Flavor Additive Integration: Beyond sweetness, you can enhance your ACV drink with various flavor additives. This allows for customization and caters to individual preferences. Experiment with these additions:
- Fresh Fruits & Berries: Muddle fresh berries (strawberries, raspberries, blueberries) or slices of fruits (apples, oranges, lemons) directly into your drink for a vibrant flavor and added nutrients. About ¼ cup of fruit per 8 ounces is a good starting point.
- Spices: A dash of cinnamon, ginger, or cardamom can add warmth and complexity to your drink. Experiment with different spice combinations to find your favorites. Start with a small amount and gradually increase until you achieve your desired level of spice.
- Herbal Infusions: Add a few sprigs of fresh mint, basil, or rosemary for a refreshing twist. Steep the herbs in hot water for a few minutes before adding to your ACV drink for a more pronounced flavor.
- Extracts: Vanilla extract, almond extract, or other flavor extracts can add a sophisticated touch. Start with a few drops and adjust to taste. Remember that extracts are highly concentrated.
Important Considerations:
- Start small and adjust gradually. It’s easier to add more sweetener or flavor than to take it away.
- Taste as you go. This will help you fine-tune the balance of sweetness and flavor to your liking.
- Consider the other ingredients in your drink. If you are adding other ingredients like juices, this will affect the overall sweetness.
- Store your finished drink in the refrigerator to maintain freshness and prevent spoilage.
Professional Recommendation: Always prioritize quality ingredients. Using fresh, high-quality fruits, spices, and sweeteners will result in a superior tasting and more nutritious ACV drink. Experimentation is key to finding your perfect blend!
Chill and Serve
Once you’ve mixed your delicious homemade apple cider vinegar drink (recipe assumed to be provided elsewhere), the final step is chilling and serving it for optimal enjoyment. Proper chilling enhances the flavors and creates a refreshing experience. This section details the best methods for chilling and serving your creation, ensuring you get the most out of your hard work.
Method 1: Refrigerator Chilling (Recommended)
This is the most straightforward and recommended method for chilling your apple cider vinegar drink. Simply pour your prepared drink into a clean glass container, such as a pitcher or individual bottles. Ensure the container is tightly sealed to prevent absorption of odors from the refrigerator. Place the container in the refrigerator for at least 2-3 hours, or preferably overnight, to allow for thorough chilling. This slow chilling process allows the flavors to meld and prevents the drink from becoming too diluted.
Important Note: Avoid using metallic containers, especially those made of aluminum or uncoated iron, as they can react with the vinegar and potentially alter the taste or color. Glass or food-grade plastic are the best choices.
Method 2: Quick Chill (for urgent situations)
If you need to chill your drink quickly, you can use a combination of ice and water. Fill a large bowl with ice and cold water. Place your sealed container of apple cider vinegar drink into the ice bath. Stir the ice bath occasionally to ensure even cooling. This method can chill your drink sufficiently within 30-45 minutes, depending on the volume and initial temperature of the drink. However, this method may slightly dilute your drink due to the melting ice. It’s a great option for immediate consumption, but refrigerator chilling is always preferred for the best flavor profile.
Serving Suggestions:
Serving Temperature: The ideal serving temperature for an apple cider vinegar drink is between 35-45°F (2-7°C). Anything colder might numb the palate and mask the subtle nuances of the drink’s flavor.
Garnishing: A simple garnish can elevate the presentation and enhance the sensory experience. Consider adding:
- A sprig of fresh mint or rosemary
- A thin slice of apple or cucumber
- A few berries (strawberries, raspberries, or blueberries)
Serving Vessel: Choose a glass that complements the drink. Tall, slender glasses are ideal for showcasing the color and enhancing the visual appeal. Avoid using glasses that are too wide, as this can lead to rapid temperature increase.
Serving Size: A typical serving size is around 8-12 ounces (240-360 ml). Adjust the serving size to your preference and consider the strength of your apple cider vinegar drink. Start with a smaller amount and add more if needed, as the taste can be quite intense for some.
Storage: Leftover chilled apple cider vinegar drink should be stored in an airtight container in the refrigerator for up to 3-4 days. However, the flavor might slightly diminish over time, so it’s best consumed fresh.
Recommendations for Your Homemade Apple Cider Vinegar Drink
Your homemade apple cider vinegar drink is a delicious and potentially healthy addition to your diet. To maximize its benefits and enjoyment, consider these recommendations:
Serving Suggestions: The best way to enjoy your apple cider vinegar drink is to tailor it to your personal preferences. A simple approach is to dilute 1-2 tablespoons of your homemade vinegar in 8-12 ounces of water. For a sweeter taste, add a touch of honey or maple syrup (but be mindful of added sugars). Experiment with adding slices of fresh fruit like lemon, lime, or orange for a zesty twist. A sprig of fresh mint or a few berries can also enhance the flavor profile. Consider chilling the drink for a refreshing experience, especially during warmer months. For a more sophisticated beverage, try incorporating it into sparkling water or adding a splash of cranberry or pomegranate juice.
Storage Conditions: Proper storage is crucial to maintaining the quality and longevity of your apple cider vinegar. Store your finished vinegar in a clean, airtight glass bottle or jar in a cool, dark, and dry place. Avoid storing it in direct sunlight, as this can degrade the quality of the vinegar and potentially affect the flavor. Refrigeration is not strictly necessary but can help extend its shelf life. Properly stored, your homemade apple cider vinegar should remain good for several months, though its flavor might subtly change over time.
Complementary Dishes: The versatility of apple cider vinegar extends beyond simply drinking it. Its tangy flavor pairs well with a variety of dishes. It can be used as a marinade for meats, poultry, and fish, adding a unique depth of flavor. A small amount incorporated into salad dressings can provide a pleasant zing. It can also be used as a component in sauces and glazes, adding a subtle acidity that cuts through richness. Consider using it in a vinaigrette for a light and refreshing salad dressing, or as a component in a flavorful barbecue sauce.
Calorie and Nutritional Information (per 2 tbsp serving diluted in water): The calorie count of your homemade apple cider vinegar drink will largely depend on the added sweeteners you use. A serving without added sweeteners contains very few calories, typically under 10. The nutritional content is primarily derived from the acetic acid, which is the main component responsible for its characteristic sourness. It also contains trace amounts of vitamins and minerals, depending on the apples used in its production. However, it is important to note that the nutritional value of apple cider vinegar is often exaggerated. It should be considered a complement to a healthy and balanced diet, not a primary source of nutrients.
Important Considerations: While apple cider vinegar is generally safe for consumption, it’s crucial to use it in moderation. Excessive consumption can cause tooth enamel erosion, so it’s recommended to rinse your mouth with water after drinking it. Individuals with certain medical conditions, such as acid reflux or low potassium levels, should consult their doctor before regularly incorporating apple cider vinegar into their diets. Always start with a small amount to assess your tolerance and gradually increase the quantity as needed.