Prepare yourself for a culinary journey to Sicily, the birthplace of the iconic Perfect Italian Cannoli. These crispy, cylindrical shells of fried dough, filled with a luscious, sweet ricotta cream, are far more than a simple dessert; they represent a significant piece of Italian culinary heritage. Their origins are shrouded in some mystery, with tales weaving through centuries of Sicilian history. Some believe cannoli emerged during the Arab occupation of Sicily (9th-11th centuries), possibly evolving from earlier Middle Eastern pastries. Others point to a more recent origin, linking their creation to the aristocratic courts of Palermo in the 13th century, gaining popularity during Carnival celebrations.
The name cannolo itself is derived from the Latin word canna, meaning reed, a fitting description of the tube-like shape. Initially, the cannoli shells were likely filled with simple sweet concoctions, but over time, the recipe evolved, becoming the sophisticated treat we know and love today. The filling, traditionally a sweet ricotta cheese base, can be enhanced with chocolate chips, candied fruit, pistachios, or other delightful additions, reflecting the region’s abundant agricultural bounty and the creativity of Sicilian pastry chefs. While the precise recipe varies from family to family, and across the island’s diverse regions, the core elements – crispy shell and creamy ricotta filling – remain constant.
Cannoli’s cultural significance in Sicily is immense. They are an indispensable part of festive occasions, from religious holidays like Easter and Christmas to weddings and birthdays. It’s not uncommon to find cannoli being sold in street markets and pasticcerie (pastry shops) across the island, a testament to their enduring popularity. In fact, Sicilians consume an estimated 50 million cannoli annually, a staggering number that underscores their place at the heart of Sicilian culinary identity. Beyond Sicily, cannoli have achieved global recognition, becoming a beloved dessert worldwide, inspiring countless variations and interpretations. Yet, the original Sicilian cannolo remains the benchmark of excellence, a testament to the enduring power of tradition and simple, delicious ingredients.
The process of making a perfect cannolo is a testament to skilled craftsmanship. The delicate, thin shell requires precise technique, from the careful rolling of the dough to the precise frying process that results in a shatteringly crisp exterior. The art of filling the cannoli with the creamy ricotta mixture also involves skill and finesse, ensuring an even distribution and a visually appealing finish. Each bite offers a delightful textural contrast, the crisp shell yielding to the smooth, sweet cream, creating a symphony of flavors and textures that captivates the senses. More than just a dessert, the Perfect Italian Cannolo represents a legacy of culinary artistry and cultural pride.
Ingredients and Measurements: Perfect Italian Cannoli
Crafting authentic Italian cannoli requires precise measurements and high-quality ingredients. The success of your cannoli hinges on the balance of flavors and textures, so paying close attention to this section is crucial.
For the Cannoli Shells:
- 2 cups (250g) all-purpose flour: Use a good quality flour for optimal texture. Avoid using bleached flour, as it can result in less crisp shells. Sifting the flour before using is highly recommended to ensure a smooth, lump-free dough.
- 1/2 teaspoon salt: This enhances the flavors of the other ingredients. Don’t be tempted to omit it.
- 1/4 cup (50g) vegetable shortening: Shortening provides flakiness to the shells. You can substitute with lard for a more traditional flavor, but shortening is readily available and works equally well.
- 1/2 cup (120ml) dry Marsala wine: Marsala wine contributes to the unique flavor and helps create a tender dough. If you don’t have Marsala, you can substitute with dry sherry or even white wine, but the flavor will be slightly different.
- 1 large egg: The egg binds the ingredients together and adds richness. Ensure the egg is at room temperature for optimal mixing.
- Vegetable oil, for frying: Use a high-heat oil with a neutral flavor, such as canola or sunflower oil. Ensure you have enough oil to fully submerge the cannoli tubes; about 3 inches deep in a large, heavy-bottomed pot.
For the Ricotta Filling:
- 2 cups (450g) whole milk ricotta cheese: Use high-quality, whole milk ricotta. The fat content is essential for a creamy, rich filling. Drain the ricotta in a cheesecloth-lined sieve for at least 30 minutes to remove excess whey. This will prevent a watery filling.
- 1/2 cup (100g) granulated sugar: Adjust this amount to your preference. Taste the filling as you go and add more sugar if needed.
- 1 teaspoon vanilla extract: Adds a touch of sweetness and enhances the overall flavor profile.
- 1/4 cup (60ml) mini chocolate chips: These add a delightful textural and flavor contrast. Feel free to substitute with chopped nuts, candied fruit, or other mix-ins to your liking.
- 1/4 cup (30g) chopped candied orange peel (optional): This adds a bright citrusy note which complements the sweetness of the filling. Use quality candied peel, avoiding those with excessive artificial coloring.
- Pinch of cinnamon (optional): A small amount of cinnamon adds a warm, comforting spice to the filling.
Important Note: These measurements are for approximately 12 cannoli shells. You may need to adjust the quantities depending on the size of your cannoli tubes.
Professional Tip: Prepare the cannoli shells a day ahead of time. They will crisp up beautifully overnight. For the filling, prepare it a few hours in advance and let it rest in the refrigerator. This allows the flavors to meld and creates a more cohesive filling.
Equipment List: Perfect Italian Cannoli
Creating perfect Italian cannoli requires the right tools to ensure both ease of preparation and a beautiful final product. This equipment list details the essential items, along with recommendations for optimal results and alternatives where possible.
Cannoli Tubes (10-12, 6-inch): These are the quintessential cannoli-making tools. Aluminum tubes are readily available and easy to clean. Ensure you purchase a sufficient quantity to avoid delays during the frying process. Avoid using tubes that are rusty or damaged as this can affect the final product and potentially be hazardous. If you’re making a smaller batch, 6-8 tubes will suffice.
Large Mixing Bowls (at least 3, varying sizes): You’ll need separate bowls for mixing the ricotta filling, preparing the cannoli shells’ dough, and potentially for whisking egg whites if you’re adding them to the dough for extra crispiness. Choose bowls of sufficient size to allow for easy mixing and prevent spills. A 5-quart bowl for the dough and two smaller 3-quart bowls for the filling and egg whites (if using) are ideal.
Pastry Bag with a Large Round Tip (or a Ziploc bag with a corner snipped off): A pastry bag with a large round tip (approximately 1/2 inch diameter) is ideal for seamlessly piping the ricotta filling into the cannoli shells. If you don’t have a pastry bag, a sturdy Ziploc bag with one corner carefully snipped off will work as a cost-effective alternative. Ensure the tip is large enough to easily fill the cannoli shells without tearing them.
Large Heavy-bottomed Saucepan (at least 4-quart): This is crucial for frying the cannoli shells. A heavy-bottomed saucepan ensures even heat distribution, preventing hot spots that could burn the shells. Avoid using non-stick pans for frying, as high temperatures can damage the non-stick coating.
Deep-Fry Thermometer: This is essential for maintaining the correct oil temperature (around 375°F or 190°C) during frying. Inconsistent oil temperature will result in unevenly cooked shells – some burnt, others undercooked. Accurate temperature control is key to achieving perfectly crisp cannoli shells.
Wooden Spoon or Spatula: You’ll need this for mixing the cannoli dough and the ricotta filling. A sturdy wooden spoon is preferred for its durability and resistance to scratching bowls. A rubber spatula can be used to scrape down the sides of the bowls.
Rolling Pin: A standard rolling pin is needed to roll out the cannoli dough to the correct thickness (approximately 1/8 inch). Ensure your rolling pin is clean and free from any debris to prevent contamination of the dough.
Measuring Cups and Spoons: Accurate measurements are crucial in baking. A set of standard measuring cups and spoons will ensure consistent results. Having both dry and liquid measuring cups is highly recommended.
Wire Rack: Once the cannoli shells are fried, place them on a wire rack to cool and drain excess oil. This prevents the shells from becoming soggy.
Optional: Pastry Brush: A pastry brush can be used to lightly brush the cannoli shells with melted butter or oil after frying to enhance their crispness.
Cannoli Shell Preparation
Creating the perfect cannoli shell is paramount to achieving the ultimate Italian cannoli experience. This seemingly simple step requires precision and attention to detail. Here’s a comprehensive guide to ensure your shells are crisp, golden brown, and flawlessly cylindrical.
Ingredients:
- 2 cups (250g) all-purpose flour, plus extra for dusting
- 1/2 teaspoon salt
- 1/2 cup (113g) unsalted butter, cold and cubed
- 1/2 cup (120ml) dry Marsala wine (or substitute with white wine)
- 1 large egg, lightly beaten
- Vegetable oil, for frying
- Cannoli tubes (metal or aluminum)
Instructions:
1. Make the Dough: In a large bowl, whisk together the flour and salt. Cut in the cold butter using a pastry blender or your fingertips until the mixture resembles coarse crumbs. This step is crucial for achieving a flaky shell. Avoid overmixing, as this will result in a tough dough.
2. Incorporate Liquids: Gradually add the Marsala wine and the beaten egg, mixing gently with a fork until the dough just comes together. Do not knead the dough excessively; simply bring it together into a ball. Wrap the dough in plastic wrap and refrigerate for at least 30 minutes, or preferably up to 2 hours. This resting period allows the gluten to relax, resulting in a more tender shell.
3. Roll and Cut: On a lightly floured surface, roll out the dough very thinly, aiming for a thickness of about 1/16 inch (1.5mm). Using a sharp knife or pizza cutter, cut the dough into 4-inch (10cm) squares. If your dough is too sticky, lightly dust your work surface with flour.
4. Wrap the Tubes: Carefully wrap each dough square around a cannoli tube, overlapping the edges slightly and pressing to seal. Ensure the dough is tightly wrapped around the tube to maintain its shape during frying. Trim any excess dough with a sharp knife.
5. Fry the Shells: Heat about 2 inches (5cm) of vegetable oil in a large, heavy-bottomed pot to 350°F (175°C). Carefully lower the cannoli tubes into the hot oil, a few at a time, to avoid overcrowding the pot. Fry for about 5-7 minutes, turning occasionally, until the shells are golden brown and crispy. Remove the shells from the oil and drain on paper towels.
6. Cool and Remove Tubes: Let the shells cool completely on a wire rack before gently removing the cannoli tubes. If the shells are still warm, the tubes may stick. Allow them to cool completely to prevent breakage.
Professional Tip: For extra-crisp shells, you can prick the dough with a fork before wrapping it around the tubes. This allows for better heat distribution and prevents air bubbles from forming.
Storage: Store the cooled cannoli shells in an airtight container at room temperature for up to 2 days, or freeze them for longer storage. Reheat briefly in a low oven before filling.
Ricotta Filling Preparation
The creamy, sweet ricotta filling is the heart and soul of a perfect cannoli. Its texture and flavor are paramount, so take your time and follow these steps carefully to achieve the best results. This recipe yields enough filling for approximately 12-15 cannoli shells, depending on their size.
Ingredients:
- 24 ounces (680g) whole milk ricotta cheese, drained exceptionally well. This is crucial! Excess moisture will make your filling runny. Drain the ricotta in a fine-mesh sieve lined with cheesecloth for at least 2-3 hours, or even overnight in the refrigerator for optimal results.
- 1 cup (200g) granulated sugar
- 1/2 cup (120ml) mini semi-sweet chocolate chips
- 1/4 cup (60ml) chopped candied orange peel
- 2 large eggs, separated
- 1 teaspoon pure vanilla extract
- 1/4 teaspoon ground cinnamon
- Pinch of salt
Instructions:
Begin by ensuring your ricotta is impeccably drained. The drier it is, the smoother and more stable your filling will be. Pressing the ricotta gently with a spoon against the cheesecloth during draining will further reduce moisture content.
In a large bowl, using an electric mixer on low speed, beat the drained ricotta until it’s completely smooth and creamy. Avoid over-mixing, as this can make the filling too airy and potentially grainy. Gradually add the sugar, beating until it’s fully incorporated. The mixture should be relatively smooth at this point.
In a separate bowl, gently whisk together the egg yolks, vanilla extract, cinnamon, and salt. Do not over-whisk the yolks; a gentle incorporation is all that’s needed. Add the yolk mixture to the ricotta mixture and beat on low speed until just combined. Be careful not to overmix, as this can lead to a curdled texture.
In another bowl, beat the egg whites until stiff peaks form. Stiff peaks are essential for giving the filling its light and airy texture. Gently fold the egg whites into the ricotta mixture in three additions, being careful not to deflate the egg whites. Fold in the chocolate chips and candied orange peel.
Once everything is thoroughly combined, cover the bowl with plastic wrap and refrigerate the filling for at least 2 hours, or preferably overnight. This chilling period allows the flavors to meld and the filling to thicken further, resulting in a superior cannoli filling. Before filling your cannoli shells, give the filling a gentle stir to ensure it’s evenly distributed.
Professional Tip: For an even richer and more decadent filling, consider substituting some of the granulated sugar with powdered sugar. This will create a smoother, less grainy texture. You can also experiment with other additions like chopped pistachios, dried cherries, or a touch of liqueur like Marsala or Amaretto.
Cannoli Filling
The creamy, sweet ricotta filling is arguably the most crucial element of a perfect cannoli. A well-made filling balances sweetness, texture, and subtle flavors, perfectly complementing the crisp shell. This recipe focuses on creating a luscious, smooth filling that’s not overly sweet, allowing the delicate flavors of the cannoli shell to shine through.
Ingredients:
- 15 ounces (425g) whole milk ricotta cheese, drained very well. This step is crucial! Excess moisture will result in a runny filling. Use a cheesecloth or fine-mesh sieve to drain the ricotta for at least 2 hours, or preferably overnight in the refrigerator.
- 1 cup (200g) granulated sugar
- 1/2 cup (120ml) heavy cream
- 2 large eggs, lightly beaten
- 1 teaspoon vanilla extract
- 1/2 teaspoon ground cinnamon
- 1/4 teaspoon finely grated orange zest (optional, but adds a lovely bright note)
- 1/2 cup (60g) mini chocolate chips (optional, for added texture and sweetness)
- Pinch of salt
Instructions:
1. Prepare the Ricotta: As mentioned earlier, thoroughly draining the ricotta is paramount. Place the ricotta in a cheesecloth-lined sieve set over a bowl and refrigerate for at least 2 hours, or preferably overnight. This removes excess whey, resulting in a thicker, creamier filling.
2. Whip the Cream: In a chilled bowl, whip the heavy cream until stiff peaks form. Be careful not to overwhip, as this can result in a grainy texture.
3. Combine Ingredients: In a separate bowl, gently whisk together the drained ricotta, sugar, beaten eggs, vanilla extract, cinnamon, orange zest (if using), and salt until well combined. Avoid overmixing, as this can make the filling too smooth and lose its texture.
4. Fold in the Cream: Gently fold the whipped cream into the ricotta mixture until just combined. Do not overmix; you want to retain some airiness in the filling. If using chocolate chips, gently fold them in at this stage.
5. Chill: Cover the bowl and refrigerate the filling for at least 2 hours, or preferably overnight. This allows the flavors to meld and the filling to thicken further. Chilling is essential for a smooth, firm filling that holds its shape well within the cannoli shells.
Professional Recommendations:
- For an even richer flavor, use a high-quality ricotta cheese made from whole milk.
- Adjust the amount of sugar to your preference. Some prefer a less sweet filling, while others prefer a sweeter one.
- Experiment with different flavorings. Consider adding a pinch of nutmeg, a tablespoon of Marsala wine, or some chopped candied fruit.
- Fill the cannoli shells just before serving to prevent the shells from becoming soggy.
Following these steps will ensure you create a cannoli filling that is both delicious and visually appealing, elevating your cannoli to perfection.
Assembly Instructions
Assembling perfect Italian cannoli requires a delicate touch and attention to detail. With the crispy shells and creamy filling prepared, you’re ready for the final, delicious stage. This section provides a step-by-step guide to ensure your cannoli are as stunning as they are tasty.
Prepare your filling: Before you begin assembling, ensure your ricotta filling is at room temperature. This will make it much easier to pipe and will result in a smoother, more spreadable texture. If your filling is too cold, it will be difficult to work with and may crack once piped into the shells.
Choose your piping tip: A large round piping tip (approximately 1cm in diameter) is ideal for filling cannoli. This size allows for a generous amount of filling without overflowing the shell. If you prefer a more visually appealing swirl, a star tip can also be used, but be mindful of the amount of filling to prevent breakage.
Fill a piping bag: Transfer your prepared ricotta filling into a piping bag fitted with your chosen tip. Ensure the bag is firmly sealed to prevent any leakage during the filling process. It’s helpful to twist the top of the piping bag to create a tighter seal.
Filling the cannoli shells: Hold a cannoli shell firmly but gently. Gently pipe the filling into one end of the shell, filling it about ¾ full. Avoid overfilling, as this can cause the shell to break or the filling to overflow. A consistent amount of filling in each shell ensures a uniform presentation and taste experience.
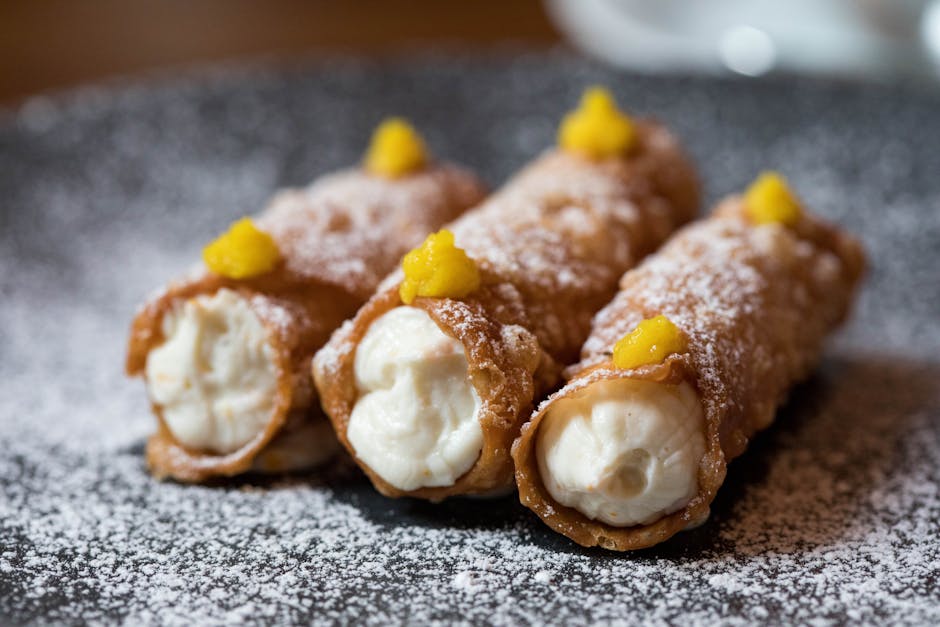
Creating a beautiful finish: Once filled, you can choose to leave the cannoli as is, or you can add a decorative touch. A simple dusting of powdered sugar is classic and elegant. Alternatively, you can use mini chocolate chips, chopped pistachios, or candied fruit for a more vibrant presentation. Be gentle when applying toppings to avoid damaging the delicate shells.
Storage and serving: For best results, serve the cannoli immediately after filling. However, if you need to prepare them in advance, store them in an airtight container in the refrigerator for up to 24 hours. Do not refrigerate for longer than 24 hours as the shells may become soggy. Allow the cannoli to come to room temperature before serving for the optimal taste and texture. Before serving, add any final decorative touches, such as a dusting of powdered sugar or a sprinkle of chocolate shavings.
Professional Tip: To prevent the cannoli shells from becoming soggy, try dipping the filled ends into melted dark chocolate. This creates a protective barrier and adds a delicious extra layer of flavor. Let the chocolate set completely before adding any other toppings. This is a great way to enhance both the visual appeal and structural integrity of your cannoli.
Troubleshooting: If your cannoli shells are breaking easily, they may be too dry or brittle. Ensure your shells are completely cool before filling. If the filling is too runny, try adding a tablespoon of powdered sugar to thicken it. Remember, practice makes perfect! With a little patience and attention to detail, you’ll be creating beautiful and delicious cannoli in no time.
Perfect Italian Cannoli: Recommendations
To fully appreciate the exquisite taste and delicate texture of our Perfect Italian Cannoli, we recommend the following:
Serving Suggestions: For the ultimate indulgence, serve your cannoli at room temperature. This allows the crisp shell to retain its satisfying crunch while the creamy ricotta filling reaches its optimal, smooth consistency. Gently dust the cannoli with powdered sugar just before serving for an elegant presentation. Consider offering a small selection of accompaniments such as fresh berries (strawberries, raspberries, blueberries) or a drizzle of high-quality honey to enhance the flavor profile. A small scoop of vanilla gelato nestled beside the cannoli also provides a delightful contrast in temperature and texture.
Storage Conditions: For optimal freshness, store your cannoli in an airtight container in the refrigerator. Do not freeze the cannoli, as this can drastically affect the texture of both the shell and the filling. The shells will lose their crispness, and the filling may become grainy upon thawing. Ideally, consume your cannoli within 24 hours of purchase for the best experience. If storing for longer than a few hours, it’s best to store the shells and filling separately and assemble just before serving.
Complementary Dishes: Our Perfect Italian Cannoli are fantastic as a standalone dessert, but they also pair beautifully with other dishes. Their rich, sweet filling complements the bitterness of strong espresso or a robust Italian coffee. A light and refreshing dessert wine, such as Vin Santo, will also enhance the cannoli’s flavor. If you’re planning a more elaborate dessert course, consider serving the cannoli alongside a light fruit salad or a small portion of biscotti for a delightful Italian-inspired dessert spread. The slight tartness of a lemon sorbet could also cut through the richness of the cannoli, offering a palate-cleansing experience.
Nutritional Information (per cannoli, approximate values): Calories: Approximately 350-400. Fat: 20-25g. Saturated Fat: 10-15g. Cholesterol: 50-70mg. Sodium: 100-150mg. Carbohydrates: 40-50g. Sugar: 25-35g. Protein: 5-7g. Please note: These are approximate values and may vary slightly depending on the specific ingredients used and the size of the cannoli.
Important Note: While our cannoli are incredibly delicious, we encourage moderation. Enjoy them as a special treat and savor each bite!