The Pastel de Nata, or custard tart, is arguably Portugal’s most famous culinary export, a symbol of national pride and a beloved treat enjoyed worldwide. Its origins are deeply rooted in the history of the country, specifically linked to the Jerónimos Monastery in Belém, Lisbon. Legend suggests that the recipe was developed in the late 18th century by the monks of the Jerónimos Monastery, who sought a way to utilize leftover egg yolks from the production of egg whites used for laundry starching. This resourceful approach, born out of necessity, unwittingly birthed one of the most iconic pastries in the world.
While the exact origins remain shrouded in some mystery, the monastery’s connection is undeniable. The Pastel de Belém bakery, located near the Jerónimos Monastery, is widely credited with preserving the original recipe and is still producing these pastries today using a closely guarded secret formula. Their production is staggering; they bake tens of thousands of Pastéis de Belém daily, showcasing the enduring popularity of this iconic treat. The bakery’s success has contributed significantly to the Lisbon economy and its status as a must-visit destination for tourists.
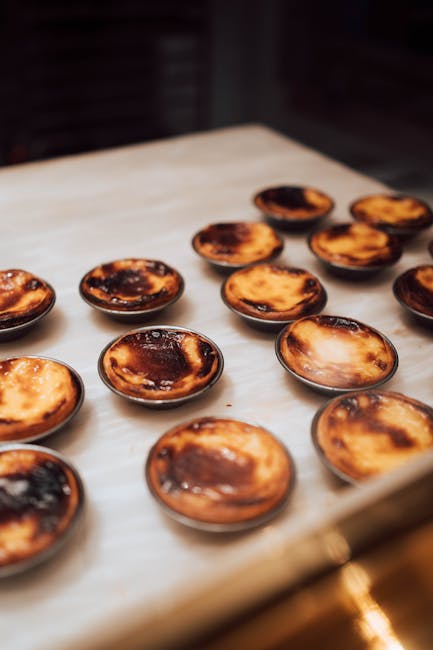
Beyond Belém, Pastéis de Nata are now produced throughout Portugal and internationally, with variations on the recipe reflecting regional preferences. However, the quintessential Pastel de Nata is characterized by its flaky, crisp pastry shell, filled with a rich, creamy custard that’s subtly sweet and slightly caramelized on top. This perfect balance of textures and flavors is what captivates palates worldwide. The cultural significance of the Pastel de Nata extends beyond its deliciousness; it represents Portuguese culinary heritage, its ingenuity, and its enduring connection to its monastic past. It’s a small pastry with a large story to tell, a testament to the power of simple ingredients transformed into something truly extraordinary.
Annual sales of Pastéis de Nata in Portugal alone are estimated to be in the millions, a testament to its widespread consumption. Beyond the economic impact, the Pastel de Nata plays a vital role in Portuguese social life. It’s a common sight in cafes, bakeries, and even supermarkets, enjoyed as a breakfast treat, an afternoon snack, or a delightful end to a meal. It’s frequently paired with a strong cup of Portuguese coffee, creating a quintessential moment of Portuguese culinary culture. Its enduring popularity shows no signs of waning, ensuring that the Pastel de Nata will continue to delight generations to come.
Ingredients and Measurements
Crafting authentic Pastel de Natas requires precision in both ingredient quality and measurement. Using inferior ingredients will significantly impact the final texture and flavour of these delicate pastries. Therefore, sourcing high-quality ingredients is paramount.
For the Custard Filling (Creme Pasteleira), you will need:
- 1 litre (4 cups) whole milk: Using whole milk is crucial for achieving the rich, creamy texture. Skimmed or semi-skimmed milk will result in a thinner, less satisfying custard.
- 170g (1 1/2 cups) granulated sugar: Adjust slightly to your preference, but don’t reduce too much, as the sugar contributes to the setting and sweetness of the custard. Using caster sugar can result in a smoother texture.
- 1 cinnamon stick: Adds a subtle warmth and complexity to the custard. Alternatively, you can use a pinch of ground cinnamon, but the stick imparts a more nuanced flavour.
- 1 lemon zest: A small amount of lemon zest brightens the custard and balances the sweetness. Ensure you only use the outer, yellow part of the zest, avoiding the bitter white pith.
- 100g (¾ cup) all-purpose flour: Use a good quality flour. Sifting the flour before adding it to the milk mixture ensures a smoother custard, preventing lumps.
- 100g (¾ cup) cornstarch (cornflour): This is essential for achieving the characteristic creamy texture and thickness of the Pastel de Natas filling. Do not substitute with other starches.
- 6 large egg yolks: Egg yolks are crucial for richness and emulsification. Using fresh, high-quality eggs is highly recommended. Do not use whole eggs, as this will result in a much runnier custard.
- Pinch of salt: Enhances the overall flavour profile of the custard. Don’t skip this seemingly insignificant ingredient.
For the Pastry Dough (Massa Tarte), you will need:
- 250g (2 cups) all-purpose flour: Again, use good quality flour. Sifting is not essential but recommended for a smoother dough.
- 125g (1/2 cup) unsalted butter, cold and cubed: Cold butter is key to achieving a flaky pastry. Using unsalted butter allows better control over the salt content of the pastry.
- 50g (1/4 cup) icing sugar (powdered sugar): Adds sweetness and tenderness to the pastry.
- 1 large egg yolk: Binds the dough together and adds richness. Use a fresh egg yolk.
- 4-6 tablespoons ice water: Add gradually, ensuring the dough comes together without being overly wet. The amount of water may vary slightly depending on the flour’s absorption rate.
- Pinch of salt: Balances the sweetness and enhances the flavour of the pastry.
Important Note: Accurate measurements are critical for achieving the desired consistency in both the custard and pastry. Use a kitchen scale for the most precise results, especially for the flour and butter.
Remember to prepare all your ingredients beforehand to ensure a smooth and efficient baking process. Enjoy your Pastel de Natas making experience!
Pastry Dough Preparation
Creating the perfect pastel de nata begins with a flawlessly executed pastry dough. This recipe yields enough dough for approximately 24 pastéis de nata, depending on the size of your tart tins.
Ingredients:
- 250g plain flour (all-purpose flour), plus extra for dusting
- 125g cold unsalted butter, cubed
- 50g cold lard (vegetable shortening can be substituted), cubed
- 1/2 teaspoon fine sea salt
- 100-125ml ice water
Instructions:
1. Combining Dry Ingredients: In a large bowl, whisk together the flour and salt. Ensure the salt is evenly distributed. It’s crucial that your flour is at room temperature to ensure even mixing and prevent the dough from becoming too tough.
2. Incorporating Fats: Add the cold, cubed butter and lard to the flour mixture. Using your fingertips or a pastry blender, work the fats into the flour until the mixture resembles coarse breadcrumbs. Avoid overworking the dough at this stage; aim for a consistency where there are still visible pieces of butter and lard. Overworking the dough will develop the gluten, resulting in a tough pastry.
3. Adding Water Gradually: Gradually add the ice water, a tablespoon at a time, mixing gently with a fork. The water should be truly icy; this helps to keep the fat cold and prevents the gluten from developing too much. Do not add all the water at once; the amount needed may vary slightly depending on the type of flour used and the humidity. Mix until the dough just comes together; it should be slightly crumbly and not overly sticky.
4. Forming the Dough: Turn the dough out onto a lightly floured surface. Gently bring the dough together using the heel of your hand. Avoid kneading. Form the dough into a flat disc, wrap it tightly in cling film (plastic wrap), and refrigerate for at least 30 minutes. This resting period allows the gluten to relax and the flavors to meld, resulting in a more tender pastry.
5. Rolling and Shaping: After chilling, roll out the dough on a lightly floured surface to a thickness of approximately 3mm (1/8 inch). Use a 7-8cm (3-inch) round cutter to cut out circles of dough. Gently press each circle into individual tart tins, ensuring the dough covers the base and sides evenly. Trim any excess dough from the edges. Prick the base of each pastry case with a fork to prevent air bubbles from forming during baking.
Professional Recommendations:
- Use high-quality ingredients for the best results.
- Keep everything cold throughout the process.
- Don’t overwork the dough.
- Blind bake the pastry shells before adding the custard filling to prevent a soggy bottom.
- Chill the dough thoroughly before rolling to prevent shrinking.
Following these steps carefully will ensure you create a delicious and flaky pastry base for your pastéis de nata.
Custard Filling Preparation
The heart of a Pastel de Nata lies in its creamy, rich custard filling. Achieving the perfect consistency requires precision and attention to detail. This section outlines the process for making a truly authentic Portuguese custard filling.
Ingredients:
- 1 litre whole milk (full-fat is crucial for richness and creaminess)
- 170g granulated sugar
- 1 cinnamon stick
- 1 lemon zest (only the yellow part, avoid the bitter white pith)
- 120g all-purpose flour
- 6 large egg yolks
- Pinch of salt
Instructions:
Begin by combining the milk, sugar, cinnamon stick, and lemon zest in a heavy-bottomed saucepan. Using a heavy-bottomed pan is essential to prevent scorching. Heat the mixture over medium heat, stirring occasionally, until the sugar dissolves completely and the milk is gently simmering. Do not allow the milk to boil vigorously. Gentle simmering is key to prevent curdling.
While the milk simmers, whisk together the flour, egg yolks, and salt in a separate bowl until pale and slightly thickened. Ensure there are no lumps in the egg yolk mixture. This step is critical for a smooth, lump-free custard.
Once the milk mixture is simmering, slowly temper the egg yolk mixture by gradually whisking in a small amount of the hot milk mixture into the eggs. This process slowly raises the temperature of the eggs, preventing them from scrambling when added to the hot milk. Tempering is crucial to avoid a grainy custard. Once about a third of the hot milk is incorporated into the eggs, slowly pour the egg mixture into the saucepan with the remaining milk. Stir continuously with a wooden spoon or heat-resistant spatula.
Continue to cook the custard over low heat, stirring constantly, until it thickens to a consistency that coats the back of a spoon. This will take approximately 8-10 minutes. Continuous stirring prevents sticking and ensures even cooking. Do not stop stirring, as this can lead to lumps and scorching.
Once the custard has reached the desired consistency, remove it from the heat and strain it through a fine-mesh sieve into a bowl. This step removes any lumps or bits of cinnamon that may have formed during cooking, resulting in a smoother, more refined custard. Strain immediately to prevent the custard from thickening further.
Let the custard cool completely, preferably covered with cling film that touches the surface to prevent a skin from forming. Cooling the custard fully before filling the pastry cases is important for preventing soggy pastry. Once cooled, the custard is ready to be used to fill the prepared Pastel de Nata pastry shells.
Professional Tip: For an extra rich and luxurious custard, consider using a higher percentage of egg yolks (up to 8) or adding a tablespoon of heavy cream to the milk mixture.
Blind Baking the Pastry Shells
Blind baking the pastel de nata pastry shells is crucial for achieving that signature crisp, buttery texture. It prevents a soggy bottom, a common pitfall when baking custard tarts. This process involves baking the pastry shell partially before adding the custard filling. This pre-baking allows the shell to set and crisp up, ensuring a perfect contrast to the creamy filling.
Prepare your pastry: Ensure your pastry dough is thoroughly chilled. This prevents shrinkage during baking. If you’ve just made your dough, chill it in the refrigerator for at least 30 minutes, or even longer, ideally for an hour or two. A well-chilled dough is easier to handle and less likely to stick.
Roll out the dough: On a lightly floured surface, roll out your pastry dough to approximately 2mm thickness. This thinness is essential for achieving a delicate, crispy shell. Avoid rolling it too thin, as this can make it fragile and prone to tearing. If the dough becomes too warm and sticky, chill it again for 15-20 minutes.
Line the tart tins: Gently press the pastry into your individual tart tins (typically around 4cm in diameter). Work carefully to avoid stretching the dough, which can lead to shrinkage. Use your fingers to gently press the dough into the corners and up the sides of the tins. Trim any excess dough overhanging the edges with a sharp knife or pastry cutter. Ensure the bottom and sides are evenly lined with a consistent thickness.
Prick the base: Using a fork, prick the base of the pastry shell all over. This prevents air bubbles from forming during baking, which can cause the bottom to puff up unevenly. Prick generously, spacing the holes about 1cm apart.
Blind baking method 1 (with baking beans): Line the pastry shells with parchment paper. Fill the parchment paper-lined shells with baking beans or dried rice. This weight prevents the pastry from shrinking or bubbling up during baking. Ensure the beans or rice reach the top edge of the pastry to prevent the sides from collapsing. Bake at 180°C (350°F) for 15-20 minutes. This pre-baking stage sets the base and prevents sogginess.
Blind baking method 2 (without baking beans): An alternative method, especially useful if you lack baking beans, is to simply prick the base and sides of the pastry more thoroughly. Bake at 180°C (350°F) for 12-15 minutes, keeping a close eye on the pastry to prevent burning. This method can result in a slightly less crisp shell, but is still effective.
Remove the weights: After the initial baking time, carefully remove the baking beans and parchment paper (if used). Be gentle to avoid damaging the delicate pastry. If the edges look slightly browned but the base is still pale, bake for another 2-3 minutes, keeping a close watch. The pastry should be lightly golden-brown.
Optional: For an extra crisp base, you can brush the pre-baked shell with a little beaten egg before adding the custard filling. This adds a subtle richness and aids in achieving a deeper golden color.
Once your pastry shells are blind-baked, they are ready for the delicious custard filling. Remember to let them cool slightly before adding the filling to prevent the pastry from becoming soggy from the hot custard.
Filling the Pastry Shells
Once your pastel de nata shells are baked and cooled, the most crucial step begins: filling them with the creamy, rich custard. This requires precision and a gentle hand to avoid cracking the delicate pastry. Prepare your custard while the shells are still warm, but not hot, to facilitate a smooth filling process.
For approximately 12 pastel de nata shells, you’ll need about 400ml of your prepared pastel de nata custard. Ensure your custard is cooled sufficiently to avoid burning yourself, but still retains a pourable consistency. If it’s too thick, you can gently whisk in a tablespoon or two of milk or cream to loosen it. If it’s too thin, let it rest for a few more minutes to slightly thicken.
Using a piping bag fitted with a large, round nozzle (approximately 1cm in diameter) is highly recommended. This provides a consistent and even filling, preventing spills and ensuring each pastel de nata is generously filled. Alternatively, you can use a spoon, but this requires more care and a steadier hand to avoid overfilling and damaging the pastry shells.
Fill each pastry shell almost to the brim, leaving a small gap (approximately 2-3mm) at the top to prevent overflow during baking. Overfilling can lead to spillage during the second baking stage, creating a messy and uneven finish. Aim for a consistent filling level across all the shells for a uniform appearance.
Before the final baking, carefully inspect each filled shell to ensure no custard has spilled over the edges. Gently wipe away any excess custard with a clean, damp cloth. This prevents burning and ensures a neat, professional finish. Any small imperfections can be easily corrected at this stage.
The temperature and duration of the second baking are crucial. A preheated oven at 220°C (428°F) is optimal. Baking for approximately 10-12 minutes, or until the custard is set and lightly golden brown, will achieve the perfect balance of texture and color. Keep a close eye on them during baking, as ovens can vary. The custard should be firm to the touch, but not overly browned or burnt. Remove them from the oven immediately once they reach the desired level of browning.
Once removed from the oven, allow the pastel de nata to cool completely on a wire rack before serving. This prevents them from becoming soggy and allows the custard to set fully. Cooling completely also enhances the flavour and texture, allowing the different components to meld together.
Patience and attention to detail are key to creating perfect pastel de nata. Taking the time to carefully fill and bake the shells will result in a beautifully presented and deliciously satisfying treat. Enjoy the fruits of your labor!
Baking the Pastel de Natas
Baking the Pastel de Natas is the culmination of the process, requiring precision and attention to detail to achieve that signature creamy custard and perfectly crisp pastry shell. This section will guide you through the crucial steps, ensuring your Pastel de Natas are authentic and delicious.
Preheat your oven to 260°C (500°F) for at least 30 minutes before baking. This high temperature is essential for achieving the characteristic caramelized top and puffed pastry. A preheated oven ensures even cooking and prevents a soggy bottom. Using a thermometer is highly recommended to guarantee accuracy.
Prepare your custard filling. Ensure your custard is cool before filling the pastry cases. A lukewarm custard will cook unevenly and potentially cause the pastry to become soggy. Gently fill each pastry case about ¾ full, leaving enough space for the custard to rise slightly during baking.
Arrange the filled pastry cases in a baking sheet. Place the filled tart shells evenly spaced on a baking sheet. This allows for even heat distribution and prevents the pastries from sticking together. Do not overcrowd the baking sheet, as this will hinder proper baking and result in unevenly cooked Pastel de Natas.
Bake for 12-15 minutes. Keep a close eye on your Pastel de Natas during this time. The high temperature will cause them to puff up and develop a beautiful golden-brown caramelized top. The baking time may vary depending on your oven, so start checking for doneness around the 12-minute mark. The custard should be set, and the edges of the pastry should be golden brown.
Reduce the oven temperature to 200°C (390°F) after 12 minutes and continue baking for another 3-5 minutes. This step helps to ensure the custard is fully cooked without burning the top. Lowering the temperature prevents excessive browning and ensures the pastry remains crisp.
Remove the Pastel de Natas from the oven and let them cool slightly on a wire rack. This allows the custard to set completely and prevents them from becoming soggy. Do not attempt to remove them while they are still hot, as the custard will be very delicate.
Sprinkle with cinnamon powder (optional). Once cooled slightly, you can dust the Pastel de Natas with a light sprinkling of cinnamon powder for an extra touch of flavour and visual appeal. This is a traditional finishing touch that enhances the overall sensory experience.
Professional Recommendation: For the most authentic Pastel de Natas, use a high-quality pastry cream and fresh eggs. The quality of your ingredients directly impacts the final taste and texture. Also, remember that practice makes perfect. Don’t be discouraged if your first attempt isn’t flawless – keep experimenting and refining your technique!
Important Note: Oven temperatures can vary, so always monitor your Pastel de Natas closely during baking. Adjust the baking time as needed to achieve the desired level of browning and custard consistency.
Recommendations for Traditional Portuguese Pastel de Nata
Serving Suggestions: Pastel de Nata is best enjoyed fresh from the oven, when the custard is still warm and slightly wobbly, and the pastry is crisp. For the ultimate experience, dust generously with cinnamon powder and enjoy it immediately. The contrast between the warm, creamy custard and the flaky, slightly caramelized pastry is what makes this treat so special. You can also add a sprinkle of icing sugar for extra sweetness. Consider offering a small dollop of whipped cream or a scoop of vanilla ice cream alongside for a richer, more decadent dessert. This adds a cool contrast to the warm pastry, balancing the sweetness perfectly.
Storage Conditions: While Pastel de Nata is undeniably best enjoyed fresh, leftovers can be stored. However, it’s crucial to understand that the quality will diminish over time. For optimal preservation, allow the Pastel de Nata to cool completely before storing. Wrap each pastry individually in parchment paper or plastic wrap to prevent them from drying out. Store them in an airtight container in the refrigerator for up to 2 days. Avoid freezing Pastel de Nata, as this will significantly affect the texture of both the pastry and the custard.
Reheating: If you choose to reheat leftover Pastel de Nata, the best method is to warm them gently in a preheated oven (around 160°C/320°F) for a few minutes, or until heated through. Avoid using a microwave, as this can make the pastry soggy. Alternatively, you can briefly heat them in a toaster oven for a crispier result.
Complementary Dishes: Pastel de Nata is a versatile treat that can be enjoyed in various ways. It pairs beautifully with a strong, sweet coffee, such as a Portuguese bica or an espresso. Alternatively, a glass of chilled Vinho Verde, a crisp, slightly sparkling Portuguese wine, would cut through the richness of the custard. For a more substantial pairing, consider offering it alongside a selection of fresh fruits, such as berries or citrus fruits, to create a refreshing contrast. A light and fruity dessert wine can also be a pleasant accompaniment.
Nutritional Information (Approximate per Pastel de Nata): The nutritional content of a Pastel de Nata can vary depending on the recipe and size. However, a typical Pastel de Nata contains approximately 200-250 calories. This includes carbohydrates from the pastry and sugar from the custard; moderate amounts of fat, primarily from the butter and egg yolks; and a relatively small amount of protein. Detailed nutritional information, including specific amounts of fat, carbohydrates, proteins, and sugars, should be obtained from the specific bakery or recipe used. Please note that these are estimates and may vary.
Important Note: While Pastel de Nata is a delicious treat, it is high in calories and fat. Enjoy it in moderation as part of a balanced diet.